Flutterは、Material Designを標準サポートしています。そして、テーマを自分で設定できます。
そのために利用するのが、ThemeDataです。
これについて色々な記事があります。
が、日本語はもちろん、英語でも、ThemeDataのプロパティのどこを変更すれば、Widgetのどこに影響するのかを纏めてある記事が見つかりませんでした。
そこで、この記事では自分が愚直にコードを書いて調べたものを記述します。
基本的にここに書いてあるものだけ変更すればそれなりに統一的なデザインになるものを書いてます。
前提
カスタムテーマは MaterialApp の themeプロパティで設定します。
ThemeData() のプロパティにカスタマイズしたい値を設定していきます。
void main() => runApp(MyApp());

class MyApp extends StatelessWidget {
  @override
  Widget build(BuildContext context) {
    return MaterialApp(
      title: 'Flutter Demo',
      theme: ThemeData(
        // TODO ここにカスタマイズしてく
      ),
      home: MyHomePage(title: 'Flutter Demo Home Page'),
    );
  }
}
基本
Material Designの基本の色設定です。
primarySwatch
  static const MaterialColor _primary = Colors.indigo;
・・・
    primarySwatch: _primary,
ここに書いた色がアプリの基本の色になります。
- AppBarやbackdropなどの色
- BottomNavigationのselected(Brightness.lightの場合)
- TextFieldの選択した時の枠線やアイコンの色(InputDecorationの色)
- CircleAvatarの色
- DialogのButtonの色、
これだけだとボタンやアイコンなどの色は変わりません。
accentColor
アクセントカラーです。
  static const MaterialAccentColor _accent = Colors.amberAccent;
・・・
    accentColor: _accent,
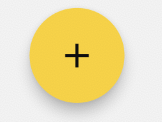
- FloatingButtonの色
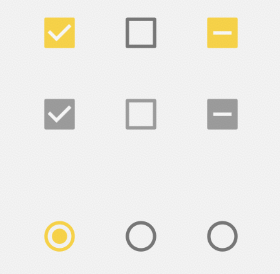
- checkbox/radioのselected(Brightness.lightの場合)
- indicatorの矢印の色
- DialogのButtonの文字色
- BottomNavigationのselected(Brightness.darkの場合)
ダイアログ
この状態でのDialogはこんな感じです。
なので、次はダイアログを変えます。

colorScheme
ダイアログのボタンの文字色を変えられます。
ただし、RaisedButtonは変わらないので、textStyleの色を変えたほうが良い。
以下のbuttonTheme.textThemeは、ダイアログ以外のその他のボタンのテーマを変えればなおります。
  Button(
    textTheme: Theme.of(context).buttonTheme.textTheme,
onSurface
- OutlineButtonの枠線の色。注意すべきは、この色に
.withOpacity(0.12)をした色になるので薄い。 - disableボタンもこの色に合わせてくれる
    colorScheme: ColorScheme.fromSwatch(
      primarySwatch: _primary,
    ).copyWith(
      onSurface: _primary,
    ),

dialogTheme
- Dialogのボタン以外のテーマを変えれます。
  dialogTheme: DialogTheme(
    titleTextStyle: TextStyle(
    color: _primary,
  )),
ここまでのダイアログです。

ボタン/アイコン
buttonTheme textTheme
- Dialog以外のボタンの文字色に影響を与える。
RaisedButtonの場合、ButtonTextTheme.primaryを与えるとよしなにprimayの色にあった白や黒に変えてくれる
buttonTheme shape
- ボタンの角に影響を与える。
  buttonTheme: ButtonThemeData(
    textTheme: ButtonTextTheme.primary,
    shape: RoundedRectangleBorder(
      /// Dialog以外のボタンの角に影響を与えることができる
      borderRadius: const BorderRadius.all(Radius.circular(24)),
      ),
    ),
OutlineButtonの枠線の色をつけたい場合
ThemeDataだけではできません。直接指定する必要があります。
  OutlineButton.icon(
    borderSide: BorderSide(
    color: Theme.of(context).primaryColor.withOpacity(0.5),
  ),
iconTheme
- 普通のアイコンのテーマを変えられる。
- IconButton,Iconのどちらも変わる
  iconTheme: const IconThemeData.fallback().copyWith(
    color: _accent,
  ),

accentIconTheme
- FloatingActionButtonのアイコン色
  accentIconTheme: const IconThemeData.fallback().copyWith(
    color: Colors.red,
  ),

FloatingActionButtonの色
ThemeDataだけでは変えられません。
直接指定する必要があります。ただし、 Theme.of(context)を使いましょう。
  floatingActionButton: FloatingActionButton(
    backgroundColor: Theme.of(context).primaryColor,
primaryIconTheme
- AppBarなどで利用しているアイコン
  primaryIconTheme: const IconThemeData.fallback().copyWith(
    color: Colors.greenAccent,
  ),
primaryTextTheme
AppBarのアイコンを変えたら、こちらも変えたいでしょう。
- appBarのタイトルの色が変わる
  primaryTextTheme: const TextTheme().copyWith(
    title: TextStyle().copyWith(
      color: Colors.teal,
    ),
  ),

フォーム
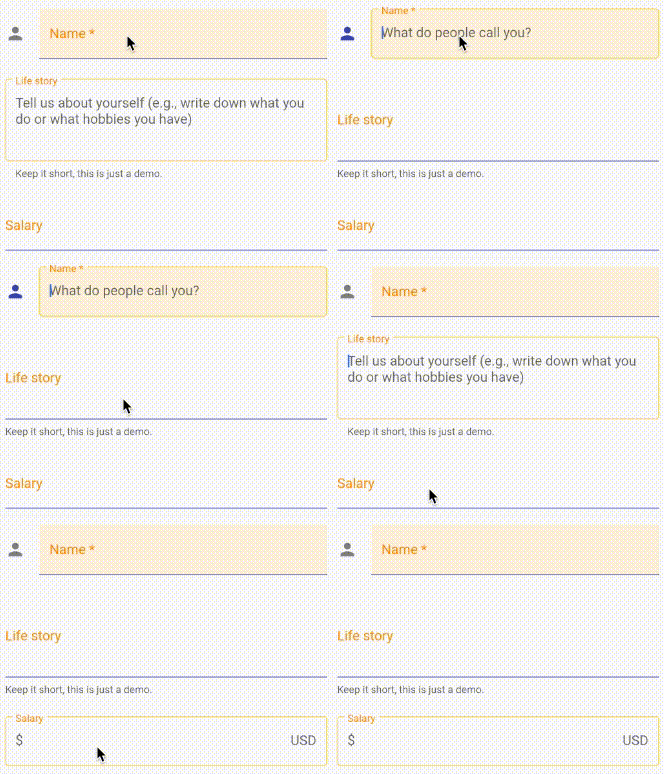
TextFieldなどの枠線の変更です。
動きがないとわからないかもしれないので、下の動画を見てください。
inputDecorationTheme enabledBorder
- TextFieldなどで設定する枠線の設定を変えられる
- 利用しているWidgetで
InputBorderを指定してもこちらの値が使われる
  inputDecorationTheme: InputDecorationTheme(
    enabledBorder: UnderlineInputBorder(
      borderSide: BorderSide(color: _primary),
    ),
inputDecorationTheme focusedBorder
- TextFieldなどでonFocusの時の枠線のstyleを設定
    focusedBorder: OutlineInputBorder(
      borderSide: BorderSide(color: _accent),
    ),
inputDecorationTheme labelStyle
- InputDecorationのlabelTextの色が変えられる
    labelStyle: const TextStyle(
      color: Colors.orange,
    ),
labelStyle fillColor
- filed:trueの場所の色を設定できる。
fillColor: Colors.orange.shade50,
コード
コードです。これのそれぞれの場所を変更すれば、統一的なテーマになるはずです。
(FloatingActionButtonの色とOutlineButtonの枠の色を変えたい場合はそれぞれのWidgetに直接書く必要があります。)
import 'dart:ui';

import 'package:flutter/cupertino.dart';
import 'package:flutter/material.dart';

class MyTheme {
  const MyTheme._internal();

  static const MaterialColor _primary = Colors.indigo;
  static const MaterialAccentColor _accent = Colors.amberAccent;

  static final ThemeData data = ThemeData(
    primarySwatch: _primary,
    accentColor: _accent,
    buttonTheme: ButtonThemeData(
      textTheme: ButtonTextTheme.primary,
      shape: RoundedRectangleBorder(
        borderRadius: const BorderRadius.all(Radius.circular(24)),
      ),
    ),
    primaryTextTheme: const TextTheme().copyWith(
      title: TextStyle().copyWith(
        color: Colors.teal,
      ),
    ),
    inputDecorationTheme: InputDecorationTheme(
      enabledBorder: OutlineInputBorder(
        borderSide: BorderSide(color: Colors.green),
      ),
      focusedBorder: OutlineInputBorder(
        borderSide: BorderSide(color: Colors.greenAccent),
      ),
      fillColor: Colors.orange.shade50,
      labelStyle: const TextStyle(
        color: Colors.orange,
      ),
    ),
    iconTheme: const IconThemeData.fallback().copyWith(
      color: _accent,
    ),
    primaryIconTheme: const IconThemeData.fallback().copyWith(
      color: Colors.greenAccent,
    ),
    accentIconTheme: const IconThemeData.fallback().copyWith(
      color: Colors.red,
    ),
    colorScheme: ColorScheme.fromSwatch(
      primarySwatch: _primary,
    ).copyWith(
      onSurface: _primary,
    ),
    dialogTheme: DialogTheme(
        titleTextStyle: TextStyle(
      color: Colors.deepOrange,
    )),
  );
}
ツール
最後に、この記事を書いてる途中で知ったツールを紹介します。
panacheです。
これはGUIでポチポチ選択していくとThemeDataのソースを吐き出してくれます。
Androidアプリがあるので、これでThemeDataを作るのも良いかもしれません。
https://play.google.com/store/apps/details?id=bz.rxla.panache&pcampaignid=MKT-Other-global-all-co-prtnr-py-PartBadge-Mar2515-1


