DeNA 24 新卒 Advent Calendar 2023の18日目1の記事です。
はじめに
2023年はLLM元年と言っても過言ではないほど日進月歩で次々と新しいLLM2が発表されました。
ローカルLLMを利用した開発にあたって、GPUの確保は最大の課題です。そこで今回はModalというリソース提供サービスを用いて、気軽にローカルLLMを利用する方法を紹介します。
Modalとは
Modalは関数の実行環境を提供しています。以下のように、ローカルで作成した関数をクラウド上のCPUやGPUで計算する、いわゆるバッチジョブのような利用が可能です。
 3
3
実行後は以下のように関数ごとにプロセス使用率や呼ばれた回数などを確認することが可能です。
 3
3
類似するサービスとしてRunpod ServerlessやReplicateがありますが、Modalは自由度が高くほぼ全ての操作をCLIで完結できるため、ソフトウェアエンジニア向きだなと感じています。
料金設定
利用料金はGPU+CPU+Memの秒単位の従量課金となっています。コードの保管やモデルのキャッシュは無料です。

例えば、A10Gであれば1時間あたり2ドル程度で運用可能です。ただし同程度の構成であるAWSのg5.xlargeが1.643ドル/hとなっており、常にアクセスのあるサイトであればAWSでの運用を検討すべきかもしれません。
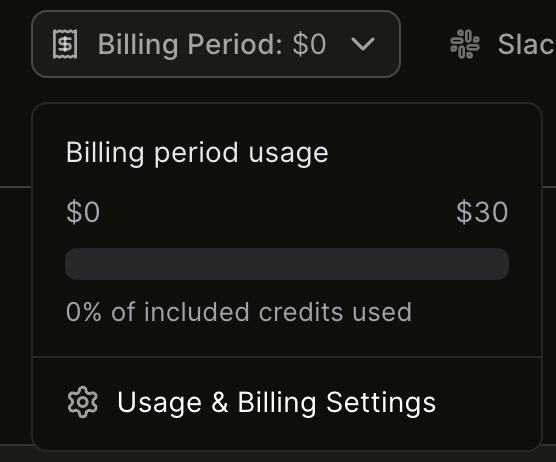
執筆時点ではクレジットカードの登録なしで毎月30ドルの無料枠があります。嬉しい。

メリット・デメリット
メリット
- 常にサーバを起動しておくよりトータルで安い
- ローカルの環境構築が不要
- Dockerより簡単に構築できる
- 起動と停止が簡単
- エンドポイントのURLを指定できる
- ファインチューン後のモデルの実行が可能
- オートスケーリング
- GPUを止め忘れる心配がない
デメリット
- 時間単価では非常に高額
- (コールドスタートの場合)毎回の起動に時間がかかる
- 複雑な処理は難しい
- 費用の概算が難しい
- (APIとして使用時)アクセスコントロールに工夫が必要
上記を踏まえて、場面別の向き不向きは以下のようになります。
⭕️ アクセスが少ない個人アプリやチーム内サイト
⭕️ 1日のうち数時間だけアクセスが集中するサービス
⭕️ 技術検証
⭕️ データセット構築
⭕️ アイドルタイムが長い処理
⭕️ 短時間の訓練
❎ スタート時のレスポンス速度が求められるサービス
❎ 常にアクセスが多いサービス
❎ 予算が固定のプロジェクト
❎ (APIとして使用時)高いセキュリティが求められる環境
❎ 長時間/大規模な訓練
初期設定
Modalはpipでインストール可能です。
pip install modal && python3 -m modal setup
上記のコマンドを実行するとブラウザにModalのログイン画面が表示され、GitHubアカウントとの紐付けを行います。
ブラウザがない環境では自身のコマンドラインに表示された以下のようなURLに別のPCでアクセスしてください。
The web browser should have opened for you to authenticate and get an API token.
If it didn't, please copy this URL into your web browser manually:

https://modal.com/token-flow/tf-xxxxxx
成功するとコマンドラインに以下の表示が出ると思います。(xxxxは仮名)
Web authentication finished successfully!
Token is connected to the xxxx workspace.
Token verified successfully!
Token written to /Users/xxxx/.modal.toml successfully!
とりあえず推論する
HuggingFaceライブラリを用いてstreamで推論してみます。今回はTokyoTech-LLMのSwallow-13Bを使用しています。
プログラム
# This file is based on modal-labs/modal-examples
# MIT License
# https://github.com/modal-labs/modal-examples/blob/main/06_gpu_and_ml/falcon_bitsandbytes.py

from modal import Image, Stub, gpu, method, web_endpoint

def download_model():
    from huggingface_hub import snapshot_download

    model_name = "tokyotech-llm/Swallow-13b-instruct-hf"
    snapshot_download(model_name)

image = (
    Image.micromamba()
    .micromamba_install(
        "cudatoolkit=11.7",
        "cudnn=8.1.0",
        "cuda-nvcc",
        "scipy",
        channels=["conda-forge", "nvidia"],
    )
    .apt_install("git")
    .pip_install(
        "bitsandbytes==0.39.0",
        "bitsandbytes-cuda117==0.26.0.post2",
        "peft @ git+https://github.com/huggingface/peft.git",
        "transformers @ git+https://github.com/huggingface/transformers.git",
        "accelerate @ git+https://github.com/huggingface/accelerate.git",
        "hf-transfer~=0.1",
        "torch==2.1.0",
        "torchvision==0.16.0",
        "sentencepiece==0.1.97",
        "huggingface-hub",
        "einops==0.6.1",
    )
    .env({"HF_HUB_ENABLE_HF_TRANSFER": "1"})
    .run_function(download_model)
)

stub = Stub(image=image, name="model")

@stub.cls(
    gpu=gpu.A10G(),
    container_idle_timeout=60 * 5,
    )
class LLMModel:
    def __enter__(self):
        import torch
        from transformers import (
            AutoModelForCausalLM,
            AutoTokenizer,
        )

        model_name = "tokyotech-llm/Swallow-13b-instruct-hf"

        model = AutoModelForCausalLM.from_pretrained(
            model_name,
            trust_remote_code=True,
            local_files_only=True,
            torch_dtype=torch.bfloat16,
        )
        model.eval()

        tokenizer = AutoTokenizer.from_pretrained(
            model_name,
            trust_remote_code=True,
        )

        self.model = torch.compile(model)
        self.tokenizer = tokenizer

    @method()
    def generate(self, prompt: str):
        from threading import Thread
        from transformers import GenerationConfig, TextIteratorStreamer

        tokenized = self.tokenizer(prompt, return_tensors="pt")
        input_ids = tokenized.input_ids
        input_ids = input_ids.to(self.model.device)

        generation_config = GenerationConfig(
            repetition_penalty=1.1,
            max_new_tokens=128,
        )

        streamer = TextIteratorStreamer(
            self.tokenizer, skip_special_tokens=True,skip_prompt=True
        )
        generate_kwargs = dict(
            input_ids=input_ids,
            generation_config=generation_config,
            return_dict_in_generate=True,
            streamer=streamer,
        )

        thread = Thread(target=self.model.generate, kwargs=generate_kwargs)
        thread.start()
        for new_text in streamer:
            print(new_text, end="")
            yield new_text

        thread.join()

prompt_template = (
    "以下に、あるタスクを説明する指示があります。"
    "リクエストを適切に完了するための回答を記述してください。\n\n"
    "### 指示:\n{}\n\n### 応答:"
)

@stub.local_entrypoint()
def cli(prompt: str = None):
    question = (
        prompt
        or "What are the main differences between Python and JavaScript programming languages?"
    )
    model = LLMModel()
    for text in model.generate.remote_gen(prompt_template.format(question)):
        print(text, end="", flush=True)

@stub.function()
@web_endpoint()
def get(question: str):

    from fastapi.responses import StreamingResponse

    model = LLMModel()
    return StreamingResponse(
        model.generate.remote_gen(prompt_template.format(question)),
        media_type="text/event-stream",
    )
実行は以下のようにします。prompt引数に指示を入力します。
modal run llm.py --prompt おはよう
実行開始から数分経つと以下のように出力されるかと思います。
❯ modal run llm.py --prompt おはよう
✓ Initialized. View run at https://modal.com/xxxx/apps/ap-xxxx
✓ Created objects.
├── 🔨 Created mount /Users/xxxx/llm.py
├── 🔨 Created download_model.
├── 🔨 Created mount /Users/xxxx/llm.py
├── 🔨 Created LLMModel.generate.
└── 🔨 Created get => https://xxxx--model-get-dev.modal.run
The cache for model files in Transformers v4.22.0 has been updated. Migrating your old cache. This is a one-time only operation. You can interrupt this and resume the migration later on by calling `transformers.utils.move_cache()`.
0it [00:00, ?it/s]0it [00:00, ?it/s]
Loading checkpoint shards: 100%|██████████| 6/6 [00:13<00:00,  1.95s/it]Loading checkpoint shards: 100%|██████████| 6/6 [00:13<00:00,  2.25s/it]
おはようございます!今日
は何
かお手伝いできますか?
Stopping app - local entrypoint completed.
Runner terminated.
おはようございます!今日は何かお手伝いできますか?✓ App completed. View run at https://modal.com/xxxx/apps/ap-yyyy
「おはよう」とプロンプトに入力すると、「おはようございます!今日は何かお手伝いできますか?」と適切な応答が返ってきました!1応答で0.1ドル程度なのでChatGPTとは比べものにならないくらい割高ですが......
ブラウザでシステム使用率を見ると、確かにGPUで実行されていたことがわかります。

基本操作
Modalには以下のモードがあります
- run
- serve
- deploy
run
1回だけ実行したいプログラムの場合はこの機能を使用します。今回のように、お試しで生成したい場合にはこのモードが適しています。
modal run xxx.py
serve
短時間で連続して何回もアクセスしたいときや、APIの一時的なテストに使用します。FastAPIでリクエストの処理ができます。終了時はCtrl+Cでジョブを停止します。
modal serve xxx.py
deploy
クラウドにデプロイを行います。API化した場合、半永続的にインターネットに公開してくれます。
modal deploy xxx.py
deployを行うと、ダッシュボードでは以下のようにdeployされていることがわかります。

APIアクセスは以下のようにGETリクエストで行うことができます。
https://xxxx--model-get.modal.run?question=おはよう
コード解説
def download_model():
    from huggingface_hub import snapshot_download

    model_name = "tokyotech-llm/Swallow-13b-instruct-hf"
    snapshot_download(model_name)
HuggingFaceからモデルをダウンロードしています。
image = (
    Image.micromamba()
    .micromamba_install(
        "cudatoolkit=11.7",
        "cudnn=8.1.0",
        "cuda-nvcc",
        "scipy",
        channels=["conda-forge", "nvidia"],
    )
    .apt_install("git")
    .pip_install(
        "bitsandbytes==0.39.0",
        "bitsandbytes-cuda117==0.26.0.post2",
        "peft @ git+https://github.com/huggingface/peft.git",
        "transformers @ git+https://github.com/huggingface/transformers.git",
        "accelerate @ git+https://github.com/huggingface/accelerate.git",
        "hf-transfer~=0.1",
        "torch==2.1.0",
        "torchvision==0.16.0",
        "sentencepiece==0.1.97",
        "huggingface-hub",
        "einops==0.6.1",
    )
    .env({"HF_HUB_ENABLE_HF_TRANSFER": "1"})
    .run_function(download_model)
)
必要なライブラリを導入したImageを作成しています。作成はデプロイ時に行われ、デプロイ以降は作成済みのImageをロードします。
stub = Stub(image=image, name="model")

@stub.cls(
    gpu=gpu.A10G(),
    container_idle_timeout=60 * 5,
    )
class LLMModel:
    def __enter__(self):
        import torch
        from transformers import (
            AutoModelForCausalLM,
            AutoTokenizer,
        )

        model_name = "tokyotech-llm/Swallow-13b-instruct-hf"

        model = AutoModelForCausalLM.from_pretrained(
            model_name,
            trust_remote_code=True,
            local_files_only=True,
            torch_dtype=torch.bfloat16,
        )
        model.eval()

        tokenizer = AutoTokenizer.from_pretrained(
            model_name,
            trust_remote_code=True,
        )

        self.model = torch.compile(model)
        self.tokenizer = tokenizer
__enter__クラスにアクセスしたときにGPUにモデルをロードします。今回は@stub.clsに使用したいGPUとスリープまでのタイムアウト時間を定義しています。keep_warm=1を設定することでコールドスタートを回避することができますが、常に1台分の利用料金がかかるためおすすめしません。
    @method()
    def generate(self, prompt: str):
        from threading import Thread
        from transformers import GenerationConfig, TextIteratorStreamer

        tokenized = self.tokenizer(prompt, return_tensors="pt")
        input_ids = tokenized.input_ids
        input_ids = input_ids.to(self.model.device)

        generation_config = GenerationConfig(
            repetition_penalty=1.1,
            max_new_tokens=128,
        )

        streamer = TextIteratorStreamer(
            self.tokenizer, skip_special_tokens=True,skip_prompt=True
        )
        generate_kwargs = dict(
            input_ids=input_ids,
            generation_config=generation_config,
            return_dict_in_generate=True,
            streamer=streamer,
        )

        thread = Thread(target=self.model.generate, kwargs=generate_kwargs)
        thread.start()
        for new_text in streamer:
            print(new_text, end="")
            yield new_text

        thread.join()
LLMで文章生成を行います。yieldを使用して、逐次結果を返り値として渡すようにしています。
prompt_template = (
    "以下に、あるタスクを説明する指示があります。"
    "リクエストを適切に完了するための回答を記述してください。\n\n"
    "### 指示:\n{}\n\n### 応答:"
)
好みのプロンプトを入れます。今回は公式のプロンプトをそのまま使用しています。
@stub.local_entrypoint()
def cli(prompt: str = None):
    question = (
        prompt
        or "What are the main differences between Python and JavaScript programming languages?"
    )
    model = LLMModel()
    for text in model.generate.remote_gen(prompt_template.format(question)):
        print(text, end="", flush=True)
modal runで実行されるのはこの関数です。
@stub.function(timeout=60 * 10)
@web_endpoint()
def get(question: str):

    from fastapi.responses import StreamingResponse

    model = LLMModel()
    return StreamingResponse(
        model.generate.remote_gen(prompt_template.format(question)),
        media_type="text/event-stream",
    )
modal serve modal deployで呼ばれるのはこの関数です。FastAPIを使用して、Streamingでレスポンスを行っています。
Tips
非公開モデルの利用
非公開モデルを利用する際には、HuggingFaceのプライベートリポジトリを利用します。
- URL先を参考にHuggingFaceのトークンを取得します。https://huggingface.co/docs/hub/security-tokens
- 先ほどのコードの
download_fileを以下のように変更してください。hf...には取得したトークンを入力してください。
def download_model():
    from huggingface_hub import snapshot_download
    access_token = "hf_..."

    model_name = "your-account/your-model"
    snapshot_download(model_name,token=access_token)
セキュリティを考慮する場合は、GitHubなどと同じように環境変数の使用を検討してください。
また、試していないのですがローカルディレクトリをマウントする方法もあるようです。
定期実行
Cronによる定期実行が可能です。以下を参考にしてください。
おわりに
今回はModalを使用してローカルLLMを簡単に動かす方法を紹介しました。
本記事ではわかりやすいようにHuggingFaceライブラリを直接使用しましたが、vLLMなどの高速な推論ができるライブラリもあります。vLLMについては公式ドキュメントや他の方のブログで解説されているため、本記事では割愛させていただきます。
GradioのパブリックURLを利用してtext-generation-webuiをデプロイすることも可能なので、時間があったら試してみたいです。
この記事を通じてローカルLLMを身近に感じていただけたら嬉しいです。
-
私のスケジュール管理ミスで論文の締め切りと被らせてしまいましたすみません
 ↩
↩ -
最近だと株式会社CyberAgent様のCALM2や大学研究所協同体のSwallowやrinna株式会社様のnekomataなど ↩
-
画像は公式サイトから引用しています。https://modal.com/blog/general-availability-and-series-a ↩ ↩2