概要
ESP32のWi-Fiクライアント(STA)を使っていて、場所を変える度にSSIDとパスワードを変更して書きこむ必要があり、面倒に感じました。
ESP32のSTAにはSmartConfigという関数があり、これを入れとくとスマートフォンの専用アプリからSSIDとパスワード設定ができます。
スマートフォンの専用アプリはいくつかあるようですが、今回はIoT SmartConfig(Android用)というアプリを使用しました。
https://play.google.com/store/apps/details?id=com.iotmaker
環境
・スマートフォン:Android
・対象デバイス:ESP32-DevkitC
・IDE:Arduino IDE
ソースコード
githubで公開しています。
https://github.com/kmaepu/ESP32_WiFi_SmartConfig
# include <WiFi.h>

WiFiServer server(80);

void setup()
{
    Serial.begin(115200);

    WiFi.mode(WIFI_AP_STA);     // AP + STAモードで動作
    WiFi.beginSmartConfig();    // SmartConfigを有効化

    // 設定待ち
    Serial.println("Waiting for SmartConfig.");
    while (!WiFi.smartConfigDone()) {
      delay(500);
      Serial.print(".");
    }
    Serial.println("SmartConfig received.");

    Serial.println("Waiting for WiFi connect.");
    while (WiFi.status() != WL_CONNECTED) {
        delay(500);
        Serial.print(".");
    }

    Serial.println("");
    Serial.println("WiFi connected");
    Serial.println("IP address: ");
    Serial.println(WiFi.localIP());
}

void loop()
{
  WiFiClient client = server.available();   // listen for incoming clients

  if (client) {                             // if you get a client,
    Serial.println("New Client.");           // print a message out the serial port
    String currentLine = "";                // make a String to hold incoming data from the client
    while (client.connected()) {            // loop while the client's connected
      if (client.available()) {             // if there's bytes to read from the client,
        char c = client.read();             // read a byte, then
        Serial.write(c);                    // print it out the serial monitor
        if (c == '\n') {                    // if the byte is a newline character

          // if the current line is blank, you got two newline characters in a row.
          // that's the end of the client HTTP request, so send a response:
          if (currentLine.length() == 0) {
            // HTTP headers always start with a response code (e.g. HTTP/1.1 200 OK)
            // and a content-type so the client knows what's coming, then a blank line:
            client.println("HTTP/1.1 200 OK");
            client.println("Content-type:text/html");
            client.println();

            // the content of the HTTP response follows the header:
            client.print("Click <a href=\"/H\">here</a> to turn ON the LED.<br>");
            client.print("Click <a href=\"/L\">here</a> to turn OFF the LED.<br>");

            // The HTTP response ends with another blank line:
            client.println();
            // break out of the while loop:
            break;
          } else {    // if you got a newline, then clear currentLine:
            currentLine = "";
          }
        } else if (c != '\r') {  // if you got anything else but a carriage return character,
          currentLine += c;      // add it to the end of the currentLine
        }
      }
    }
    // close the connection:
    client.stop();
    Serial.println("Client Disconnected.");
  }
}
使い方
1.ESP32_WiFi_SmartConfig.inoをESP32に書き込む
※シリアルコンソールを開いておく
2.スマートフォンに「IoT SmartConfig」をインストールする
3.ESP32が動作している状態で、IoT SmartConfigを起動する
↓起動後の画面
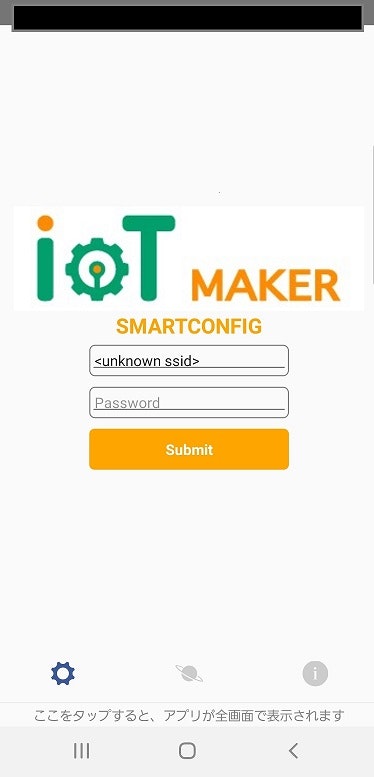
4.SSIDとパスワードを入力する
"unknown ssid"を消してSSIDを入力。
Password欄にパスワードを入力。
5.Submitボタンを押す
ESP32のSSIDとパスワードの設定が開始されます。
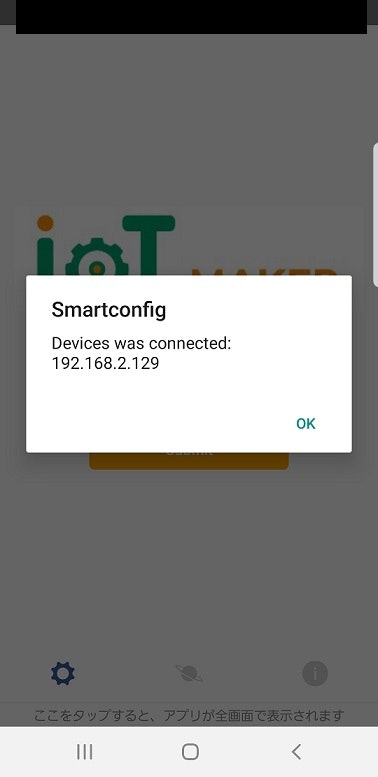
6.設定完了
設定が完了すると、IoT SmartConfigの画面に、ESP32のIPアドレスが表示されます。
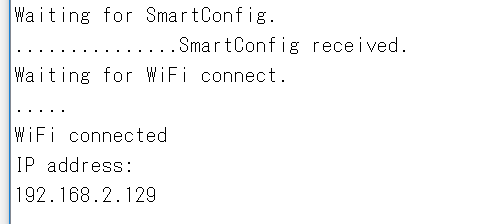
ESP32のシリアルコンソールに接続ログが表示されます。
おわりに
これでESP32のSSIDとパスワードをスマートに設定できる!
※個人の感想です。