前からMVVMを意識した開発をしないとなあと思いつつ、、今まで来てしまったので勉強をかねて備忘録。
やりたいこと
-
ViewModelを使ってデータの操作がしたい!
-
レイアウトからもDataBindingしたい!
-
Fragmentからも操作したい!
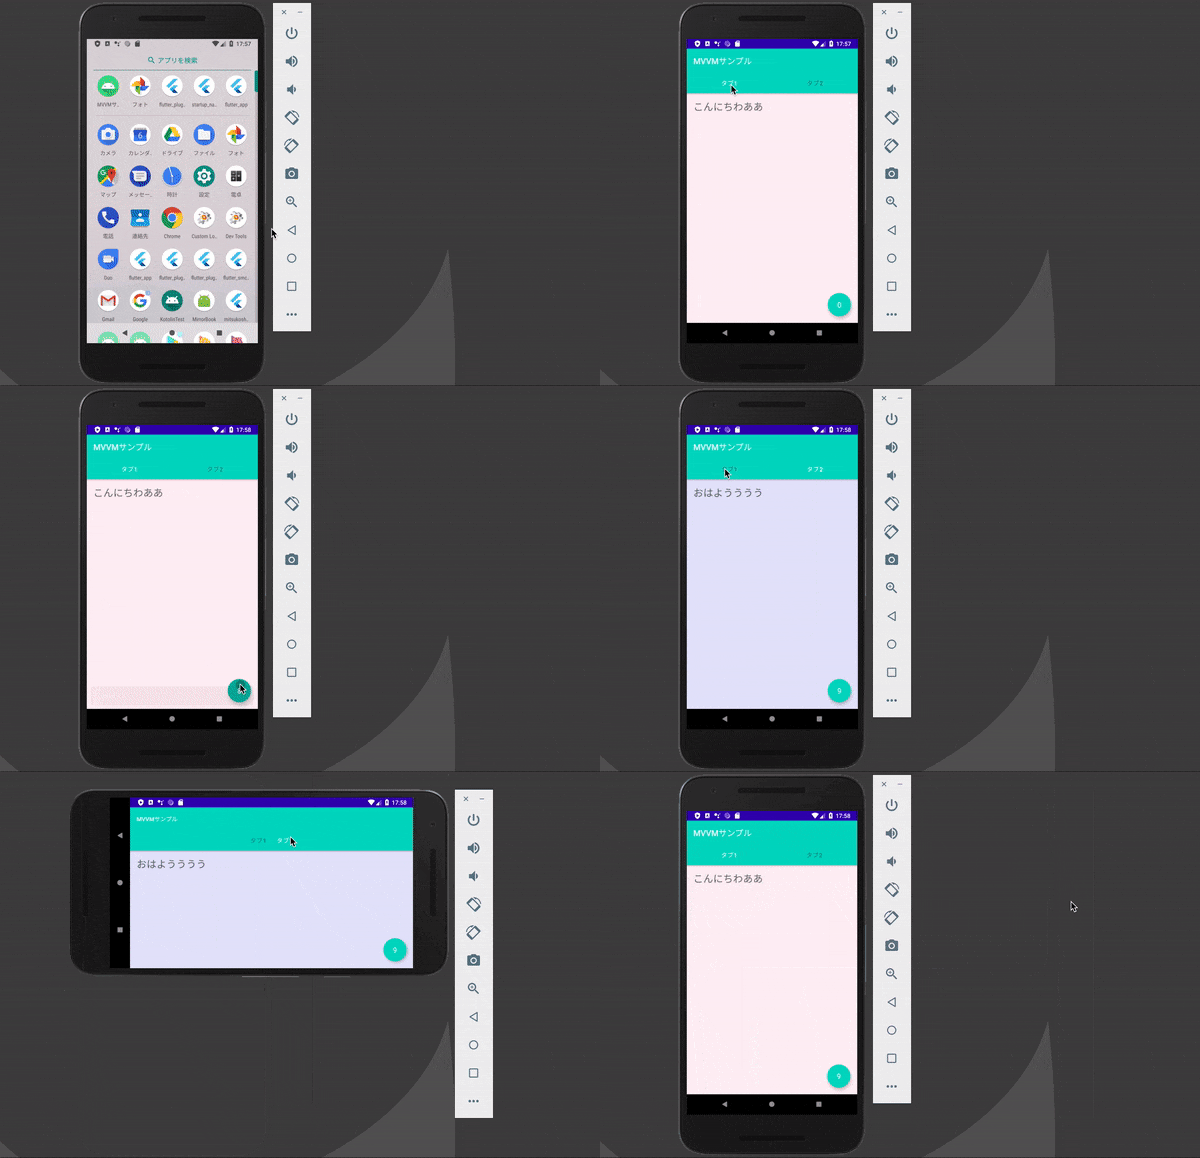
二つのタブを用意して、それぞれの画面でメッセージや背景色を変更させてます。
右下のFloatingActionButtonを押すとカウント処理が実行され、カウントがボタンに反映されるようにしました。(Snackbarでもカウント数を表示してますが、、邪魔でしたね![]() 笑)
笑)
ViewModelを使ってるので、画面を回転しても数字は初期化されません!なんて便利なんでしょう。
さっそく
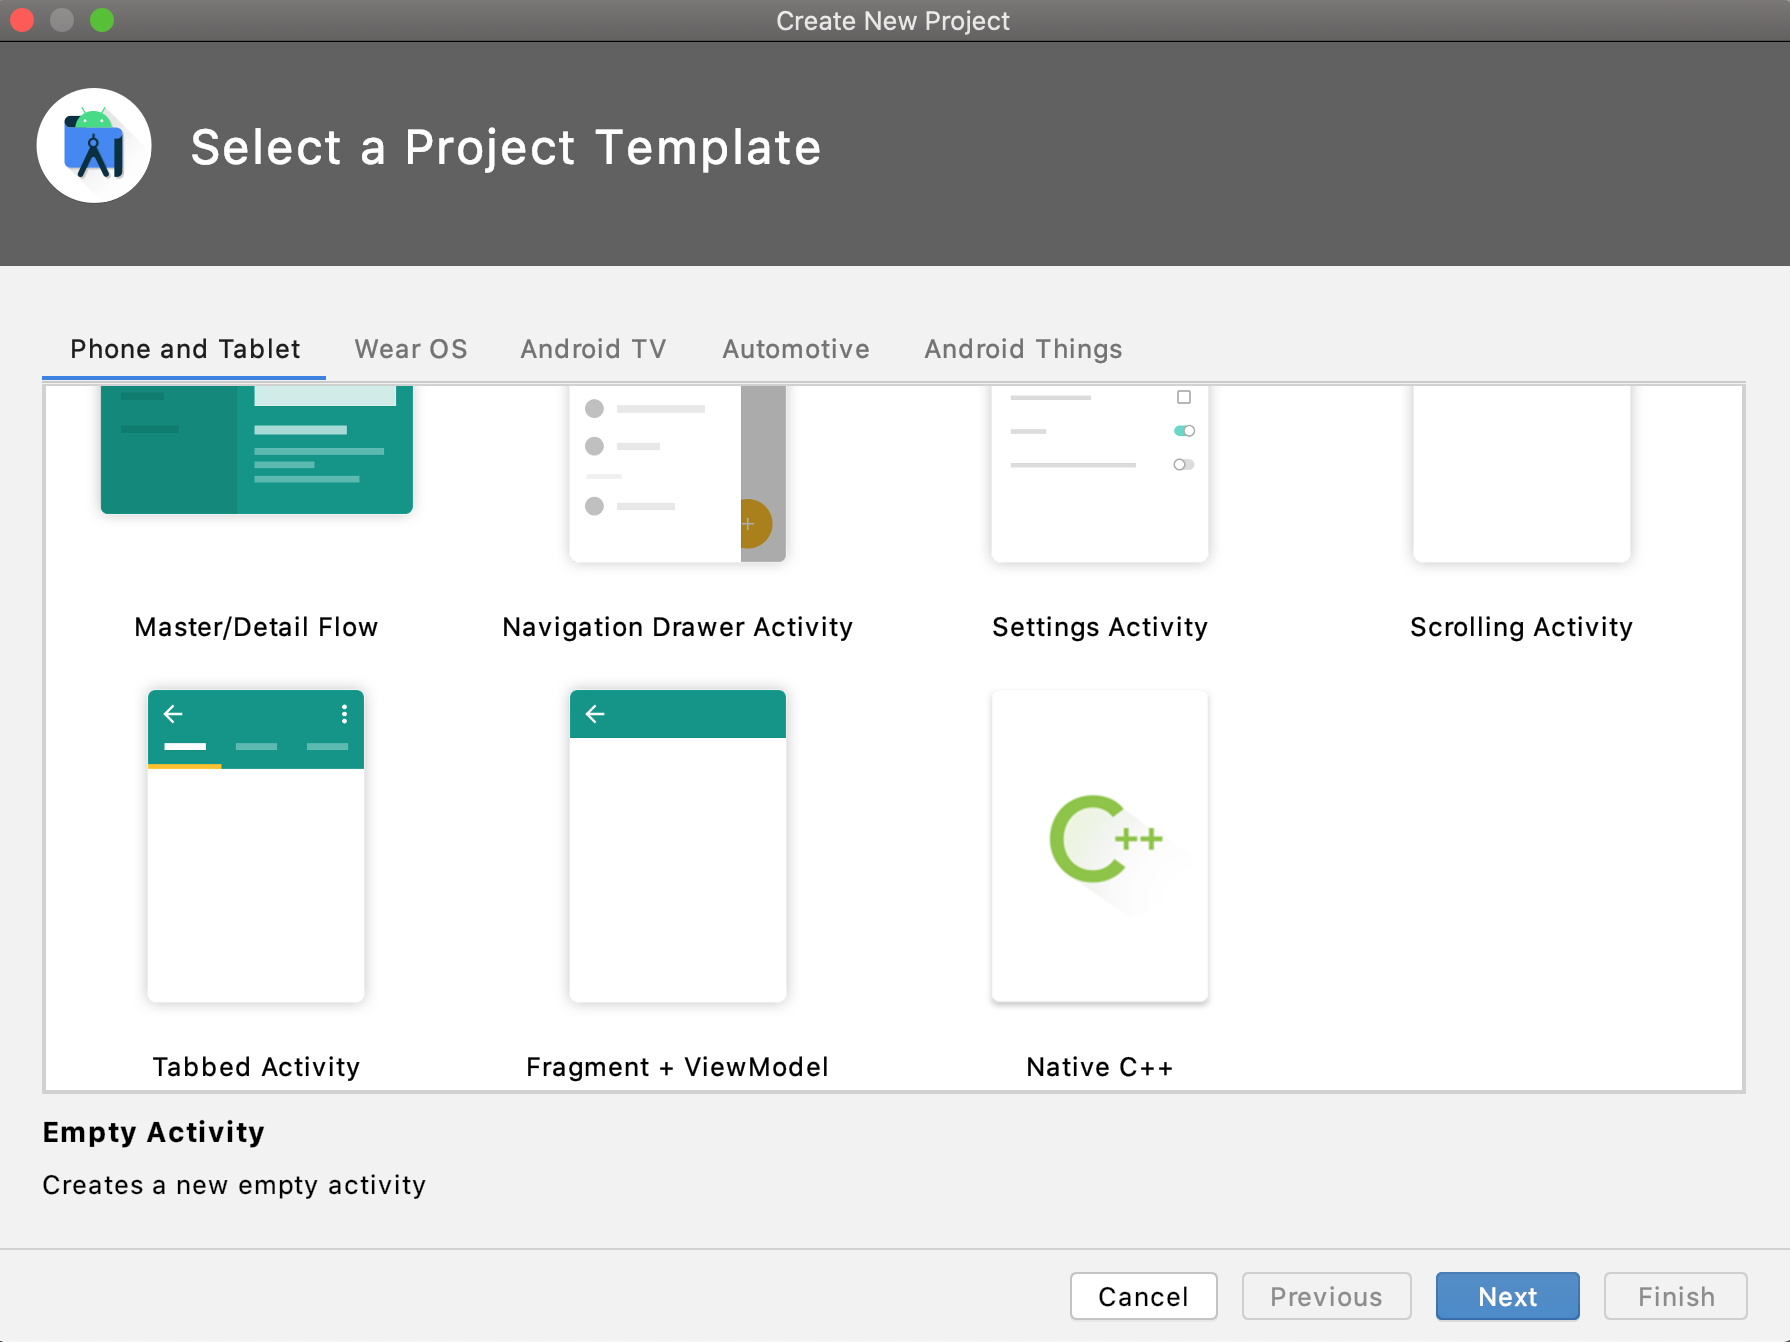
1. Androidプロジェクトを新規作成
ここではDataBindingを中心にやりたかったので、Tabbed Activityテンプレートを使用しました!

2. ViewModelに必要な部品を用意する
テンプレートで必要なViewModelは用意されてるので、ちょいとViewModelの中をいじっていきます。
メッセージ用の変数と背景色用の変数とカウント用の変数を用意する。あってるかわかんないけど、こんな感じ。。
class PageViewModel : ViewModel() {

    private var count = 0
    private val _index = MutableLiveData<Int>().also {
        mutableLiveData -> mutableLiveData.value = 0
    }
    val index: LiveData<Int>
        get() = _index

    private val _colorIndex = MutableLiveData<String>()
    val colorIndex: LiveData<String>
        get() = _colorIndex

    private val _messageText = MutableLiveData<String>().also { mutableLiveData ->
        mutableLiveData.value = ""
    }
    val messageText: LiveData<String>
        get() = _messageText

    fun setIndex(index: Int) {
        if(index == 1) {
            _messageText.value = "おはようううう"
            _colorIndex.value = "#e6e6fa"
        } else {
            _messageText.value = "こんにちわああ"
            _colorIndex.value = "#fff0f5"
        }
    }

    fun count() {
        _index.value = count++
    }
}
setIndexはFragmentを構成する時に呼ばれる。タブ1の時はindexが1
なのでおはよううううと背景色は#e6e6faがセットされるように設定しています。
※いや正確には0だけどSectionsPagerAdapterでposition + 1してるから1なんだなあ〜![]()
override fun getItem(position: Int): Fragment {
        // getItem is called to instantiate the fragment for the given page.
        // Return a PlaceholderFragment (defined as a static inner class below).
        return PlaceholderFragment.newInstance(position + 1)
    }
3. Fragmentをいじるよ
上で追加したmessegeTextとcolorIndexを監視してタブが切り替わるたびに値がセットされるように修正する。
override fun onCreateView(
            inflater: LayoutInflater, container: ViewGroup?,
            savedInstanceState: Bundle?
    ): View? {
        val root = inflater.inflate(R.layout.fragment_main, container, false)
        val textView: TextView = root.findViewById(R.id.section_label)
        val layout: ConstraintLayout = root.findViewById(R.id.constraintLayout)
        pageViewModel.messageText.observe(this, Observer<String> {
            textView.text = it
        })
        pageViewModel.colorIndex.observe(this, Observer<String> {
            layout.setBackgroundColor(Color.parseColor(it))
        })
        return root
    }
ここまでで、タブの切り替えで文字と背景色が変わるように実装が完了!
カウントはまだだよ。
4. Activityをいじるよ
まずレイアウトから値がすぐ反映できるようにDataBindingを有効にする。
以下を追記したら、Sync Now!
plugins {
    ・・・略・・・
    id 'kotlin-kapt'
}
    ・・・略・・・

android {
    ・・・略・・・
    dataBinding {
        enabled true
    }
}
続いて、レイアウトに適用させるよ!
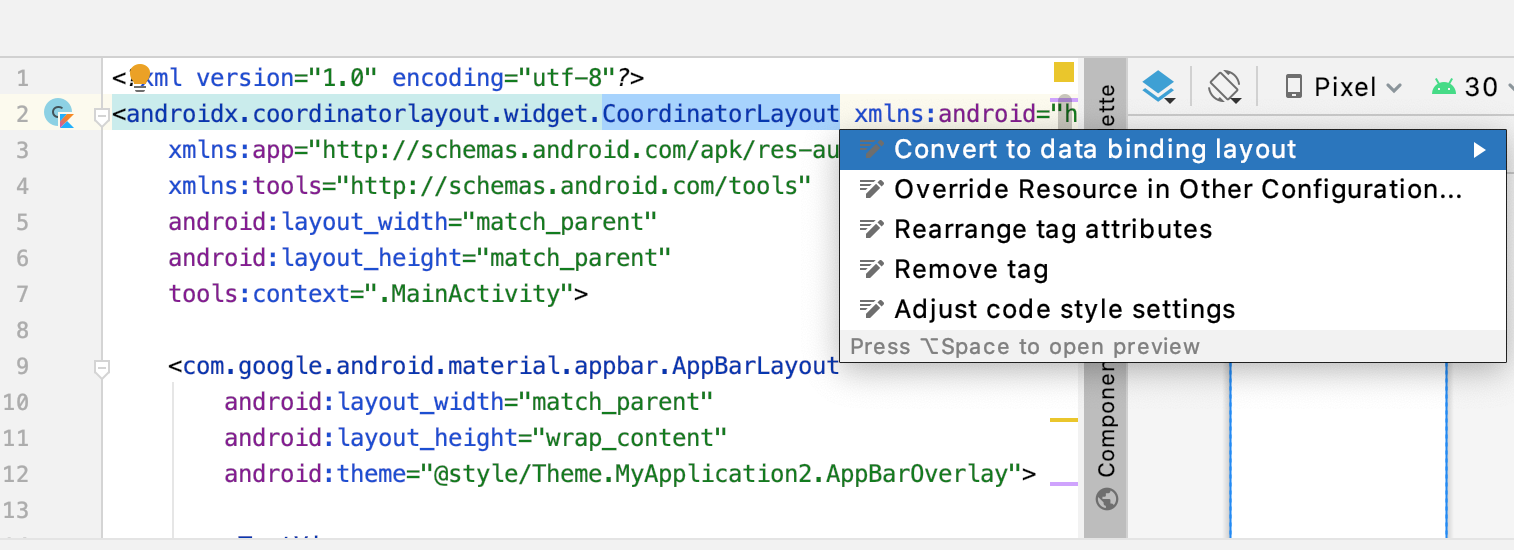
ここでは、MainActivityのレイアウトにバインドさせたいからactivity_mainを開いて、レイアウトにカーソルを合わせたとこで、option + commandを押すよ。(はい、macです)
そうすると、以下みたいなConvert to data binding layoutっていうのがでてくるのでそれを選択すると簡単にDataBinding用に変換してくれるんですね。

dataタグ内にDataBindingしたい変数を定義して、こんな感じにカウントボタンを用意しました!
<?xml version="1.0" encoding="utf-8"?>
<layout xmlns:android="http://schemas.android.com/apk/res/android"
    xmlns:app="http://schemas.android.com/apk/res-auto"
    xmlns:tools="http://schemas.android.com/tools">

    <data>
        <variable
            name="vm"
            type="jp.co.test.tabapp.ui.main.PageViewModel" />
    </data>

    <androidx.coordinatorlayout.widget.CoordinatorLayout
        android:layout_width="match_parent"
        android:layout_height="match_parent"
        tools:context=".MainActivity">

        <com.google.android.material.appbar.AppBarLayout
            android:layout_width="match_parent"
            android:layout_height="wrap_content"
            android:theme="@style/Theme.TabApp.AppBarOverlay">

            <TextView
                android:id="@+id/title"
                android:layout_width="wrap_content"
                android:layout_height="wrap_content"
                android:gravity="center"
                android:minHeight="?actionBarSize"
                android:padding="@dimen/appbar_padding"
                android:text="@string/app_name"
                android:textAppearance="@style/TextAppearance.Widget.AppCompat.Toolbar.Title" />

            <com.google.android.material.tabs.TabLayout
                android:id="@+id/tabs"
                android:layout_width="match_parent"
                android:layout_height="wrap_content"
                android:background="?attr/colorPrimary"
                app:tabSelectedTextColor="@color/teal_700"
                app:tabTextColor="@color/white" />
        </com.google.android.material.appbar.AppBarLayout>

        <androidx.viewpager.widget.ViewPager
            android:id="@+id/view_pager"
            android:layout_width="match_parent"
            android:layout_height="match_parent"
            app:layout_behavior="@string/appbar_scrolling_view_behavior" />

        <FrameLayout
            android:layout_width="wrap_content"
            android:layout_height="wrap_content"
            android:layout_gravity="bottom|end">


            <com.google.android.material.floatingactionbutton.FloatingActionButton
                android:id="@+id/fab"
                android:layout_width="wrap_content"
                android:layout_height="wrap_content"
                android:layout_margin="@dimen/fab_margin" />

            <TextView
                android:layout_width="wrap_content"
                android:layout_height="wrap_content"
                android:layout_gravity="center"
                android:text="@{String.valueOf(vm.index)}"
                android:elevation="16dp"
                android:textColor="@color/white"
                android:textAppearance="?android:attr/textAppearanceMedium" />
        </FrameLayout>
    </androidx.coordinatorlayout.widget.CoordinatorLayout>
</layout>
この一番下にあるTextViewのとこがカウント数を表示する部分です。
android:text="@{String.valueOf(vm.index)}"
カウントが増えていくたびに自動的に数字が変わるようにViewModelのindexを読み込みます。
続いてMainActivityの修正!
DataBindingするときは以下のように設定するみたい。
(なんでActivityMainBindingかというと、レイアウトファイル名をキャメル記法にして末尾にBindingをつけた名前だから。(※レイアウト名がactivity_main.xml))
val binding : ActivityMainBinding = DataBindingUtil.setContentView(this, R.layout.activity_main)
通常はこれですよね。
setContentView(R.layout.activity_main)
全体ではこんな感じ。
class MainActivity : AppCompatActivity() {

    private lateinit var pageViewModel: PageViewModel

    override fun onCreate(savedInstanceState: Bundle?) {
        super.onCreate(savedInstanceState)
        pageViewModel = ViewModelProvider(this).get(PageViewModel::class.java)
        val binding : ActivityMainBinding = DataBindingUtil.setContentView(this, R.layout.activity_main)
        binding.vm = pageViewModel
        binding.lifecycleOwner = this

        val sectionsPagerAdapter = SectionsPagerAdapter(this, supportFragmentManager)
        binding.viewPager.adapter = sectionsPagerAdapter
        binding.tabs.setupWithViewPager(binding.viewPager)

        binding.fab.setOnClickListener { view ->
            pageViewModel.count()
            Snackbar.make(view, "count = " + pageViewModel.index.value, Snackbar.LENGTH_LONG)
                .setAction("Action", null).show()
        }
    }
}
これ重要です。
binding.lifecycleOwner = this
これがなかったせいで、カウントボタン押してるのに数字がUIに反映されなくて詰まってました〜。笑
おわり
まだまだ流れが理解できず混乱したりするし、
本当にこのやり方でいいのかわかりませんが、とりあえずDataBindingできました![]()
