このエントリは、CloudStack Advent Calendar 2015の23日目のエントリーです。
最初に謝っておきます。構築できませんでした。この手順にそっても最後まで構築できません。参考程度にはなるかもしれません。
理由は、ホストが、他のSystem系VMと同一サブネットにいる必要があるのですが、このSystem系VMは、管理サーバーにより自動的に作成され、あらかじめ作成したサブネットで、IPアドレスがアサインされます。SoftLayerでは、「Portable IPアドレス」を利用することで、あらかじめサブネットを作成し、IPアドレスプールしておく事ができます。しかし、「ポータブルIPアドレス」で作成したサブネットに、ホスト(XenServer)をアサインさせることができなかったため、ここから先に進めませんでした。時間のあるときに解決策を考えてみますが、いい方法があればコメントいただければ助かります、、、12/23の担当でしたので、とりあえず、そこまでの手順を公開します。
CloudStack固有の構築に関しては、CloudStack構築解説が分かりやすくて参考になります。
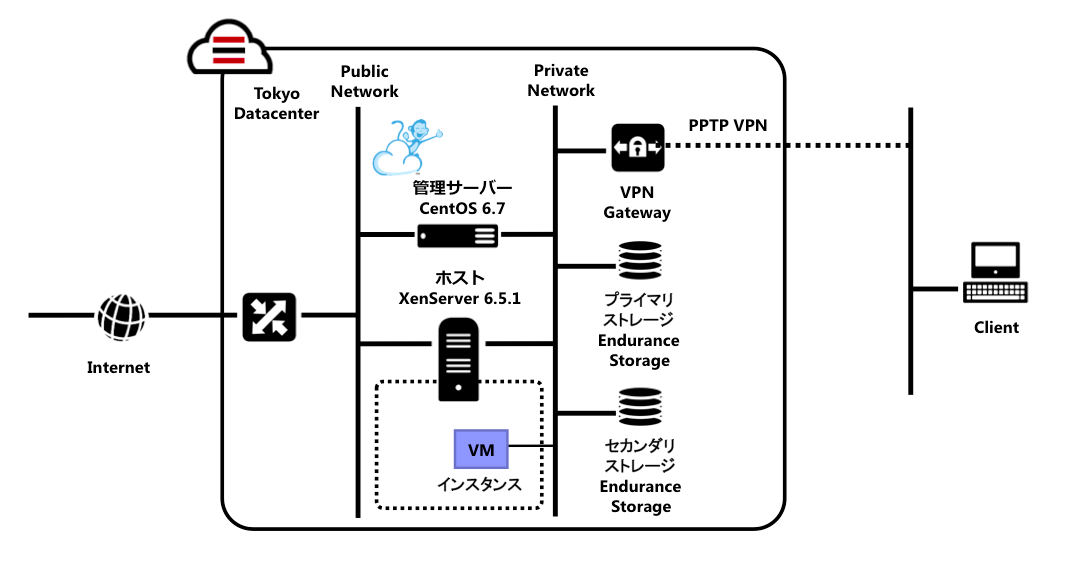
XenServer(ホスト)の注文
- SoftLayer管理ポータルから、Device – Device List - Order Devicesをクリックし、Bare Metal Servers Monthlyをクリックします。スペック表がでてきますので、ここでは、「Intel Xeon E3-1270 4 Cores 3.40GHz Up to 4 drives 4 GB - 32 GB」を選択します。いくつかのベアメタルサーバーには、MonthlyとHourlyが存在しますので注意しましょう。
- Configure your Single E3-1270 (4 Drives) (Monthly)で、下記のように選択し、Continue Your Orderをクリックします。ここでは、無償のオープンソース・ハイパーバイザー「Citrix XenServer」の最新版をインストールします。
- DATA CENTER: TOK02
- Operation System: Citrix XenServer 6.5.1
- サーバー名(例: xenserver651)、ドメイン名(例: handson.jp)を入力し、I have read and agree to the entire Master Service Agreementをチェクし、Finalize Your Orderをクリックし、サーバーをオーダーします。
- 最後に、Your Receiptが表示されます。確認して、このウインドウを閉じます。
- 月額課金のベアメタルサーバーは作成完了まで数時間かかります。時間課金のベアメタルサーバーは30分程度で作成されます。
仮想サーバー(管理サーバー)の注文
- SoftLayer CLI(slcli)からオーダーします。slcliのインストール方法については、MQTT、MongoDB入りのNode-REDの環境をさくっと作ってみるを参照してください。
- プロビジョニングスクリプトで、必要なサービスをインストールしていますので、詳細はこちらを参照ください。
slcli vs create \
--cpu=1 --memory=8192 --os=CENTOS_6_64 --billing=hourly --datacenter=tok02 \
--disk=100 --hostname=cloudstack2 --domain=handson.jp \
--postinstall=https://raw.githubusercontent.com/kkitase/softlayer-provisioning-script/master/cloudstack46 \
--key <sshkey>
Portable IPアドレスの注文
System VMやGuest VM用に、IPアドレスを注文しておきます。
- 管理ポータルから、Network – IP Management – Subnetsをクリックします。
- 右上のOrder IP Addressをクリックします。
- Select the type of subnet to add to this accountで、「Portable Private」を選択し、「32 Portable Private IP Addresses」をチェックし、Continueボタンをクリックします。
- 該当のVLANを選択します。
- Order IP Addressesにて、下記の様に必要な情報を入力して、Place Orderをクリックします。
- SoftLayerのほうで確認されたあと、Portable Private IP Addressesが提供されます。管理ポータルから、Network – IP Management – Subnetsをクリックし、左上のリストボックスでAll Subnetsを選択し、Portable Private IP Addressesが提供されたか確認します。
- 提供されたSubnetをクリックし、下記の設定を確認しメモしておきます。
- サブネットマスク: Portable Private IP addressのサブネットマスク(例: 10.140.9.224/27の場合、255.255.255.224)
- IPアドレス: 利用可能なIPアドレスの確認
- ゲートウェイ: Portable Private IP addressのGatewayのアドレスを指定します。
注意:Portable Private IPアドレスは無料ですが、Portable Public IP アドレスは、課金されます。
NFSストレージの作成 (Endurance Storage)
SoftLayerでNFSストレージを使いたい場合、「Endurance Storage」を利用するといいでしょう。
- まず、SoftLayerの管理ポータルから、Storage - File Storageをクリックします。
- 右上に、Order - File Storageをクリックします。
- Order File Storageで、
Location: Tokyo,Select Storage Package: 4 IOPS/GB,Select Storage Size: 250 GBを選択し、注文します。 - 確認し、"I have read the Master Service Agreement and agree to the terms therein."をチェックして、Place Orderをクリックします。
- 10秒程度で作成されますので、アクセスできるホストを設定します。
- 管理ポータルから、Storage - File Storage - 該当のVolume Name - 右横のActions - Authorize Hostsをクリック
- Authorize Hostsで、
Device Type: Virtual Server,Virtual Gestで、仮想サーバーと物理サーバーを指定しておきます。
CloudStack管理サーバーの設定
作成した仮想サーバーにSSHでログインします。プロビジョニングスクリプトが終了すると下記メッセージ表示されます。表示されない場合は少し待ってログインしてください。
****************************************************************************
  Provisioning was successful
  1) Setup MySQL server
  2) Check accessibility to Primary and Secondary storages
  3) Download System VM template
  4) Access http://ipaddress:8080/client/ and setup cloudstack network
****************************************************************************
MySQLの設定
# vi /etc/my.cnf
下記行を[mysqld]に追加
innodb_rollback_on_timeout=1
innodb_lock_wait_timeout=600
max_connections=350
log-bin=mysql-bin
binlog-format = 'ROW'
# service mysqld restart
# mysql_secure_installation
全てYで
# cloudstack-setup-databases cloud:password@localhost --deploy-as=root:password
# cloudstack-setup-management
プライマリストレージとセカンダリストレージの確認
mkdir /mnt/primary
mount -t nfs4 nfstok0201a.service.softlayer.com:/Volume名 /mnt/primary
umount /mnt/primary/
rm -fr /mnt/primary/
mkdir /mnt/secondary
mount -t nfs4 nfstok0201a.service.softlayer.com:/Volume名 /mnt/secondary
umount /mnt/secondary/
rm -fr /mnt/secondary/
System VM Templateのダウンロード
mkdir /mnt/secondary
mount -t nfs4 nfstok0201a.service.softlayer.com:/Volume名 /mnt/secondary
/usr/share/cloudstack-common/scripts/storage/secondary/cloud-install-sys-tmplt \
-m /mnt/secondary \
-u http://cloudstack.apt-get.eu/systemvm/4.6/systemvm64template-4.6.0-xen.vhd.bz2 \
-h xenserver \
-F
umount /mnt/secondary/
rm -fr /mnt/secondary/
CloudStackのネットワーク設定(CloudStack管理ポータルから)
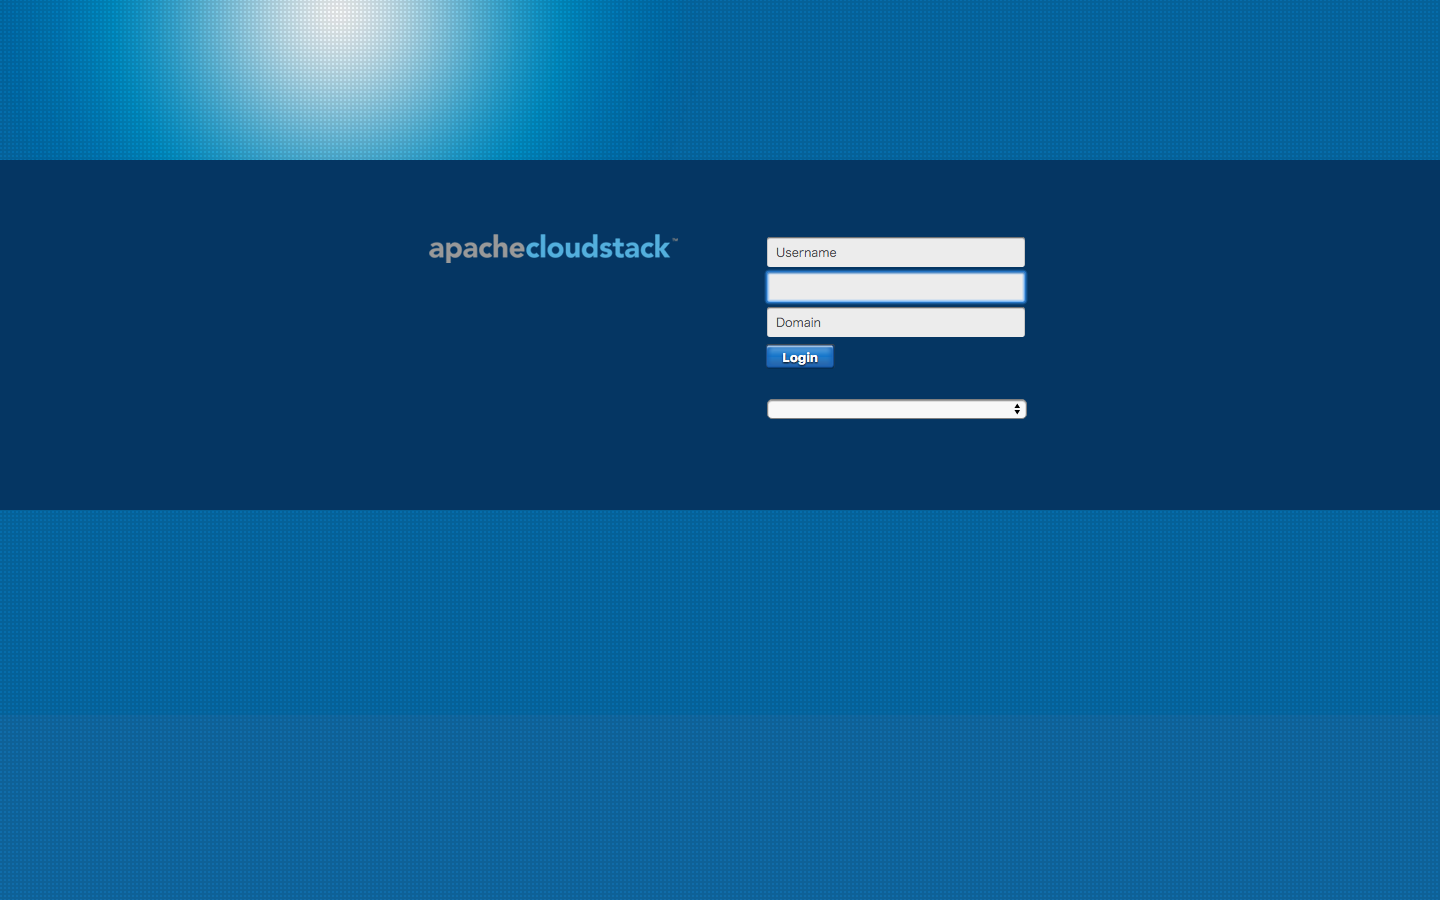
- ブラウザで、http://管理サーバのIP:8080/client にアクセスし、
user:admin,password:passwordでログイン
- 「CloudStackを使用したことがるので、このガイドをスキップする」をクリックし、ウィザードに沿って下記の設定を行います。
- Zoneの設定
- Podの設定
- Guest Networkの設定
- Storage Networkの設定
- Clusterの設定
- Hostの設定
- Primary Storageの設定
- Secondry Storageの設定
Hostの追加手順で、設定したCIDRにHostがない為にエラーがでてしまいます。この先は、また時間のあるときにでも考えてみます。いい方法があれば教えていただければと思います。
# tail -n 300 /var/log/cloudstack/management/management-server.log
Java.lang.IllegalArgumentException: The private ip address of the server (xx.xxx.xxx.xxx) is not compatible with the CIDR of pod: KimiPod and zone: KimiZone...
コミュニティ
CloudStackユーザー会、SoftLayerユーザー会などに入っておくと有用な情報を入手することができますので、是非登録しておきましょう。
参考
- SoftLayer実践ガイド 前編
- CloudStack構築解説
- Quick Installation Guide for CentOS 6
- http://yp.g20k.jp/2015/07/softlayer.html
- http://giraffeforestg.blog.fc2.com/blog-entry-170.html
- http://www.slideshare.net/remibergsma/cloudstack-handson-workshop-devopsdays-amsterdam?
- http://akira-junkbox.blogspot.jp/2013/03/cloudstack.html