はじめに
Python CLI/SDK v2を用いてAzureMLのデザイナーで作成したパイプラインをトレーニングからモデルの登録・デプロイ・推論まで行ってみようと思います。
開発環境
- OS Windows 10(NVIDIA GTX 1650Ti,16GB RAM, i5-10300H CPU)
- Visual Studio Code 1.73.1
- Python 3.9
パイプラインをPythonからトレーニングする
今回はこのパイプラインを使っていきます。
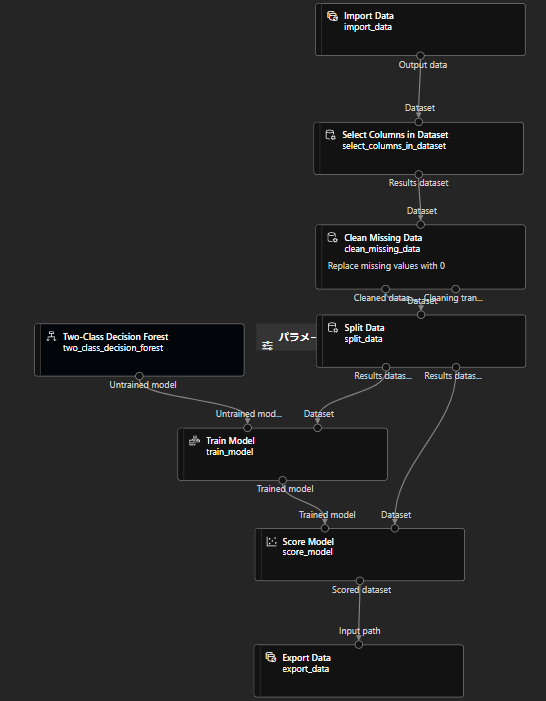
Pythonから操作できるように、入力データと出力データにはそれぞれImport DataとExport Dataコンポーネントを使い、パイプラインパラメータを設定します。
やり方は以前の記事で紹介してます。
学習データにはKaggleのTPSを使いました。failureが0か1か予測する二項分類タスクです。
まずはデザイナーで作成したパイプラインが動くか、ジョブ送信をして確認します。

問題なく完了しました!
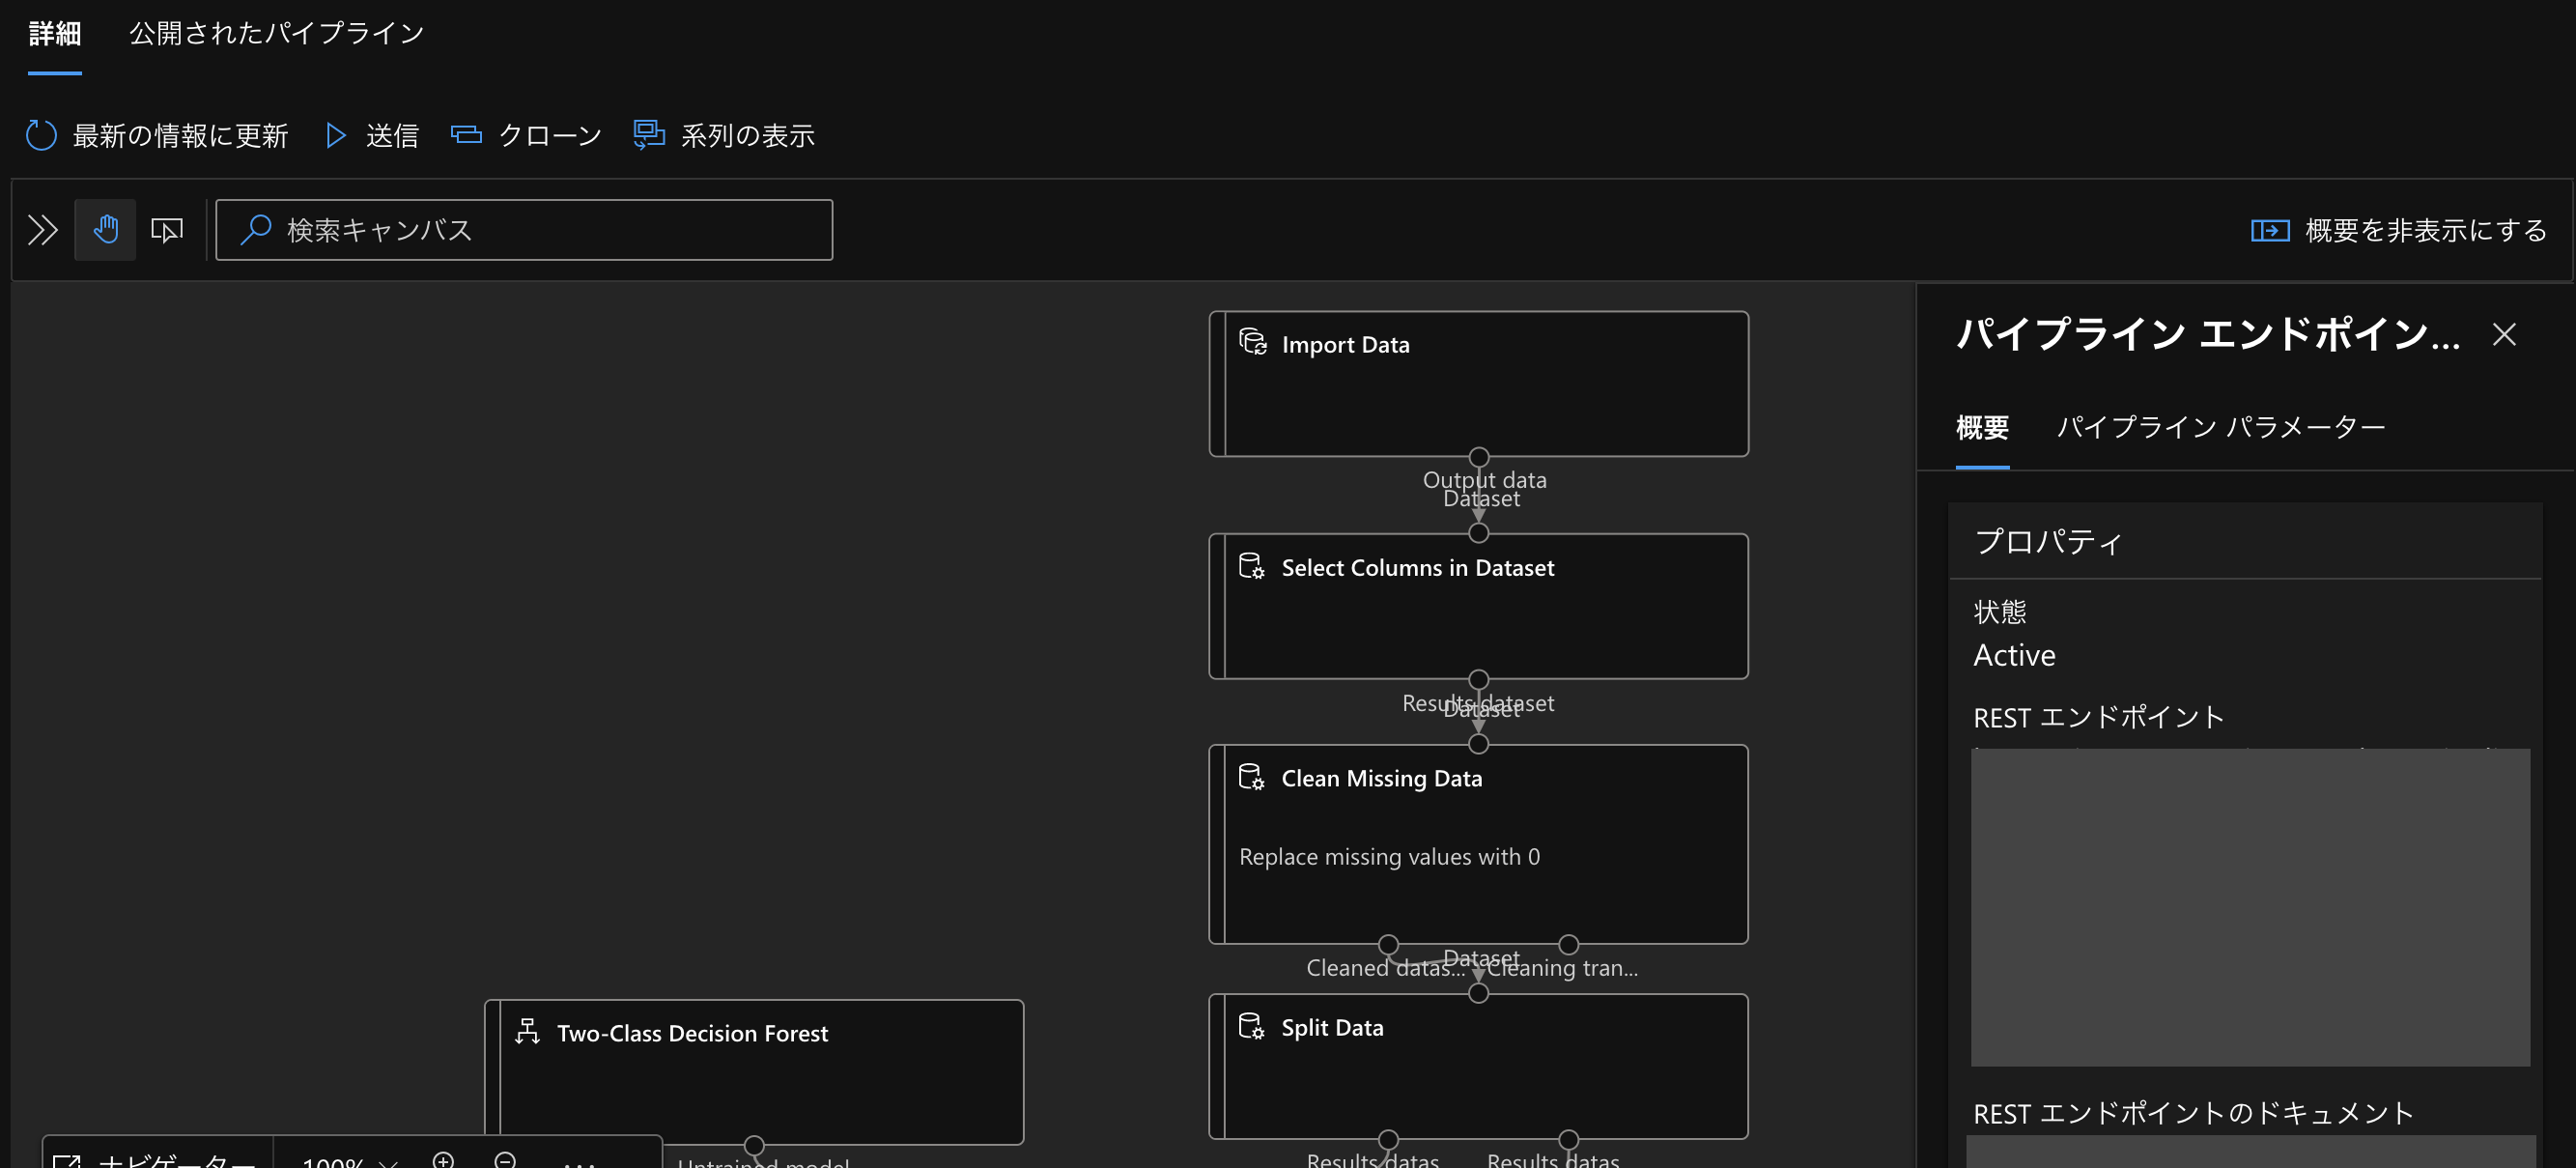
あとはPythonから実行できるように、このパイプラインを公開します。
公開すると、「概要」のところにRESTエンドポイントやパイプラインIDが記載されています。
これを使ってPythonからトレーニングを行ってみます!
v1の場合はパイプラインIDとazureml-coreのExperimentクラスやPublishedPipelineを用いてジョブの送信を行いましたが、今回はRESTエンドポイントを使ってPOSTしてみました。
from azure.ai.ml import MLClient
from azure.identity import DefaultAzureCredential, InteractiveBrowserCredential
from azure.ai.ml.entities import AmlCompute
import requests

#ワークスペースへの接続
try:
    credential = DefaultAzureCredential()
    credential.get_token("https://management.azure.com/.default")
except Exception as ex:
    credential = InteractiveBrowserCredential()

subscription_id = '<サブスクリプションID>'
resource_group = '<リソースグループ名>'
workspace = '<ワークスペース名>'

ml_client = MLClient(credential, subscription_id, resource_group, workspace)


#コンピューティングリソースの作成
cpu_compute_target = "cpu-cluster"

try:
    ml_client.compute.get(cpu_compute_target)
except Exception:
    print("Creating a new cpu compute target...")
    compute = AmlCompute(
        name=cpu_compute_target,
        size="STANDARD_D2_V2",
        min_instances=0,
        max_instances=1
    )
    ml_client.compute.begin_create_or_update(compute).result()

#POST
url = "https://XXX"
aad_token = credential.get_token("https://management.azure.com/.default")[0]

response = requests.post(
    url,
    headers={'Authorization':'Bearer {}'.format(aad_token)},
    json={
        "ExperimentName" : "open-pipeline",
        "ParameterAssignments":{
            "Import_data_path" : "UI/2022-12-15_140436_UTC/train.csv",
            "Export_score_path" : "Export_score/score-1216.csv"
            }
    }
)
ワークスペースへの接続
実験の前に、ワークスペースへ接続します。
DefaultAzureCredentialクラスのget_tokenメソッドを使ってアクセストークンが得られるかチェックし、できない場合はブラウザを起動して取得するようにしてます。
try:
    credential = DefaultAzureCredential()
    credential.get_token("https://management.azure.com/.default")
except Exception as ex:
    credential = InteractiveBrowserCredential()

subscription_id = '<サブスクリプションID>'
resource_group = '<リソースグループ名>'
workspace = '<ワークスペース名>'

ml_client = MLClient(credential, subscription_id, resource_group, workspace)
最後にMLClientでワークスペースの操作をできるようにします。
コンピューティングクラスターの作成
クラスターの名前やコンピューティングサイズを次のように設定します。
cpu_compute_target = "cpu-cluster"

try:
    ml_client.compute.get(cpu_compute_target)
except Exception:
    print("Creating a new cpu compute target...")
    compute = AmlCompute(
        name=cpu_compute_target,
        size="STANDARD_D2_V2",
        min_instances=0,
        max_instances=1
    )
    ml_client.compute.begin_create_or_update(compute).result()
POST
先ほど公開したパイプラインに記載してあった「RESTエンドポイント」でrequestsのPOSTメソッドを使ってAzureにジョブを送信してみます。
url = "https://XXX"
aad_token = credential.get_token("https://management.azure.com/.default")[0]

response = requests.post(
    url,
    headers={'Authorization':'Bearer {}'.format(aad_token)},
    json={
        "ExperimentName" : "<実験名>",
        "ParameterAssignments":{
            "Import_data_path" : "UI/2022-12-15_140436_UTC/train.csv",
            "Export_score_path" : "Export_score/score-1216.csv"
            }
    }
)
DefaultAzureCredentialクラスのget_tokenメソッドを使うとAzure Active Directory認証トークンを取得できます。取得したトークンはaad_tokenに入れておきます。
そして、Authorization : Bearer{aad_token}のようにベアラートークンとして入れます。
引数jsonのところには実験名、またパイプライン作成時にパイプラインパラメータを設定していたので、それぞれ入力データがあるパス名と出力先のパス名を入れます。
これで実行してみます!
ワークスペースの方をのぞいてきちんと実行できているか確認してみると…

完了になっていました!
今回Scoreデータを出力するようにしていたので、それもデータストアの方から確認してみます。
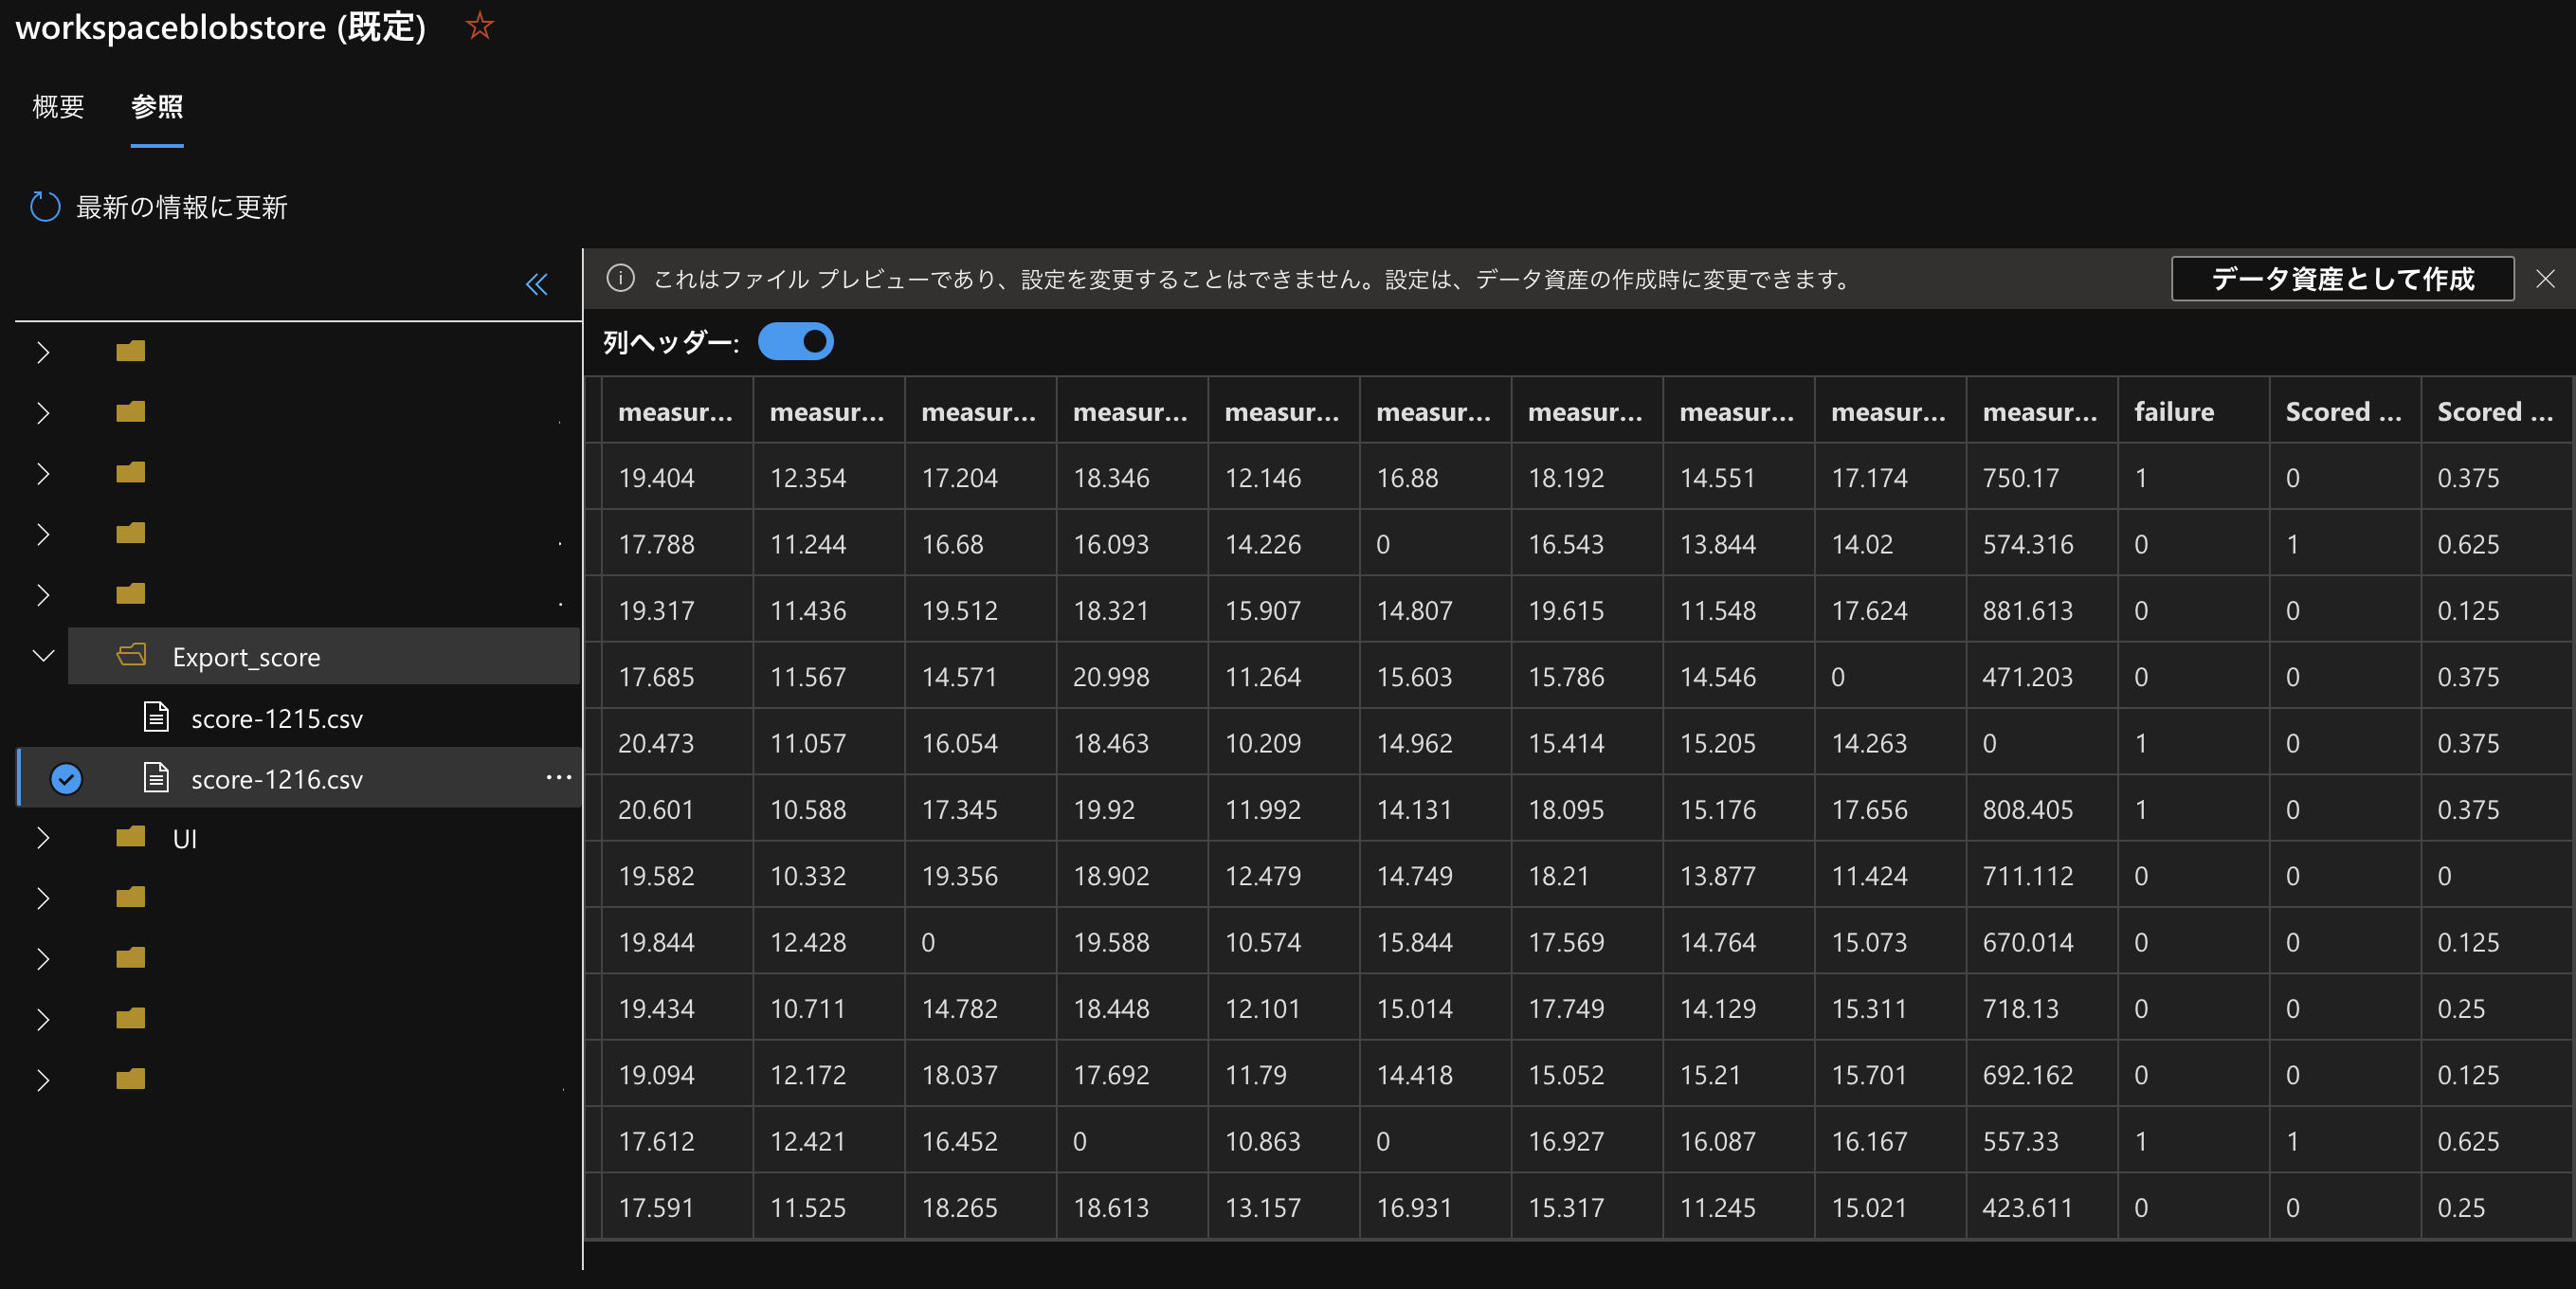
Export_scoreファイルにscore-1216.csvができており、さらに中身にはScored labelsなどが作成されているのを確認できました。
トレーニングしたモデルをデプロイ・推論する
それでは今度はデプロイを行っていきますが、まずはその前にモデルの登録から行います。
その後、エンドポイントの作成をしてデプロイ・推論という流れでやっていきます。
モデルの登録
まずはワークスペースへ接続し、azure.ai.ml.entitiesのModelクラスで登録を行います。
モデルのパスと登録するときの名前を入れたらml_client.models.create_or_update()で登録します。
from azure.ai.ml.entities import Model
from azure.identity import DefaultAzureCredential
from azure.ai.ml import MLClient

#ワークスペースの接続
subscription_id = "<サブスクリプションID>"
resource_group = "<リソースグループ名>"
workspace = "<ワークスペース名>"
ml_client = MLClient(
    DefaultAzureCredential(), subscription_id, resource_group, workspace
)

#モデルの登録
model = Model(
    path="azureml://datastores/workspaceblobstore/paths/azureml/XXX",
    name="TPStrainmodel_v2"
)

ml_client.models.create_or_update(model)
パスの取得は完了したジョブへ移って、Train Modelコンポーネントをダブルクリックし、
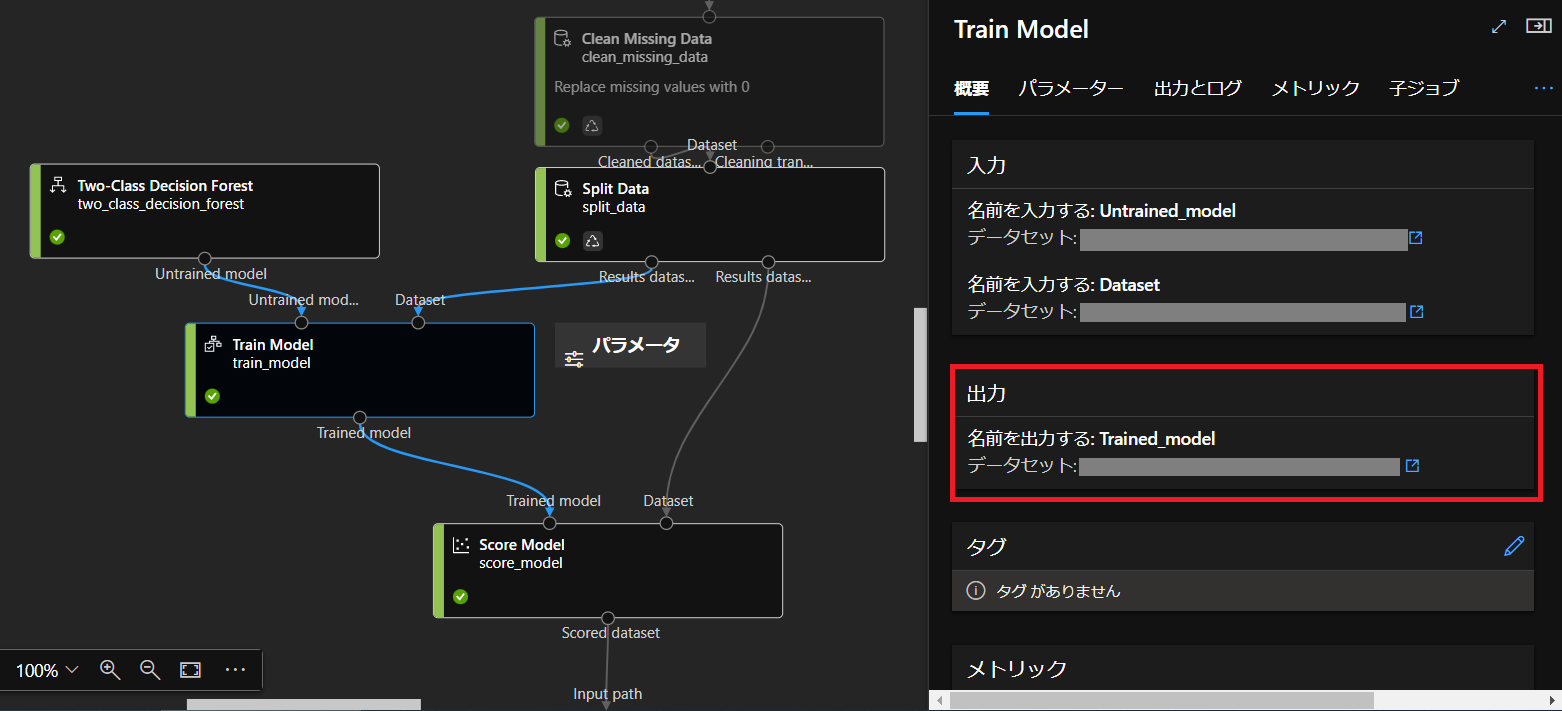
「出力」の「データセット」をクリック
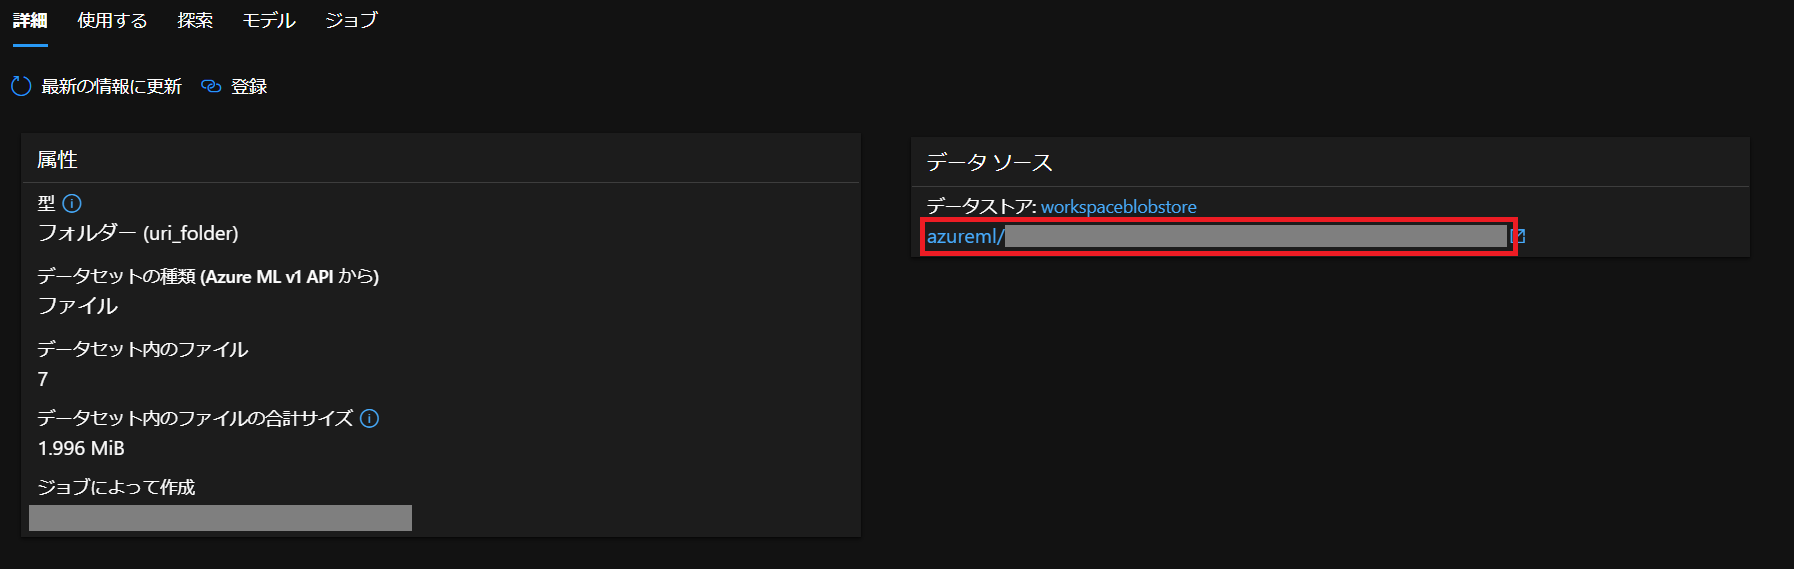
するとこのページに移るので、右側の「データストア」の下にあるパスをコピーしておきます。
あとは公式にパスの記載方法が示されているので、同じような形になるよう書きます。
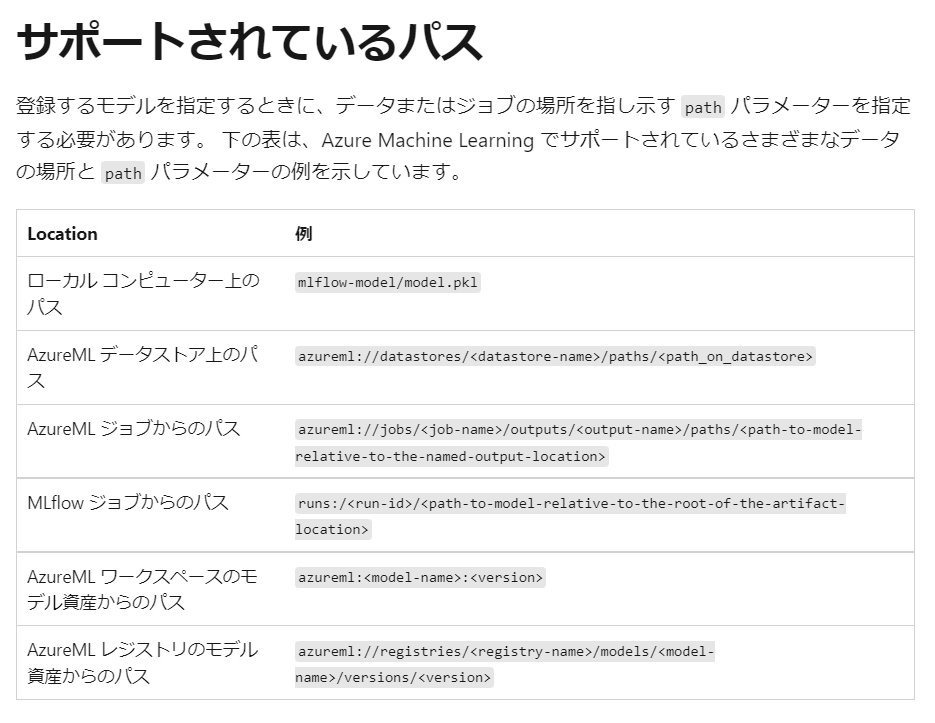
ちなみに今回はAzureMLデータストア上のパスになるので、azureml://datastores/<datastore-name>/paths/以下に先ほど取得したパスを貼り付けました。
また、モデルのパスは入力データごとに出力先が異なるため、現時点では手動でUIからパス取得する方法しか確認できませんでした。
実行後、ワークスペースのモデル一覧を確認すると
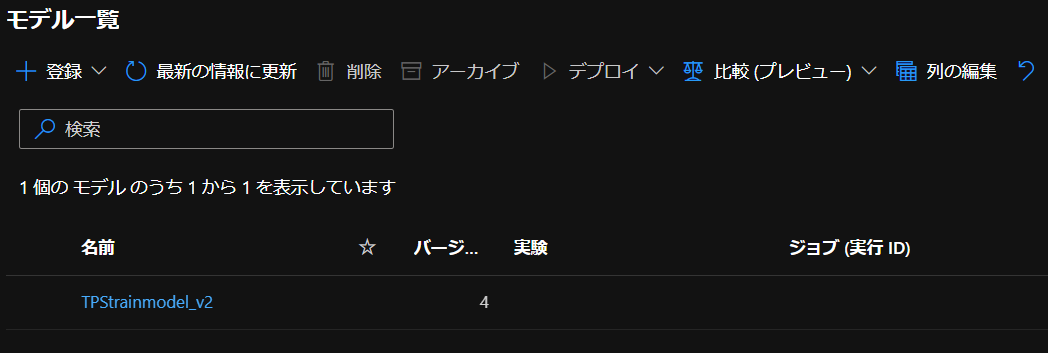
このように登録できていました。
エンドポイントの作成
デプロイ前にエンドポイントを作成します。
同じようにワークスペースに接続したらエンドポイントの名前を決め、ml_clientでエンドポイントを作成します。
from azure.ai.ml import MLClient
from azure.ai.ml.entities import ManagedOnlineEndpoint
from azure.identity import DefaultAzureCredential

#ワークスペースへ接続
subscription_id = "<サブスクリプションID>"
resource_group = "<リソースグループ名>"
workspace = "<ワークスペース名>"
ml_client = MLClient(
    DefaultAzureCredential(), subscription_id, resource_group, workspace
)

#エンドポイント作成
endpoint_name = "t-kawano-1216"
endpoint = ManagedOnlineEndpoint(
  name=endpoint_name, description="this is a sample local endpoint"
)

ml_client.online_endpoints.begin_create_or_update(endpoint)
エンドポイントの名前ですが、"_(アンダーバー)"などを使うと
The name for an endpoint must start with an upper- or lowercase letter
 and only consist of '-'s and alphanumeric characters.
このようなエラーが出ます。必ず"-(ハイフン)"を使った名前に設定しておきましょう。
デプロイ
エンドポイントが作成できたので、いよいよデプロイしてみます。
from azure.ai.ml import MLClient
from azure.ai.ml.entities import (
    ManagedOnlineEndpoint,
    ManagedOnlineDeployment,
    Model,
    Environment,
    CodeConfiguration,
)
from azure.identity import DefaultAzureCredential

#ワークスペースへ接続
subscription_id = "<サブスクリプションID>"
resource_group = "<リソースグループ名>"
workspace = "<ワークスペース名>"
ml_client = MLClient(
    DefaultAzureCredential(), subscription_id, resource_group, workspace
)

endpoint_name = "t-kawano-1216"

model = Model(
    path="azureml://datastores/workspaceblobstore/paths/XXX",
    name="TPStrainmodel_v2"
)
env = Environment(
    conda_file="conda_env.yaml",
    image="mcr.microsoft.com/azureml/minimal-ubuntu20.04-py38-cpu-inference:latest",
)
deployment = ManagedOnlineDeployment(
    name="regression-model-1216",
    endpoint_name=endpoint_name,
    model=model,
    environment=env,
    code_configuration=CodeConfiguration(
        code="./",
        scoring_script="score.py"
    ),
    instance_type="Standard_DS2_v2",
    instance_count=1,
)

ml_client.online_deployments.begin_create_or_update(deployment=deployment)
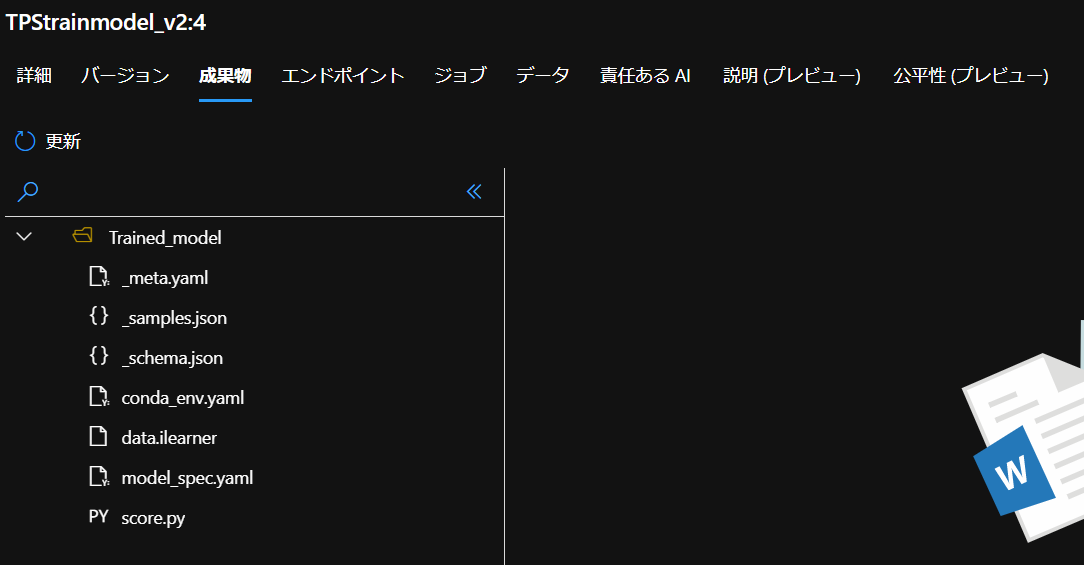
conda_env.yamlとscore.pyは登録したモデルの「成果物」からダウンロードできます。
conda_env.yaml
yamlの中身はこちら
name: project_environment
channels:
- conda-forge
dependencies:
- python=3.8.10
- pip=20.2
- pip:
  - azureml-defaults
  - azureml-designer-classic-modules==0.0.176
  - azureml-designer-serving==0.0.12
score.py
score.pyの中身も見ておきましょう。
import os
import json

from azureml.studio.core.io.model_directory import ModelDirectory
from pathlib import Path
from azureml.studio.modules.ml.score.score_generic_module.score_generic_module import ScoreModelModule
from azureml.designer.serving.dagengine.converter import create_dfd_from_dict
from collections import defaultdict
from azureml.designer.serving.dagengine.utils import decode_nan
from azureml.studio.common.datatable.data_table import DataTable


model_path = os.path.join(os.getenv('AZUREML_MODEL_DIR'), '<登録したモデルの名前を指定>')
schema_file_path = Path(model_path) / '_schema.json'
with open(schema_file_path) as fp:
    schema_data = json.load(fp)


def init():
    global model
    model = ModelDirectory.load(model_path).model


def run(data):
    data = json.loads(data)
    input_entry = defaultdict(list)
    for row in data:
        for key, val in row.items():
            input_entry[key].append(decode_nan(val))

    data_frame_directory = create_dfd_from_dict(input_entry, schema_data)
    score_module = ScoreModelModule()
    result, = score_module.run(
        learner=model,
        test_data=DataTable.from_dfd(data_frame_directory),
        append_or_result_only=True)
    return json.dumps({"result": result.data_frame.values.tolist()})
モデルの読み込みを行い、入力データをjson形式のデータを辞書型に変換し、辞書の値にはリスト型で格納するようにします。
さて、これをデプロイしてみると

正常にデプロイを行えました。
「使用」タグに移ると
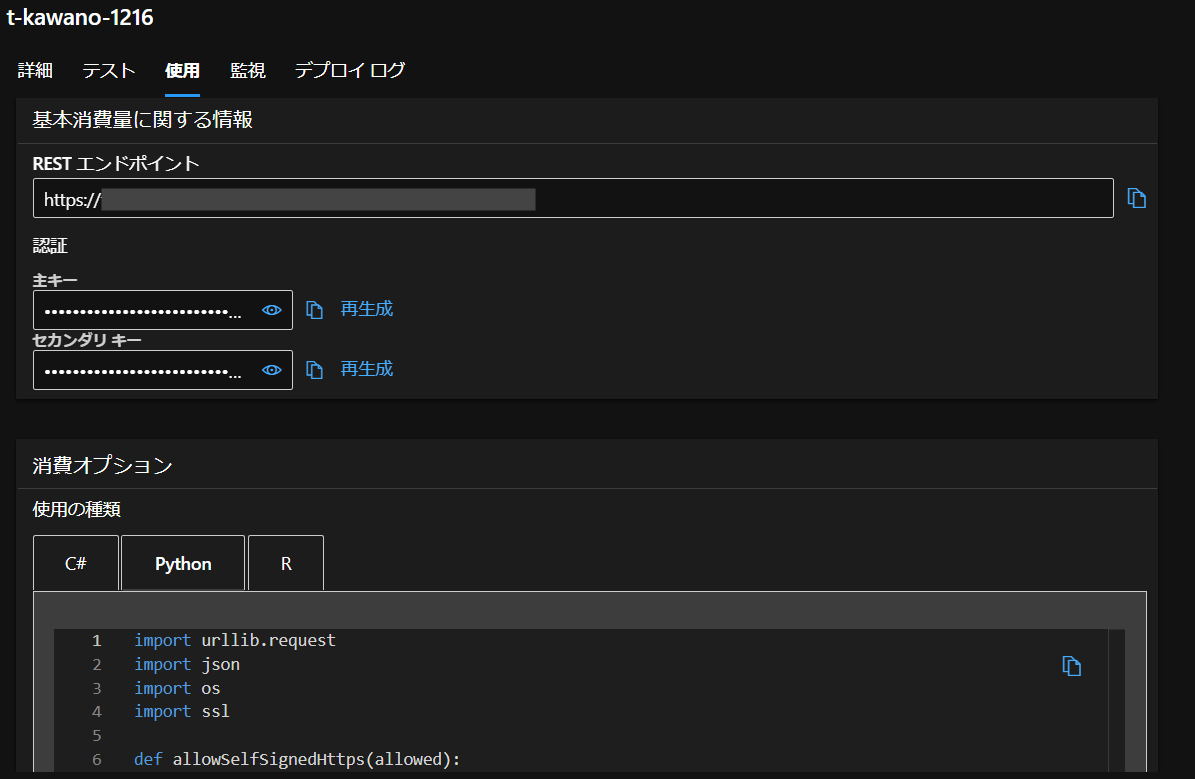
RESTエンドポイントやPythonコードも書かれています。これを使って次に推論を行います。
推論
import urllib.request
import json
import os
import ssl

def allowSelfSignedHttps(allowed):
    if allowed and not os.environ.get('PYTHONHTTPSVERIFY', '') and getattr(ssl, '_create_unverified_context', None):
        ssl._create_default_https_context = ssl._create_unverified_context

allowSelfSignedHttps(True)

data =  [
      {
        "id": 26570,
        "loading": 119.57,
        "attribute_0": "material_5",
        "attribute_1": "material_6",
        "attribute_2": 6,
        "attribute_3": 4,
        "measurement_0": 6,
        "measurement_1": 9,
        "measurement_2": 6,
        "measurement_3": 19.305,
        "measurement_4": 10.178,
        "measurement_5": 17.534,
        "measurement_6": 18.168,
        "measurement_7": 11.598,
        "measurement_8": 18.654,
        "measurement_9": 10.802,
        "measurement_10": 15.909,
        "measurement_11": 18.07,
        "measurement_12": 13.772,
        "measurement_13": 13.659,
        "measurement_14": 16.825,
        "measurement_15": 13.742,
        "measurement_16": 17.71,
        "measurement_17": 634.612,
        "failure":1
      }
    ]

body = str.encode(json.dumps(data))

url = 'https://XXX'
api_key = 'YYY'
if not api_key:
    raise Exception("A key should be provided to invoke the endpoint")

headers = {'Content-Type':'application/json', 'Authorization':('Bearer '+ api_key), 'azureml-model-deployment': 'regression-model-1214' }

req = urllib.request.Request(url, body, headers)

try:
    response = urllib.request.urlopen(req)

    result = response.read()
    print(result)
except urllib.error.HTTPError as error:
    print("The request failed with status code: " + str(error.code))
    print(error.info())
    print(error.read().decode("utf8", 'ignore'))
先ほどのコードから追加した部分はdataの部分とapi_keyのところです。
api_keyは「主キー」のところで取得できます。
結果
実行すると、このように結果が返ってきました。
b'"{\\"result\\": [[26570, 119.57, \\"material_5\\", \\"material_6\\", 6, 4, 6, 9, 6, 19.305, 10.178, 17.534, 18.168, 11.598, 18.654, 10.802, 15.909, 18.07, 13.772, 13.659, 16.825, 13.742, 17.71, 634.612, 1, 0, 0.25]]}"'