0. はじめに
C#でOpenGLを使用するには,OpenTKをNuGetからインストールすればよい.そしてOpenTK.GLWpfControlもインストールすることで,WPF用の描画コントロールGLWpfControlを使用できるようになる.しかしGLWpfControlを扱った記事がなかったので,備忘録としてWPFアプリに描画コントロールGLWpfControlを実装する例を記す.
今回は下のような,回転する線分をWPFアプリ内に描画し,回転の開始/停止をボタンクリックで制御する.
ソースコード:https://github.com/kkaneko1090/OpenTKWpfDemo
1. プロジェクトの作成とパッケージのインストール
まず,WPFアプリケーション(.Net) を作成する.

今回は .Net 8.0 を選択する.

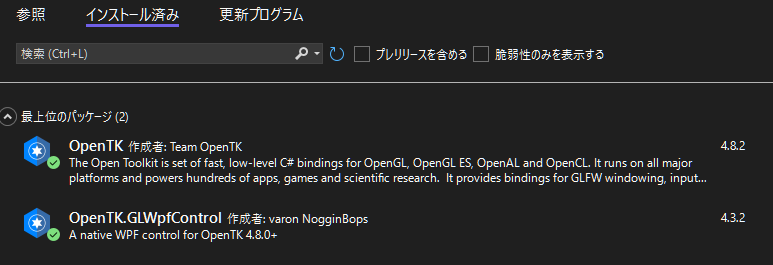
次に必要なパッケージをNuGetでインストールする.まずはC#版OpenGLであるOpenTK (ver 4.8.2) をインストールする.加えて,描画領域のコントロールを使用したいので,OpenTK.GLWpfControl (ver 4.3.2) もインストールする.

2. GUIの構築
下図のように,GLWpfControl,ラベル,ボタンの3つでGUIを構築する.

XAMLファイルには,GLWpfControlを使用するために,xmlns:glWpfControl="clr-namespace:OpenTK.Wpf;assembly=GLWpfControl" を追記する.その後,glWpfControl:GLWpfControl,Button,Labelを配置する.glWpfControl:GLWpfControlには描画を行うためにReady とRender のイベントを設定した.
<Window x:Class="OpenTKWpfDemo.MainWindow"
        xmlns="http://schemas.microsoft.com/winfx/2006/xaml/presentation"
        xmlns:x="http://schemas.microsoft.com/winfx/2006/xaml"
        xmlns:d="http://schemas.microsoft.com/expression/blend/2008"
        xmlns:mc="http://schemas.openxmlformats.org/markup-compatibility/2006"
        xmlns:local="clr-namespace:OpenTKWpfDemo"
        xmlns:glWpfControl="clr-namespace:OpenTK.Wpf;assembly=GLWpfControl"
        mc:Ignorable="d"
        Title="MainWindow" Height="450" Width="600">
    <Grid>
        <glWpfControl:GLWpfControl x:Name="glControl" Ready="glControl_Ready" Render="glControl_Render"/>
        <Button x:Name="btnStartStop" Content="Start/Stop" Margin="0,0,10,10" HorizontalAlignment="Right" Width="126" Height="31" VerticalAlignment="Bottom" Click="btnStartStop_Click"/>
        <Label x:Name="lblAngle" Content="angle" Foreground="White" HorizontalAlignment="Right" Margin="0,0,10,46" VerticalAlignment="Bottom" Height="31" Width="126"/>
    </Grid>
</Window>
3. 描画用のコードの実装
MainWindow.xaml.csには,GLWpfControlによる描画を開始するために InitializeComponent();の後ろに,コントロールの設定と描画開始用のコードを記述する.settings についてはOpenGLのバージョン3.1を使用したいので,MajorVersion = 3, MinorVersion = 1 とした.連続的にレンダリングしたいのでRenderContinuously = trueと設定した.
using OpenTK.Graphics.OpenGL;
using OpenTK.Mathematics;
using OpenTK.Wpf;
using System.Text;
using System.Windows;
using System.Windows.Controls;
using System.Windows.Data;
using System.Windows.Documents;
using System.Windows.Input;
using System.Windows.Media;
using System.Windows.Media.Imaging;
using System.Windows.Navigation;
using System.Windows.Shapes;

namespace OpenTKWpfDemo
{
    /// <summary>
    /// Interaction logic for MainWindow.xaml
    /// </summary>
    public partial class MainWindow : Window
    {
        public MainWindow()
        {
            InitializeComponent();

            //GLコントロールの設定
            var settings = new GLWpfControlSettings()
            {
                MajorVersion = 3,
                MinorVersion = 1,
                RenderContinuously = true,
            };

            //描画開始
            glControl.Start(settings);
        }

        //...

    }
}
glControl.Start(settings);の後に一度だけ呼び出されるイベントReady では,描画の初期設定を以下のように行う.ここでは描画に関する種々の設定を行っているが,線分を描画するだけならよりシンプルに実装できるが,今後3次元形状も描画することを考えて記述している.(x, y, z) = (0, 0, 1)の位置にライトを配置した.また今回はポリゴンの描画は行わないのだが,Readyイベントでポリゴン裏面のカリング設定も行うようにした.
        /// <summary>
        /// Readyイベント
        /// </summary>
        private void glControl_Ready()
        {
            //背景を黒色でクリア
            GL.ClearColor(Color4.Black);
            //デプステストを有効化
            GL.Enable(EnableCap.DepthTest);
            //カリングの設定
            GL.Enable(EnableCap.CullFace); //カリングの有効化
            GL.CullFace(CullFaceMode.Back); //裏面をカリングする面に指定
            GL.FrontFace(FrontFaceDirection.Ccw); //反時計回りで描かれる面を表面に指定
            //ライトの設定
            GL.Enable(EnableCap.Lighting); //ライティングの有効化
            GL.Enable(EnableCap.Light0); //ライトを1つ(0番)を有効化
            GL.Light(LightName.Light0, LightParameter.Position, Vector4.UnitZ); //UnitZ(0,0,1)にライトを配置
            //法線の正規化
            GL.Enable(EnableCap.Normalize);
            //物体の質感の設定
            GL.Enable(EnableCap.ColorMaterial); //質感の有効化
            GL.ColorMaterial(MaterialFace.Front, ColorMaterialParameter.Diffuse);//表面を拡散反射する質感に指定

        }
下記のRenderイベントは描画時に呼び出されるが,まず最初にGL.Clearでバッファを消去する.
        /// <summary>
        /// Renderイベント
        /// </summary>
        /// <param name="obj"></param>
        private void glControl_Render(TimeSpan obj)
        {
            //カラーバッファ初期化
            GL.Clear(ClearBufferMask.ColorBufferBit);
            //デプスバッファ初期化
            GL.Clear(ClearBufferMask.DepthBufferBit);

            //描画領域を指定する2点のXY座標を指定
            GL.Viewport(0, 0, (int)glControl.ActualWidth, (int)glControl.ActualHeight); //(0,0)と((int)glControl.ActualWidth, (int)glControl.ActualHeight)が成す長方形領域を指定
            //視点を設定
            Matrix4 modelView = Matrix4.LookAt(Vector3.UnitZ, Vector3.Zero, Vector3.UnitY); //UnitZ(0,0,1)からZero(0,0,0)の向きに見るように指定,画面の上方向はUnitY(0,1,0)と指定
            //マトリックスの読み込みモードをModelView(視点)に変更
            GL.MatrixMode(MatrixMode.Modelview);
            //視点行列を読み込み
            GL.LoadMatrix(ref modelView);

            //投影領域を設定
            Matrix4 projection = Matrix4.CreateOrthographic((float)glControl.ActualWidth, (float)glControl.ActualHeight, -500.0f, 500.0f);
            //マトリクスの読み込みモードをProjection(投影領域)に変更
            GL.MatrixMode(MatrixMode.Projection);
            //投影行列を読み込み
            GL.LoadMatrix(ref projection);

            //線分の描画
            DrawLineSegment();
        }
Viewportの設定では,下図のような視点となるようにコードを記述している.また,Projectionに関するパラメータは,コントロール(glControl)を目いっぱい使うように領域を指定した.

最後に関数 DrawLineSegment で回転する線分を描画する.関数の中身は下の通り.
//グローバル変数
//線分の角度
float angle = 0;
//線分の回転半径
float radius = 200;
//回転中フラグ
bool isRotating = false;

/// <summary>
/// 線分の描画
/// </summary>
private void DrawLineSegment()
{

   #region 描画処理
   //線の幅を設定
   GL.LineWidth(1);
   //Lineモードで描画開始
   GL.Begin(PrimitiveType.Lines);
   //色指定
   GL.Color4(Color4.Red);
   //線分の始点
   GL.Vertex3(0, 0, 0);
   //線分の終点
   GL.Vertex3(radius * MathF.Cos(angle), radius * MathF.Sin(angle), 0);
   //描画終了
   GL.End();

   //実行中フラグのとき
   if (isRotating)
   {
       //角度をインクリメント
       angle += 0.01f;
       //角度を正規化
       angle = angle % (2 * MathF.PI);
       //ラベルに角度を表示
       lblAngle.Content = string.Format("Angle: {0} deg.", (angle / MathF.PI * 180).ToString("F2"));
   }
   #endregion
}
線分の始点と終点は上図のようになるようにGL.Beginを使用して描画する.if(isRotating)の中身では,線分の回転角度のインクリメントと,現在の角度をラベルに表示するコードを記述している.そして回転中フラグ isRotating は,以下のようにボタンクリックで変更するようにした.
 /// <summary>
 /// ボタンによる処理
 /// </summary>
 /// <param name="sender"></param>
 /// <param name="e"></param>
 private void btnStartStop_Click(object sender, RoutedEventArgs e)
 {
     isRotating = !isRotating;
 }

