はじめに
本記事はANGEL Calendar、15日目の記事となります!
記事一覧は↓のOrganizationアカウントの一覧をチェックしてみてください!
本記事の内容
「v0」というユーザーインターフェース(UI)を簡単に作成できるツールの概要、使い方を紹介します!
ハッカソンや個人開発で簡単にUIを作成したいといった方や、React初学者にも役立つ内容だと思いますので、ぜひ目を通していただければと思います。
v0とは?
Next.jsの開発で知られるVercel Inc.によって開発された、ChatGPTのようなチャット形式でやり取りを行い、UIを生成できるツールです。
要件を入力することで、shadcn/uiとTailwind CSSを用いたReactコードが生成され、コピー&ペーストでNext.jsやReactに組み込むことができます。
v0の使い方
- ↑のURLにアクセスする。
- ログイン(アカウント登録)する。
- 要件を入力する。
- UIが生成される。
(5. 追加の要件を伝える。) - ReactやNext.jsに組み込んでみる。
利用上限はありますが、無料で利用できます。(200 credits/month)
UIの初期生成に30クレジット、追加修正に10クレジット消費されます。
※2024.9.15時点
使用例(ToDoアプリのUI作成)
では、実際の使ってみます。
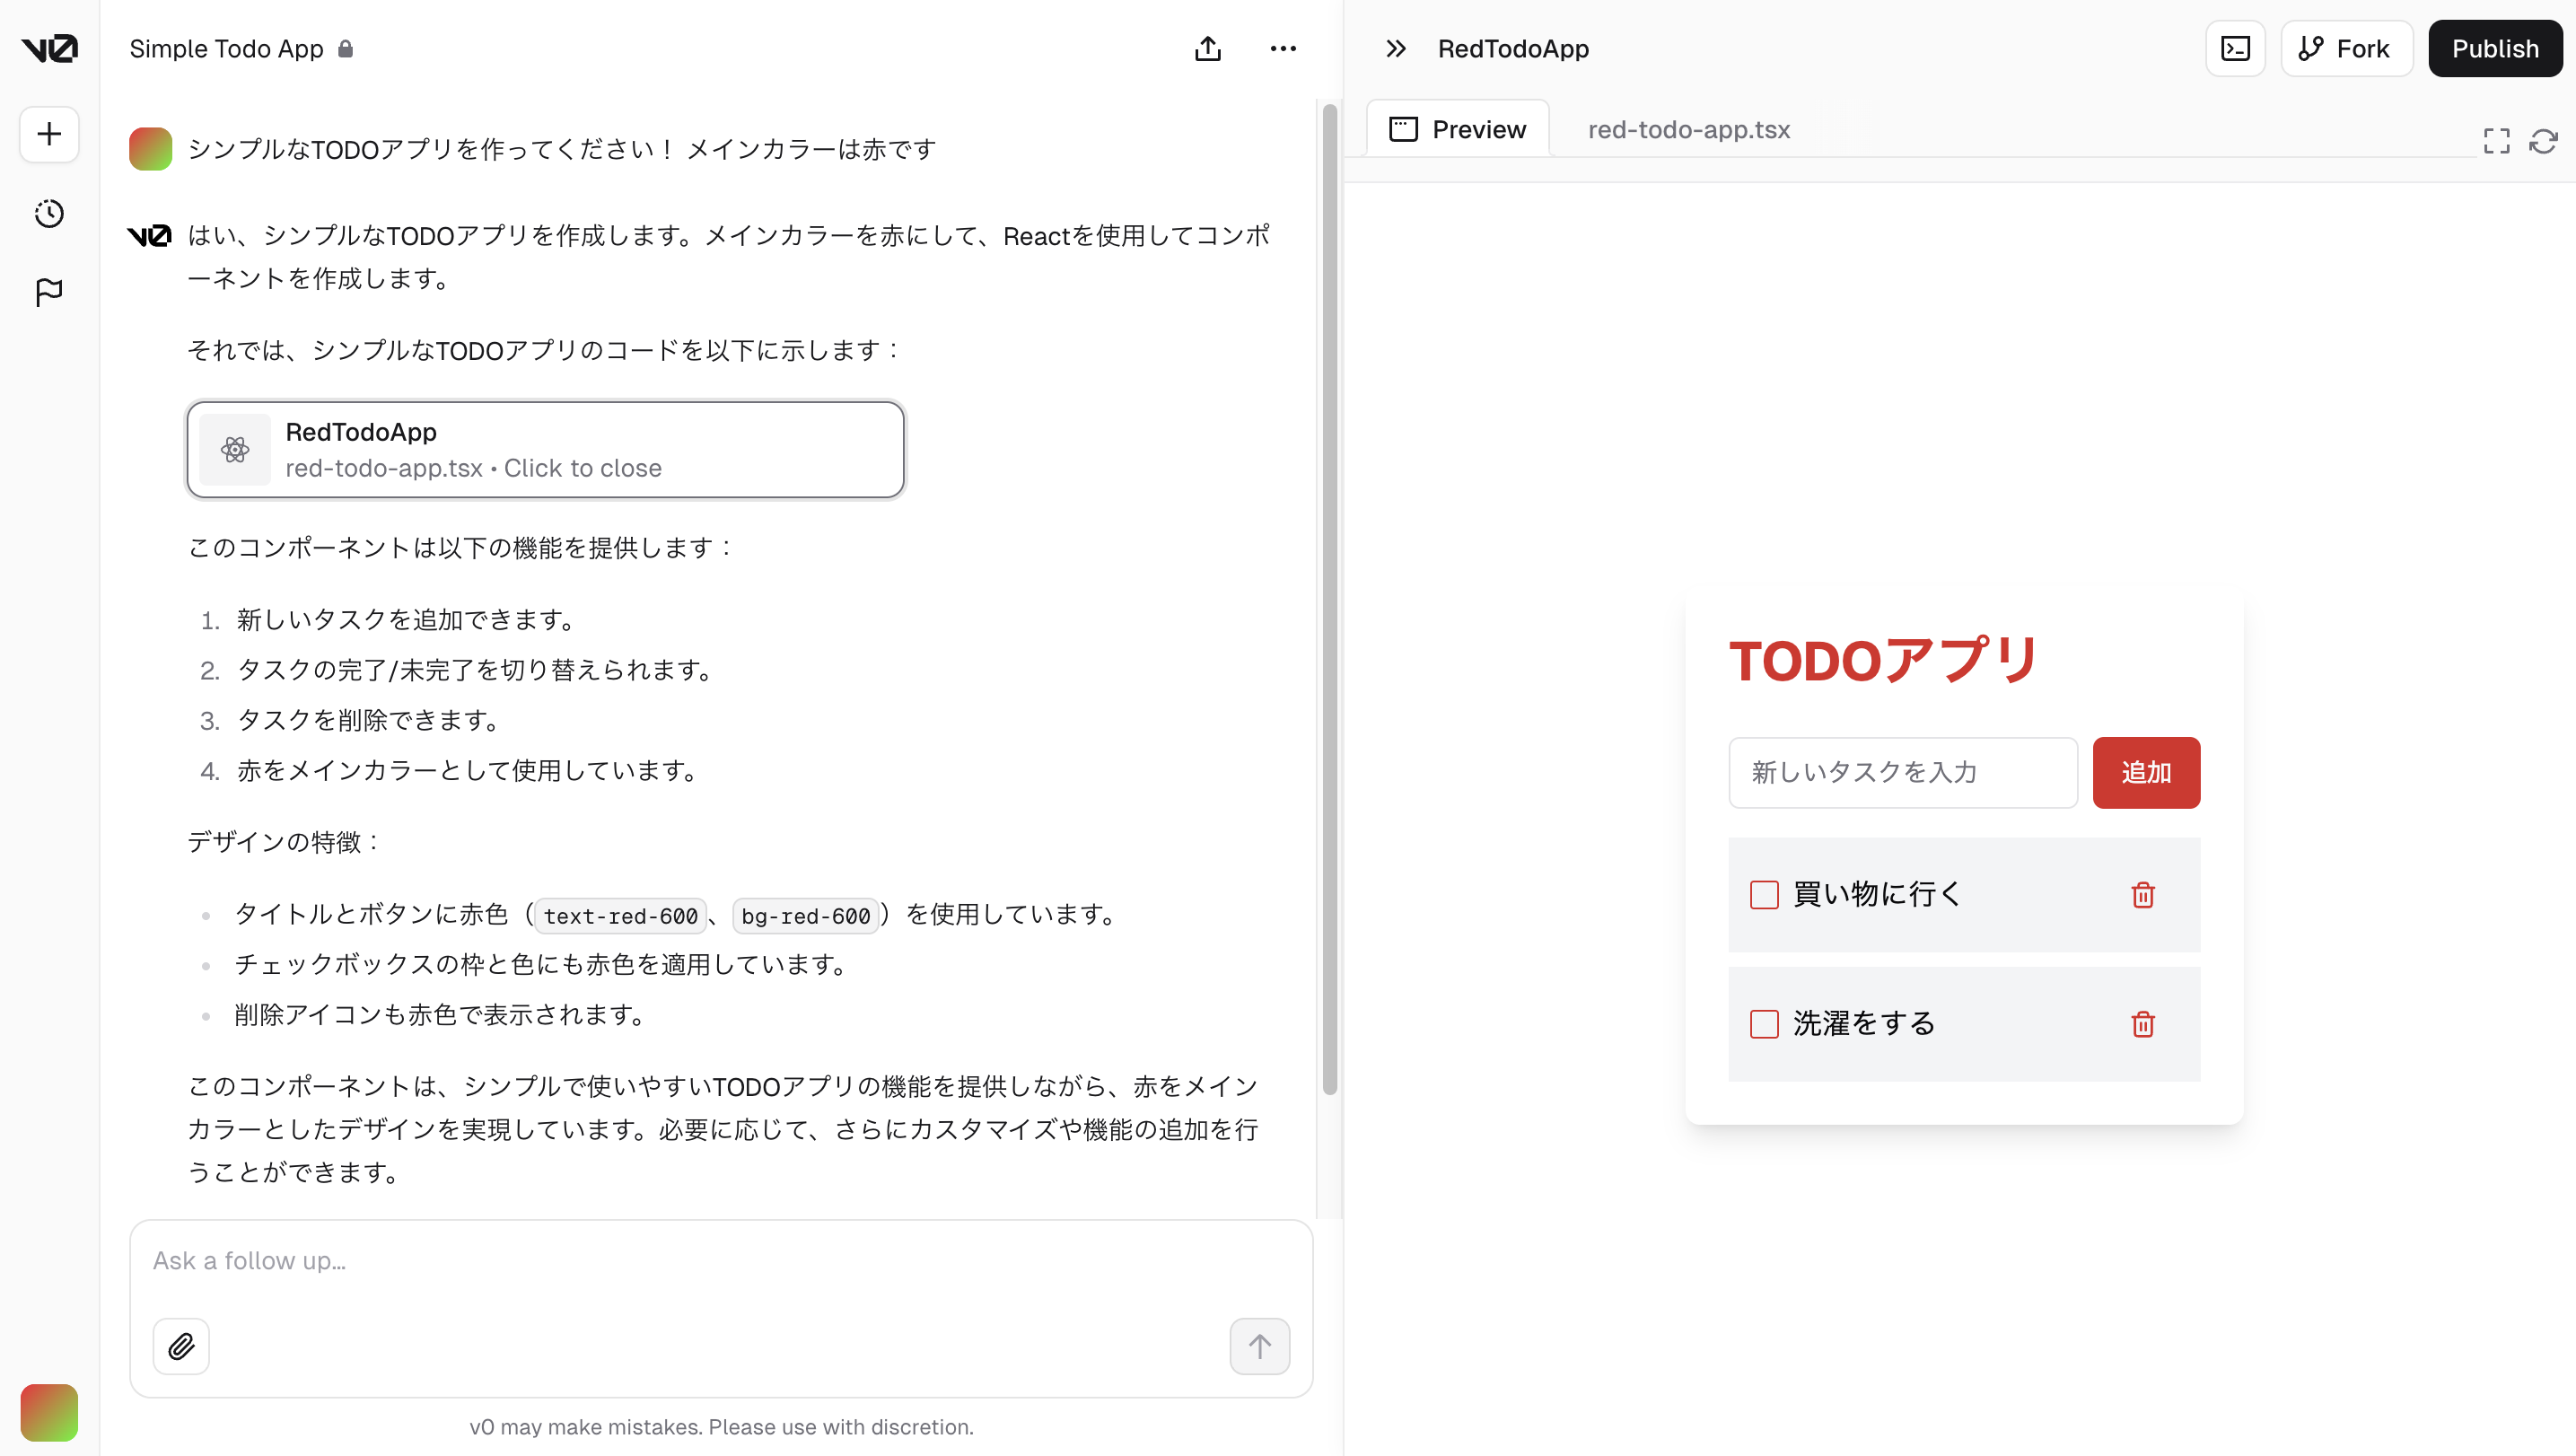
要件を入力します。
今回はToDoアプリを作ってもらおうと思います。

入力した要件からコードが生成され、プレビューが表示されます。(数秒で生成されます!)
※ToDoリストの項目は後から追加しています。

生成されたコードはこちら
"use client"

import { useState } from "react"
import { Input } from "@/components/ui/input"
import { Button } from "@/components/ui/button"
import { Checkbox } from "@/components/ui/checkbox"
import { Trash2 } from "lucide-react"

type Todo = {
  id: number
  text: string
  completed: boolean
}

export default function Component() {
  const [todos, setTodos] = useState<Todo[]>([])
  const [newTodo, setNewTodo] = useState("")

  const addTodo = () => {
    if (newTodo.trim() !== "") {
      setTodos([...todos, { id: Date.now(), text: newTodo, completed: false }])
      setNewTodo("")
    }
  }

  const toggleTodo = (id: number) => {
    setTodos(todos.map(todo =>
      todo.id === id ? { ...todo, completed: !todo.completed } : todo
    ))
  }

  const deleteTodo = (id: number) => {
    setTodos(todos.filter(todo => todo.id !== id))
  }

  return (
    <div className="max-w-md mx-auto mt-10 p-6 bg-white rounded-lg shadow-lg">
      <h1 className="text-3xl font-bold mb-6 text-red-600">TODOアプリ</h1>
      <div className="flex mb-4">
        <Input
          type="text"
          value={newTodo}
          onChange={(e) => setNewTodo(e.target.value)}
          placeholder="新しいタスクを入力"
          className="flex-grow mr-2"
        />
        <Button onClick={addTodo} className="bg-red-600 hover:bg-red-700">
          追加
        </Button>
      </div>
      <ul className="space-y-2">
        {todos.map(todo => (
          <li key={todo.id} className="flex items-center justify-between bg-gray-100 p-3 rounded">
            <div className="flex items-center">
              <Checkbox
                checked={todo.completed}
                onCheckedChange={() => toggleTodo(todo.id)}
                className="mr-2 border-red-600 text-red-600"
              />
              <span className={todo.completed ? "line-through text-gray-500" : ""}>
                {todo.text}
              </span>
            </div>
            <Button
              variant="ghost"
              size="icon"
              onClick={() => deleteTodo(todo.id)}
              className="text-red-600 hover:text-red-700"
            >
              <Trash2 className="h-4 w-4" />
            </Button>
          </li>
        ))}
      </ul>
    </div>
  )
}
このままでも十分ですが、試しにタイトル部分の下線の追加と、追加ボタンの「追加」を「+」に変えてみました。
ちゃんと実装できていますね!
改良されたコードはこちら
"use client"

import { useState } from "react"
import { Input } from "@/components/ui/input"
import { Button } from "@/components/ui/button"
import { Checkbox } from "@/components/ui/checkbox"
import { Trash2, Plus } from "lucide-react"

type Todo = {
  id: number
  text: string
  completed: boolean
}

export default function Component() {
  const [todos, setTodos] = useState<Todo[]>([])
  const [newTodo, setNewTodo] = useState("")

  const addTodo = () => {
    if (newTodo.trim() !== "") {
      setTodos([...todos, { id: Date.now(), text: newTodo, completed: false }])
      setNewTodo("")
    }
  }

  const toggleTodo = (id: number) => {
    setTodos(todos.map(todo =>
      todo.id === id ? { ...todo, completed: !todo.completed } : todo
    ))
  }

  const deleteTodo = (id: number) => {
    setTodos(todos.filter(todo => todo.id !== id))
  }

  return (
    <div className="max-w-md mx-auto mt-10 p-6 bg-white rounded-lg shadow-lg">
      <h1 className="text-3xl font-bold mb-2 text-red-600 pb-2 border-b-2 border-red-600">TODOアプリ</h1>
      <div className="flex mb-4 mt-6">
        <Input
          type="text"
          value={newTodo}
          onChange={(e) => setNewTodo(e.target.value)}
          placeholder="新しいタスクを入力"
          className="flex-grow mr-2"
        />
        <Button onClick={addTodo} className="bg-red-600 hover:bg-red-700 px-3">
          <Plus className="h-5 w-5" />
          <span className="sr-only">追加</span>
        </Button>
      </div>
      <ul className="space-y-2">
        {todos.map(todo => (
          <li key={todo.id} className="flex items-center justify-between bg-gray-100 p-3 rounded">
            <div className="flex items-center">
              <Checkbox
                checked={todo.completed}
                onCheckedChange={() => toggleTodo(todo.id)}
                className="mr-2 border-red-600 text-red-600"
              />
              <span className={todo.completed ? "line-through text-gray-500" : ""}>
                {todo.text}
              </span>
            </div>
            <Button
              variant="ghost"
              size="icon"
              onClick={() => deleteTodo(todo.id)}
              className="text-red-600 hover:text-red-700"
            >
              <Trash2 className="h-4 w-4" />
            </Button>
          </li>
        ))}
      </ul>
    </div>
  )
}
価格や商用利用については、よくある質問に記述されています。
おわりに
実際に試してみると分かるのですが、本当に一瞬でUIが作成できます!
現時点でもかなり便利ですが、まだPublic Beta版なので、今後の進化が楽しみです。
ぜひ一度、触っていただき、v0の凄さを体感していただければと思います!

