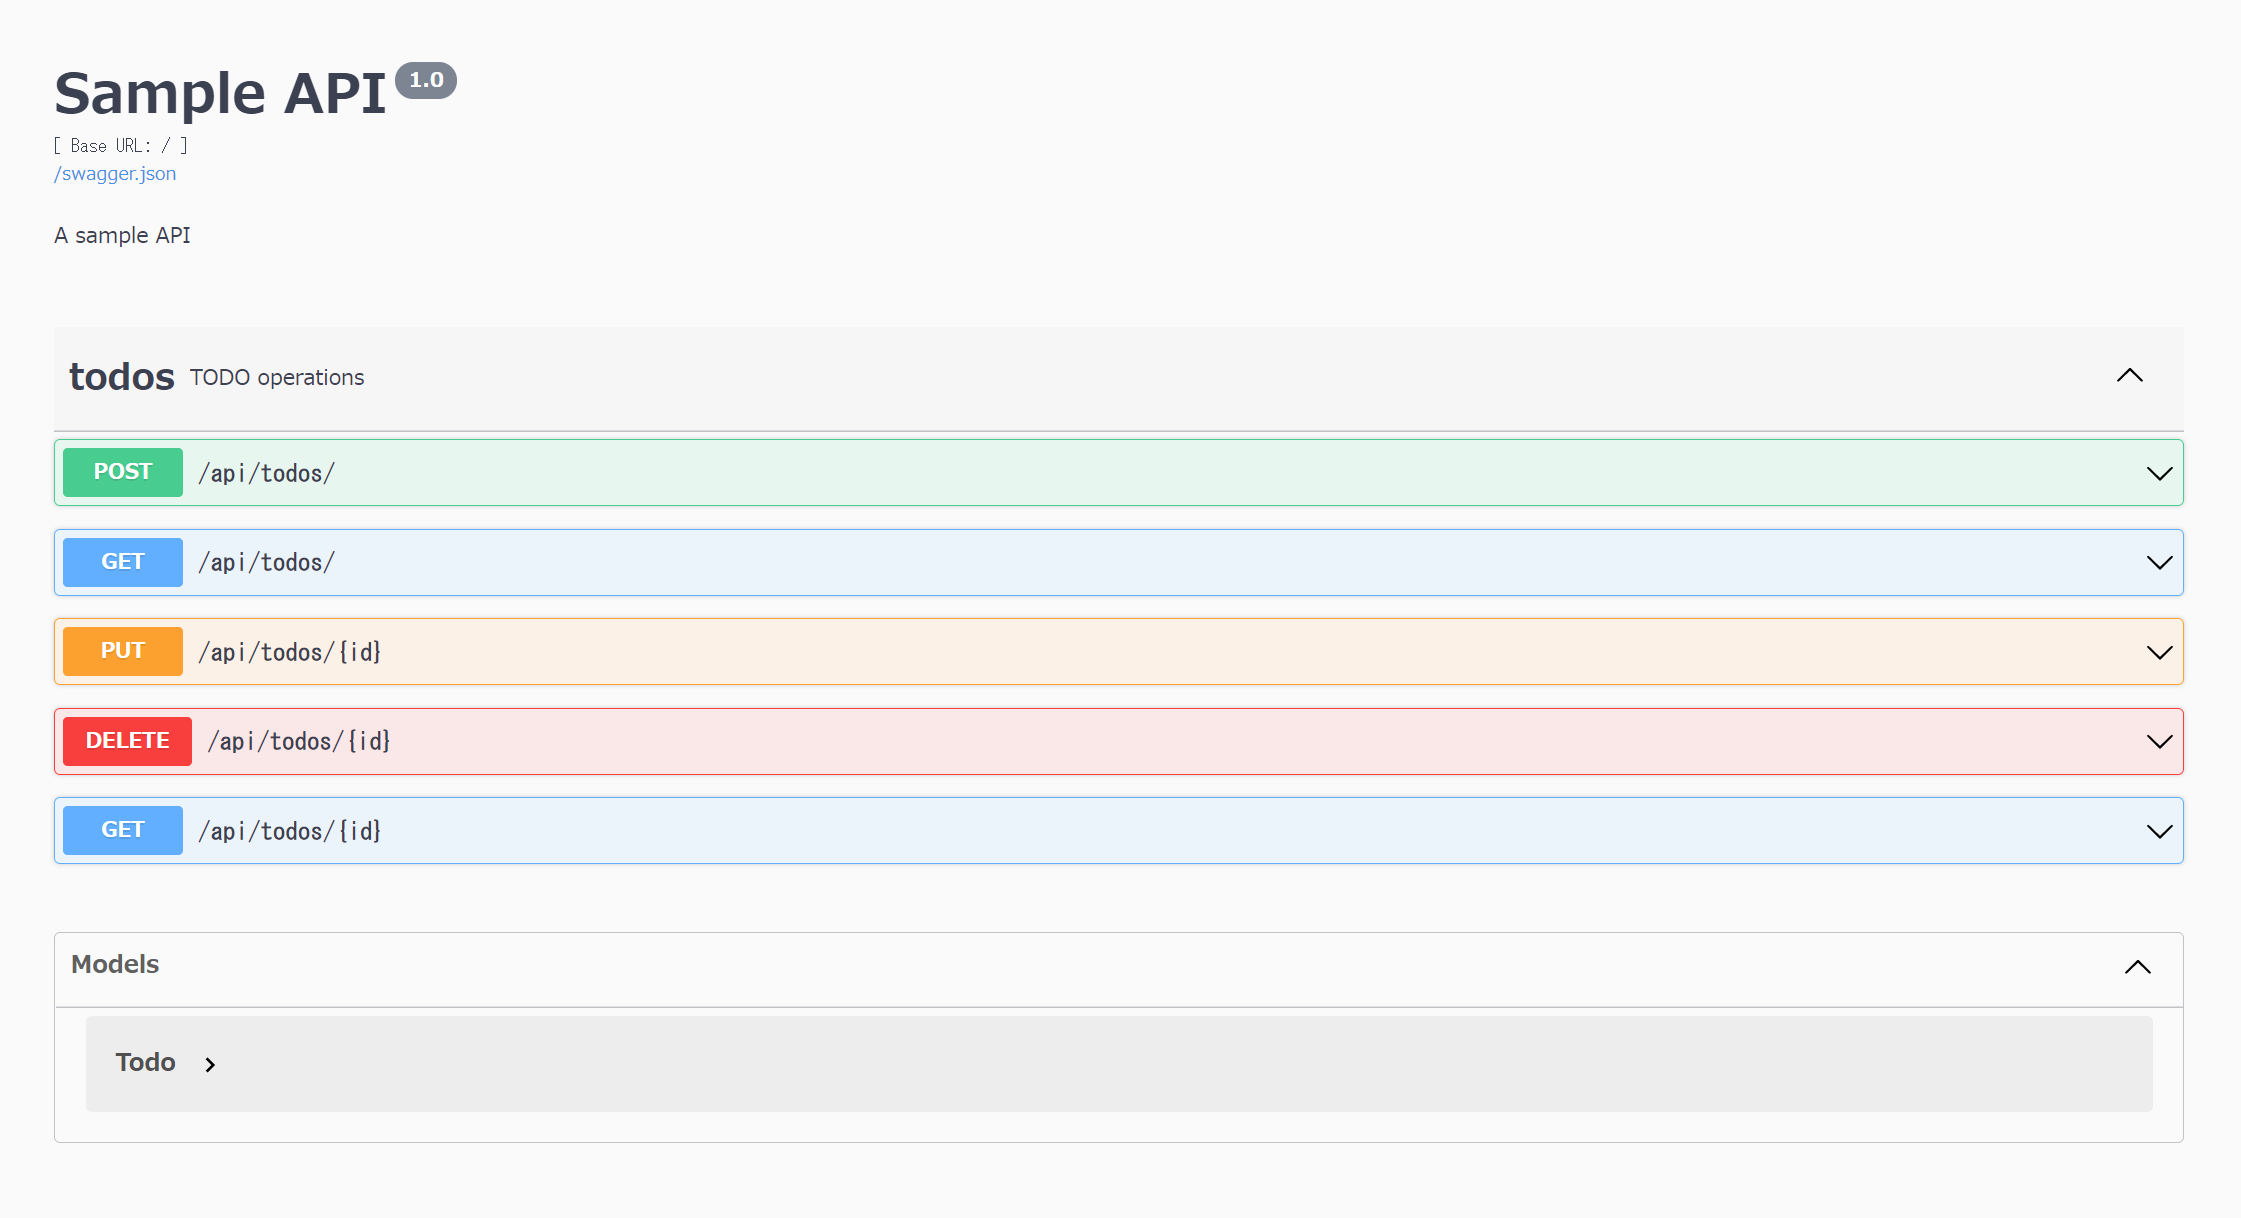
python のマイクロフレームワークである Flask と、それを拡張する Flask RESTX 、オブジェクトのシリアライズ/デシリアライズで人気の Marshmallow(今回はリクエストのバリデーション目的) を使って restful な api を作ってみたいと思います。
環境構築
docker を使って開発環境を作ってみます。docker 起動時にカレントディレクトリを docker コンテナにマウントさせて、指定のポートをフォワーディングさせます。
$ mkdir flask-app
$ cd flask-app
$ docker run -it --rm -p 8080:80 -v ${PWD}:/app python:3.9.6 /bin/bash
root@e799da19215a:/#
コンテナ内では /app が作業ディレクトリですので、 /app にカレントディレクトリを変更しておきます。
root@e799da19215a:/# cd /app
root@e799da19215a:/app#
インストール
アプリケーションに必要なモジュールをインストールします。
# docker コンテナ内で作業
root@e799da19215a:/app# pip install Flask flask-restx marshmallow
実装
flask-restx のドキュメントにサンプルアプリケーションがありましたので、それをベースに作っていきます。サンプルアプリケーションでは 1 ファイルだけで作られていたので、機能別にファイルを作成して必要なときにインポートする作りにします。また、リクエストのバリデーションも実装してみます。
最終的なディレクトリ構成は下記になります。
flask-app/
├── apis
│   ├── __init__.py
│   └── todos.py
├── app.py
├── dao
│   ├── __init__.py
│   └── todo.py
├── schema
│   └── todo.py
└── utils
    └── format.py
API 定義
アプリケーションで使用する api エントリーポイントを api.todos.py に記載します。また、レスポンスの marshalling と期待するリクエストのペイロードを示すために、 flask_restx.Model を使用します。 created_at のフィールドにはレスポンスデータをカスタマイズするため、自作した TimeFormat を指定します。
from utils.format import TimeFormat
from flask_restx import Namespace, Resource, fields
from dao.todo import TodoDAO

api = Namespace('todos', description='TODO operations')

todo = api.model('Todo', {
    'id': fields.String(readonly=True,
                        description='The task unique identifier',
                        example='fdc02467-67df-4577-9ceb-d9a18acc0587'),
    'task': fields.String(required=True,
                         description='The task details',
                         example='Build an API'),
    'created_at': TimeFormat(readonly=True,
                            description='The task created',
                            example='2021-08-09 18:19:23')
})

DAO = TodoDAO()
DAO.create({'task': 'Build an API'})
DAO.create({'task': '??????'})
DAO.create({'task': 'profit!'})

@api.route('/')
class TodoList(Resource):
    @api.expect(todo)
    @api.marshal_with(todo, code=201)
    def post(self):
        return DAO.create(api.payload), 201

    @api.doc('clist_todos')
    @api.marshal_list_with(todo)
    def get(self):
        return DAO.todos

@api.route('/<string:id>')
@api.response(404, 'Todo not found')
@api.param('id', 'The task identifier')
class Todo(Resource):
    @api.doc('get_todo')
    @api.marshal_with(todo)
    def get(self, id):
        return DAO.get(id)

    @api.doc('delete_todo')
    @api.response(204, 'Todo deleted')
    def delete(self, id):
        DAO.delete(id)
        return '', 204

    @api.expect(todo)
    @api.marshal_with(todo)
    def put(self, id):
        return DAO.update(id, api.payload)
created_at の値を %Y-%m-%d %H:%M:%S 形式にするために、 TimeFormat クラスを作成して、format メソッドをオーバーライドします。
from flask_restx import fields

class TimeFormat(fields.DateTime):
    def format(self, value):
        return value.strftime('%Y-%m-%d %H:%M:%S')
api.__init__.py で api エンドポイントを登録します。
from flask_restx import Api
from .todos import api as todos

api = Api(
    version='1.0',
    title='Sample API',
    description='A sample API',
    doc="/doc/"
)

api.add_namespace(todos, path='/api/todos')
CRUD 処理
dao/todo.py に crud 処理を書いていきます。今回はデータベースを使用せずメモリ上にデータを保存します。
import uuid
from schema.todo import TodoSchema
from flask import abort
from marshmallow.exceptions import ValidationError

class TodoDAO(object):
    def __init__(self):
        self.counter = 0
        self.todos = []

    def get(self, id):
        for todo in self.todos:
            print(todo['id'])
            print(id)
            if todo['id'] == uuid.UUID(id):
                return todo
        abort(404, "Todo {} doesn't exist".format(id))

    def create(self, data):
        try:
            schema = TodoSchema()
            result = schema.load(data)
            result['id'] = uuid.uuid4()
            self.todos.append(result)
        except ValidationError as err:
            abort(400, err.messages)
        return result

    def update(self, id, data):
        todo = self.get(id)
        todo.update(data)
        return todo

    def delete(self, id):
        todo = self.get(id)
        self.todos.remove(todo)
POST されたペイロードの検証のために、TodoSchema を使用しています。Marshmallow を dict を object にデシリアライズしたり、object を dict にシリアライズするときに使用ます。今回は、リクエストのペイロード(dict)をスキーマに従ってデシリアライズし、その際に不正なデータの場合はバリデーションエラーとなるようにします。
import datetime as dt
from marshmallow import Schema, fields

class TodoSchema(Schema):
    task = fields.Str(
        required=True,
        error_messages={'required': {'message': '[task] is required.'}}
    )
    created_at = fields.DateTime(missing=dt.datetime.now)
アプリケーション起動
app.py に作成した api を flask に登録する処理を書きます。また、コンソールから app.py が実行されたら、flask サーバーが起動するようにします。ですが run を使用するのは非推奨のようです。
It is not recommended to use this function for development with automatic reloading as this is badly supported. Instead you should be using the flask command line script’s run support.
https://flask.palletsprojects.com/en/2.0.x/api/#flask.Flask.run
from flask import Flask
from apis import api

app = Flask(__name__)
api.init_app(app)

if __name__ == '__main__':
    app.run(
        debug=True, port='80', host='0.0.0.0')
サーバーを起動します。
# FLASK_ENV=development FLASK_APP=app flask run --debugger --reload --port 80 --host 0.0.0.0
サーバーが起動できたら、http://localhost:8080/doc/をブラウザで開くと swagger ui が表示されます。[GET] /api/todos 定義から [Try it out] → [execute] を実行すると、リクエストが実際にサーバーに送信されレスポンスが確認できます。
Postman と連携
作成した API は Postman のコレクションとして json で出力することができます。出力方法は別の記事で紹介しているので、興味のある方はそちらをご覧ください。
https://qiita.com/kiyo27/items/e0d3b304533c3102ed10
参考資料
今回サンプルアプリケーションを作成するにあたって参考したサイトをまとめておきます。
Flask
doc
https://flask.palletsprojects.com/en/2.0.x/
python と flask で restfult api 開発
https://auth0.com/blog/jp-developing-restful-apis-with-python-and-flask/
Flask-RESTX
full example
https://flask-restx.readthedocs.io/en/latest/example.html
api referrence
https://flask-restx.readthedocs.io/en/latest/api.html
response の marshalling
https://flask-restx.readthedocs.io/en/latest/marshalling.html
namespace の活用
https://flask-restx.readthedocs.io/en/latest/scaling.html
swagger ドキュメント
https://flask-restx.readthedocs.io/en/latest/swagger.html
swagger ui 表示
https://flask-restx.readthedocs.io/en/latest/swagger.html#swagger-ui
api model
https://flask-restx.readthedocs.io/en/latest/api.html#models
レスポンスの値をカスタマイズ
https://stackoverflow.com/questions/46326075/specific-time-format-for-api-documenting-using-flask-restplus
Marshmallow
doc
https://marshmallow.readthedocs.io/en/stable/quickstart.html
必須フィールドのバリデーションエラーメッセージ変更
https://marshmallow.readthedocs.io/en/stable/quickstart.html#required-fields
デフォルトエラーメッセージを変更する
fields.Integer.default_error_messages = {'invalid': 'Invalid request: language'}

