タイトルの通りです。
LaravelでFCMとやりとりして、今回はブラウザにプッシュ通知します。
PHPでFirebase
Firebaseにはバックエンドで使うための公式のAdmin SDKがありますが、利用可能な言語にPHPはありません。
なので、Firebaseとのやりとりを自前で実装するか、外部のライブラリに頼らないといけませんが、
調べたところ、「Firebase Admin SDK for PHP」が活発に開発も進められていてよさそうだったのでそれを使うことにしました。
https://github.com/kreait/firebase-php
https://firebase-php.readthedocs.io/en/latest/index.html
準備
上のリンク先に従って、Firebaseのプロジェクトを作成、認証情報を含むJSONファイルをダウンロードします。このJSONファイルは後でサーバのSDKで使います。
Laravelのインストールは割愛します。Laravelのバージョンは5.8です。
Laravelをインストールしたら、「Firebase Admin SDK for PHP」をComposerでインストールします。
$ composer require kreait/firebase-php ^4.18
今回はブラウザで通知を受信するので、フロントエンドでも設定が必要です。
に従って、鍵ペアを生成します。
フロントエンド
まずは、public以下にmanifest.jsonを作ります。gcm_sender_idは固定値です。
{
  "name": "Laravel FCM Sample",
  "gcm_sender_id": "103953800507"
}
今回はCDNから必要なファイルを読み込みます。
Firebaseコンソールの設定からスニペットをhtmlにコピペします。
通知の受信許可を求める処理や、登録トークンの取得処理も追加します。
<!DOCTYPE html>
<html lang="ja">
<head>
  <meta charset="utf-8">
  <link rel="manifest" href="/manifest.json">
  <title>Laravel FCM sample</title>
</head>
<body>
<!-- The core Firebase JS SDK is always required and must be listed first -->
<script src="https://www.gstatic.com/firebasejs/6.0.4/firebase-app.js"></script>
<script src="https://www.gstatic.com/firebasejs/6.0.4/firebase-messaging.js"></script>

<script>
  // Your web app's Firebase configuration
  var firebaseConfig = {
    // 諸々の設定情報
  };
  // Initialize Firebase
  firebase.initializeApp(firebaseConfig);

  const messaging = firebase.messaging();

  // 通知の受信許可を求める
  // https://firebase.google.com/docs/cloud-messaging/js/client?hl=ja#request_permission_to_receive_notifications
  messaging.requestPermission().then(function() {
    console.log('Notification permission granted.');
  }).catch(function(err) {
    console.log('Unable to get permission to notify.', err);
  });

  // 現在の登録トークンを取得する
  // https://firebase.google.com/docs/cloud-messaging/js/client?hl=ja#%E7%8F%BE%E5%9C%A8%E3%81%AE%E7%99%BB%E9%8C%B2%E3%83%88%E3%83%BC%E3%82%AF%E3%83%B3%E3%81%AE%E5%8F%96%E5%BE%97
  messaging.getToken().then(function(currentToken) {
    if (currentToken) {
      console.log(currentToken);
    } else {
      console.log('No Instance ID token available. Request permission to generate one.');
    }
  }).catch(function(err) {
    console.log('An error occurred while retrieving token. ', err);
  });

  // フォアグラウンドで通知を受信する
  // https://firebase.google.com/docs/cloud-messaging/js/receive?hl=ja#handle_messages_when_your_web_app_is_in_the_foreground
  messaging.onMessage(function(payload) {
    console.log('Message received. ', payload);
  });
</script>
</body>
</html>
バックグラウンドでも通知を受信できるようにするために、Service Workerの設定も必要です。
firebase-messaging-sw.jsというファイルを作ります。
importScripts("https://www.gstatic.com/firebasejs/6.0.4/firebase-app.js");
importScripts("https://www.gstatic.com/firebasejs/6.0.4/firebase-messaging.js");

// Your web app's Firebase configuration
var firebaseConfig = {
  // 諸々の設定情報
};
// Initialize Firebase
firebase.initializeApp(firebaseConfig);

const messaging = firebase.messaging();

messaging.setBackgroundMessageHandler(function(payload) {
  console.log('[firebase-messaging-sw.js] Received background message ', payload);
});
$ php artisan serve
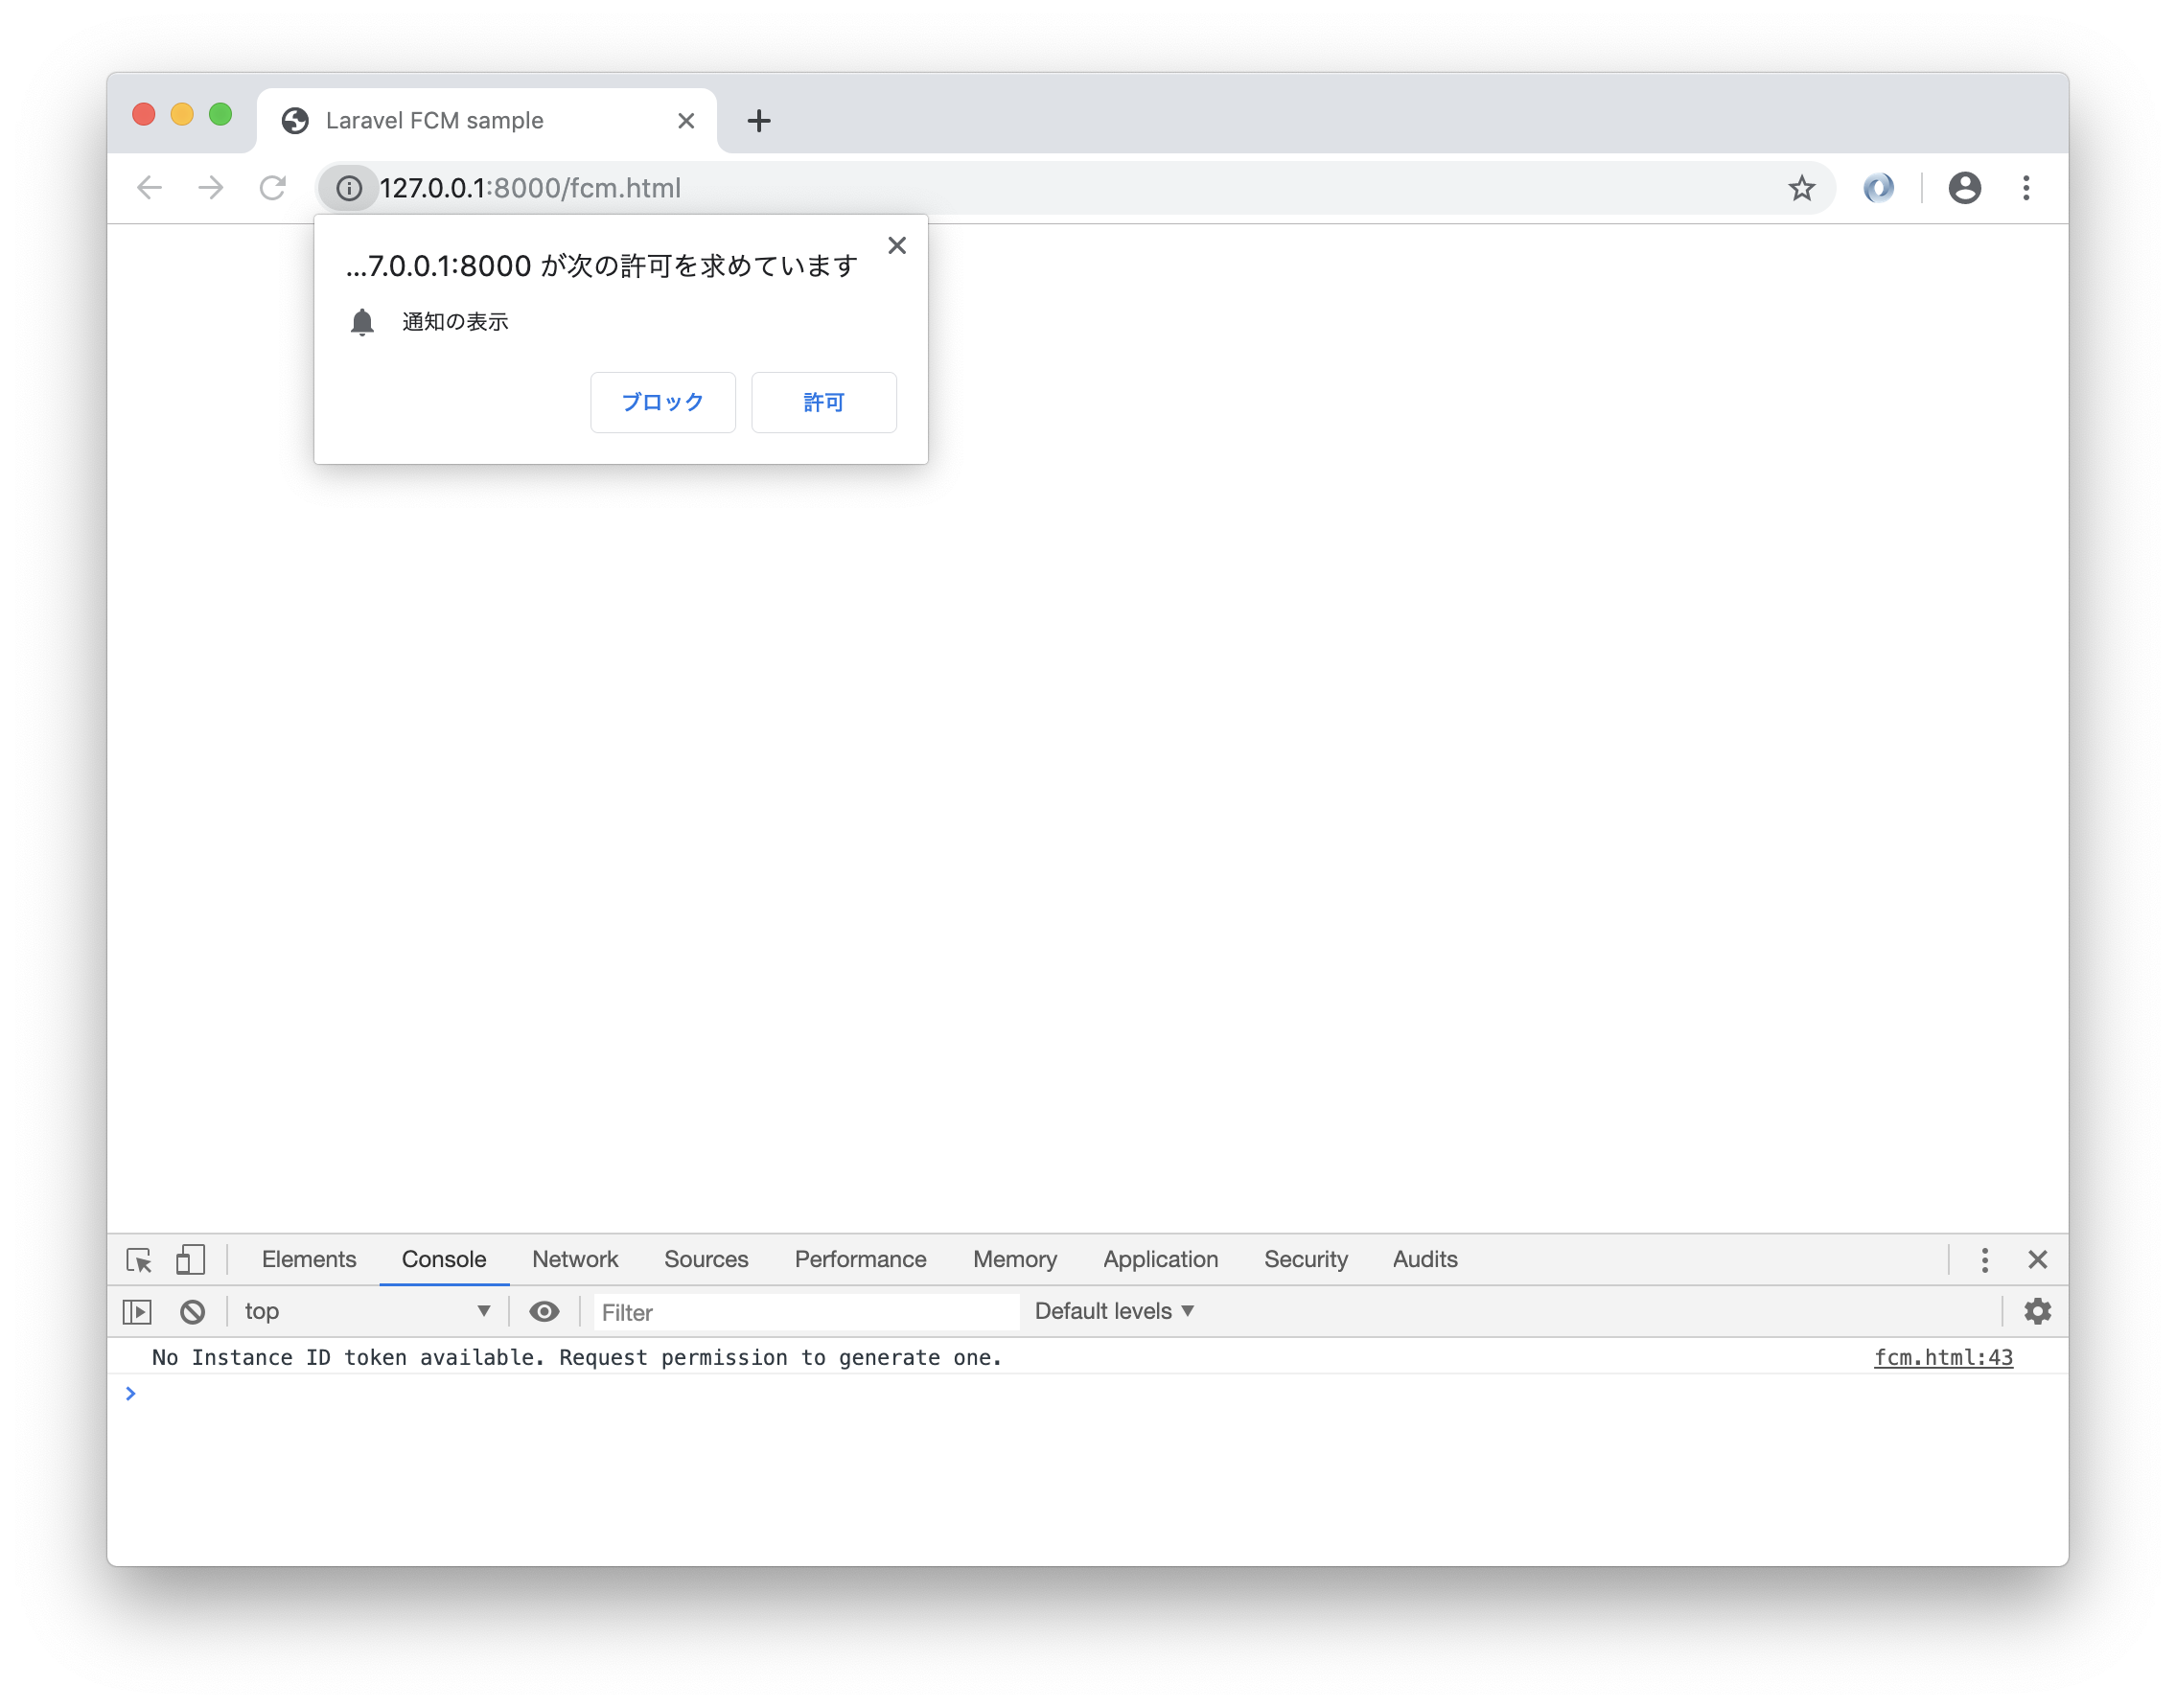
を実行して、Chromeでhttp://127.0.0.1:8000/fcm.htmlにアクセスすると、通知の受信を許可するかどうかのダイアログが表示されるので許可します。

画面をリロードすると、デベロッパーツールのコンソールに登録トークンが出力されるので、そのトークン文字列を控えておきます。
ちなみにphp artisan serveではなくValetでやると「Uncaught FirebaseError: Messaging: This browser doesn't support the API's required to use the firebase SDK.」というエラーが出ます。何が違うのか。。。
ここまででフロントエンドの実装は終わりです。
Laravel
次はプッシュ通知をリクエストする側のLaravelの実装になります。
何をトリガーに通知するかはいろいろあると思いますが、今回はArtisanコマンドを実行したら通知するように作ります。
サンプルコードも用意されています。
まずコマンドを作成します。
$ php artisan make:command SendTgifNotification
Console command created successfully.
SDKを使う準備ですが、認証情報のJSONを読み込むために、環境変数を使って自動で読み込む方法と、コードに直接パスを記述して読み込む方法があります。今回はパスを直接記述して読み込みます。
通知にはトピックに対して通知したり、いくつか種類があります。今回は登録トークンに対して通知します。Chromeが通知を受信、通知をクリックして送信したURLに遷移できたら成功です。
<?php

namespace App\Console\Commands;

use Illuminate\Console\Command;
use Kreait\Firebase\Factory;
use Kreait\Firebase\ServiceAccount;
use Kreait\Firebase\Messaging\CloudMessage;
use Kreait\Firebase\Messaging\Notification;
use Kreait\Firebase\Messaging\WebPushConfig;

class SendTgifNotification extends Command
{
    /**
     * The name and signature of the console command.
     *
     * @var string
     */
    protected $signature = 'command:send-tgif-notification';

    /**
     * The console command description.
     *
     * @var string
     */
    protected $description = 'TGIF!!';

    /**
     * Create a new command instance.
     *
     * @return void
     */
    public function __construct()
    {
        parent::__construct();
    }

    /**
     * Execute the console command.
     *
     * @return mixed
     */
    public function handle()
    {
        // ブラウザから取得した登録トークン
        $registration_token = '登録トークン';

        // 事前にダウンロードした認証情報のJSONを読み込む
        $serviceAccount = ServiceAccount::fromJsonFile(base_path() . '/google-service-account.json');

        $firebase = (new Factory)
            ->withServiceAccount($serviceAccount)
            ->create();

        $messaging = $firebase->getMessaging();

        // FCMに送信するデータの作成
        $notification = Notification::fromArray([
            'title' => 'TGIF!!!!!!!!!!',
            'body'  => 'Thank God It\'s Friday'
        ]);
        $config = WebPushConfig::fromArray([
            'fcm_options' => [
                'link' => 'https://firebase-php.readthedocs.io/en/latest/cloud-messaging.html#webpush',
            ],
        ]);

        $message = CloudMessage::withTarget('token', $registration_token)
            ->withNotification($notification)
            ->withWebPushConfig($config);

        $messaging->send($message);
    }
}
$ php artisan command:send-tgif-notification

コマンドを実行すると通知が出ました。クリックするとfcm_optionsで設定したURLに遷移することが確認できました。成功です![]()
さらにLaravelっぽく
今後の課題として、Laravelの通知を使ったかたちで実装したいですね。
参考URL
https://firebase.google.com
https://github.com/kreait/firebase-php
https://firebase-php.readthedocs.io/en/latest/