の続きです。
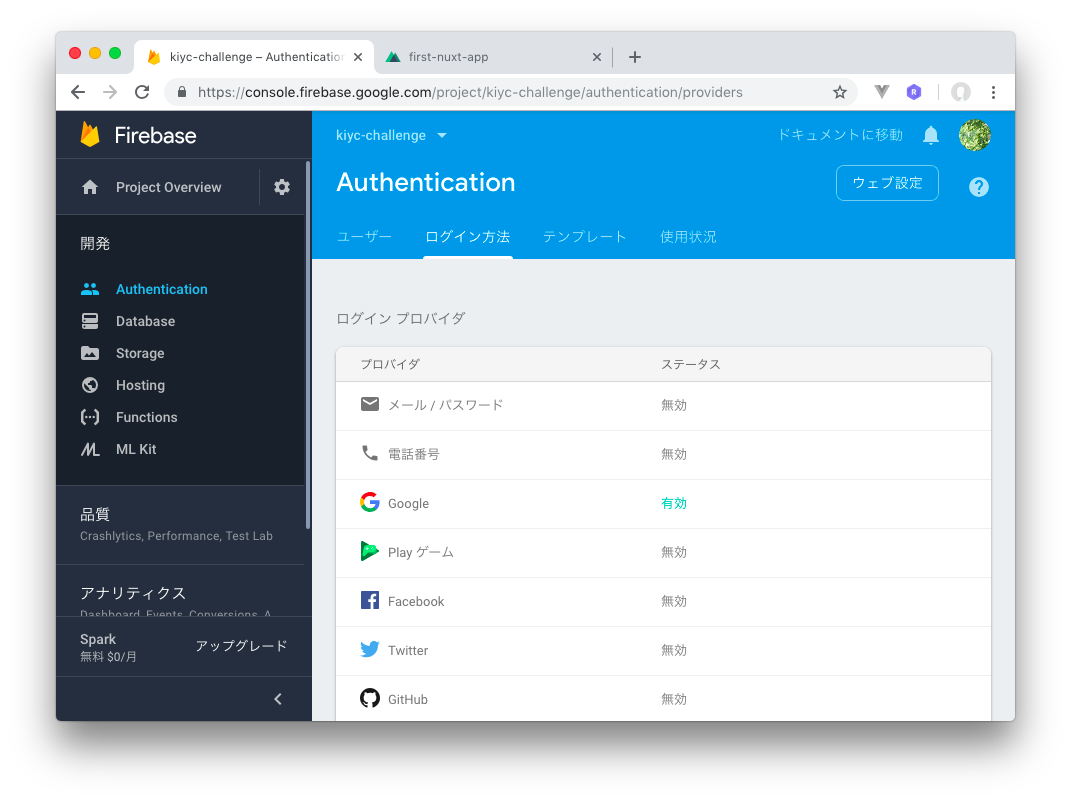
Firebase AuthenticationでGoogle認証
Firebaseなら認証も超簡単です。簡単すぎてびびります。
Firebaseでは様々な認証手段が用意されていますが、GoogleなのだからGoogle認証を使うのがいちばん楽かなとGoogleを選択しました。


投稿してみます。

GoogleアカウントのdisplayNameがFirestoreに保存され、それを表示出来るようになりました。
ソースコードの説明
plugins/firebase.js
import firebase from 'firebase'
import config from '@/config'

if (!firebase.apps.length) {
  firebase.initializeApp(config)
}

const db = firebase.firestore()
const settings = { timestampsInSnapshots: true }
db.settings(settings);

const auth = firebase.auth

export { db, auth }
Firebaseの認証機能にはfirebase.auth()またはfirebase.authでアクセスします。
pages/index.js
<template>
  <v-layout
    justify-center
    align-center
    row
    wrap>
    <v-flex
      v-if="isLoggedIn"
      xs12
      mb-2>
      <div>
        <span class="subheading">ようこそ! {{ user.displayName }} さん</span>
        <v-btn
          color="info"
          @click="googleLogout">
          Logout
        </v-btn>
      </div>
      <v-text-field
        v-model="newNote"
        label="日記を書こう!"
      ></v-text-field>
      <v-btn
        color="success"
        @click="saveNote">
        Send
      </v-btn>
    </v-flex>
    <v-flex
      v-else
      xs12
      mb-2>
      <v-btn
        color="success"
        @click="googleLogin">
        Login via Google
      </v-btn>
    </v-flex>
    <v-flex
      v-for="(note, i) in notes"
      :key="i"
      xs12
      mb-2>
      <v-card>
        <v-card-text>
          <p v-if="note.name">{{ note.name }}</p>
          <p v-else>Anonymous</p>
          <p class="ma-0">{{ note.content }}</p>
        </v-card-text>
      </v-card>
    </v-flex>
  </v-layout>
</template>
ログインしているかどうかで表示を切り替えます。
pages/index.js
<script>
import { mapGetters } from 'vuex'
import { db, auth } from '../plugins/firebase'

export default {
  data () {
    return {
      newNote: '',
      isLoggedIn: false,
      user: null,
    }
  },
  computed: {
    ...mapGetters({ notes: 'getNotes' })
  },
  mounted () {
    this.$store.dispatch('setNotesRef', db.collection('notes'))

    auth().onAuthStateChanged( (user) => {
      if (user) {
        this.isLoggedIn = true
        this.user = user
      } else {
        this.isLoggedIn = false
        this.user = null
      }
    })
  },
ログインしているかどうかはonAuthStateChanged()で判別します。
コールバック内で認証済みアカウントにアクセス出来ます。
pages/index.js
  methods: {
    saveNote () {
      if (!this.newNote.length) {
        return
      }

      const newNote = {
        content: this.newNote,
        name: this.user ? this.user.displayName : 'Anonymous'
      }
      this.newNote = ''

      db.collection('notes').add(newNote)
    },
    googleLogin () {
      auth().signInWithRedirect(new auth.GoogleAuthProvider())
    },
    googleLogout () {
      auth().signOut().then( () => {
        this.isLoggedIn = false
        this.user = null
      }).catch( (error) => {
        console.log(error)
      })
    },
  },
}
</script>
Googleのログインページにリダイレクトしての認証にはsignInWithRedirect()を使います。
まとめ
FirebaseでのGoogle認証、非常に簡単です![]()
参考URL