こんばんば、長〜くDiverseでお付き合いさせていただいた @kiy0p0n です。
この記事は Diverse Advent Calendar 2018 として書いてます。
今日の話
今はVチューバーを支援するお仕事に就いているのですが、UnityのARKitを使ってFaceTrackingして、3Dキャラクターなるのがお手軽過ぎて楽しかったので、簡単に紹介します。
作ったのを試す図 pic.twitter.com/6HVb965sxv
— きよぽん (@kiy0p0n) 2018年12月16日
※ 作成者がメガネをかけてるので瞬きが微妙。。。裸眼の人はもっときれいに瞬きできます
環境
以下の環境で構築しているのと、各ツールの環境設定で説明があるものは省いています。
Step
- Unityをインストール(iOS Build Support入り)
- ARKit2のcloneまたはDownloadして、ProjectをUnityで開く
- UniVRMをimport
- VRMファイルをAssetsの任意のフォルダに配置
- FaceTracking部分の実装
- Buildして遊ぶ!
この記事ではStep5のFaceTrackingの部分を簡単に解説します。
FaceTrackingの実装
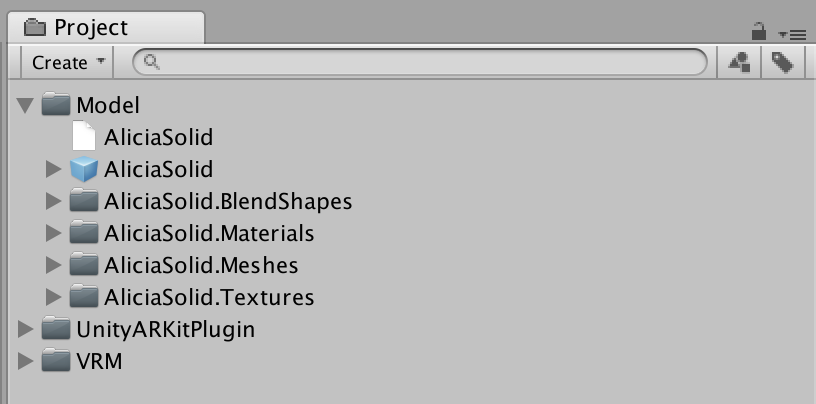
Step1~4まで終わっていると、Projectは次のようになってます。
VRMファイルはUnity上でファイルが複数に展開されるため、わかりやすいように今回は Model フォルダを作成し、その下に配置しました。

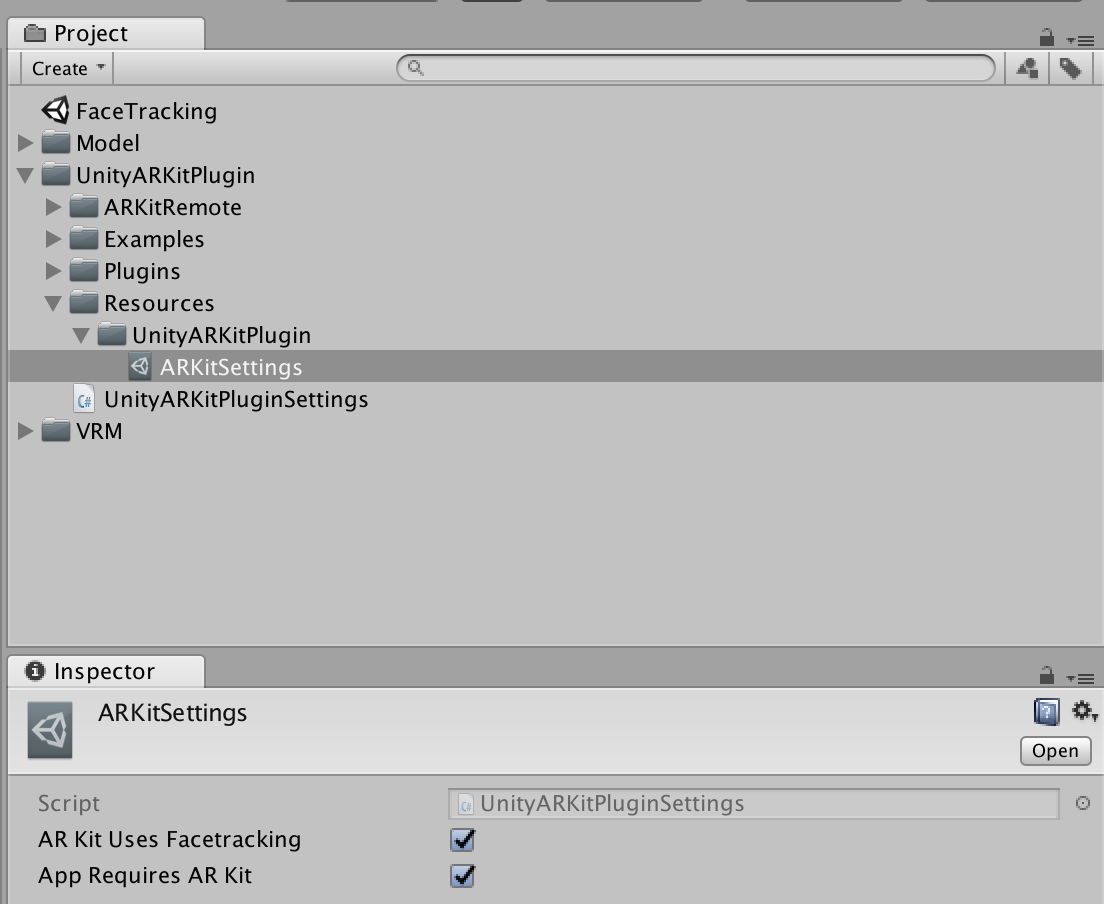
ARKitの設定
ARKitSettings.asset の AR Kit Uses Facetracking と App Requires AR Kit にチェックを入れる

シーンの作成
参考シーン
ARKitにサンプルが含まれており、以下のシーンがとても参考になるので、もっと良く知りたい方は見てみてください。
-
UnityARKitPlugin/Examples/FaceTracking/FaceAnchorScene: 顔の回転や向きのトラッキングに使っているサンプル -
UnityARKitPlugin/Examples/FaceTracking/FaceBlendshapeScene: 顔認識時の表情における目や口などの動きの特徴を使っているサンプル
FaceTrackingするスクリプトを書く
FaceTracking.cs
using UnityEngine;
using VRM;
using UnityEngine.XR.iOS;

public class FaceTracking : MonoBehaviour {

    [Header("VRMモデル")]
    public Transform Head;
    public VRMBlendShapeProxy proxy;

    private UnityARSessionNativeInterface Session;

	// Use this for initialization
	void Start () {
        InitializeARSession();
	}

    void InitializeARSession() {
        Session = UnityARSessionNativeInterface.GetARSessionNativeInterface();
        ARKitFaceTrackingConfiguration configuration = new ARKitFaceTrackingConfiguration();
        configuration.alignment = UnityARAlignment.UnityARAlignmentGravity;
        configuration.enableLightEstimation = true;

        if (configuration.IsSupported)
        {
            UnityARSessionNativeInterface.ARFaceAnchorAddedEvent += FaceAdd;
            UnityARSessionNativeInterface.ARFaceAnchorUpdatedEvent += FaceUpdate;
            UnityARSessionNativeInterface.ARFaceAnchorRemovedEvent += FaeRemoved;
        }
        else {
            // 利用できない場合の処理
        }

        Session.RunWithConfig(configuration);
    }

    void FaceAdd(ARFaceAnchor anchorData) {
        UpdateHead(anchorData);
        UpdateFace(anchorData);
    }

    void FaceUpdate(ARFaceAnchor anchorData) {
        UpdateHead(anchorData);
        UpdateFace(anchorData);
    }

    void FaeRemoved(ARFaceAnchor anchorData) {
        // 顔の認識ができなくなった場合の処理
    }

    void UpdateHead(ARFaceAnchor anchorData) {
        // ARKitが右手軸なのをUnityの左手軸に変更と水平坑はミラーにするように変更
        float angle = 0.0f;
        Vector3 axis = Vector3.zero;
        var rot = UnityARMatrixOps.GetRotation(anchorData.transform);
        rot.ToAngleAxis(out angle, out axis);
        axis.x = -axis.x;
        axis.z = -axis.z;
        Head.localRotation = Quaternion.AngleAxis(angle, axis);

    }

    void UpdateFace(ARFaceAnchor anchorData) {
        var blendShapes = anchorData.blendShapes;
        if (blendShapes == null || blendShapes.Count == 0)
            return;

        proxy.SetValue(BlendShapePreset.O, blendShapes[ARBlendShapeLocation.JawOpen]);
        proxy.SetValue(BlendShapePreset.Blink_L, blendShapes[ARBlendShapeLocation.EyeBlinkLeft]);
        proxy.SetValue(BlendShapePreset.Blink_R, blendShapes[ARBlendShapeLocation.EyeBlinkRight]);
    }
}
シーンに必要なものを配置する
-
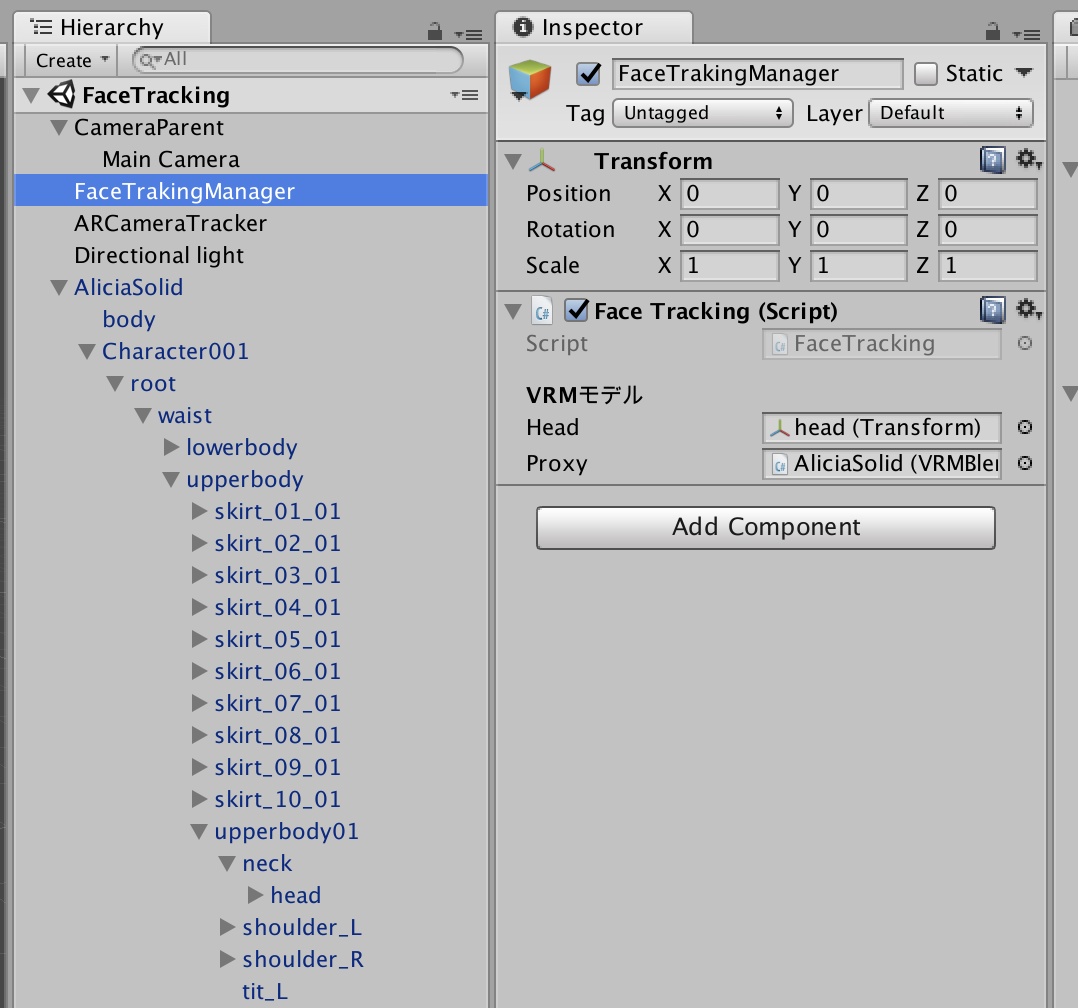
UnityARKitPlugin/Examples/FaceTracking/FaceAnchorSceneをDuplicateしてFaceTrackingに名前を変更して開く -
FaceAnchorManagerを削除し、 空のGameObjectを作ってFaceTackerスクリプトを追加 -
FaceTrackerスクリプトに3DモデルのheadのTransformと、一番親のオブジェクトが持っているVRMBlendshapeProxyを追加 - 3Dのモデルの顔が見えるように
CameraParentの位置と角度を変更 - ライトがモデルに当たるように位置と角度を変更

- XcodeのプロジェクトをBuildし、iOSへBuildして実行
もっと表現を豊かにするには
もっと細かい表情を設定する
ARFaceAnchor.BlendShapeLocation にトラッキングできる顔の箇所の一覧があります。かなり細かい部位の変化も取得できるので、全部利用できればかなり自然な表情をトラッキングできるようになります。
体の表現を加える
- 首の回転に合わせて体の回転にも補正をかける
- 体にアニメーションを設定しておき、トリガーに合わせて体を動かす
VRMを動的に切り替える
UniVRMのリポジトリには、ランタイムでVRMを読み込めるサンプルも用意されています。実行中に3Dモデルを変更させることやネットワークから取得した3Dモデルを利用することも可能です。
おわり
iPhone X限定ですが、簡単に顔認識ができる方法を簡単にまとめました。
明日は @Nakaz さんで「初心者のgoogle optimize導入話書きます」です!