Google OAuth 2.0 認証を使ってgoogleでログインを実装してみる。
よくあるGoogleでログインという物を作るためGoogle OAuth 2.0 認証を使ってみる。
Googleアカウントを作成
Googleアカウントを作成します。個人の物ではなく、サイト専用に作成した方が良いと思います。
Google Developers Consoleにてサイト情報などの設定
Google Developers Console から、プロジェクトを作成、認証情報や、OAuth 用クライアントID等を取得します。
Google Developers Consoleにログイン、プロジェクトの作成などを行っていきます。
左上の「Project」よりプロジェクトを作成を選択します。
プロジェクト名などを入力しプロジェクトを作成します。
作成したプロジェクトを選択し、左メニューの認証情報を押下します。
すると下記のような画面になります。!
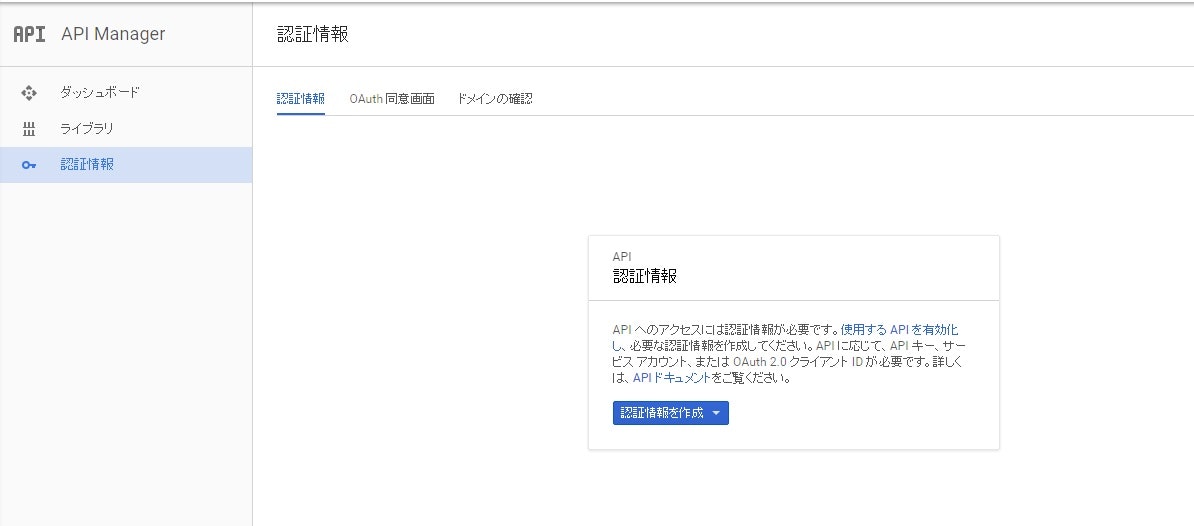
OAuth同意画面の設定
サービス名やURLなど必要事項を記載します。
認証情報の作成を行います。
認証情報を作成ボタンを押下し、OAuthクライアントIDを選択します。
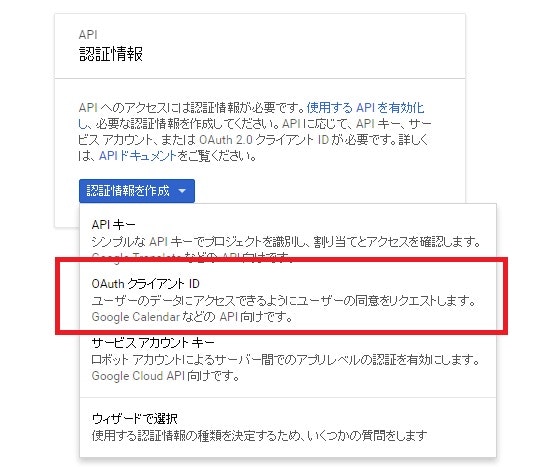
今回はWEBアプリなのでアプリケーションの種類にはウェブアプリケーションを選択し、名前、制限事項、
認証された後に遷移するURL(callbackURL)などを設定していきます。
作成後、クライアントIDとクライアントシークレットが発行されるのでメモしておきます。
実装
php
        $querys = array(
                'client_id' => HogeUtil::getGoogleClientId(),
                'redirect_uri' => HogeUtil::getGoogleClientCallBack(),
                'scope' => 'https://www.googleapis.com/auth/userinfo.profile',
                'response_type' => 'code',
        );

        return 'https://accounts.google.com/o/oauth2/auth?' . http_build_query($querys);
上記でログインボタンのリンクを作成し、コールバック側で
php
    private function getGoogleAuthToken($code) {
        $baseURL = 'https://accounts.google.com/o/oauth2/token';
        $params = array(
                'code'          => $code,
                'client_id'     => HogeUtil::getGoogleClientId(),
                'client_secret' => HogeUtil::getGoogleClientSecret(),
                'redirect_uri'  => HogeUtil::getGoogleClientCallBack(),
                'grant_type'    => 'authorization_code'
        );
        $headers = array(
                'Content-Type: application/x-www-form-urlencoded',
        );

        $options = array('http' => array(
                'method' => 'POST',
                'content' => http_build_query($params),
                'header' => implode("\r\n", $headers),
        ));

        $response = json_decode(
                file_get_contents($baseURL, false, stream_context_create($options)));

        if(!$response || isset($response->error)){
            return null;
        }

        return $response->access_token;
    }
トークンを取得して
php
    private function getGoogleUserId($asscessToken) {
        if (empty($asscessToken)) {
            return null;
        }

        $userInfo = json_decode(
                file_get_contents('https://www.googleapis.com/oauth2/v1/userinfo?'.
                'access_token=' . $asscessToken)
        );
        if (empty($userInfo)) {
            return null;
        }

        return $userInfo->id;
    }
こんな感じでuseridを取得できます。
useridが取得できたのでこれをうまいこと自システムのテーブルなどに入れてユーザ管理すればいいと思います。
id以外にもメールアドレスとかもとれるのでその辺りはgoogleの管理画面で調整してみてください。