はじめに
GUIへの恐怖もあって、Serverlessというアーキテクチャと距離を置いていた私が、Claudia.jsに出会って会心したというコネタです。
Serverlessの何が怖いか
WEBブラウザでコンピューティングしなければならない恐怖
これに尽きます。
遠くない将来、AWSを始めとするプラットフォームが広告モデルに移行したとします。
そんなある日、担当しているプロジェクトが繁盛して、コンピュータリソースが足りなくなりました。
リソースの追加には、WEBブラウザを立ち上げて、コンソールにログインする必要があるでしょう。ポチポチと。
で、コンピュータリソースを追加したと思ったら、トンデモな広告を踏んでたら嫌じゃないですか。
GUI怖い。WEBブラウザ怖い。
CLIでServerlessが実現出来たらいいなとぼんやり思っていたのですが、Terminalが必要なケースを想像することが出来ていませんでした。
AWS LambdaもAmazon API Gatewayもコンソールからセットアップするでしょう??
Claudia.jsとは何か
閑話休題。
プロジェクトでごく単純なChatBotが必要となりました。
Serverlessを意識していたわけでないのですが、Hubotの運用実績からデプロイがChatBot運用の要だと考えていたので、AWS LambdaをChatBotのサーバに利用出来ないかと策をめぐらしていました。
このことが、Claudia.jsとのファーストコンタクトでした。
Claudia.jsは、AWS Lambdaの関数(言語はNode.js)をWEBアプリケーションとして稼働させるために必要なリソースをセットアップし、デプロイするためのNode.jsのモジュールです。
詳細は、本家のドキュメントや参考のリンクをご参照ください。
本稿では、Claudia.jsのClaudia Bot Builderを用いて、ごく単純なChatBotをごく単純なCLIでデプロイしていく手順をコマンドを交えて紹介します。
ChatBotをデプロイする
claudiajs/claudia-bot-builderのREADMEを参考にChatBotをデプロイしていきます。
デプロイするChatBotは
- SlackのSlash Commandsに反応する
- Slash Commandsの引数を組み込んだ文字列をSlackのチャットルームにレスポンスする
どこかで聞いたことがあるような仕様ですね。
ChatBotとしては、ごく単純です。
AWSリソース
必要なAWSのリソースは、以下の通りです。
- Lambda
- API Gateway
- IAM
Lambdaは、Node.jsのモジュールを稼働させるアプリケーションサーバに相当します。
API Gatewayは、WEBサーバに相当します。
IAMは、LambdaやAPI Gatewayの実行権限を操作するために必要です。
事前にこれらのリソースを管理できる権限を付与したCredential(ex. chatbot_deploy)を用意しておきます(GUIで...)
Claudia.jsに出会う前の私であれば、ごく単純なChatBotを稼働させるために温かみのある手作業(GUI...)によるセットアップが必要だったわけですが、今の私は違います。
リソースのセットアップは、Claudia.jsを用いてCLIで実施していきます。
Claudia.jsのインストール
チュートリアルを参考に、Claudia.jsをインストールしていきます。
# グローバルにインストール
$ npm install claudia -g

# バージョン確認
% claudia --version
2.6.0
ChatBotを開発
チュートリアルを参考に、claudia-bot-builderモジュールを用いたChatBotを開発していきます。
# ChatBotプロジェクトのディレクトリを作成
$ mkdir -p chatbot-by-claudia

# Node.jsのプロジェクトとして初期化
$ npm init

# claudia-bot-builderモジュールをインストール
$ npm install claudia-bot-builder -S

# huhモジュールをインストール ク◯なサーバ管理者のセリフをランダムに生成してくれるモジュール
$ npm install huh -S
ChatBotの本体はbot.jsにプログラムします。
$ vi bot.js

var botBuilder = require('claudia-bot-builder'), excuse=require('huh');

module.exports = botBuilder(function(request){
  return 'Thanks for sending ' + request.text + '. Your message is very important to us, but ' + excuse.get();
});
ChatBotのセットアップ
claudia create コマンドでAWSのリソースをセットアップし、ChatBotのプログラムをデプロイしていきます。
# 用意しておいたCredentialを指定して、セットアップ
% claudia create --profile chatbot_deploy --region ap-northeast-1 --api-module bot
saving configuration
{
  "lambda": {
    "role": "chatbot-executor",
    "name": "chatbot",
    "region": "ap-northeast-1"
  },
  "api": {
    "id": "hoge",
    "module": "bot",
    "url": "https://hoge.execute-api.ap-northeast-1.amazonaws.com/latest",
    "deploy": {
      "facebook": "https://hoge.execute-api.ap-northeast-1.amazonaws.com/latest/facebook",
      "slackSlashCommand": "https://hoge.execute-api.ap-northeast-1.amazonaws.com/latest/slack/slash-command",
      "telegram": "https://hoge.execute-api.ap-northeast-1.amazonaws.com/latest/telegram",
      "skype": "https://hoge.execute-api.ap-northeast-1.amazonaws.com/latest/skype",
      "twilio": "https://hoge.execute-api.ap-northeast-1.amazonaws.com/latest/twilio",
      "kik": "https://hoge.execute-api.ap-northeast-1.amazonaws.com/latest/kik",
      "groupme": "https://hoge.execute-api.ap-northeast-1.amazonaws.com/latest/groupme",
      "viber": "https://hoge.execute-api.ap-northeast-1.amazonaws.com/latest/viber",
      "alexa": "https://hoge.execute-api.ap-northeast-1.amazonaws.com/latest/alexa"
    }
  }
}
大まかに以下の処理を実行しています。
- bot.jsをLambdaの関数としてデプロイ
- API Gatewayのエンドポイントをセットアップ
- IAMで実行権限を調整
今回は、SlackのSlash CommandsのAPIに対応したChatBotですが、様々なプラットフォームに対応したChatBotをセットアップしていることが分かります。
Amazon Alexaにも対応している様なので、折を見て遊んで検証してみようと思います。
Slash Commandsのセットアップ
Slackサイドの設定となります。詳細は、Slackのドキュメントを参照してください。
- Slash Commandsをアプリとして設定し、カスタムコマンドを登録します。
- tokenが払い出されるので、控えておきます。
- POSTするURLとして先にセットアップしたAPI Gatewayのエンドポイントを指定します。
- 前述の
slackSlashCommandの値が該当します。"slackSlashCommand": "https://hoge.execute-api.ap-northeast-1.amazonaws.com/latest/slack/slash-command",
- 前述の
ChatBotのデプロイ
claudia updateコマンドでChatBotのプログラム(Lambdaの関数)をデプロイしていきます。
# updateサブコマンドで--configure-slack-slash-commandオプションを指定
% claudia update --profile chatbot_deploy --region ap-northeast-1 --api-module bot --configure-slack-slash-command
updating REST API       apigateway.setAcceptHeader


Slack slash command setup


Following info is required for the setup, for more info check the documentation.


Note that you can add one token for a slash command, and a second token for an outgoing webhook.


Your Slack slash command Request URL (POST only) is https://hoge.execute-api.ap-northeast-1.amazonaws.com/latest/slack/slash-command

If you are building full-scale Slack app instead of just a slash command for your team, restart with --configure-slack-slash-app

# Slackが払い出したtokenを指定
Slack token: foo

# Slackが払い出したtokenを指定
Outgoing webhook token: foo

updating REST API       apigateway.setAcceptHeader
{
  "FunctionName": "james-bot",
  "FunctionArn": "arn:aws:lambda:ap-northeast-1:123456789:function:chatbot:1",
  "Runtime": "nodejs4.3",
  "Role": "arn:aws:iam::123456789:role/chatbot-executor",
  "Handler": "bot.proxyRouter",
  "CodeSize": 4047078,
  "Description": "ChatBot",
  "Timeout": 3,
  "MemorySize": 128,
  "LastModified": "2017-01-24T07:38:23.358+0000",
  "CodeSha256": "hogefoobar",
  "Version": "5",
  "KMSKeyArn": null,
  "url": "https://hoge.execute-api.ap-northeast-1.amazonaws.com/latest",
  "deploy": {
    "facebook": "https://hoge.execute-api.ap-northeast-1.amazonaws.com/latest/facebook",
    "slackSlashCommand": "https://hoge.execute-api.ap-northeast-1.amazonaws.com/latest/slack/slash-command",
    "telegram": "https://hoge.execute-api.ap-northeast-1.amazonaws.com/latest/telegram",
    "skype": "https://hoge.execute-api.ap-northeast-1.amazonaws.com/latest/skype",
    "twilio": "https://hoge.execute-api.ap-northeast-1.amazonaws.com/latest/twilio",
    "kik": "https://hoge.execute-api.ap-northeast-1.amazonaws.com/latest/kik",
    "groupme": "https://hoge.execute-api.ap-northeast-1.amazonaws.com/latest/groupme",
    "viber": "https://hoge.execute-api.ap-northeast-1.amazonaws.com/latest/viber",
    "alexa": "https://hoge.execute-api.ap-northeast-1.amazonaws.com/latest/alexa"
  }
}
AWS Key Management Serviceにも対応している様ですね。
tokenは、暗号化しておいた方がいいですね。
動作確認
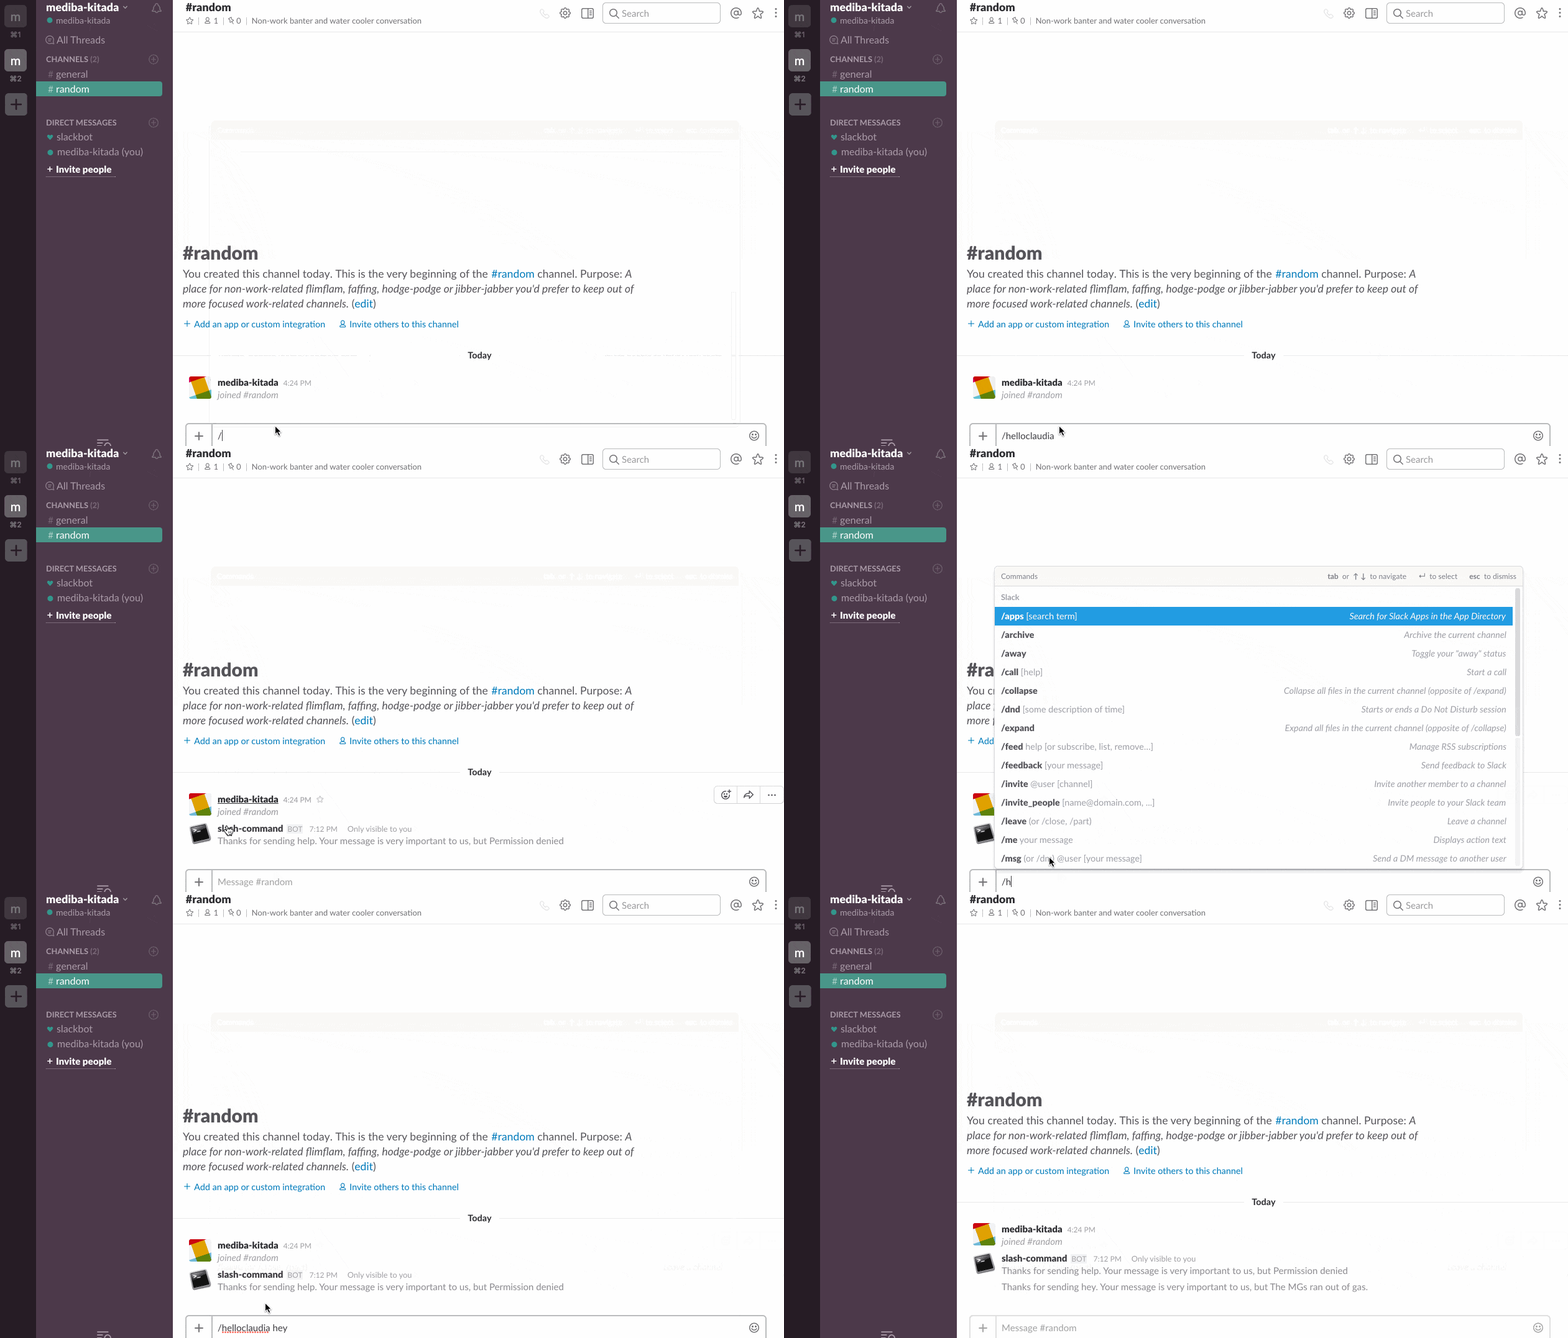
SlackからSlash Commandsを入力してみます。
ク◯なサーバ管理者な煽ってきますね。
おわりに
タイトルを「Claudia.jsでServerless入門」としたのは、CLIで完結するワークフローも魅力的ですが、Claudia.jsによっってServerlessの面白みと本質が垣間見えたからです。
- WEBサーバのアーキテクチャが隠蔽化されている
- デプロイ時にWEBサーバのプロセスを意識する必要がない
- 開発チームの運用負荷が減るので、アプリケーションの開発に注力出来る
Claudia.jsの開発者のインタビューの中でもあるように、上記のポイントをかなり狙ってきているようです。
チームで開発する上で、課題となりがちなシステム運用(Ops)の省力化、もしくは消滅(Opsless)も見込めそうです。
個人的には、Node.js習得のモチベーションにもなりました。
入門したからには、帯なりモヒカンなりを身に着けたいので、継続的に学習していきたいと思います。
