はじめに
Cisco Merakiは、クラウド管理型のネットワークプラットフォームです。WebブラウザからMerakiクラウドのダッシュボードにアクセスすることで、GUIベースで簡単に管理ができます。
製品ラインナップとしては、MR(アクセスポイント)、MX(SD-WANとセキュリティアプライアンス)、MS(イーサネットスイッチ)、MV(セキュリティカメラ)等のシリーズがあります。
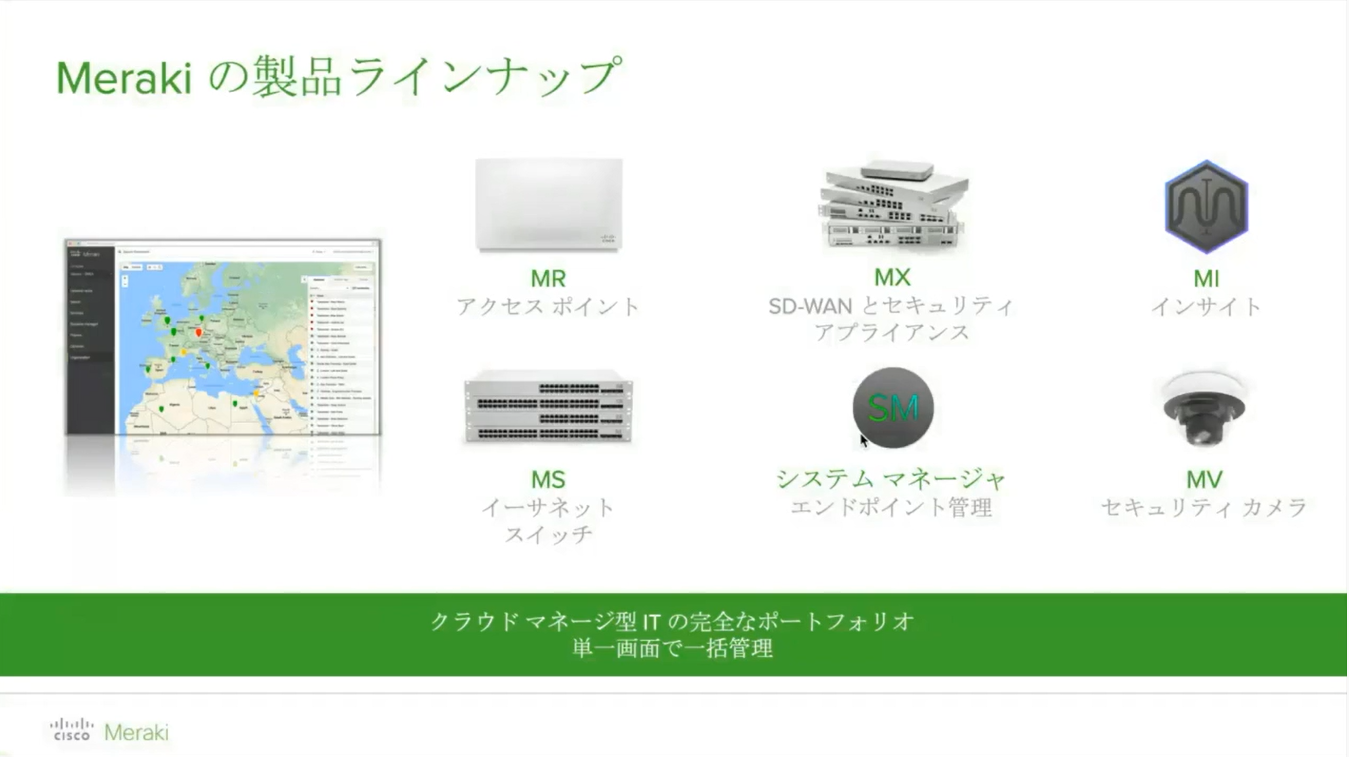
※Cisco Meraki オンデマンドウェビナーより引用
MerakiはダッシュボードAPIが提供されており、各デバイスのプロビジョニング、管理、モニタリングをHTTPSベースでも行えます。(他のAPIとして、クライアントの位置情報を提供するローカルスキャニングAPIや、Wi-Fi環境を利用するデバイスを対象としたカスタムエンゲージメントモデルを構築するための外部キャプティブポータルAPIがあります。)
今回は、Ansibleのmeraki_xxモジュール経由で、ダッシュボードAPIへコールし、以下の操作を行ってみます。
- ネットワーク・デバイス情報の取得
- MSシリーズのスイッチポート情報取得
- MSシリーズのスイッチポート設定変更
参考資料
-
Cisco DevNet Learning Labs - Merakiの紹介
Merakiや各種APIの概要が説明されている。PostmanやPythonを使ったAPI操作のハンズオンも体験できる。 -
Cisco Meraki オンデマンドウェビナー
MR/MX/MSシリーズの製品毎に、概要、GUI設定方法、導入事例が紹介されている。受講後、一定の条件を満たせば検証機をもらえる模様。(2019年12月現在) -
Ansible - Cisco Meraki Guide
Ansible Merakiモジュールの概要や使用時の注意点について記載。 -
Ansible - Merakiモジュール
各モジュールの設定方法が記載されている。(モジュール総数は2019年12月時点で19個)
1. 環境のセットアップ
1-1. Ansible
CentOSのPython仮想環境上にインストールした2.9.2を使用しました。
1-2. Meraki
Cisco DevNet SandboxのMeraki Enterprise (Reserve)を使わせて頂きました。
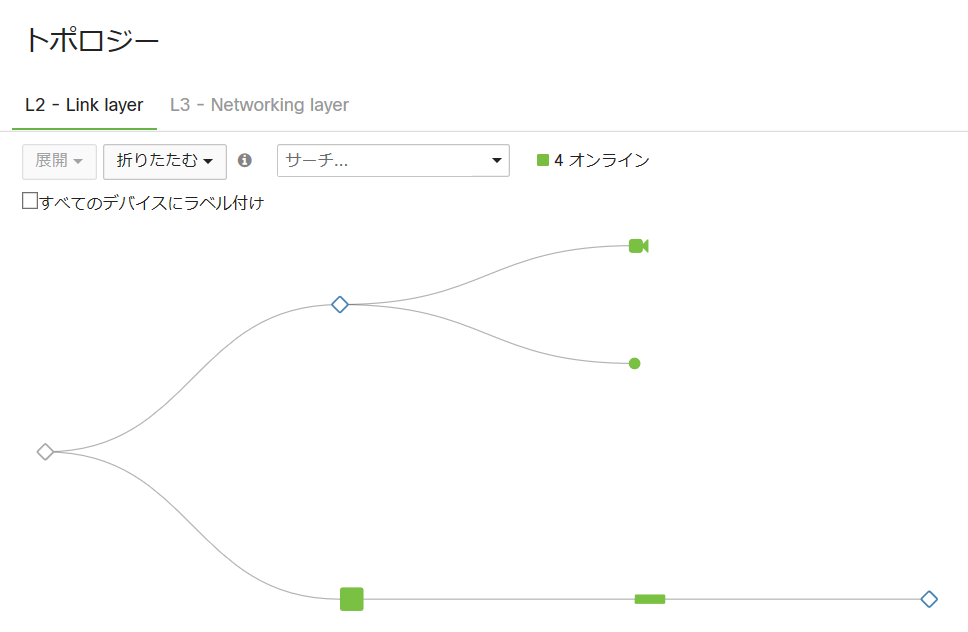
Sandboxで用意されるトポロジーは以下の通りです。図だけだとちょっと分かりづらいですが、緑の正方形がMX84、長方形がMS225-24P、丸がMR53、上のカメラっぽいのがMV12WEです。
1-3. MerakiダッシュボードAPIキーの生成
DevNet Sandboxでは、ダッシュボードAPIへのアクセスは最初から許可されていたため、プロファイルページにてAPIキーの生成のみ行いました。APIで操作するためには、生成したキーをHTTPSメッセージに含める必要があります。
2. Inventoryファイル
ログイン先のhostはデフォルトでapi.meraki.comが使われるため、通常は指定不要です。グループ変数には、Playbook内のタスクでよく使う変数を定義しています。
[cisco]
meraki

[cisco:vars]
api_key=xxxxxxxxxxxxxxxx
# 組織名。複数のネットワークを収容可能
org_name="DevNet Sandbox"
# DevNet予約時に、自分用に作成されるネットワーク
net_name=DNENT3-xxxxxxxx@gmail.com
# MS225-24Pのシリアル番号
ms225_serial=xxxx-xxxx-xxxx
3. ネットワーク・デバイス情報の取得
まずは、先程のトポロジーに描かれたネットワークと、ネットワーク内の各デバイスの情報を取得してみます。
3-1. Playbook
各タスクの内容は以下の通りです。なお、Connectionプラグインはlocalとしています。
-
meraki_networkモジュールで、情報を取得したいネットワークと、所属する組織名を指定。取得時、stateはqueryとする。なお、ネットワーク名を指定しない場合、組織内の全ネットワーク情報が取得される。 - タスク1の結果を表示。
-
meraki_deviceモジュールで、デバイス情報を取得したいネットワークと、所属する組織名を指定。 - タスク3の結果を表示。
---

- hosts: cisco
  gather_facts: no
  connection: local

  tasks:
    - name: Query my network
      meraki_network:
        auth_key: "{{ api_key }}"
        org_name: "{{ org_name }}"
        net_name: "{{ net_name }}"
        state: query
      register: result1

    - name: display output data
      debug:
        msg: "{{ result1.data }}"

    - name: Query all devices in my network
      meraki_device:
        auth_key: "{{ api_key }}"
        org_name: "{{ org_name }}"
        net_name: "{{ net_name }}"
        state: query
      register: result2

    - name: display output data
      debug:
        msg: "{{ result2.data }}"
3-2. 実行結果
タスク2で、ネットワーク情報としてネットワークID、ネットワーク名、組織ID、プロダクトタイプ、タイムゾーン等が表示されています。
またタスク4で、デバイス情報として設置場所(住所)、ファームウェア情報、IP/MACアドレス、型番、シリアル番号等が計4台分表示されています。
$ ansible-playbook -i inventory_meraki.ini playbook_meraki_device.yml

PLAY [cisco] **********************************************************************************************************

TASK [Query my network] ***********************************************************************************************
ok: [meraki]

TASK [display output data] ********************************************************************************************
ok: [meraki] => {
    "msg": {
        "disable_my_meraki_com": false,
        "disable_remote_status_page": true,
        "id": "L_646829496481104163",
        "name": "DNENT3-xxxxxxxx@gmail.com",
        "organization_id": "549236",
        "product_types": [
            "appliance",
            "camera",
            "switch",
            "wireless"
        ],
        "tags": null,
        "time_zone": "America/Los_Angeles",
        "type": "combined"
    }
}

TASK [Query all devices in my network] ********************************************************************************
ok: [meraki]

TASK [display output data] ********************************************************************************************
ok: [meraki] => {
    "msg": [
        {
            "address": "",
            "firmware": "wireless-25-13",
            "floor_plan_id": null,
            "lan_ip": "192.168.128.5",
            "lat": 37.4180951010362,
            "lng": -122.098531723022,
            "mac": "e0:cb:bc:xx:xx:xx",
            "model": "MR53",
            "network_id": "L_646829496481104163",
            "serial": "xxxx-xxxx-xxxx"
        },
        {
            "address": "",
            "firmware": "camera-4-0",
            "floor_plan_id": null,
            "lan_ip": "192.168.128.2",
            "lat": 37.4180951010362,
            "lng": -122.098531723022,
            "mac": "34:56:fe:xx:xx:xx",
            "model": "MV12WE",
            "network_id": "L_646829496481104163",
            "serial": "xxxx-xxxx-xxxx",
            "wireless_mac": "34:56:fe:xx:xx:xx"
        },
        {
            "address": "",
            "firmware": "switch-11-22",
            "floor_plan_id": null,
            "lan_ip": "192.168.128.3",
            "lat": 37.4180951010362,
            "lng": -122.098531723022,
            "mac": "34:56:fe:xx:xx:xx",
            "model": "MS225-24P",
            "network_id": "L_646829496481104163",
            "serial": "xxxx-xxxx-xxxx",
            "switch_profile_id": null
        },
        {
            "address": "東京都港区六本木",
            "firmware": "wired-14-40",
            "floor_plan_id": null,
            "lan_ip": "10.10.10.115",
            "lat": 35.66186,
            "lng": 139.73455,
            "mac": "e0:55:3d:xx:xx:xx",
            "model": "MX84",
            "network_id": "L_646829496481104163",
            "serial": "xxxx-xxxx-xxxx",
            "wan1_ip": "10.10.10.115",
            "wan2_ip": null
        }
    ]
}

PLAY RECAP ************************************************************************************************************
meraki                     : ok=4    changed=0    unreachable=0    failed=0    skipped=0    rescued=0    ignored=0
4. MSシリーズのスイッチポート情報取得
次に、MS225-24Pのスイッチポート情報を取得してみます。
4-1. Playbook
各タスクの内容は以下の通りです。
-
meraki_switchportモジュールで、serialで指定したデバイスのスイッチポート情報を取得。numberオプションで、取得対象を特定ポートに絞る事も可能。 - タスク1の結果を表示。
---

- hosts: cisco
  gather_facts: no
  connection: local

  tasks:
    - name: Query information about all switchport on a switch
      meraki_switchport:
        auth_key: "{{ api_key }}"
        state: query
        serial: "{{ ms225_serial }}"
#        number: "1"
      register: result1

    - name: display output data
      debug:
        msg: "{{ result1.data }}"
4-2. 実行結果
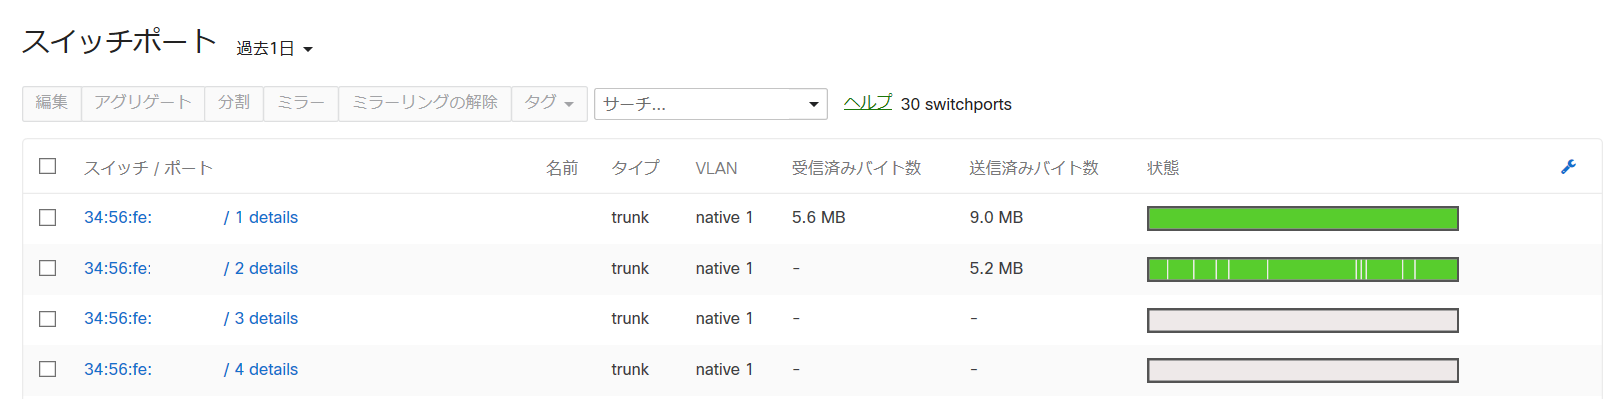
ポート番号1~30の内、1~4のみ表示しています。いずれもTrunkポートで同じ設定内容ですが、4-3.の通り、1と2は使用中、3と4は未使用の状態です。
$ ansible-playbook -i inventory_meraki.ini playbook_meraki_switchport.yml

PLAY [cisco] **********************************************************************************************************

TASK [Query information about all switchport on a switch] *************************************************************
ok: [meraki]

TASK [display output data] ********************************************************************************************
ok: [meraki] => {
    "msg": [
        {
            "access_policy_number": null,
            "allowed_vlans": "all",
            "enabled": true,
            "isolation_enabled": false,
            "link_negotiation": "Auto negotiate",
            "mac_whitelist": null,
            "name": null,
            "number": 1,
            "poe_enabled": true,
            "port_schedule_id": null,
            "rstp_enabled": true,
            "sticky_mac_whitelist": null,
            "sticky_mac_whitelist_limit": null,
            "stp_guard": "disabled",
            "tags": null,
            "type": "trunk",
            "udld": "Alert only",
            "vlan": 1,
            "voice_vlan": null
        },
        {
            "access_policy_number": null,
            "allowed_vlans": "all",
            "enabled": true,
            "isolation_enabled": false,
            "link_negotiation": "Auto negotiate",
            "mac_whitelist": null,
            "name": null,
            "number": 2,
            "poe_enabled": true,
            "port_schedule_id": null,
            "rstp_enabled": true,
            "sticky_mac_whitelist": null,
            "sticky_mac_whitelist_limit": null,
            "stp_guard": "disabled",
            "tags": null,
            "type": "trunk",
            "udld": "Alert only",
            "vlan": 1,
            "voice_vlan": null
        },
        {
            "access_policy_number": null,
            "allowed_vlans": "all",
            "enabled": true,
            "isolation_enabled": false,
            "link_negotiation": "Auto negotiate",
            "mac_whitelist": null,
            "name": null,
            "number": 3,
            "poe_enabled": true,
            "port_schedule_id": null,
            "rstp_enabled": true,
            "sticky_mac_whitelist": null,
            "sticky_mac_whitelist_limit": null,
            "stp_guard": "disabled",
            "tags": null,
            "type": "trunk",
            "udld": "Alert only",
            "vlan": 1,
            "voice_vlan": null
        },
        {
            "access_policy_number": null,
            "allowed_vlans": "all",
            "enabled": true,
            "isolation_enabled": false,
            "link_negotiation": "Auto negotiate",
            "mac_whitelist": null,
            "name": null,
            "number": 4,
            "poe_enabled": true,
            "port_schedule_id": null,
            "rstp_enabled": true,
            "sticky_mac_whitelist": null,
            "sticky_mac_whitelist_limit": null,
            "stp_guard": "disabled",
            "tags": null,
            "type": "trunk",
            "udld": "Alert only",
            "vlan": 1,
            "voice_vlan": null
        },
        (省略)
    ]
}

PLAY RECAP ************************************************************************************************************
meraki                     : ok=2    changed=0    unreachable=0    failed=0    skipped=0    rescued=0    ignored=0
4-3. ダッシュボード画面
スイッチ > スイッチポート で各ポートのタイプや送受信バイト数を閲覧可能です。(右上のスパナマークをクリックすると、リンク状態や許可VLAN等の項目を追加できます。)
5. MSシリーズのスイッチポート設定変更
次に、MS225-24Pのスイッチポート3と4を設定変更してみます。
5-1. Playbook
各タスクの内容は以下の通りです。
-
meraki_switchportモジュールで、ポート番号3をTrunkからAccessポートに設定変更。設定追加の場合、stateをpresentとします。オプションでDescriptionやタグ、所属VLANも指定しています。なお、未指定のオプションは、既存の値がそのまま使われます(マージするイメージ)。 - タスク1の結果を表示。
-
meraki_switchportモジュールで、ポート番号4に対し、Descriptionやタグに加え、許可VLANを追加。 - タスク3の結果を表示。
---

- hosts: cisco
  gather_facts: no
  connection: local

  tasks:
    - name: Configure access port
      meraki_switchport:
        auth_key: "{{ api_key }}"
        state: present
        serial: "{{ ms225_serial }}"
        number: "3"
        enabled: true
        name: Test Port
        tags: desktop
        type: access
        vlan: 10
      register: result1

    - name: display output data
      debug:
        msg: "{{ result1.data }}"

    - name: Configure trunk port with specific VLANs
      meraki_switchport:
        auth_key: "{{ api_key }}"
        state: present
        serial: "{{ ms225_serial }}"
        number: "4"
        enabled: true
        name: Server port
        tags: server
        type: trunk
        allowed_vlans:
          - 10
          - 15
          - 20
      register: result2

    - name: display output data
      debug:
        msg: "{{ result2.data }}"
5-2. 実行結果
タスク2と4で、それぞれ想定通りポート3と4の設定が行われ、changed=2となっています。
同じPlaybookをもう一度実行したところchanged=0でしたので、冪等性は担保されていそうです。
$ ansible-playbook -i inventory_meraki.ini playbook_meraki_switchport1.yml

PLAY [cisco] **********************************************************************************************************

TASK [Configure access port] ******************************************************************************************
changed: [meraki]

TASK [display output data] ********************************************************************************************
ok: [meraki] => {
    "msg": {
        "access_policy_number": null,
        "allowed_vlans": "all",
        "enabled": true,
        "isolation_enabled": false,
        "link_negotiation": "Auto negotiate",
        "mac_whitelist": null,
        "name": "Test Port",
        "number": 3,
        "poe_enabled": true,
        "port_schedule_id": null,
        "rstp_enabled": true,
        "sticky_mac_whitelist": null,
        "sticky_mac_whitelist_limit": null,
        "stp_guard": "disabled",
        "tags": "desktop",
        "type": "access",
        "udld": "Alert only",
        "vlan": 10,
        "voice_vlan": null
    }
}

TASK [Configure trunk port with specific VLANs] ***********************************************************************
changed: [meraki]

TASK [display output data] ********************************************************************************************
ok: [meraki] => {
    "msg": {
        "access_policy_number": null,
        "allowed_vlans": "10,15,20",
        "enabled": true,
        "isolation_enabled": false,
        "link_negotiation": "Auto negotiate",
        "mac_whitelist": null,
        "name": "Server port",
        "number": 4,
        "poe_enabled": true,
        "port_schedule_id": null,
        "rstp_enabled": true,
        "sticky_mac_whitelist": null,
        "sticky_mac_whitelist_limit": null,
        "stp_guard": "disabled",
        "tags": "server",
        "type": "trunk",
        "udld": "Alert only",
        "vlan": null,
        "voice_vlan": null
    }
}

PLAY RECAP ************************************************************************************************************
meraki                     : ok=4    changed=2    unreachable=0    failed=0    skipped=0    rescued=0    ignored=0
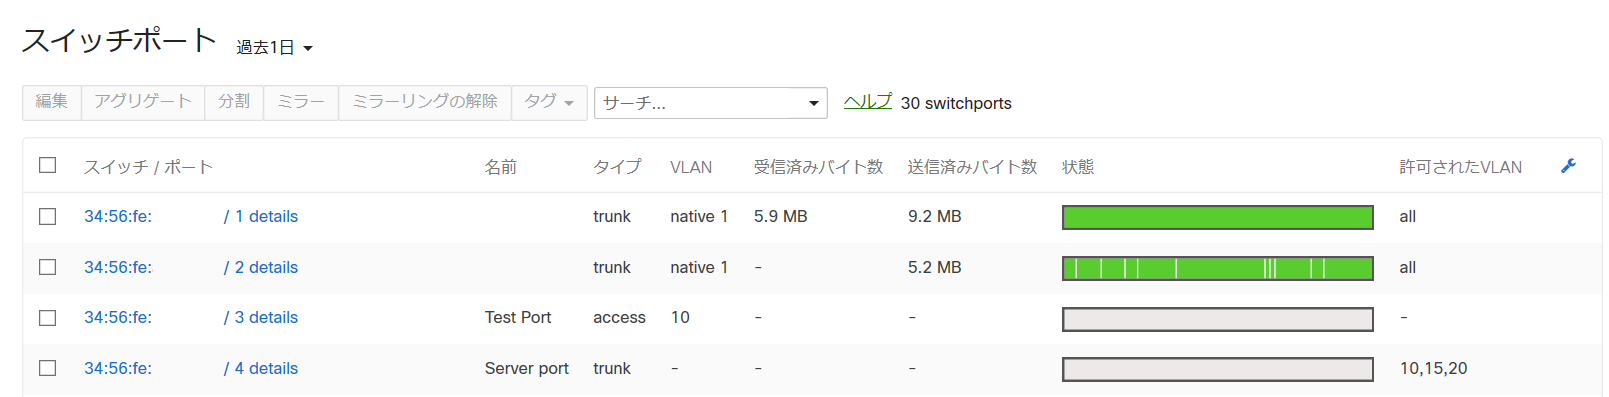
5-3. ダッシュボード画面
画面上でも問題なく設定反映されています。
最後に
Ansibleのmeraki_xxxモジュールは、今回ご紹介したもの以外に、Firewallポリシーやコンテンツフィルタリング、NAT、ルーティング、SSID管理など各シリーズの多岐に渡る設定項目をサポートしています。
別の記事で、メンテナンス頻度の比較的高い、Firewallポリシーの操作方法についてもご紹介したいと思います。