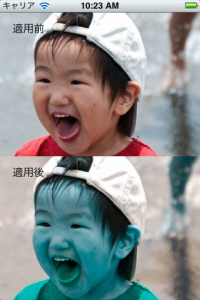
こちらのswift向けに書いてみました。(改めてタイトルを見るとアレですね。。
CoreImageを利用したフィルタをいくつかご紹介させていただきます。
iOSのバージョンが上がると、CoreImageの機能も拡張されたりするので
カメラアプリなど作る場合は多様する事もあるかもしれません。
今回紹介させていただく内容は、CIFilterを使い分ける事になります。
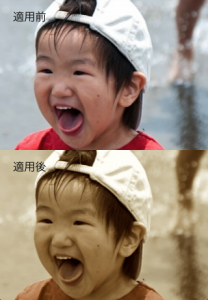
セピア【CISepiaTone】
以下コード
// image が 元画像のUIImage
let ciImage:CIImage = CIImage(image:image);
let ciFilter:CIFilter = CIFilter(name: "CISepiaTone")
ciFilter.setValue(ciImage, forKey: kCIInputImageKey)
ciFilter.setValue(0.8, forKey: "inputIntensity")
let ciContext:CIContext = CIContext(options: nil)
let cgimg:CGImageRef = ciContext.createCGImage(ciFilter.outputImage, fromRect:ciFilter.outputImage.extent())

//image2に加工後のUIImage
let image2:UIImage? = UIImage(CGImage: cgimg, scale: 1.0, orientation:UIImageOrientation.Up)
CIImageを生成し、それに対して、CIFilterを適用する形になっているかと思います。
基本的には他の加工も同様ですので、次以降はCIFilterのみ記載します。
グレースケール【CIColorMonochrome】
let ciFilter:CIFilter = CIFilter(name: "CIColorMonochrome")
ciFilter.setValue(ciImage, forKey: kCIInputImageKey)
ciFilter.setValue(CIColor(red: 0.75, green: 0.75, blue: 0.75), forKey: "inputColor")
ciFilter.setValue(1.0, forKey: "inputIntensity")
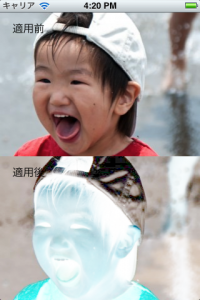
色の反転【CIColorInvert】
let ciFilter:CIFilter = CIFilter(name: "CIColorMonochrome")
ciFilter.setValue(ciImage, forKey: kCIInputImageKey)
ciFilter.setValue(CIColor(red: 0.75, green: 0.75, blue: 0.75), forKey: "inputColor")
ciFilter.setValue(1.0, forKey: "inputIntensity")
公式ドキュメントにもありますが、
CIColorInvert フィルタは画像の色を反転し、画像をネガフィルムのように見せますが、カラーネガフィルムのようなオレンジがかった色ではありません。色の反転フィルタは単にカラーを反転するだけなので、カラーネガフィルムを模倣するものではありません。
偽色【CIFalseColor】
let ciFilter:CIFilter = CIFilter(name: "CIFalseColor" )
ciFilter.setValue(ciImage, forKey: kCIInputImageKey)
ciFilter.setValue(CIColor(red: 0.44, green: 0.5, blue: 0.2), forKey: "inputColor0")
ciFilter.setValue(CIColor(red: 1, green: 0.92, blue: 0.50), forKey: "inputColor1")
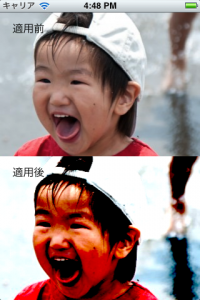
色調節フィルタ(Color Adjustment Filters)
let ciFilter:CIFilter = CIFilter(name: "CIColorControls" )
ciFilter.setValue(ciImage, forKey: kCIInputImageKey)
ciFilter.setValue(1.0, forKey: "inputSaturation")
ciFilter.setValue(0.5, forKey: "inputBrightness")
ciFilter.setValue(3.0, forKey: "inputContrast")
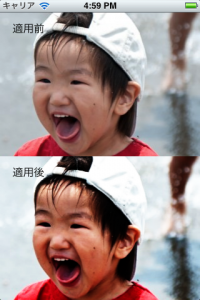
トーンカーブ【CIToneCurve】
let ciFilter:CIFilter = CIFilter(name: "CIToneCurve" )
ciFilter.setValue(ciImage, forKey: kCIInputImageKey)
ciFilter.setValue(CIVector(x: 0.0, y: 0.0), forKey: "inputPoint0")
ciFilter.setValue(CIVector(x: 0.25, y: 0.1), forKey: "inputPoint1")
ciFilter.setValue(CIVector(x: 0.5, y: 0.5), forKey: "inputPoint2")
ciFilter.setValue(CIVector(x: 0.75, y: 0.9), forKey: "inputPoint3")
ciFilter.setValue(CIVector(x: 1.0, y: 1.0), forKey: "inputPoint4")
あくまで一例です。
”inputPoint0”〜”inputPoint4”までの(x、y)座標を設定します。
”inputPoint0” デフォルト値は”[0 0]”
”inputPoint1” デフォルト値は”[0.25 0.25]”
”inputPoint2” デフォルト値は”[0.5 0.5]”
”inputPoint3” デフォルト値は”[0.75 0.75]”
”inputPoint4” デフォルト値は”[1 1]”
色相調整【CIHueAdjust】
let ciFilter:CIFilter = CIFilter(name: "CIHueAdjust" )
ciFilter.setValue(ciImage, forKey: kCIInputImageKey)
ciFilter.setValue(3.14, forKey: "inputAngle")
”inputAngle” HSV色空間およびHLS色空間における色相の位置を指定する値(NSNumber)。これは 0.0 ~ 2 pi までの範囲の角度です。値 0 は赤色を示します。緑色は pi/3 ラジアンに相当し、青色は 2/3 pi ラジアンです。
デフォルト値は0 最大値3.14 最小値-3.14です。
以上です。面白そうなものがもしあったら追記するかもしれません。
