はじめに
Cloudantでtimestampで検索をかけるにはSeach Indexを作成する必要があるようですが、方法が分かりやすく紹介されているページを見つけられなかったので備忘録のために書きました。
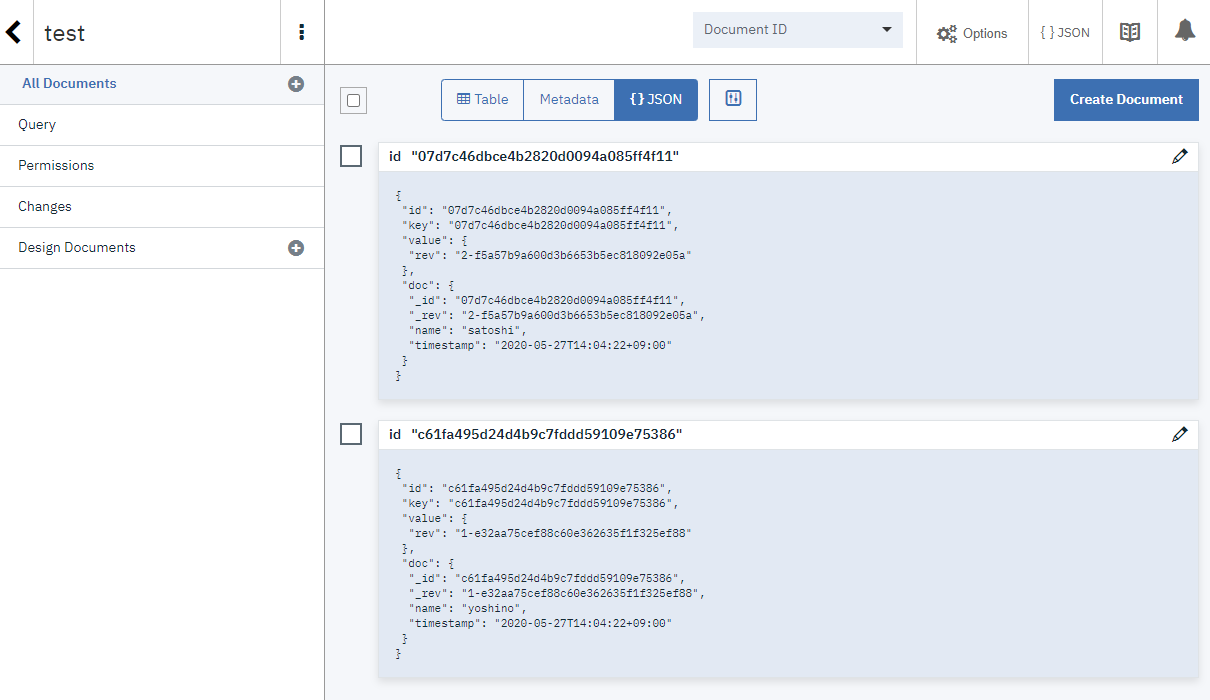
Documentの用意
サンプルのドキュメントを追加します
name, timestampの2つのフィールドを持つこととします。
{ "name": "satoshi", "timestamp": "2020-05-27T14:04:22+09:00" }
Search Indexの作成方法
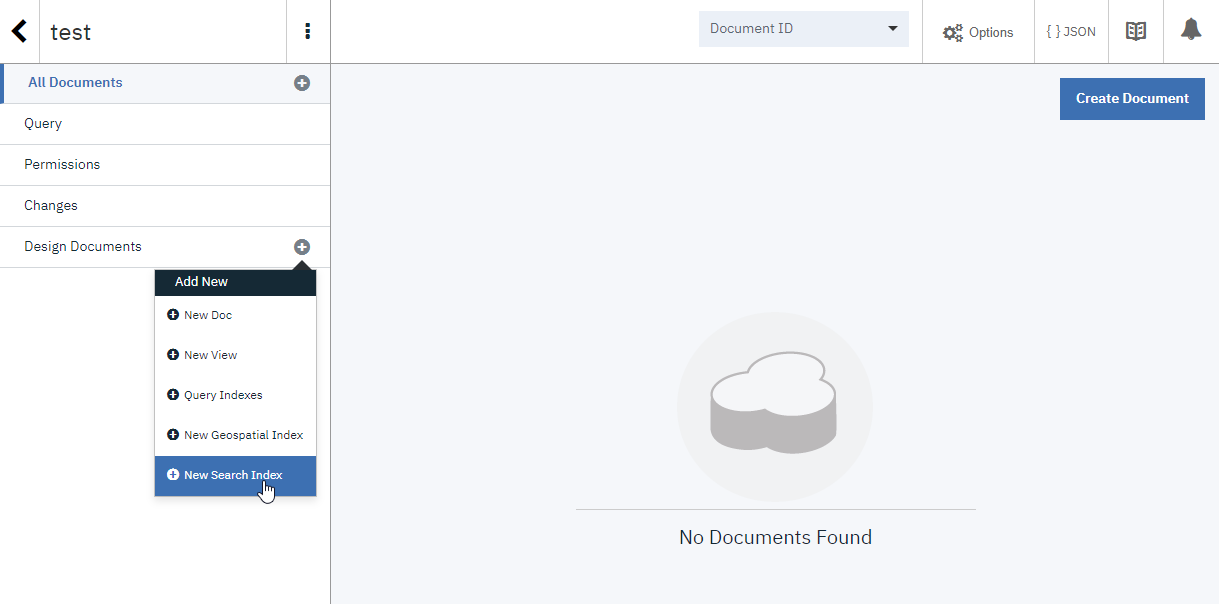
1.データベース作成後、Design Documents > New Search Indexを選択
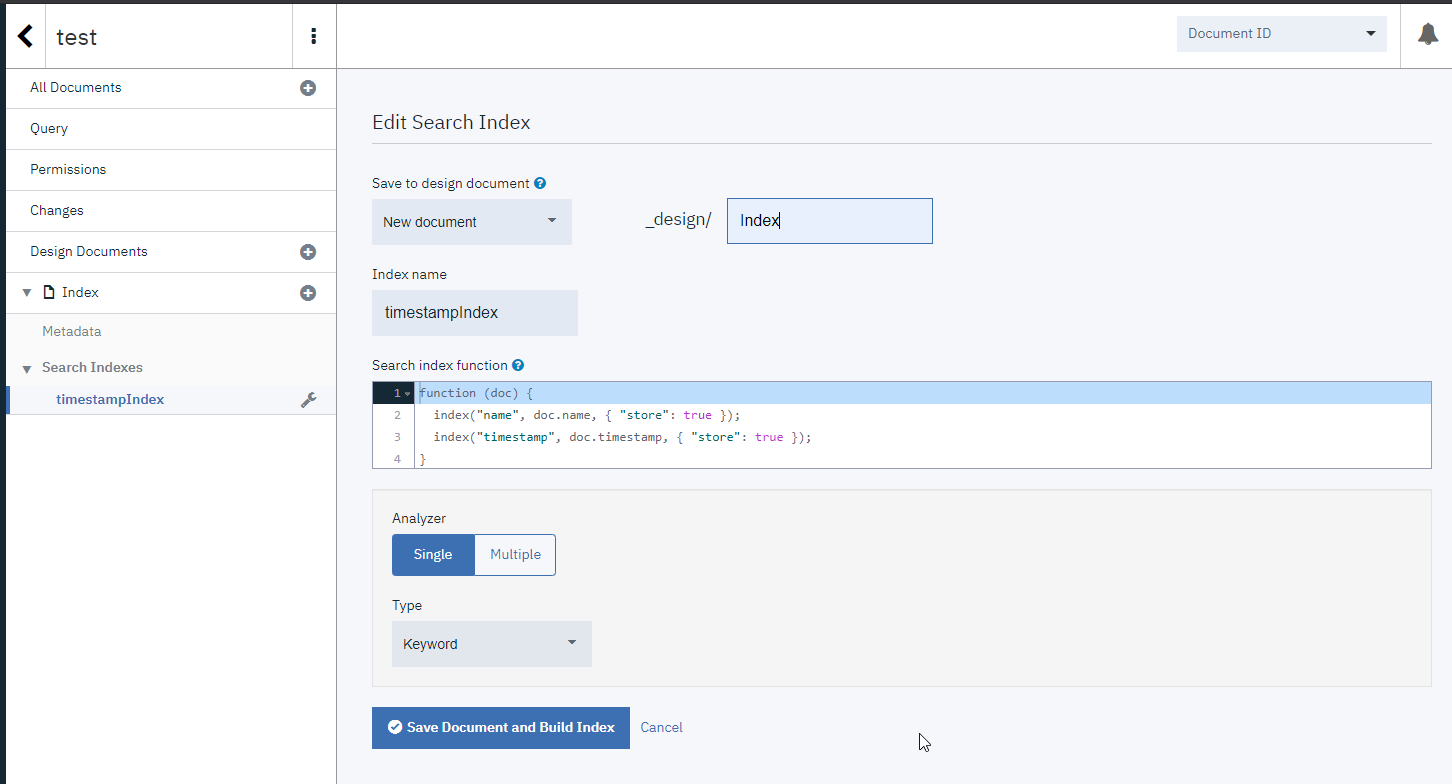
2.Search index の情報を設定する
_desing/ xxxx、Index name、Seach index function、Analyzerを設定して、Save Document and Build Indexをクリック
searchIndexFunction
function (doc) {
  index("name", doc.name, { "store": true });
  index("timestamp", doc.timestamp, { "store": true });
}
注意点
-
xxxx、Index nameは後で使用することになるのでちゃんとした名前を設定する - 検索結果として返してきてほしいフィールド名を
index("xxxx", doc.xxxx, { "store": true });で指定する - Analyzer > Single > Typeを
Keywordに設定する
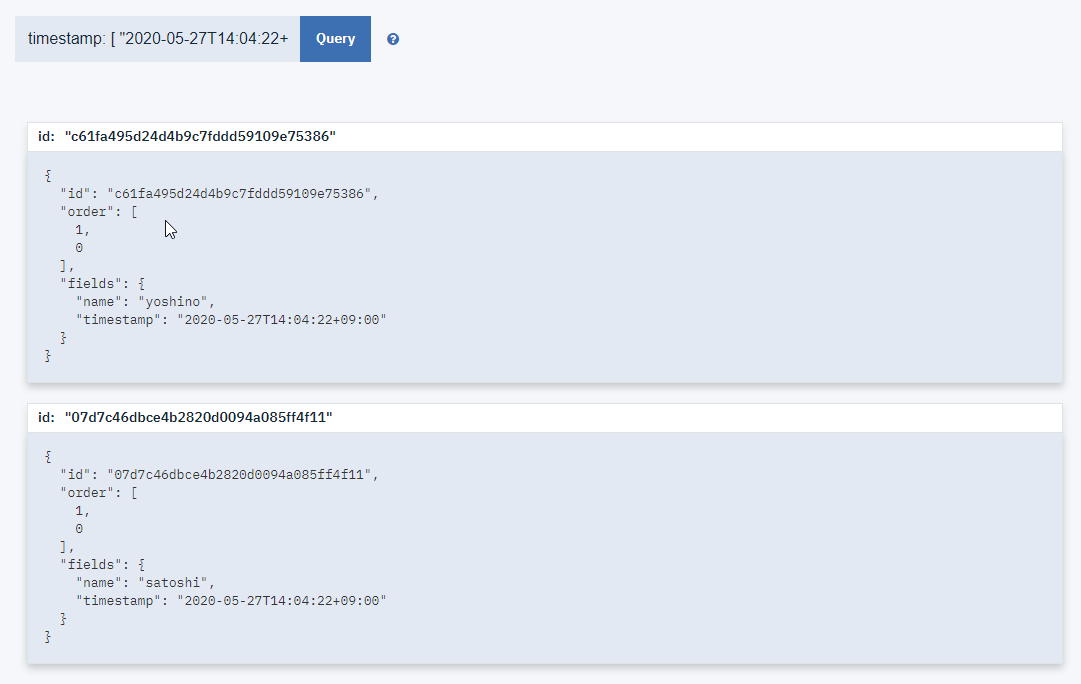
3.以下のクエリを試す
timestamp: [ "2020-05-27T14:04:22+09:00" TO "2020-05-30T14:04:22+09:00"]
指定範囲のDocumentが取得できれば成功
設定は以上
【おまけ】 Node.jsでtimestampで検索
npm install @cloudant/cloudant
test.js
  const Cloudant = require('@cloudant/cloudant');
  const cloudant = Cloudant({
          url: "",
          plugins: { iamauth: { iamApiKey: "" } }
      });

  const db = cloudant.db.use("dbName");

  const start = '2020-05-27T14:04:22+09:00'
  const end = '2020-05-30T14:04:22+09:00'
  const payload = {
      q: `timestamp: ["${start}" TO "${end}"]`,
      limit: 200 // 検索結果で返ってくるのはデフォルトで10件 最大でも200件
  }

  // Search Indexの作成方法で指定したxxxx, Index nameを1つ目、2つ目の引数で指定
  db.search('Index', 'timestampIndex', payload)
  .then((result) => {
      console.log(JSON.stringify(result, null, 2))
  })
  .catch((err) => {
      console.log(err)
  });
UIで取得したのと同じ結果が取得できました。
> node test.js
{
  "total_rows": 2,
  "bookmark": <省略>,
  "rows": [
    {
      "id": "c61fa495d24d4b9c7fddd59109e75386",
      "order": [
        1,
        0
      ],
      "fields": {
        "name": "yoshino",
        "timestamp": "2020-05-27T14:04:22+09:00"
      }
    },
    {
      "id": "07d7c46dbce4b2820d0094a085ff4f11",
      "order": [
        1,
        0
      ],
      "fields": {
        "name": "satoshi",
        "timestamp": "2020-05-27T14:04:22+09:00"
      }
    }
  ]
}


