1
0

Delete article

Deleted articles cannot be recovered.

Draft of this article would be also deleted.

Are you sure you want to delete this article?

More than 5 years have passed since last update.

AzureFileを自動でマウントする

Posted at

##前書き
前回はAzureFileを自前のPCにマウントする方法を投稿しました。
今回は下記忘れていたAzureFileを自動でマウントする方法を投稿します。

PC再起動時とかでネットワークドライブのマウントが外れてしまうので、
毎回起動時にコマンドを実行するというナンセンスさを解消できるでしょう。

WindowsOS 10以降を対象にしています。

##①バッチの作成
メモ帳を開いて下記のAzureFileをマウントするコマンドを記載します。

net use z: \\[ストレージ名].file.core.windows.net\[共有フォルダ名] /u:[ストレージ名] [ストレージキー]
echo off

入力が終わったら拡張子を「bat」にして保存してください。
ここでは「remount.bat」としておきます。

##②スタートアップに放り込む
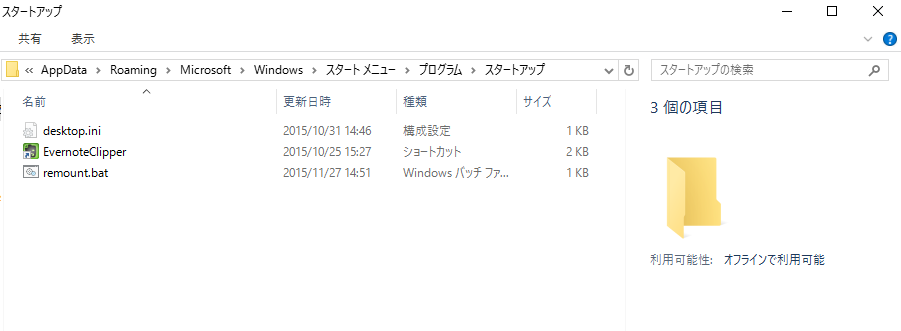
スタートアップに上記で作成したbatを配置します。
スタートアップに配置したものはOS起動時に実行されます。

スタートアップフォルダの場所がわからない場合は下記のコマンドで開くことが出来ます。

1、WindowsKey + R で「ファイル名を指定し実行」を起動します
2、shell:startupと入力するとスタートアップフォルダが開きます

batを配置します。
refer1.png

batを配置し終わったらPCを再起動してみましょう。
AzureFileがマウントされていれば成功です。

これで毎回コマンドを入力する手間を省くことが出来ます。
1
0
0

Register as a new user and use Qiita more conveniently

  1. You get articles that match your needs
  2. You can efficiently read back useful information
  3. You can use dark theme
What you can do with signing up
1
0

Delete article

Deleted articles cannot be recovered.

Draft of this article would be also deleted.

Are you sure you want to delete this article?