Bootroidを利用して、爆速Androidアプリ開発環境を整えます。特にJSON APIでサーバとやりとりするようなAndroidアプリを作る際に効果を発揮します。
特徴
- 無駄のないHTTPアクセス
- REST クライアント
- Web上の画像読み込み
- Fontawesome アイコンの利用
- 1行でオブジェクトをキャッシュ
- EditText バリデーション
- GCMの登録、受け取りの簡易化
- その他Androidでよく使うUtil集
サンプルを動かす
まずはサンプルプロジェクトを動かしてみます。
Android SDKから以下をインストール
- Android SDK Build-tools 21.1.1
- Android 5.0 SDK Platform
- Android Support Repository
- Android Support Library 21.0.2
- Google Play services 21
- Google Repository
Bootroid をクローン
git clone https://github.com/honkimi/Bootroid.git
AndroidStudioから読み込む
Open an existing Android Studio project -> build.gradleを選択
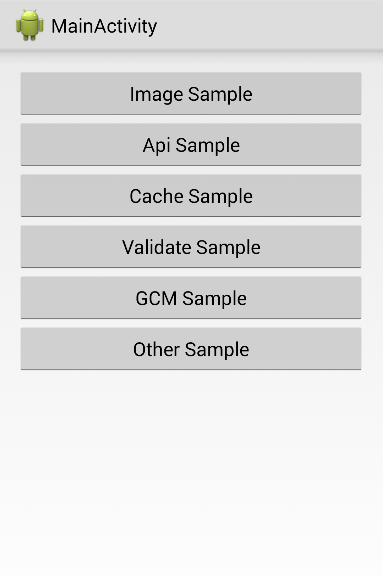
実行すると以下のようなサンプルが表示されます。
自分のAndroidプロジェクトに取り込む
早速自分のプロジェクトに取り込む場合は以下の手順を踏みます。
インポート
cd /path/to/your/project
mkdir library
cp -r /path/to/bootroid library/
settings.gradle内に , ':library:bootroid'を追加
appの方のbuild.gradle内に compile project(':library:bootroid')を追加
build実行
MyAppApplication の作成
ApplicationControllerを継承した独自のApplicationクラスを作成します。
class MyAppApplication extends ApplicationController {
    @Override
    public void onCreate() {
        super.onCreate();

        Conf.DEV_MODE = true;
        Conf.BUG_SENSE_API_KEY = "your bugsense api key";
        Conf.TRACKER_ID = "your google analytics trackerid";
        Conf.GCM_SENDERID = "your gcm sender id";
    }
}
Conf の設定はそれぞれ任意です。
- Conf.BUG_SENSE_API_KEY: バグレポートをSplunkに登録したい場合はそこで得たAPI Key を登録します。
- Conf.TRACKER_ID: Google Analytics でユーザーの行動を分析したい場合はそこのTRACKER_IDを登録します。
- Conf.GCM_SENDERID: GCMを使ってプッシュ通知を受け取りたい場合はGoogle Cloud Console のSENDER IDを登録します。
AndroidManifest にて、以下を追加
    <application
    android:name=".MyApplication"
     ......
    >
これで完了です。
Bootroid を触ってみる
API 通信
HTTP リクエスト
ApiRequest.get(URL, new ApiResponseHandler() {
    @Override
    public void onSuccess(JSONObject jsonObject) {
       // parse json
    }

    @Override
    public void onFailure(ApiException e) {
        // error handling
    }
});
REST API アクセス
API のレスポンスに対応した Java エンティティを作成するだけで自動でそのフィールドに値が入るような REST API アクセスも可能です。
例えば、以下のようなJSONを返す APIがあったとします。
{
  article: {
    "id": 1,
    title: "Bootroid",
    "author": "honkimi",
    "content": "Bootroid supports your speedy android development."
  }
}
以下のように書くだけで、値の入ったArticleを取得できます。
class Article {
    public int id;
    public String title;
    public String author;
    public String content;
}

private void fetchRestRequest() {
    RestApi.baseKey = "article";
    RestApi.show(URL, Article.class, new ApiCallbackBase.ApiCallback<Article>() {
        @Override
        public void onSuccess(Article response) {
            // article
        }

        @Override
        public void onFailure(String message, int code) {
            // error handling
        }
    });
}
画像表示
HTTP での画像表示
レイアウトは以下のように記述します。
        <com.android.volley.toolbox.NetworkImageView
            android:id="@+id/network"
            android:layout_width="50dp"
            android:layout_height="50dp" />
アクティビティに読み込むURLを指定すればOKです。
NetworkImageView network = (NetworkImageView) findViewById(R.id.network);
String imageUrl = "https://assets-cdn.github.com/images/modules/open_graph/github-mark.png";
network.setImageUrl(imageUrl, ApplicationController.getInstance().getImageLoader());
Fontawesome のアイコン表示
Fontawesome のたくさんのアイコンをAndroidで利用することができます。
レイアウトは以下のように記述します。
<TextView
android:id="@+id/github_icon"
android:text=""
android:textSize="50sp"
android:layout_width="wrap_content"
android:layout_height="wrap_content" />
 は上記リンク先で使いたいアイコンから指定します。
あとはアクティビティに以下を追加するだけです。 this は Activity を指します。複数表示するアイコンがある場合は、第3、第4引数と連続で追加できます。
IconUtil.setIcons(this, R.id.github_icon);
IconUtil.setIcons(this, R.id.github_icon, R.id.twitter_icon);
キャッシュの保存、取得
APIで取ってきたデータを一時的に保管し、次回起動時にそれを読み込ませてオフライン時の対策だったり、ローディングを回避したりといったところでキャッシュは多用されます。
Bootroid ではオブジェクトをそのままJSONに変換し、保存する機能を提供します。
例えば以下のようなエンティティがあるとします。
    class Sample {
        public int id;
        public String name;
        private Sample(int id, String name) {
            this.id = id;
            this.name = name;
        }
    }
ListでAPIから取得したとします。つまり、以下のフィールドに値が入っている状態です。
private ArrayList<Sample> samples;
private static final String CACHE_KEY = "sample_cache";
キャッシュの操作
// 保存
ObjectStorage.save(samples, CACHE_KEY);
// 読み込み
Sample[] cache = ObjectStorage.get(CACHE_KEY, Sample[].class);
// 削除
ObjectStorage.remove(CACHE_KEY);
取得した配列をリストに変換し、リスト操作した後また上書き保存することにより、簡単なデータ更新や一部削除なども簡単に実装できます。 複雑なデータ処理はSQLite を使う必要がありますが、シンプルなデータ操作であればキャッシュだけで実現できます。
EditTextのバリデーション
API通信をよくするアプリではEditTextでユーザーの入力した情報を検証する必要があります。普通に書くと大量のif文で埋め尽くされがちなこの処理を簡易化します。
    <com.honkimi.bootroid.validate.ErrorMessagesText
        android:id="@+id/error"
        android:textColor="@android:color/holo_red_dark"
        android:layout_width="match_parent"
        android:layout_height="wrap_content" />

    <EditText
        android:id="@+id/number"
        android:hint="number"
        android:contentDescription="number"
        android:layout_width="match_parent"
        android:layout_height="wrap_content" />

    <Button
        android:id="@+id/validate"
        android:text="Valildate!"
        android:onClick="onClick"
        android:layout_width="match_parent"
        android:layout_height="wrap_content" />
    public void onClick(View v) {
        if (!errorMessagesText.isSetErrors(validate())) {
            Toast.makeText(ValidateActivity.this, "Success!", Toast.LENGTH_LONG).show();
        }
    }

    private List<String> validate() {
        ValidateManager mng = new ValidateManager(this);
        Validators validators = new Validators();
        validators.add(new NumberValidatable());
        validators.add(new MaxNumValidatable(100));
        validators.add(new MinNumValidatable(1));

        mng.add(number, validators);

        return mng.validate();
    }
Bootroid ではその他に文字列の長さや存在チェックなどのバリデーションが標準で搭載されています。その他の独自バリデーションも簡単に実装することができます。
GCM
プッシュ通知を受け取るための登録と、受けた時の処理を共通化しています。
GCM 受け取り時の処理
GcmBroadcastReceiverを継承したクラスを作成します。
public class MyGcmBroadcastReceiver extends GcmBroadcastReceiver {
    @Override
    public String getGcmServiceClassName() {
        return MyGcmIntentService.class.getName();
    }
}
GcmIntentServiceを継承したクラスを作成します。
public class MyGcmIntentService extends GcmIntentService {
    @Override
    public void onGCMReceived(String content) {
        LogUtil.v(content);

        // ここにGCMを受け取った際の処理を書きます。
    }
}
AndroidManifest にたくさん追加します。
    <uses-permission android:name="android.permission.WAKE_LOCK" />
    <uses-permission android:name="com.google.android.c2dm.permission.RECEIVE" />
    <uses-permission android:name="android.permission.VIBRATE" />
    <uses-permission android:name="com.honkimi.sample.permission.C2D_MESSAGE" />
    <uses-permission android:name="com.honkimi.sample.c2dm.permission.RECEIVE" />
    <application>
        <!-- GCM -->
        <receiver
            android:name=".gcm.MyGcmBroadcastReceiver"
            android:permission="com.google.android.c2dm.permission.SEND">
            <intent-filter>
                <action android:name="com.google.android.c2dm.intent.RECEIVE" />
                <category android:name="jp.connexi.android" />
            </intent-filter>
        </receiver>
        <service android:name=".gcm.MyGcmIntentService" />
    </application>
GCM登録処理
任意のActivityに以下を記述します。
        if (GcmUtil.checkGooglePlayServiceAvailable(this)) {
            GcmUtil.setupGCM(this, new GcmUtil.GCMSender() {
                @Override
                public void onSuccessRegId(String regId) {
                    // please save this regId to your server. This regId is device's identifier.
                    // after sent to the server, please save this regId into the local.
                    storeRegistrationId(regId);
                }
            });
        }
onSuccessRegId の呼び出しの中で、用意したサーバにregIdを登録するAPIを投げてください。サーバ側でこのregIdとユーザーIDを紐付け、そのregIdを使ってプッシュ通知を行います。
保存に成功した際に storeRegistrationIdを呼び出し、ローカルにも保存しておきます。
あとはサーバ側でプッシュ通知したいタイミングでこのregIdを用いてGCMサーバーにデータを投げれば受け取れるはずです。
Conf.GCM_SENDERIDをApplicationクラスに登録するのをお忘れなく。
Google Analytics, Splunk の設定
共通アクティビティクラスを作ると楽に登録できます。
class BaseActivity extends Activity {
    @Override
    public void onCreate() {
        super.onCreate();
        BugSence.init();
        GA.screen(getClass().getSimpleName());
    }
}
Conf.TRACKER_ID, Conf.BUG_SENSE_API_KEYをApplicationクラスに登録するのをお忘れなく。
その他機能
簡易SharedPreferenceクラス
BasePrefを継承したPrefクラスを生成します。
public class UserPref extends BasePref {

    private static final String PREF_NAME = "user_pref";

    public static final String KEY_USER_ID = "user_id";
    public static final String KEY_USERNAME = "user_name";

    public UserPref() {
        super(PREF_NAME);
    }
}
以下のように利用できます。(どこでも)
// 保存
UserPref userPref = new UserPref();
userPref.putInt(UserPref.KEY_USER_ID, 1);
userPref.put(UserPref.KEY_USER_NAME, "Taro");

// 取得
userPref.getInt(UserPref.KEY_USER_ID, -1);
userPref.get(UserPref.KEY_USER_NAME, "");
キーボードを隠す
必ずググってしまうこの処理を簡易的に扱えます。
KeyBoardUtil.hide(activity, editText1, editText2);
editText3.. と続けて連続でパラメータに追加できます。
Webの起動, シェアの起動
// web
String url = "https://github.com/honkimi/Bootroid";                startActivity(IntentUtil.getWebIntent(url));
// share
String content = "share content";
startActivity(IntentUtil.getShareIntent(content));
// google play page
startActivity(IntentUtil.getMarketIntent(this));
ローカルノーティフィケーション
NotificationCenter notificationCenter = new NotificationCenter(OtherActivity.this);
Intent launcher = new Intent(OtherActivity.this, MainActivity.class);
NotificationCompat.Builder builder = notificationCenter.getNotificationBuilder(
        R.drawable.ic_launcher,
        "message",
        "title",
        notificationCenter.getPendingIntentClass(launcher));
notificationCenter.notify(builder);
終わりに
いかがでしたでしょうか。ライブラリプロジェクトとして読み込みますので、もしライブラリの元を修正したい場合でも簡単に修正できるので、Bootroidはフレームワークとしての手軽さとカスタマイズできる柔軟性を持っていると思います。
また元のAndorid開発手法自体を変えるものではなく、Bootroidは共通の処理を別クラスにまとめただけですので変に元のAndroidプロジェクトを汚す心配もありません。
Bootroid の他に、 Android の SQLite をシンプルに扱うことのできる、 Stroid も公開しておりますので、もし興味がありましたら併せてご参照ください。
Bootroidで快適なAndroid開発ライフを。
