はじめに
Elastic Enterprise Search(EWS)が7.9になってBASICライセンス(無料)での提供がはじまりました(ニュースリリース)。太っ腹。 実は7.8のときにDocker使って軽くお試ししていたのですが、基本機能はもうすぐ無料になるということで静かに待っていました。よーし試すぞー、と試したのでメモ書き。
Elastic Workplace Searchとは
Elastic Workplace Search(以下、EWS)は、Elastic社から「Elastic Enterprise Search」のサブ機能として提供されています。
EWSでは、OSSの全文検索エンジンelasticsearchのフロントエンド機能が提供されていて、いろいろなデータソースにある様々なドキュメントを気軽に検索できるようになるそうです。
↑本当は3つの機能があるぞ、の図(ホームページ)。
目次
- Ubuntu 20.4 on WSL2
- Elastic Workplace Search 構築
1. Ubuntu 20.4 on WSL2
最近、マイマシンのWindowsでWSL2(Windows Subsystem for Linux 2.0)をバージョンアップしたので、せっかくだからとWSL2上で試してみようとなりました。
■ WSL2のアップデート
WSLのインストールはマイクロソフトのページを参考に。WSL2へのアップデートはQiitaを参考にしました。
- Microsoft - Windows 10 用 Windows Subsystem for Linux のインストール ガイド
- Qiita - WSL2入れてみた
■ Ubuntu 20.4 インストール
省略しますが、アップデートしたりWSL1にインストールして大変だった。。
盛大に失敗したりしてるのでQiitaには大変助けられました。。感謝の意を込めてリンク。
- Qiita - (今はまだ)WSL1にUbuntu 20.04を入れるな
ここからセットアップ。
(1) いつものプロキシ設定(/etc/apt/apt.conf.d/proxy.conf)
$ sudo touch /etc/apt/apt.conf.d/proxy.conf
$ sudo vi /etc/apt/apt.conf.d/proxy.conf
以下の通り編集
Acquire::http::Proxy "http://<uid>:<pass>@<proxyhost>:<proxyport>";
Acquire::https::Proxy "http://<uid>:<pass>@<proxyhost>:<proxyport>";
更新先を日本に(jaistが好き)
sudo sed -i.bak -e "s%http://us.archive.ubuntu.com/ubuntu/% \
                 http://ftp.jaist.ac.jp/pub/Linux/ubuntu/%g"  \
                 /etc/apt/sources.list
更新実行
$ sudo apt update
$ sudo apt upgrade -y
(2)もろもろ環境構築
日本語環境をお好みで。
$ sudo apt install -y language-pack-ja
$ sudo update-locale LANG=ja_JP.UTF-8
$ sudo apt install -y manpages-ja manpages-ja-dev
$ sudo dpkg-reconfigure tzdata
$ sudo apt install -y nkf
curlは標準で入っている?
$ sudo apt install -y curl
2.Elastic Workspace Search構築
(参考その1)Elastic - Download Enterprise Search
(参考その2)Elastic - Installing Workspace Search
①Prerequisitesインストール

$ sudo apt install -y openjdk-11-jdk
②Elasticsearchを構築する。
wget使うなら/etc/wgetrcを編集。
$ sudo apt install -y wget
$ vi /etc/wgetrc
認証が必要な場合はいつもの形式。ポート番号の後に"/"がないとエラーになるみたい。use_proxyもonにしておく。
  :
# You can se
# You can set the default proxies for Wget to use for http, https, and ftp.
# They will override the value in the environment.
http_proxy = http://<uid>:<password>@<proxy_host>:<proxy_port>/
https_proxy = http://<uid>:<password>@<proxy_host>:<proxy_port>/

# If you do not want to use proxy at all, set this to off.
use_proxy = on
:
elasticsearchを取得しておく。DLしてゲット。
うまくいかない場合はブラウザでDLしてコピーしても良い。
$ cd ~/
$ wget https://artifacts.elastic.co/downloads/\
       elasticsearch/elasticsearch-7.9.1-linux-x86_64.tar.gz
$ tar xvf elasticsearch-7.9.1-linux-x86_64.tar.gz
$ cd elasticsearch-7.9.1
②の2と3 elasticsearch.confを編集して起動
展開したフォルダにconfigフォルダがあるのでそこにある設定ファイルを編集する。
$ vi ./config/elasticsearch.yml
以下を末尾に追加
xpack.security.enabled: true
xpack.security.authc.api_key.enabled: true
$ ./bin/elasticsaerch
なんのエラーもなく動く(と思う)
②の4 password auto
②の2と3で起動したまま別の窓を開いて実行。
$ cd ~/elasticsearch-7.9.1
$ sudo bin/elasticsearch-setup-passwords auto
  :
Changed password for user apm_system
PASSWORD apm_system = **********

Changed password for user kibana_system
PASSWORD kibana_system = **********

Changed password for user kibana
PASSWORD kibana = **********

Changed password for user logstash_system
PASSWORD logstash_system = **********

Changed password for user beats_system
PASSWORD beats_system = **********

Changed password for user remote_monitoring_user
PASSWORD remote_monitoring_user = **********

Changed password for user elastic
PASSWORD elastic = <ここのパスワードいる>
③Elastic Enterprise Searchを構築する

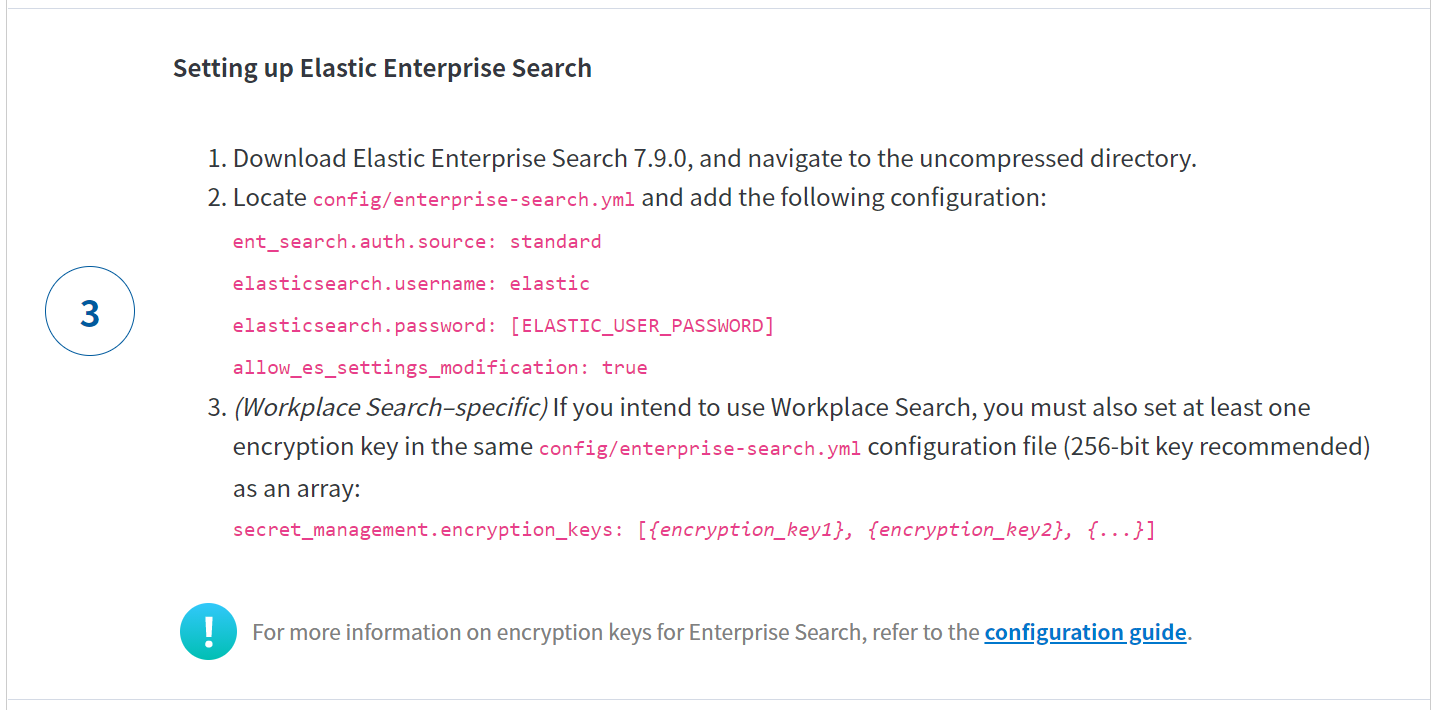
③の1. ダウンロードしてuncompressed
ダウンロードしろとあったのでdlしてuncompressed。
$ cd ~/
$ wget https://artifacts.elastic.co/downloads/\
    enterprise-search/enterprise-search-7.9.1.tar.gz
$ tar xvf enterprise-search-7.9.1.tar.gz
③の2. config/enterprise-search.ymlを見つけて設定追加
$ cd enterprise-search-7.9.1
$ vi ./config/enterprise-search.yml
elasticsearchの認証用に末尾に3行追加する。途中をコメントアウトしてもいい。
さらにelasticsearchクラスタのインデキシングができるように1行追加。プレミアライセンスある場合はいらないとか。
        :
ent_search.auth.source: standard
elasticsearch.username: elastic
elasticsearch.password: <さっき出力されたパスワード>
allow_es_settings_modification: true # クラスタOK
③の3. Workplaceの時はencryption_keysどうしても必要なのよ
ってことでencryption_keys。256bit がいいってあるのでhex 64桁。間違ってたらごめんなさい。
opensshで作成してもいいのかな?
(参考)https://www.elastic.co/guide/en/workplace-search/current/encryption-keys.html#encryption-keys
初期ファイルだとこんな感じ。
# ---------------------------------- Secrets ----------------------------------
#
# Encryption keys to protect your application secrets. This field is required.
#
secret_management.encryption_keys: []
#
$ echo "secret_management.encryption_keys: [" \
  `openssl rand -hex 64`", "`openssl rand -hex 64`"]" >> config/enterprise-search.yml
3の④Enterprise Searchを起動
で、規定のパスワード設定しつつenterpriseの方を起動する。
$ ENT_SEARCH_DEFAULT_PASSWORD=passwordexample bin/enterprise-search
3の⑤アクセス確認
もいっこshell起動してcurlで確認
$ curl -L http://localhost:3002/
<!DOCTYPE html5><head><title>Elastic Enterprise Search</title>
      <link rel="icon" type="image/png" href="http://localhost:3002/enterprise-search-favicon-196x196.png" sizes="196x196" />
:
OH。
追加設定1:Windows-Ubuntu(WSL2)間のポートフォワード
Windows側のポートを確認。
$ netstat -a | findstr LISTEN
(出力は割愛)
Windows側は3002,9200,9300のどのポートもLISTENしていない。
(1) WSLのlocalhostForwarding設定を試す
WSL2 にはWSL2のlocalhost設定をする設定があるらしいので設定(以下を参考に実施)。
結果: NG

OH。Docker上に構築したときはできるのに。。。
(2) netsh.exeのportproxy設定で試す。
リバースプロキシも考えたけどこっちのほうが気軽そうなので。参考にしたのはこちら。sshだけれども。
- Qiita - wsl2でsshサーバを起動し、外部からそこに接続
Windowsのcmd.exdを起動して、Windowsにくる3002,9200,9300をportproxy。
$ netsh.exe interface portproxy add v4tov4 listenaddress=0.0.0.0 listenport=3002 \
connectaddress=<Ubuntuのアドレス> connectport=3002
$ netsh.exe interface portproxy add v4tov4 listenaddress=0.0.0.0 listenport=9200 \
connectaddress=<Ubuntuのアドレス> connectport=9200
$ netsh.exe interface portproxy add v4tov4 listenaddress=0.0.0.0 listenport=9300 \
connectaddress=<Ubuntuのアドレス> connectport=9300
$ netsh.exe interface portproxy show v4tov4
結果: いけた
追加設定2:Elasticをdevelopmentモードで公開する。
せっかくなので外部からもアクセスできるようにしようということで、Elasticの方の設定も変更します。
Elasticsearch 公開ホスト、ポートを設定
外部に公開する場合はelasticsearch.ymlの"network.host"に設定するのですが、そうするとdeveploment mode からproduction modeになってしまい、シングルノードではだめだよ、とかhttps使ってよとか起動時にチェックが入って起動できません。
- Elatic - Bootstrap Checks
production modeではなく、development mode起動させるには、elasticsearch.ymlに次の項目を設定します。
$ cd ~/elasticsearch-7.9.1
$ vi ./config/elasticsearch.yml
http.host: <Ubuntuのアドレス>
transport.host: <Ubuntuのアドレス>
discovery.type: single-node
また、合わせてenterprse-search.ymlのそれらしき設定を編集します。
$ cd ~/enterprise-search-7.9.1
$ vi ./config/enterprise-search.yml
elasticsearch.host: http://<Ubuntuのアドレス>:9200
ent_search.external_url: http://<Ubuntuのアドレス>:3002
ent_search.listen_host: <Ubuntuのアドレス>
ent_search.listen_port: 3002
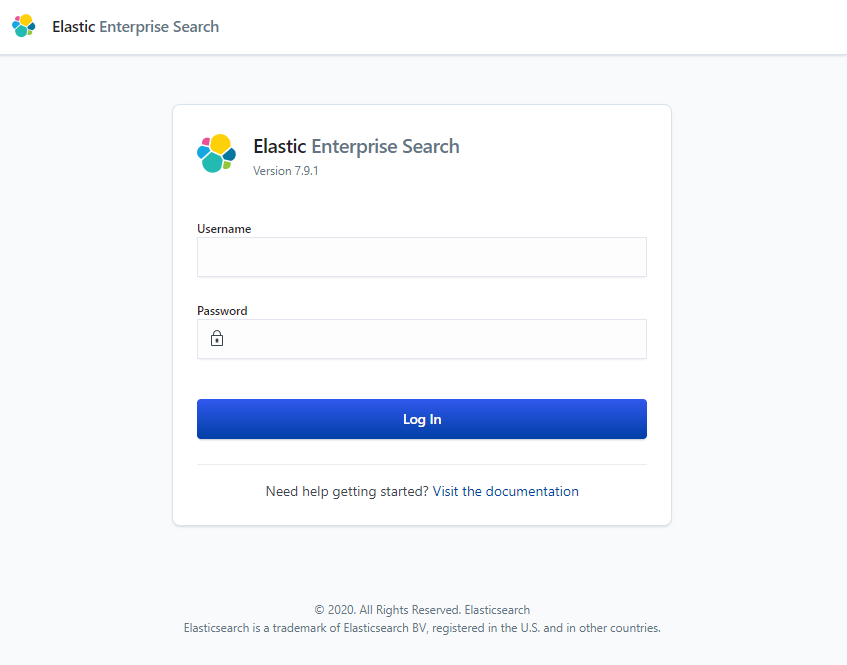
Windowsのブラウザで表示
localhostかWindowsのIPアドレスを使って3002にアクセスすると表示されます。
- uid : enterprise_search
- pwd : 起動時に指定したパスワード(ex. passwordexample)
 できた。
できた。
おわりに。
WSL1に比べてできることが増えたWSL2。頑張って勉強しつつ活用してみます。
Elastic Workplace SearchのBASICライセンスでの公開は、実稼働の前に試す良いチャンス。
次は、EWSへのインデックス登録と使い勝手チェックでも書こうかな。
参考文献
- Elastic | Download Elastic Enterprise Search
- Microsoft - Windows 10 用 Windows Subsystem for Linux のインストール ガイド
- Qiita - WSL2入れてみた
- Qiita - (今はまだ)WSL1にUbuntu 20.04を入れるな
商標など
- Elasticsearchは米国および他の国々で登録されたElasticsearch B.V.の商標です。
- Windowsは,米国Microsoft Corporationの米国およびその他の国における登録商標または商標です。
- 記載の会社名、製品名、サービス名等はそれぞれの会社の商標または登録商標です。


