はじめに
前回の話: 検証用AWSアカウントでGuardDutyと闘う話 〜不用意にポート開けるな編〜
2022年春、桜は散り新緑が眩しくなってきたある日、1通のSlack DMが届いた。月曜の朝の出来事だった。
メッセージの送り主はそう、インシデントレスポンスチームからである。
英語のメッセージで捲し立てられたが、要約するとこう↓いうことである。
SSHのアクセスがパブリックになってるせいでSSH Brute Force受けたぞ。セキュリティグループのSSH消しといたンだわ。こっちはまだ日曜の夕方なんだ。変なアラート出さすなよ。
誠にごめんなさい。
前回の記事で書いたPublic SubnetのSSH 0.0.0.0/0 が原因で攻撃を受けたらしい。
GuardDutyを確認してみると、これまた某国からの攻撃だった。
SSH Brute Forceか...鍵は自分しか持ってないから大丈夫なんじゃないの?という反論を飲み込んでGuardDutyのイベントに目を通す。
そして追加のメッセージも送られてきた。
俺がGuardDuty確認するときはタグを見るから、Purposeとかのタグに「本番データやコードは含まない」と書いとけば次からは見逃してやる。他の奴はどうするか知らんけど。
なるほど、ここらへん個人の運用の裁量に依存しそうだけど、確かにそういうタグをつけておけばアラートを受けた側もわかりやすいかも。
そして最後に↓言われた。
パブリックアクセスは止めろ。ダメ、絶対。
休み中なのに申し訳ないと返信して、とりあえず対処することにした。
とりあえず検証用であることを示すタグを追加
これは簡単
Terraform AWS Providerの default_tags にPurposeを追加するだけなので、メッセージに書いてあった文章をそのままコピペ
provider "aws" {
  region  = var.region
  default_tags {
    tags = {
      Owner     = "${var.email}"
      ManagedBy = "terraform"
      Purpose   = "testing no prod code or customer data"
    }
  }
}
これをapplyするだけで全リソースにタグが適用される。Terraform使っててほんとに良かった。
SSHのパブリックアクセスを禁止させる
「パブリック」ってどういう意味で捉えればいいんだろう?
とりあえずセキュリティグループのInboundを自宅のIPアドレスに限定してみたけど、これでいいのだろうか?
- 自宅のIPアドレスといっても同じISP使ってたら他にも同じIPアドレスの人いるし
- IPアドレスなんてコロコロ変わるから都度書き換えるのめんどくさいし
- そもそもこの設定でパブリックアクセスを禁止していると言えるのか?
resource "aws_security_group" "base_sg" {
  vpc_id = aws_vpc.my_vpc.id
  name   = "${var.prefix}-base-sg"
  description = "Base Security Group"

  ingress {
    from_port   = 22
    to_port     = 22
    protocol    = "tcp"
    cidr_blocks = ["${var.home_cidr}"]
    description = "SSH from Home"
  }

  ingress {
    from_port   = 0
    to_port     = 65535
    protocol    = "tcp"
    self        = true
    description = "ingress traffic from myself"
  }

  ingress {
    from_port   = 0
    to_port     = 65535
    protocol    = "tcp"
    security_groups = [aws_security_group.elb_sg.id, aws_security_group.home_sg.id]
    description = "ingress traffic from load balancers"
  }

  egress {
    from_port   = 0
    to_port     = 0
    protocol    = "-1"
    cidr_blocks = ["0.0.0.0/0"]
  }

  tags = {
    Name = "${var.prefix}-base-sg"
  }
}
しかもこれ、セキュリティグループを限定しているとはいえ、全ポートを開放しているの良くないよな。
検証用とはいえ、流石にこれは怖くなってきた。
じゃあどうしよう?
「パブリック許可すな」っていうのはつまり「インターネット経由すな」って意味なのか?
そんなんSSHするときインターネット経由でのアクセス必要になるじゃん。無理じゃん。どうしろって言うんだよ!?
仕事柄VPN使うことないからVPNのアクセス権を会社から支給されてないし。
ん?じゃあ自分でVPN作れば良くない?
何かいい方法ないかな・・・あっ、まさに これ ができるといいな!
Client VPN EndpointにアタッチしたセキュリティグループからのみSSHを許可すれば、パブリックアクセスじゃないと言い切れるよね。
TerraformでClient VPNをデプロイする
ステップとしてはこちら↓
- 証明書を作成してACM登録
- Client VPN Endpoint用のセキュリティグループを作成
- Route53のPrivate ZoneとResolverを作成
- Log GroupとLog Streamを作成
- Client VPN Endpointを作成
- Mac用Client VPNをダウンロードして設定
うーん、けっこうあるね。一つずつ見ていこうか。
証明書を作成してACM登録
まずはオレオレ認証局を立ててサーバー証明書とクライアント証明書を発行
locals {
  ca_private_key_file     = "${var.key_file_path}/ca/${var.prefix}-ca-private-key.id_rsa.pem"
  ca_cert_file            = "${var.key_file_path}/ca/${var.prefix}-ca.cer"

  server_private_key_file = "${var.key_file_path}/server/${var.prefix}-server-private-key.id_rsa.pem"
  server_csr_file         = "${var.key_file_path}/server/${var.prefix}-server.csr"
  server_cert_file        = "${var.key_file_path}/server/${var.prefix}-server.pem"
  server_cert_chain_file  = "${var.key_file_path}/server/${var.prefix}-server-chain.pem"

  client_private_key_file = "${var.key_file_path}/client/${var.prefix}-client-private-key.id_rsa.pem"
  client_csr_file         = "${var.key_file_path}/client/${var.prefix}-client.csr"
  client_cert_file        = "${var.key_file_path}/client/${var.prefix}-client.pem"
}

# ----------------------------------------------------------------
# Private CA
# ----------------------------------------------------------------

resource "tls_private_key" "ca_private_key" {
  algorithm = "RSA"
}

resource "local_file" "ca_private_key_pem" {
  filename = local.ca_private_key_file
  content  = tls_private_key.ca_private_key.private_key_pem

  provisioner "local-exec" {
    command = "chmod 600 ${local.ca_private_key_file}"
  }
}

resource "tls_self_signed_cert" "ca_cert" {
  private_key_pem       = tls_private_key.ca_private_key.private_key_pem
  validity_period_hours = 87600  # 10 Years
  is_ca_certificate     = true

  subject {
    common_name  = "Private CA"
    country      = "JP"
    locality     = "Tokyo"
    organization = "Private CA"
  }

  allowed_uses = [
    "cert_signing"
  ]
}

resource "local_file" "ca_cert_pem" {
  filename = local.ca_cert_file
  content  = tls_self_signed_cert.ca_cert.cert_pem

  provisioner "local-exec" {
    command = "chmod 600 ${local.ca_cert_file}"
  }
}

# ----------------------------------------------------------------
# Server Cert
# ----------------------------------------------------------------

resource "tls_private_key" "server_private_key" {
  algorithm = "RSA"
}

resource "local_file" "server_private_key_pem" {
  filename = local.server_private_key_file
  content  = tls_private_key.server_private_key.private_key_pem

  provisioner "local-exec" {
    command = "chmod 600 ${local.server_private_key_file}"
  }
}

resource "tls_cert_request" "server_csr" {
  private_key_pem = tls_private_key.server_private_key.private_key_pem

  subject {
    common_name  = "*.mydomain.internal"
    organization = "Internal"
  }
}

resource "local_file" "server_csr_pem" {
  filename = local.server_csr_file
  content  = tls_cert_request.server_csr.cert_request_pem

  provisioner "local-exec" {
    command = "chmod 600 ${local.server_csr_file}"
  }
}

resource "tls_locally_signed_cert" "server_cert" {
  cert_request_pem   = tls_cert_request.server_csr.cert_request_pem
  ca_private_key_pem = tls_private_key.ca_private_key.private_key_pem
  ca_cert_pem        = tls_self_signed_cert.ca_cert.cert_pem

  validity_period_hours = 43800  # 5 Years

  allowed_uses = [
    "key_encipherment",
    "digital_signature",
    "server_auth",
  ]
}

resource "local_file" "server_cert_pem" {
  filename = local.server_cert_file
  content  = tls_locally_signed_cert.server_cert.cert_pem

  provisioner "local-exec" {
    command = "chmod 600 ${local.server_cert_file}"
  }
}

# ----------------------------------------------------------------
# Client Cert
# ----------------------------------------------------------------

resource "tls_private_key" "client_private_key" {
  algorithm = "RSA"
}

resource "local_file" "client_private_key_pem" {
  filename = local.client_private_key_file
  content  = tls_private_key.client_private_key.private_key_pem

  provisioner "local-exec" {
    command = "chmod 600 ${local.client_private_key_file}"
  }
}

resource "tls_cert_request" "client_csr" {
  private_key_pem = tls_private_key.client_private_key.private_key_pem

  subject {
    common_name  = "kikeyama"
    organization = "Internal"
  }
}

resource "local_file" "client_csr_pem" {
  filename = local.client_csr_file
  content  = tls_cert_request.client_csr.cert_request_pem

  provisioner "local-exec" {
    command = "chmod 600 ${local.client_csr_file}"
  }
}

resource "tls_locally_signed_cert" "client_cert" {
  cert_request_pem   = tls_cert_request.client_csr.cert_request_pem
  ca_private_key_pem = tls_private_key.ca_private_key.private_key_pem
  ca_cert_pem        = tls_self_signed_cert.ca_cert.cert_pem

  validity_period_hours = 43800  # 5 Years

  allowed_uses = [
    "key_encipherment",
    "digital_signature",
    "client_auth",
  ]
}

resource "local_file" "client_cert_pem" {
  filename = local.client_cert_file
  content  = tls_locally_signed_cert.client_cert.cert_pem

  provisioner "local-exec" {
    command = "chmod 600 ${local.client_cert_file}"
  }
}
※ 眠かったので allowed_uses はかなり適当。いつかは見直したい。
そしてサーバー証明書をACMに登録
同じCAから発行された場合はクライアント証明書は登録不要らしい
resource "aws_acm_certificate" "internal_acm" {
  private_key       = tls_private_key.server_private_key.private_key_pem
  certificate_body  = tls_locally_signed_cert.server_cert.cert_pem
  certificate_chain = tls_self_signed_cert.ca_cert.cert_pem
}
Client VPN Endpoint用のセキュリティグループを作成
このブログ記事によるとInboundは不要らしい。
なるほど、ありがとうクラメソさん!
最初はClient VPN Endpointの設定に合わせて UDP 443 を設定していたけど削除した
resource "aws_security_group" "client_vpn_sg" {
  vpc_id = aws_vpc.my_vpc.id
  name   = "${var.prefix}-client-vpn-sg"
  description = "Client VPN Security Group"

  egress {
    from_port   = 0
    to_port     = 0
    protocol    = "-1"
    cidr_blocks = ["0.0.0.0/0"]
  }

  tags = {
    Name = "${var.prefix}-client-vpn-sg"
  }
}
Route53のPrivate ZoneとResolverを作成
仮に自分の端末から直接SSHでPrivate IP指定してSSHできるようになったとしても、各インスタンスのIPアドレスなんて覚えられないから、名前解決させたいよね
ということで、まずはPrivate Zone
resource "aws_route53_zone" "mydomain_internal" {
  name = "mydomain.internal"

  vpc {
    vpc_id = aws_vpc.my_vpc.id
  }

  tags = {
    Name = "${var.prefix}-internal-zone"
  }
}
前回の話の続きとして、SplunkインスタンスのプライベートFQDNはこれで登録
resource "aws_route53_record" "splunk_mydomain_internal" {
  zone_id = aws_route53_zone.mydomain_internal.zone_id
  name    = "splunk.mydomain.internal"
  type    = "A"
  ttl     = "60"
  records = [aws_instance.ec2_splunk.private_ip]
}
VPNから名前解決させるにはDNS Resolver Endpointが必要らしい
セキュリティグループのInboundはVPNのセキュリティグループを指定
各AZのサブネットに作成するので、dynamicブロックとfor_eachを使用
resource "aws_route53_resolver_endpoint" "resolver" {
  name      = "${var.prefix}-resolver"
  direction = "INBOUND"

  security_group_ids = [
    aws_security_group.dns_resolver_sg.id
  ]

  dynamic "ip_address" {
    for_each = aws_subnet.private_subnet
    content {
      subnet_id = ip_address.value.id
    }
  }

  tags = {
    Name = "${var.prefix}-resolver"
  }
}

resource "aws_security_group" "dns_resolver_sg" {
  vpc_id = aws_vpc.my_vpc.id
  name   = "${var.prefix}-dns-resolver-sg"
  description = "DNS Resolver Security Group"

  ingress {
    from_port       = 53
    to_port         = 53
    protocol        = "udp"
    security_groups = [aws_security_group.client_vpn_sg.id]
    description     = "DNS Resolver UDP"
  }

  ingress {
    from_port       = 53
    to_port         = 53
    protocol        = "tcp"
    security_groups = [aws_security_group.client_vpn_sg.id]
    description     = "DNS Resolver TCP"
  }

  egress {
    from_port   = 0
    to_port     = 0
    protocol    = "-1"
    cidr_blocks = ["0.0.0.0/0"]
  }

  tags = {
    Name = "${var.prefix}-dns-resolver-sg"
  }
}
Log GroupとLog Streamを作成
Client VPN Endpointのログ配信用にCloudWatchのロググループとログストリームを作成
resource "aws_cloudwatch_log_group" "client_vpn_lg" {
  name              = "/aws/client-vpn-endpoint/${var.prefix}"
  retention_in_days = 90

  tags = {
    Name = "${var.prefix}-client-vpn-lg"
  }
}

resource "aws_cloudwatch_log_stream" "client_vpn_ls" {
  name           = "${var.prefix}-client-vpn-endpoint"
  log_group_name = aws_cloudwatch_log_group.client_vpn_lg.name
}
Client VPN Endpointを作成
そしていよいよClient VPN Endpointである
事前に色々作らなきゃいけないものが多かったね
躓いたポイントは↓
- CIDRブロックは最低でも
/22にしないといけない(最初/24でやったらコケた) - Resolver Endpointを各サブネットに登録してあるから、
dns_serversにはforで全て登録
resource "aws_ec2_client_vpn_endpoint" "client_vpn_endpoint" {
  description            = "my client vpn endpoint"
  server_certificate_arn = aws_acm_certificate.internal_acm.arn
  client_cidr_block      = "10.0.200.0/22"
  transport_protocol     = "udp"
  vpc_id                 = aws_vpc.my_vpc.id
  vpn_port               = "443"
  security_group_ids     = [aws_security_group.client_vpn_sg.id]

  dns_servers            = [
    for r in aws_route53_resolver_endpoint.resolver.ip_address : r.ip
  ]

  authentication_options {
    type                       = "certificate-authentication"
    root_certificate_chain_arn = aws_acm_certificate.internal_acm.arn
  }

  connection_log_options {
    enabled               = true
    cloudwatch_log_group  = aws_cloudwatch_log_group.client_vpn_lg.name
    cloudwatch_log_stream = aws_cloudwatch_log_stream.client_vpn_ls.name
  }

  tags = {
    Name = "${var.prefix}-client-vpn-endpoint"
  }
}
Client VPN EndpointのRoute TableにPrivate Subnetを付与
resource "aws_ec2_client_vpn_network_association" "client_vpn_association" {
  for_each               = aws_subnet.private_subnet
  client_vpn_endpoint_id = aws_ec2_client_vpn_endpoint.client_vpn_endpoint.id
  subnet_id              = each.value.id
}
Route TableにインターネットEgressを付与
resource "aws_ec2_client_vpn_route" "client_vpn_internet_route" {
  for_each               = aws_subnet.private_subnet
  client_vpn_endpoint_id = aws_ec2_client_vpn_endpoint.client_vpn_endpoint.id
  destination_cidr_block = "0.0.0.0/0"
  target_vpc_subnet_id   = each.value.id
}
Authorization Rules追加
各サブネット(前半部分)とインターネットEgress(後半部分)の2つを作成
resource "aws_ec2_client_vpn_authorization_rule" "client_vpn_authorization" {
  for_each               = aws_subnet.private_subnet
  client_vpn_endpoint_id = aws_ec2_client_vpn_endpoint.client_vpn_endpoint.id
  target_network_cidr    = each.value.cidr_block
  authorize_all_groups   = true
}

resource "aws_ec2_client_vpn_authorization_rule" "client_vpn_internet_authorization" {
  client_vpn_endpoint_id = aws_ec2_client_vpn_endpoint.client_vpn_endpoint.id
  target_network_cidr    = "0.0.0.0/0"
  authorize_all_groups   = true
}
これらをapplyすればClient VPN Endpointは作成される
Mac用Client VPNをダウンロードして設定
そしてクライアント側の設定に移る
まずはコンソールから設定ファイルをダウンロード
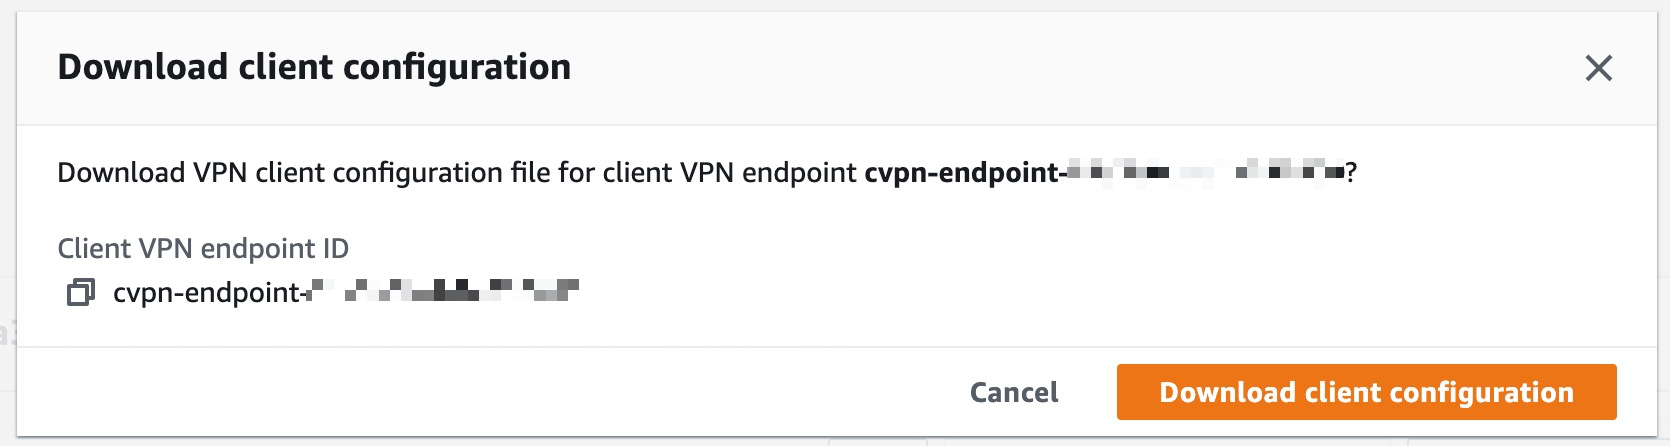
ダウンロードした .ovpn 設定ファイルをいじる
- ドメイン名に適当なサブドメインを追加
-
<cert></cert>と<key></key>を追加して保存
...
remote asdfa.cvpn-endpoint-xxxxxxxxxxxxxxxxx.prod.clientvpn.ap-northeast-1.amazonaws.com 443
...

<ca>
-----BEGIN CERTIFICATE-----
Root CAの証明書
-----END CERTIFICATE-----

</ca>

# ここから追加
<cert>
-----BEGIN CERTIFICATE-----
作成したクライアント証明書
-----END CERTIFICATE-----

</cert>

<key>
-----BEGIN RSA PRIVATE KEY-----
クライアント証明書のプライベートキー
-----END RSA PRIVATE KEY-----

</key>
そしてAWS VPN Clientをダウンロード
https://aws.amazon.com/jp/vpn/client-vpn-download/
編集した設定ファイルをVPN Clientのプロファイルに追加
[File] > [Manage Profiles]からAdd Profile
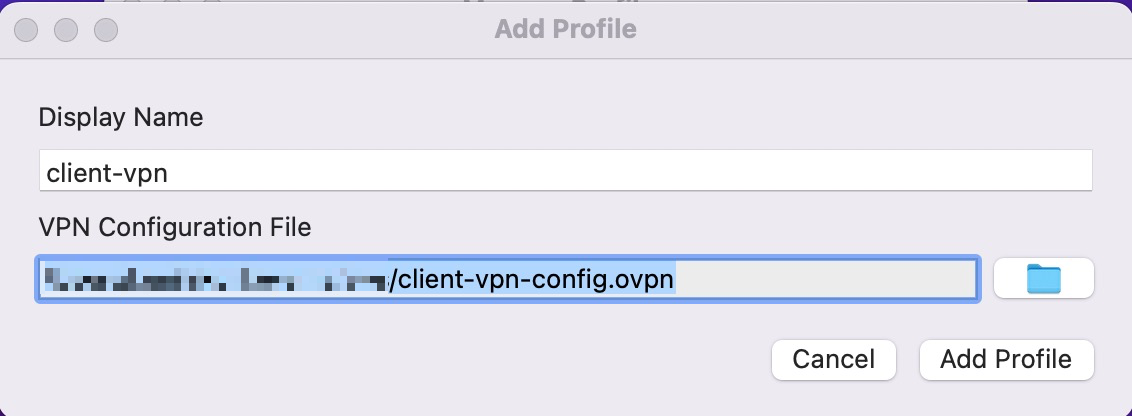
この状態でConnectをクリックするとVPNつながるよ
EC2にアタッチするセキュリティグループを編集
最後にEC2のセキュリティグループを編集しよう
- EC2インスタンス間でのSSH用に自分自身のセキュリティグループのInboundを許可
- Client VPN EndpointからのSSHを許可
- 特定セキュリティグループからの全ポート開放は怖いから削除
resource "aws_security_group" "base_sg" {
  vpc_id = aws_vpc.my_vpc.id
  name   = "${var.prefix}-base-sg"
  description = "Base Security Group"

  ingress {
    from_port   = 22
    to_port     = 22
    protocol    = "tcp"
    self        = true
    description = "SSH from This Security Group"
  }

  ingress {
    from_port       = 22
    to_port         = 22
    protocol        = "tcp"
    security_groups = [aws_security_group.client_vpn_sg.id]
    description     = "SSH from VPN Client"
  }

  egress {
    from_port   = 0
    to_port     = 0
    protocol    = "-1"
    cidr_blocks = ["0.0.0.0/0"]
  }

  tags = {
    Name = "${var.prefix}-base-sg"
  }
}
このセキュリティグループを各インスタンスにアタッチすればいいね。
うまくいったかな?
VPNつないだ状態で自分の端末からSplunkのインスタンスに接続してみよう。
$ ssh ubuntu@splunk.mydomain.internal
Welcome to Ubuntu 18.04.6 LTS (GNU/Linux 5.4.0-1059-aws x86_64)
...
Last login: Mon May  2 13:55:20 2022 from 10.0.x.xx
ubuntu@kikeyama-splunk:~$
うんうん、うまくいった!
更に WhatIsMyIp にアクセスするとNAT GatewayにアタッチしたElastic IPになっていることが確認できるよ。
おわりに
今回はけっこう大がかりなもので正直めんどくさかった。
「パブリックアクセス止めろ」って言われてもどうしたらいいんだという困惑と、どうしようもなくね!?という憤りも混じった複雑な感情になりながらも解決策に辿り着いたので、かなり満足。
ここまでやればもう大丈夫だろうという思いはあるものの、いかんせん多数のリソースを自分1人で管理しているので、何かしらの抜け漏れがありそう。
これ以上インシデントレスポンスチームに迷惑をかけたくないので、もう一度セキュリティグループを見直そうかな。
2022年5月現在、GuardDutyにはこれ以上何も出ていないが、もしかしたらまた何らかの攻撃を受けるかもしれない。
そのときはこのシリーズの記事を追加投稿しよう。
関連リンク
第1回: 検証用AWSアカウントでGuardDutyと闘う話 〜S3バケット編〜
第2回: 検証用AWSアカウントでGuardDutyと闘う話 〜不用意にポート開けるな編〜
第3回: 検証用AWSアカウントでGuardDutyと闘う話 〜怒りのVPN編〜(当記事)