A. 概要
- mBaaSのParseを使用して、テーブル間のリレーションを張る
- 今回はユーザーとツイートを1対多の関係にして、そのユーザーのツイートだけを抽出
- 抽出したデータはUITableViewに表示する
[注] ViewControllerはVCと表記しています。
1. ユーザーをforeignKeyに持たしてTweetを投稿
まず、Tweetを投稿するためのVCをストーリーボードとCocoa Touch ClassでComposeVC.swiftというファイルを作成します。
次に、ストーリーボード上で、TextFieldとボタンを用意して投稿できる形に整えます。
上記2点が完了したら、ComposeVC.swiftに下記のような関数を追加します。
    @IBOutlet var tweetTextView: UITextView! = UITextView()

    @IBAction func sendTweet(sender: AnyObject) {
        // classの作成。特にmigrationとかを書けなくても下記の一行でテーブルが作成されます。
        var tweet:PFObject = PFObject(className: "Tweets")

        // 生成するデータ
        tweet["content"] = tweetTextView.text
        tweet["tweeter"] = PFUser.currentUser()

        tweet.saveInBackground()

        self.navigationController.popToRootViewControllerAnimated(true)

    }
これでcontentとtweeterというカラムが生成されます。(二度目以降は存在するカラムにデータが入るようになります。)
ここで、tweeterというカラムに現在のユーザーのobjectIdを突っ込み、foreignKeyとしてリレーションが張れます。これだけでOK。
あとはストーリーボードから@IBOutletにドラッグでアクションを関連付けます。
2. 現在のユーザーのTweetをTableViewで表示する
最初に、ストーリーボードでTableVCを作成し、それと同時に以下の2つファイルを作成する。(Cocoa touch classを選択する)
- MyTimelineTableVC.swift(UITableVC)
- MyTweetTableViewCell.swift(UITableViewCell)
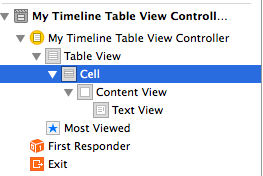
ファイルを作成したら、ストーリーボードでVCのClassをMyTimelineTableVCに変更し、CellのClassをMyTweetTableViewCellに変更する
(Cellのクラスは、ストーリーボードの左下のDocument Outlineからやります)
次に、MyTweetTableViewCell.swiftを編集します。
import UIKit

class MyTweetTableViewCell: UITableViewCell {

	// ストーリーボードでtextViewを追加しておいて、下記のIBOutletとひもづける
    @IBOutlet weak var tweetTextView: UITextView! = UITextView()

	required override convenience init(style: UITableViewCellStyle, reuseIdentifier: String) {
        self.init(style: style, reuseIdentifier: reuseIdentifier)
        // Initialization code
    }

    override func awakeFromNib() {
        super.awakeFromNib()
        // Initialization code
    }

    override func setSelected(selected: Bool, animated: Bool) {
        super.setSelected(selected, animated: animated)

        // Configure the view for the selected state
    }

}
次に、MyTimelineTableVC.swiftを編集します。
import UIKit

class MyTimelineTableViewController: UITableViewController {

    var timelineData:NSMutableArray = NSMutableArray()


    required init(coder aDecoder: NSCoder!) {
        super.init(coder: aDecoder)
    }

    func loadData(){
        timelineData.removeAllObjects()

        // Tweetsテーブルを参照
        var findCurrentUserTweets:PFQuery = PFQuery(className: "Tweets")
		// Tweetsテーブルのtweeterカラムから現在のユーザーのobjectidと一致するデータを抽出
        findCurrentUserTweets.whereKey("tweeter", equalTo: PFUser.currentUser())

        findCurrentUserTweets.findObjectsInBackgroundWithBlock{
            (objects:[AnyObject]!, error:NSError!)->Void in

            if !error{
                for object in objects{
                    self.timelineData.addObject(object)
                }

                let array:NSArray = self.timelineData.reverseObjectEnumerator().allObjects
                self.timelineData = array as NSMutableArray

                self.tableView.reloadData()
            }
        }
    }

    override func viewDidAppear(animated: Bool) {

        self.loadData()

    }

    override func viewDidLoad() {
        super.viewDidLoad()

        // Uncomment the following line to preserve selection between presentations
        // self.clearsSelectionOnViewWillAppear = false

        // Uncomment the following line to display an Edit button in the navigation bar for this view controller.
        // self.navigationItem.rightBarButtonItem = self.editButtonItem()
    }

    override func didReceiveMemoryWarning() {
        super.didReceiveMemoryWarning()
        // Dispose of any resources that can be recreated.
    }

    // MARK: - Table view data source

    override func numberOfSectionsInTableView(tableView: UITableView!) -> Int {
        // #warning Potentially incomplete method implementation.
        // Return the number of sections.
        return 1
    }

    override func tableView(tableView: UITableView!, numberOfRowsInSection section: Int) -> Int {
        // #warning Incomplete method implementation.
        // Return the number of rows in the section.
        // データの数だけrowを返す
        return timelineData.count
    }


    override func tableView(tableView: UITableView?, cellForRowAtIndexPath indexPath: NSIndexPath!) -> UITableViewCell! {
        let cell:MyTweetTableViewCell = tableView!.dequeueReusableCellWithIdentifier("Cell", forIndexPath: indexPath) as MyTweetTableViewCell

        let tweet:PFObject = self.timelineData.objectAtIndex(indexPath!.row) as PFObject

        cell.tweetTextView.text = tweet.objectForKey("content") as String

        return cell
    }
}
リレーションを使っている部分は下記の2行のみです。
        // Tweetsテーブルを参照
        var findCurrentUserTweets:PFQuery = PFQuery(className: "Tweets")
		// Tweetsテーブルのtweeterカラムから現在のユーザーのobjectidと一致するデータを抽出
        findCurrentUserTweets.whereKey("tweeter", equalTo: PFUser.currentUser())
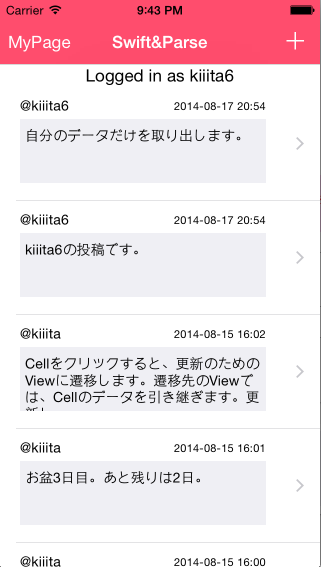
これで通常のタイムラインには全ユーザーのデータが流れて、
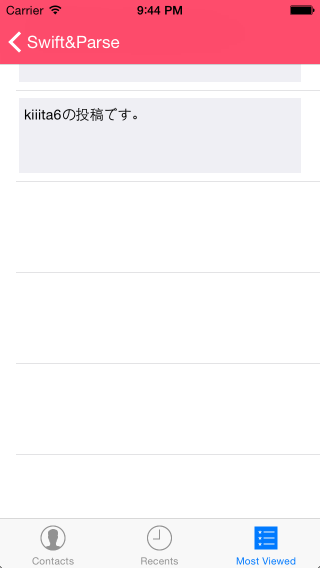
マイページには自分のタイムラインのみが流れるようになりました。
(通常のタイムラインに関しては、過去記事を参照してください)


