目的
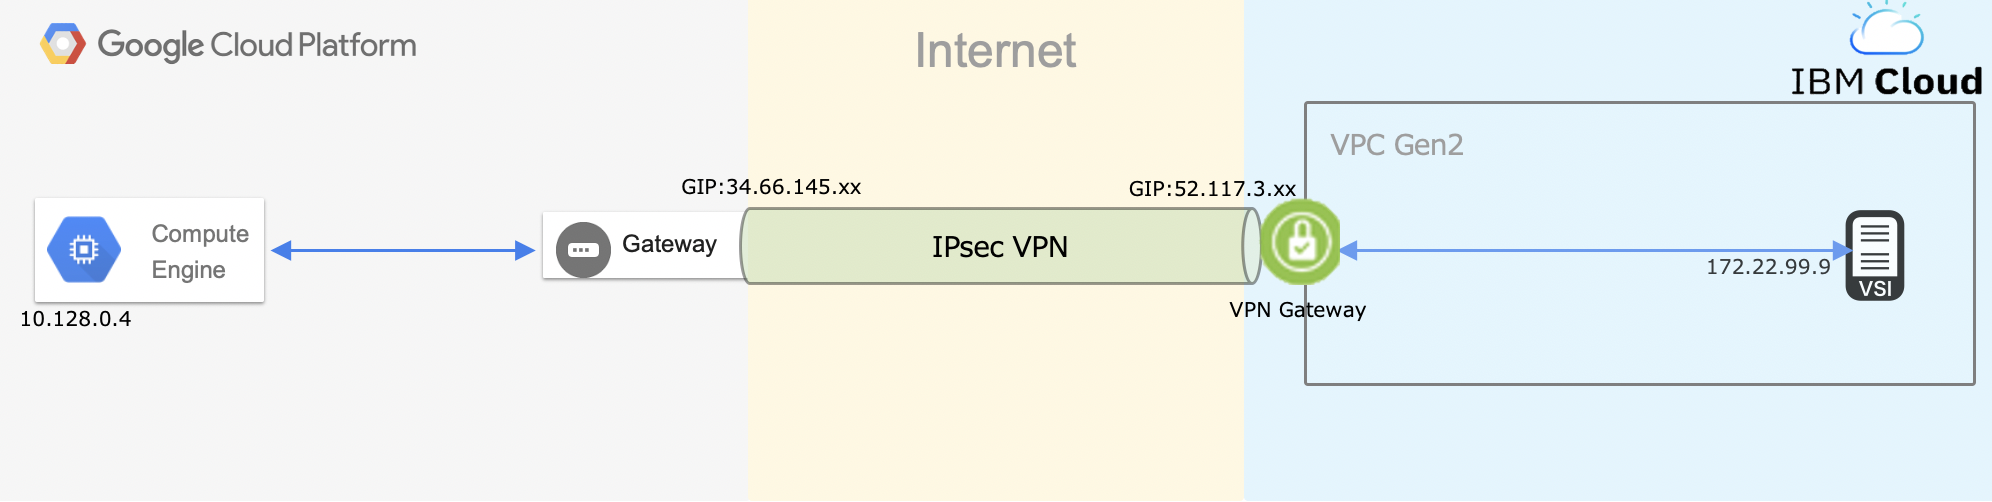
IBMCloud(VPCGen2)とGoogle Cloudをインターネットを介しIPsecVPNで接続する。
その後、IBMCloudとGCP間で仮想マシン同士の通信ができる事を確認する。
構成
- ローカル端末:macOS Ventura 13.5 1台
- プラットフォーム:IBMCloud
- VPCGen2:VPN for VPC 1サービス
- 仮想サーバ:CentOS 7.7.1908(Virtual Server for VPC) 1台
- プラットフォーム:Google Cloud
- VPC Network:外部アドレス/VPNGateway 1サービス
- Compute Engine:Debian 4.19.132-1 1台
IBMCloud VPN設定
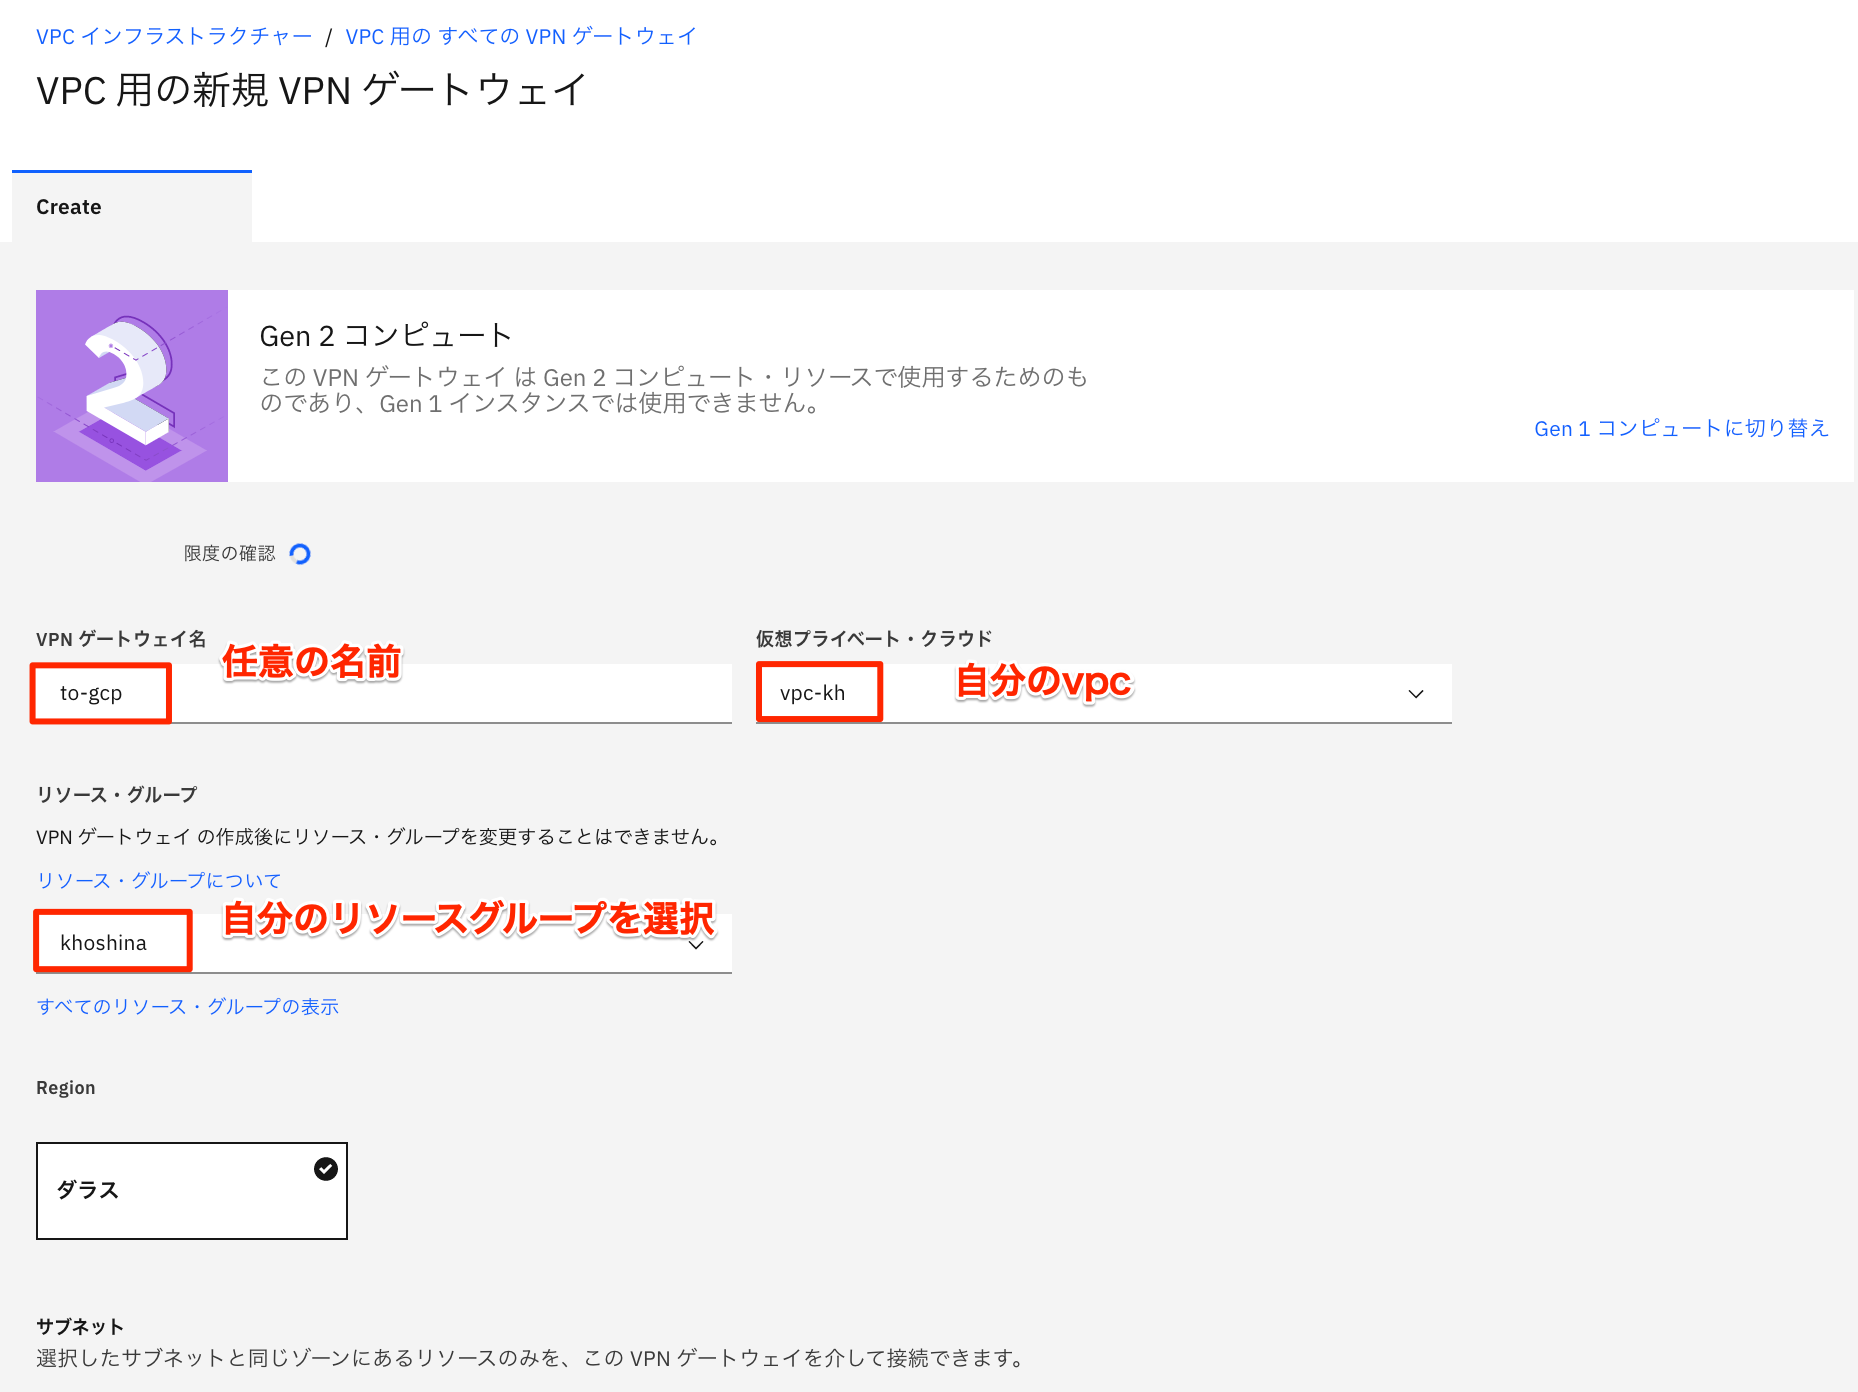
VPNゲートウェイの作成
- VPNゲートウェイ名:任意の名前を入力
- 仮想プライベートクラウド:自分のVPCを選択
- リソースグループ:自分のリソースグループを選択
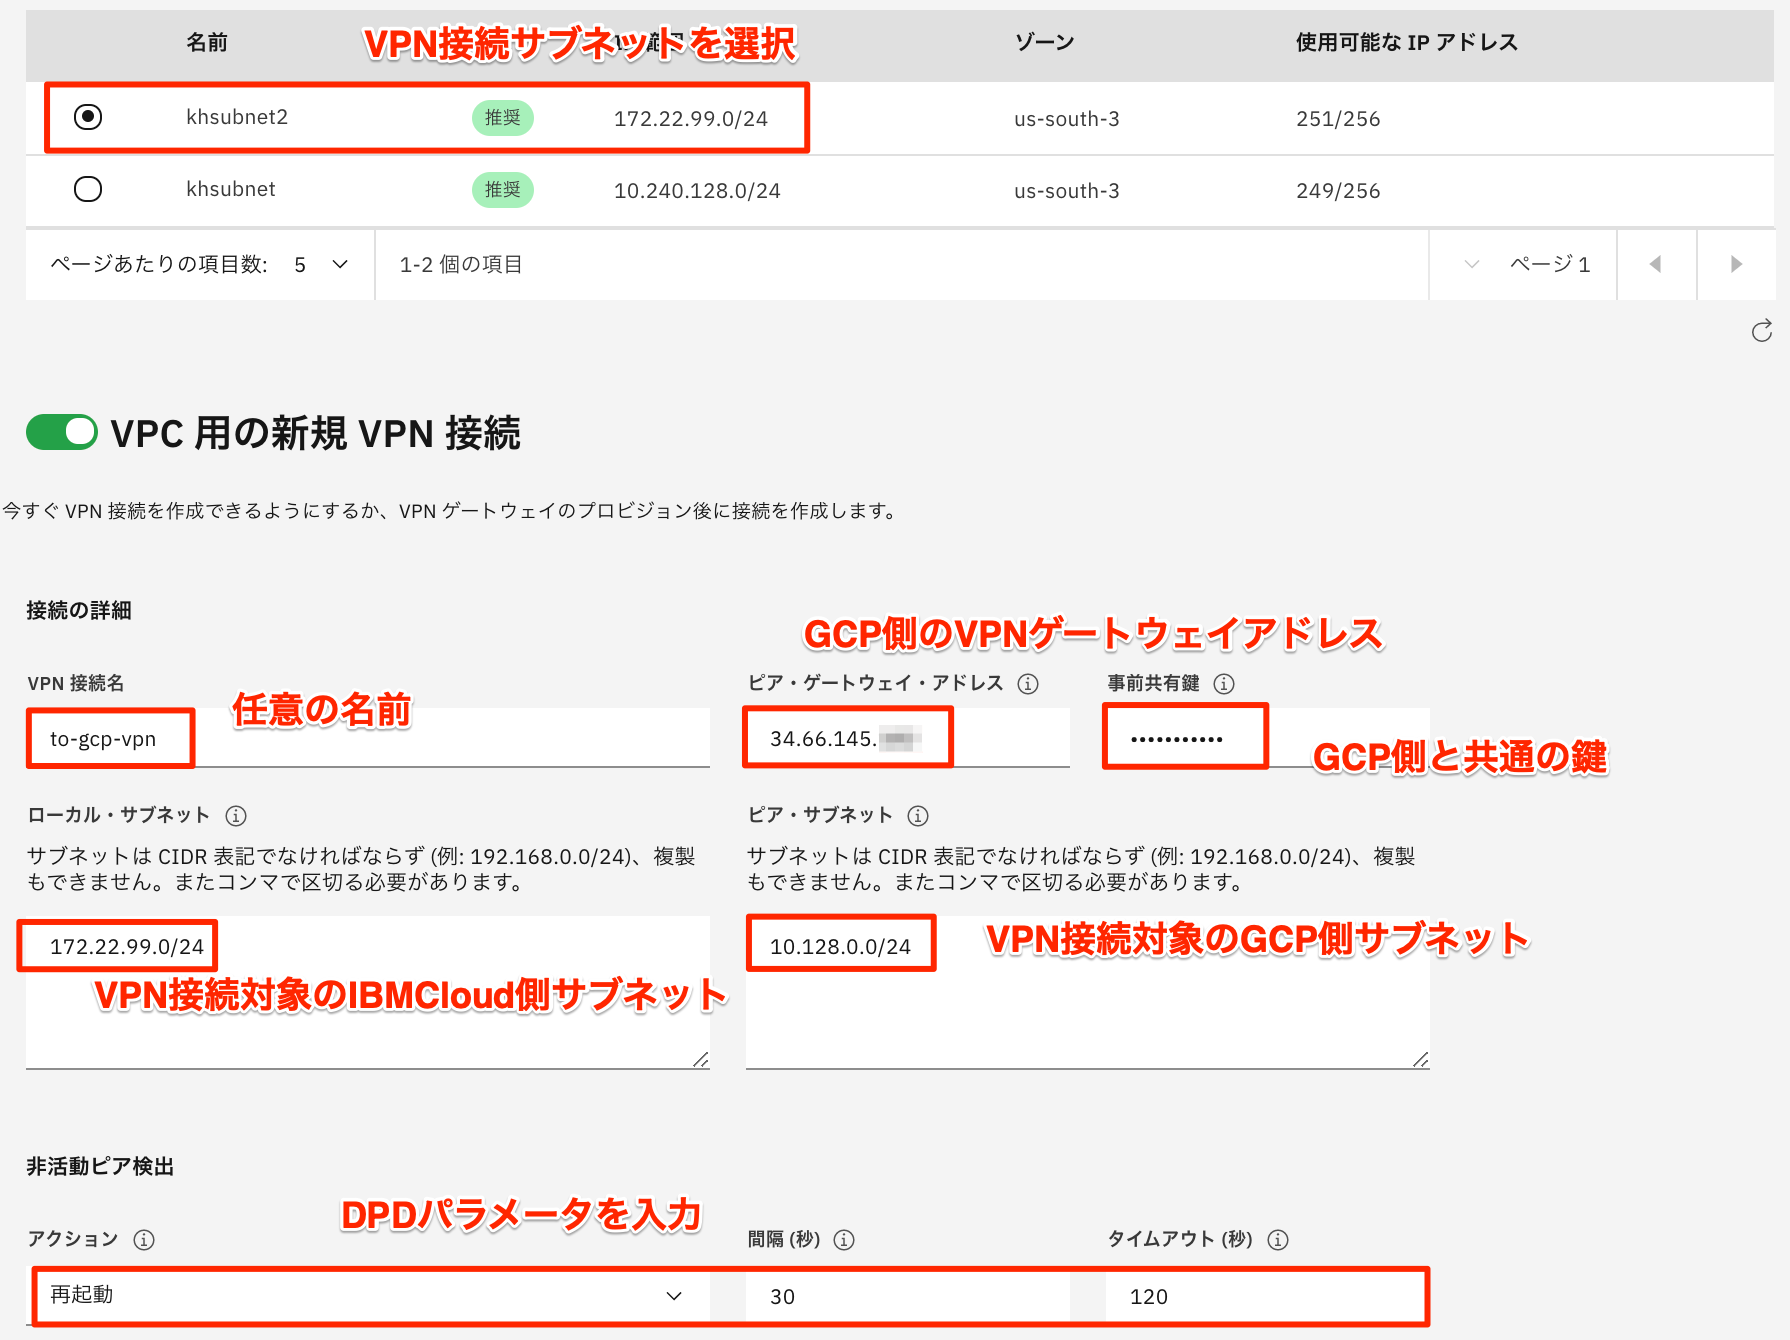
- サブネット:VPN接続対象のサブネットを選択
- VPN接続名:任意の名前
- ピアゲートウェイアドレス:GCP側のVPNゲートウェイアドレス
- 事前共有鍵:IBMCloudとGCPで一緒の鍵(今回はibmcloudgcp)
- ローカルサブネット:IBMCloud側のVPN接続対象サブネット
- ピアサブネット:GCP側のVPN接続対象サブネット
- 非活動ピア検証:DPDパラメータを任意で設定
IKEポリシーの作成
VPNゲートウェイ作成のページから、新規IKEポリシーを選択

- 名前:任意の名前
- リソースグループ:自分のリソースグループを選択
- IKE関連:GCPでサポートしているパラメータを選択するGCP:サポートされている IKE の暗号

各パラメータを入力し、IKEポリシーの作成を選択
IPsecポリシーの作成
VPNゲートウェイ作成のページから、新規IPsecポリシーを選択

- 名前:任意の名前
- リソースグループ:自分のリソースグループを選択
- IPsec関連:GCPでサポートしているパラメータを選択するGCP:サポートされている IKE の暗号
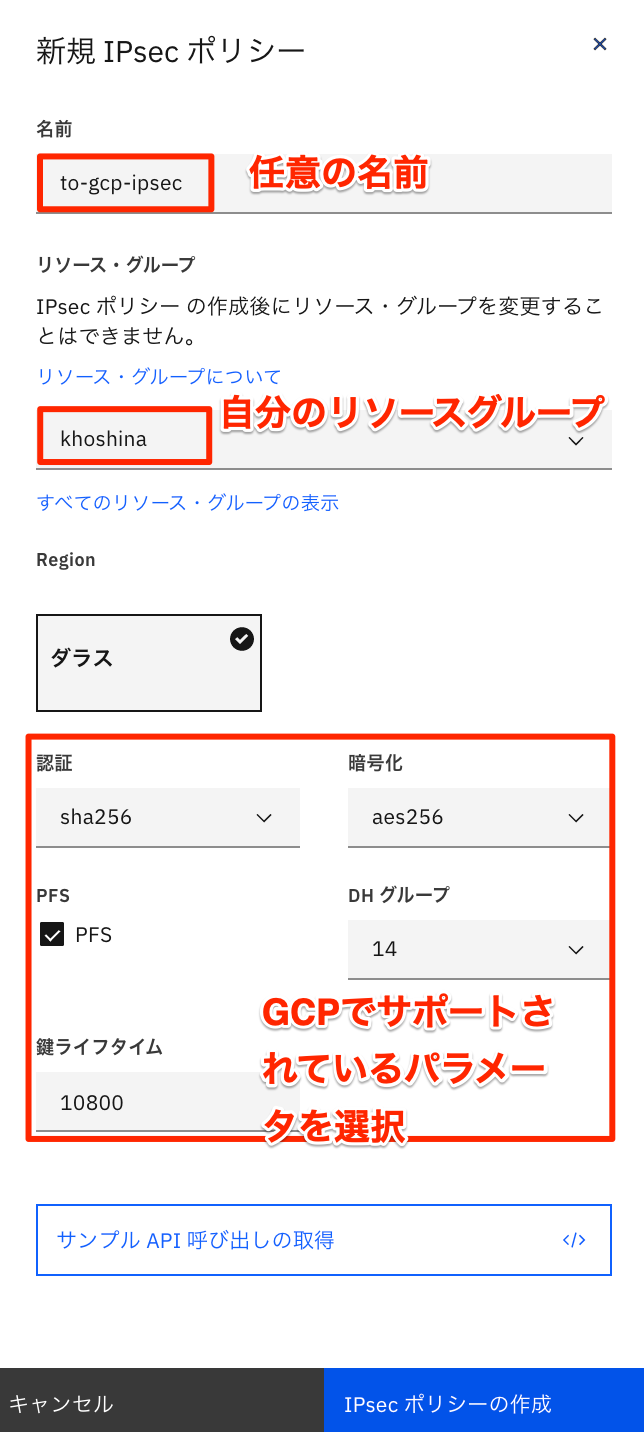
各パラメータを入力し、IPsecポリシーの作成を選択し、VPNゲートウェイの作成を選択
GCP VPN設定
GUIでやる場合
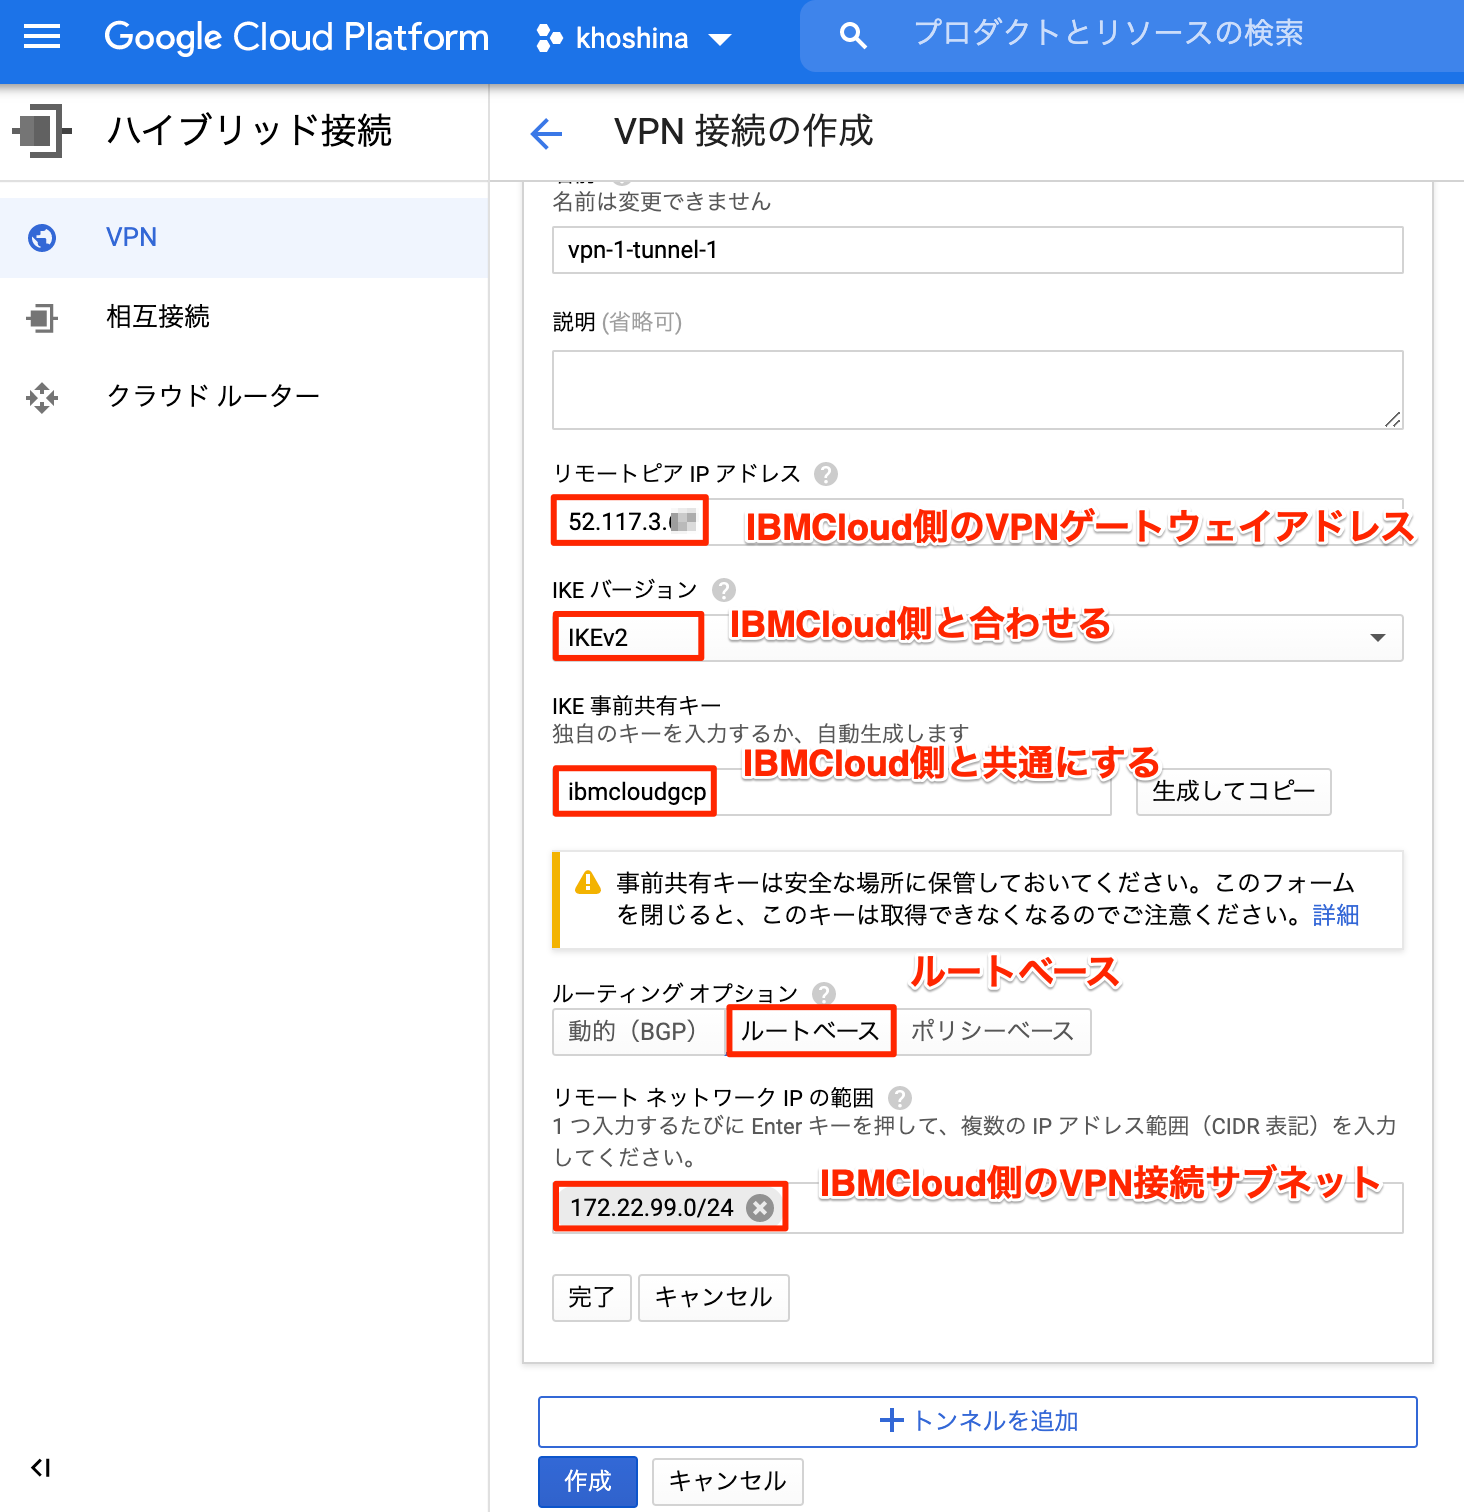
VPN接続を作成する
- 名前:任意の名前
- リモートピアIPアドレス:IBMCloud側のグローバルIPアドレス(今回は52.117.3.xx)
- IKEバージョン:IKEバージョンを指定(IBMCloud側と合わせる)
- IKE事前共有キー:IBMCloud側と一致したキー
- ルーティングオプション:ルートベースを選択
- リモートネットワークのIPの範囲:IBMCloud側のVPN接続サブネット
CloudShellでやる場合
gcloud compute --project "khoshina" target-vpn-gateways create "vpn-1" --region "us-central1" --network "default"
gcloud compute --project "khoshina" forwarding-rules create "vpn-1-rule-esp" --region "us-central1" --address "34.66.145.xx" --ip-protocol "ESP" --target-vpn-gateway "vpn-1"
gcloud compute --project "khoshina" forwarding-rules create "vpn-1-rule-udp500" --region "us-central1" --address "34.66.145.xx" --ip-protocol "UDP" --ports "500" --target-vpn-gateway "vpn-1"
gcloud compute --project "khoshina" forwarding-rules create "vpn-1-rule-udp4500" --region "us-central1" --address "34.66.145.xx" --ip-protocol "UDP" --ports "4500" --target-vpn-gateway "vpn-1"
gcloud compute --project "khoshina" vpn-tunnels create "vpn-1-tunnel-1" --region "us-central1" --peer-address "52.117.3.xx" --shared-secret "ibmcloud" --ike-version "2" --local-traffic-selector "0.0.0.0/0" --target-vpn-gateway "vpn-1"
gcloud compute --project "khoshina" routes create "vpn-1-tunnel-1-route-1" --network "default" --next-hop-vpn-tunnel "vpn-1-tunnel-1" --next-hop-vpn-tunnel-region "us-central1" --destination-range "172.22.99.0/24"
動作確認
GCP-VMインスタンス
GCPからIBMCloud側への通信確認
$ ping 172.22.99.9
PING 172.22.99.9 (172.22.99.9) 56(84) bytes of data.
64 bytes from 172.22.99.9: icmp_seq=1 ttl=62 time=17.1 ms
64 bytes from 172.22.99.9: icmp_seq=2 ttl=62 time=16.9 ms
64 bytes from 172.22.99.9: icmp_seq=3 ttl=62 time=17.8 ms
64 bytes from 172.22.99.9: icmp_seq=4 ttl=62 time=17.1 ms
64 bytes from 172.22.99.9: icmp_seq=5 ttl=62 time=17.10 ms
IBM-VMインスタンス
IBMCloudからGCP側への通信確認
# ping 10.128.0.4
PING 10.128.0.4 (10.128.0.4) 56(84) bytes of data.
64 bytes from 10.128.0.4: icmp_seq=1 ttl=62 time=17.7 ms
64 bytes from 10.128.0.4: icmp_seq=2 ttl=62 time=16.7 ms
64 bytes from 10.128.0.4: icmp_seq=3 ttl=62 time=17.0 ms
64 bytes from 10.128.0.4: icmp_seq=4 ttl=62 time=16.8 ms
64 bytes from 10.128.0.4: icmp_seq=5 ttl=62 time=17.1 ms