目的
IBM Citrix Netscaler VPXを活用して、Webサーバへのロードバランスを試してみた。
今回はVPXロードバランスの基本機能を確認する。
環境
- ローカル端末:macOS Catalina 10.15.6 1台
- プラットフォーム:IBMCloud
- ロードバランサ:Citrix NetScalerVPX NS11.1: Build 64.14.nc 1サービス
- DNSサービス:IBMCloud DNS 1サービス
- 接続先サーバ:CentOS 7.7.1908(Virtual Server for Classic) 2台
概要構成図

分散先設定
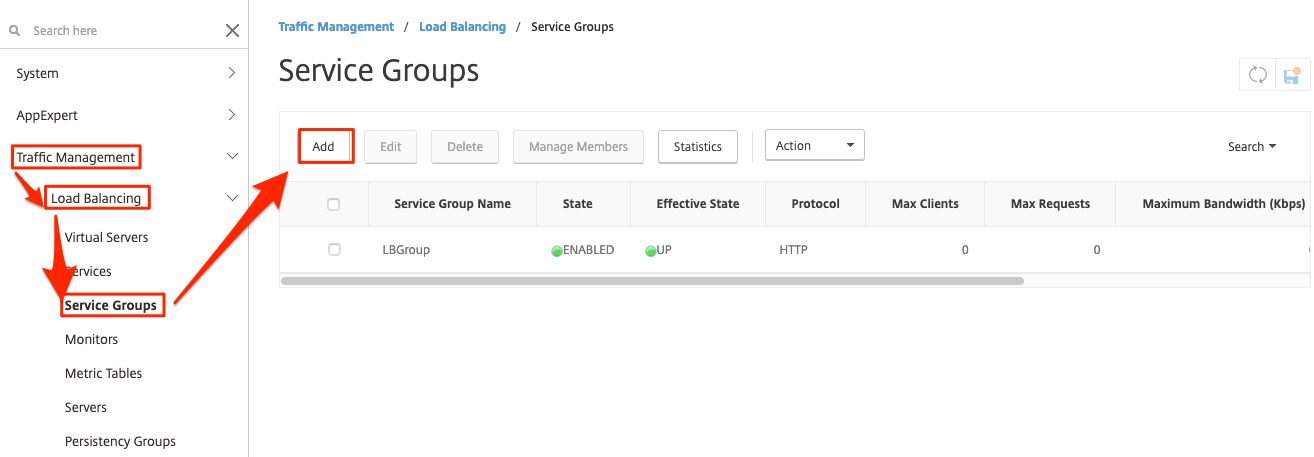
Service GroupsもしくはServicesで分散先のサーバを登録する。
今回はService Groupsで実施した。
Traffic Management -> Load Balancing -> Service Groups -> Addを選択
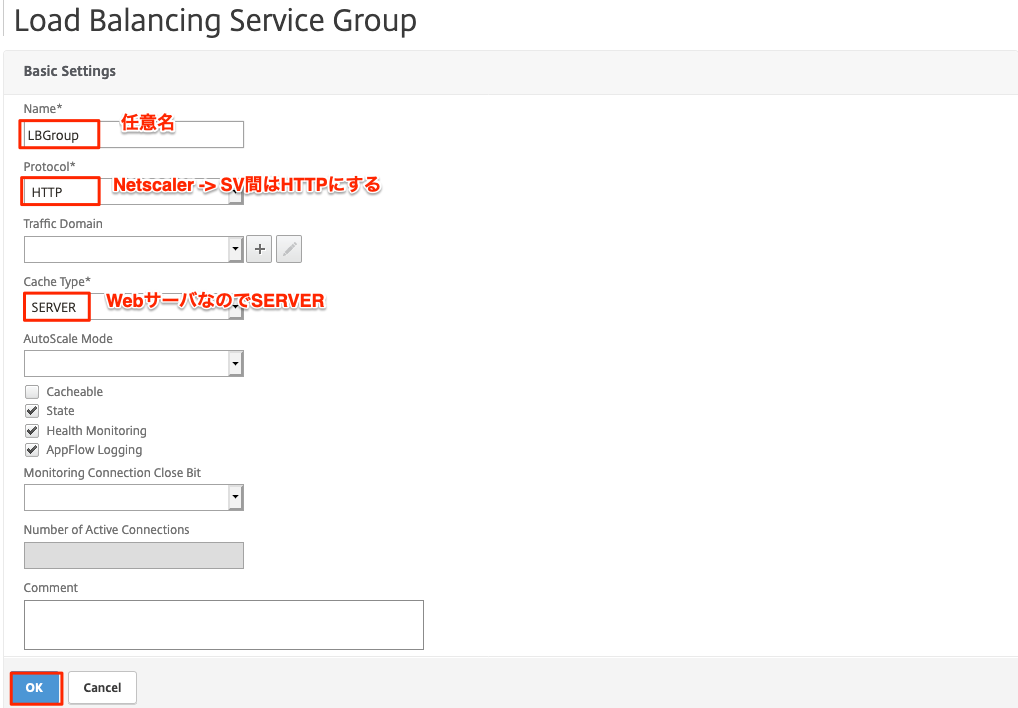
- Name:任意名
- Protocol:HTTP
- CacheType:SERVER
- その他:デフォルト
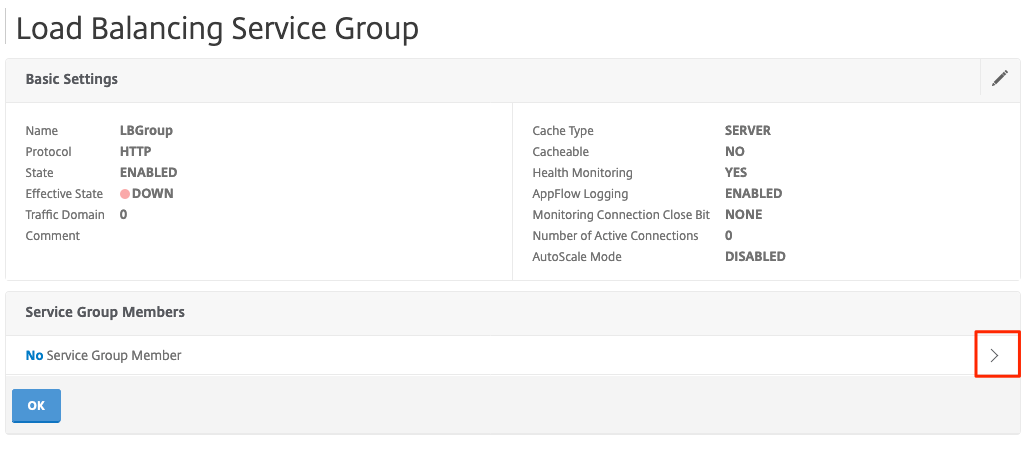
Service Group Membersの右側にある**>**を選択する。
- IP Address:分散対象サーバのIPアドレス
- Port:HTTPで利用したいポート番号
- その他:デフォルト
分散対象サーバの数だけこの工程を繰り返して、複数台登録する

SSL証明書の登録
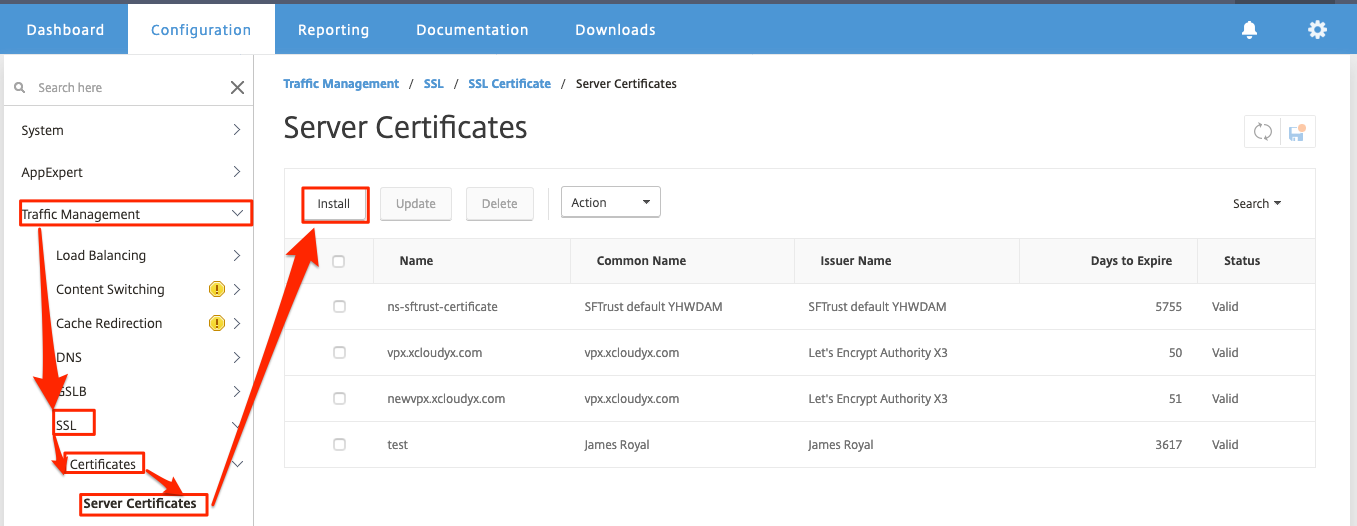
VPXのフロント側はHTTPSで待ち受けるため、証明書を登録する。
証明書は公開するFQDNで発行すること。今回は**vpx.xcloudyx.com**で発行している。
Traffice Management -> SSL -> Certificates -> Server Certificates -> Installを選択する。
保有している証明書と秘密鍵を登録する。
お試しであれば、Let's Encryptなどでやってみるとよい
Webブラウザから証明書を簡単に発行可能なこちらLet's Encryptをオススメします

フロント側設定
サービス提供用のフロントVIPを設定する
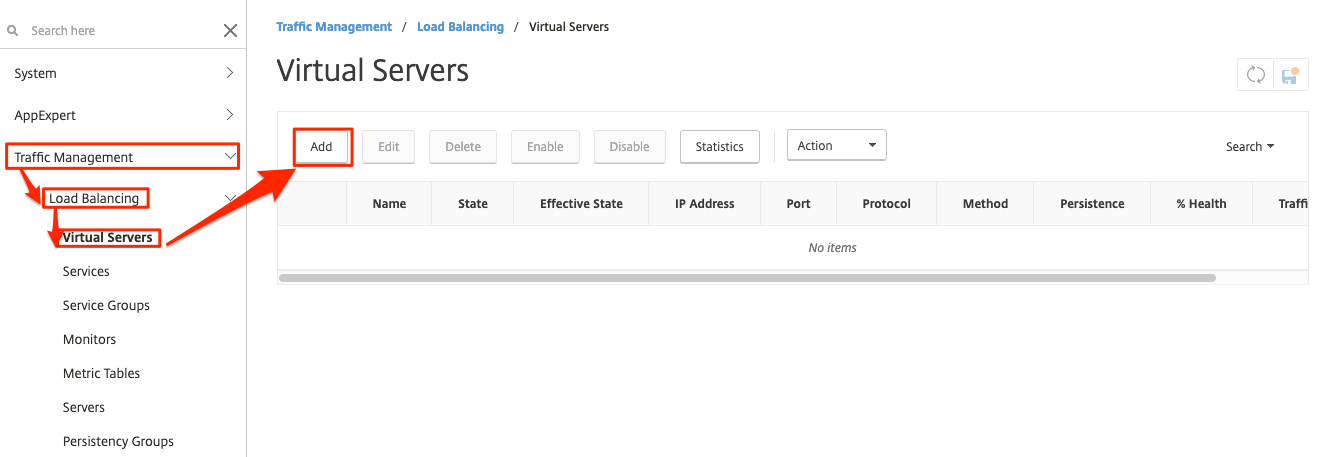
Traffic Management -> Load Balancing -> Virtual Servers -> Addを選択する。
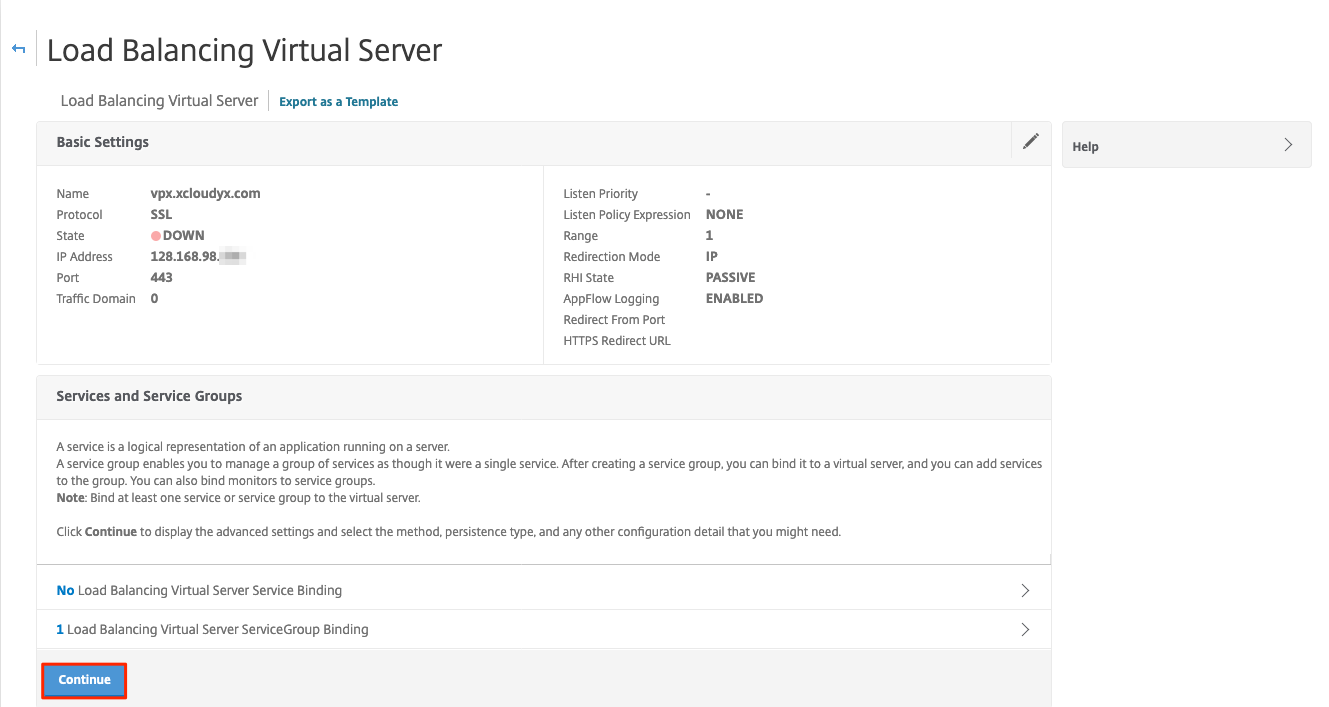
- Name:任意
- Protocol:SSL
- IP Address:購入時にオーダしたグローバルIP
- クラウドポータルのvpx詳細から見れる
- Port:SSLで受けるポート番号


Load Balancing Virtual Server ServiceGroup Bindingの右にある**>**を選択する。

**>**を選択する。

分散先設定で作成した、分散先サーバを選択し、Selectを選択する。

Bindを選択する。

Continueを選択する。
Certificate -> Server Certificateの右にある**>**を選択する。

**>**を選択する。

SSL証明書の登録で設定した、証明書を選択し、Selectを選択する。
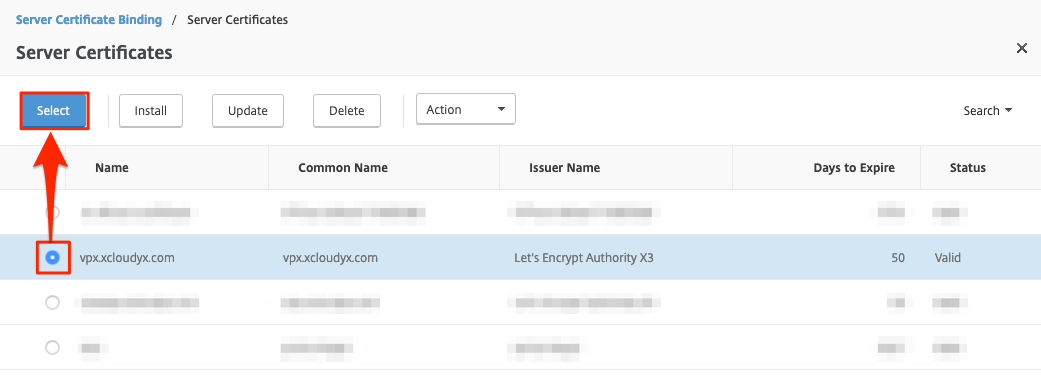
Bindを選択する。

Continueを選択する。

動作確認
ここまでで、単純な負荷分散設定は完了したので、動作確認を実施する。
SSL通信の確認、TLSv1.2で動作していることを確認
% curl -v https://vpx.xcloudyx.com
*   Trying 128.168.98.xx...
* TCP_NODELAY set
* Connected to vpx.xcloudyx.com (128.168.98.xx) port 443 (#0)
* ALPN, offering h2
* ALPN, offering http/1.1
* successfully set certificate verify locations:
*   CAfile: /etc/ssl/cert.pem
  CApath: none
* TLSv1.2 (OUT), TLS handshake, Client hello (1):
* TLSv1.2 (IN), TLS handshake, Server hello (2):
* TLSv1.2 (IN), TLS handshake, Certificate (11):
* TLSv1.2 (IN), TLS handshake, Server finished (14):
* TLSv1.2 (OUT), TLS handshake, Client key exchange (16):
* TLSv1.2 (OUT), TLS change cipher, Change cipher spec (1):
* TLSv1.2 (OUT), TLS handshake, Finished (20):
* TLSv1.2 (IN), TLS change cipher, Change cipher spec (1):
* TLSv1.2 (IN), TLS handshake, Finished (20):
* SSL connection using TLSv1.2 / AES256-SHA
負荷分散設定、SV11とSV01で交互に分散している事を確認
% while true; do curl https://vpx.xcloudyx.com; done
SV11
SV01
SV11
SV01
SV11
SV01
SV11
SV01
SV11
SV01