VRF とは
1つの物理ルーターの境界に依存せず、お客様ごとのルーティングテーブルを分離する技術です。
https://cloud.ibm.com/docs/infrastructure/direct-link/vrf-on-ibm-cloud.html
ibmcloud コマンドを使う
事前準備
IBM Cloud CLI をインストールします。
有効化されている場合
「VRF Enabled」が「true」になっています。
$ ibmcloud account show
Retrieving account xxx of xxxxx@example.com...
OK

Account Name:                       xxx
Account ID:                         xxxxxxxxxxxx
Account Owner:                      xxxxxxx@example.com
Account Type:                       PAYG
Account Status:                     ACTIVE
Linked Softlayer Account:           xxxxxxx
VRF Enabled:                        true
Service Endpoint Enabled:           true
EU Supported                        false
PoC (Commercial Proof of Concept)   false
HIPPA Supported                     false
有効化されていない場合
「VRF Enabled」が「false」になっています。
$ ibmcloud account show
Retrieving account xxx of xxxxx@example.com...
OK

Account Name:                       xxx
Account ID:                         xxxxxxxxxxxx
Account Owner:                      xxxxxxx@example.com
Account Type:                       PAYG
Account Status:                     ACTIVE
Linked Softlayer Account:           xxxxxxx
VRF Enabled:                        false
Service Endpoint Enabled:           false
EU Supported                        false
PoC (Commercial Proof of Concept)   false
HIPPA Supported                     false
slcli コマンドを使う
事前準備
「slcli」のインストール・アップデート
「slcli」コマンドを使います。必要に応じて、インストール・最新化してください。
Installation — SoftLayer API Python Client latest documentation
IaaS API key の発行・取得
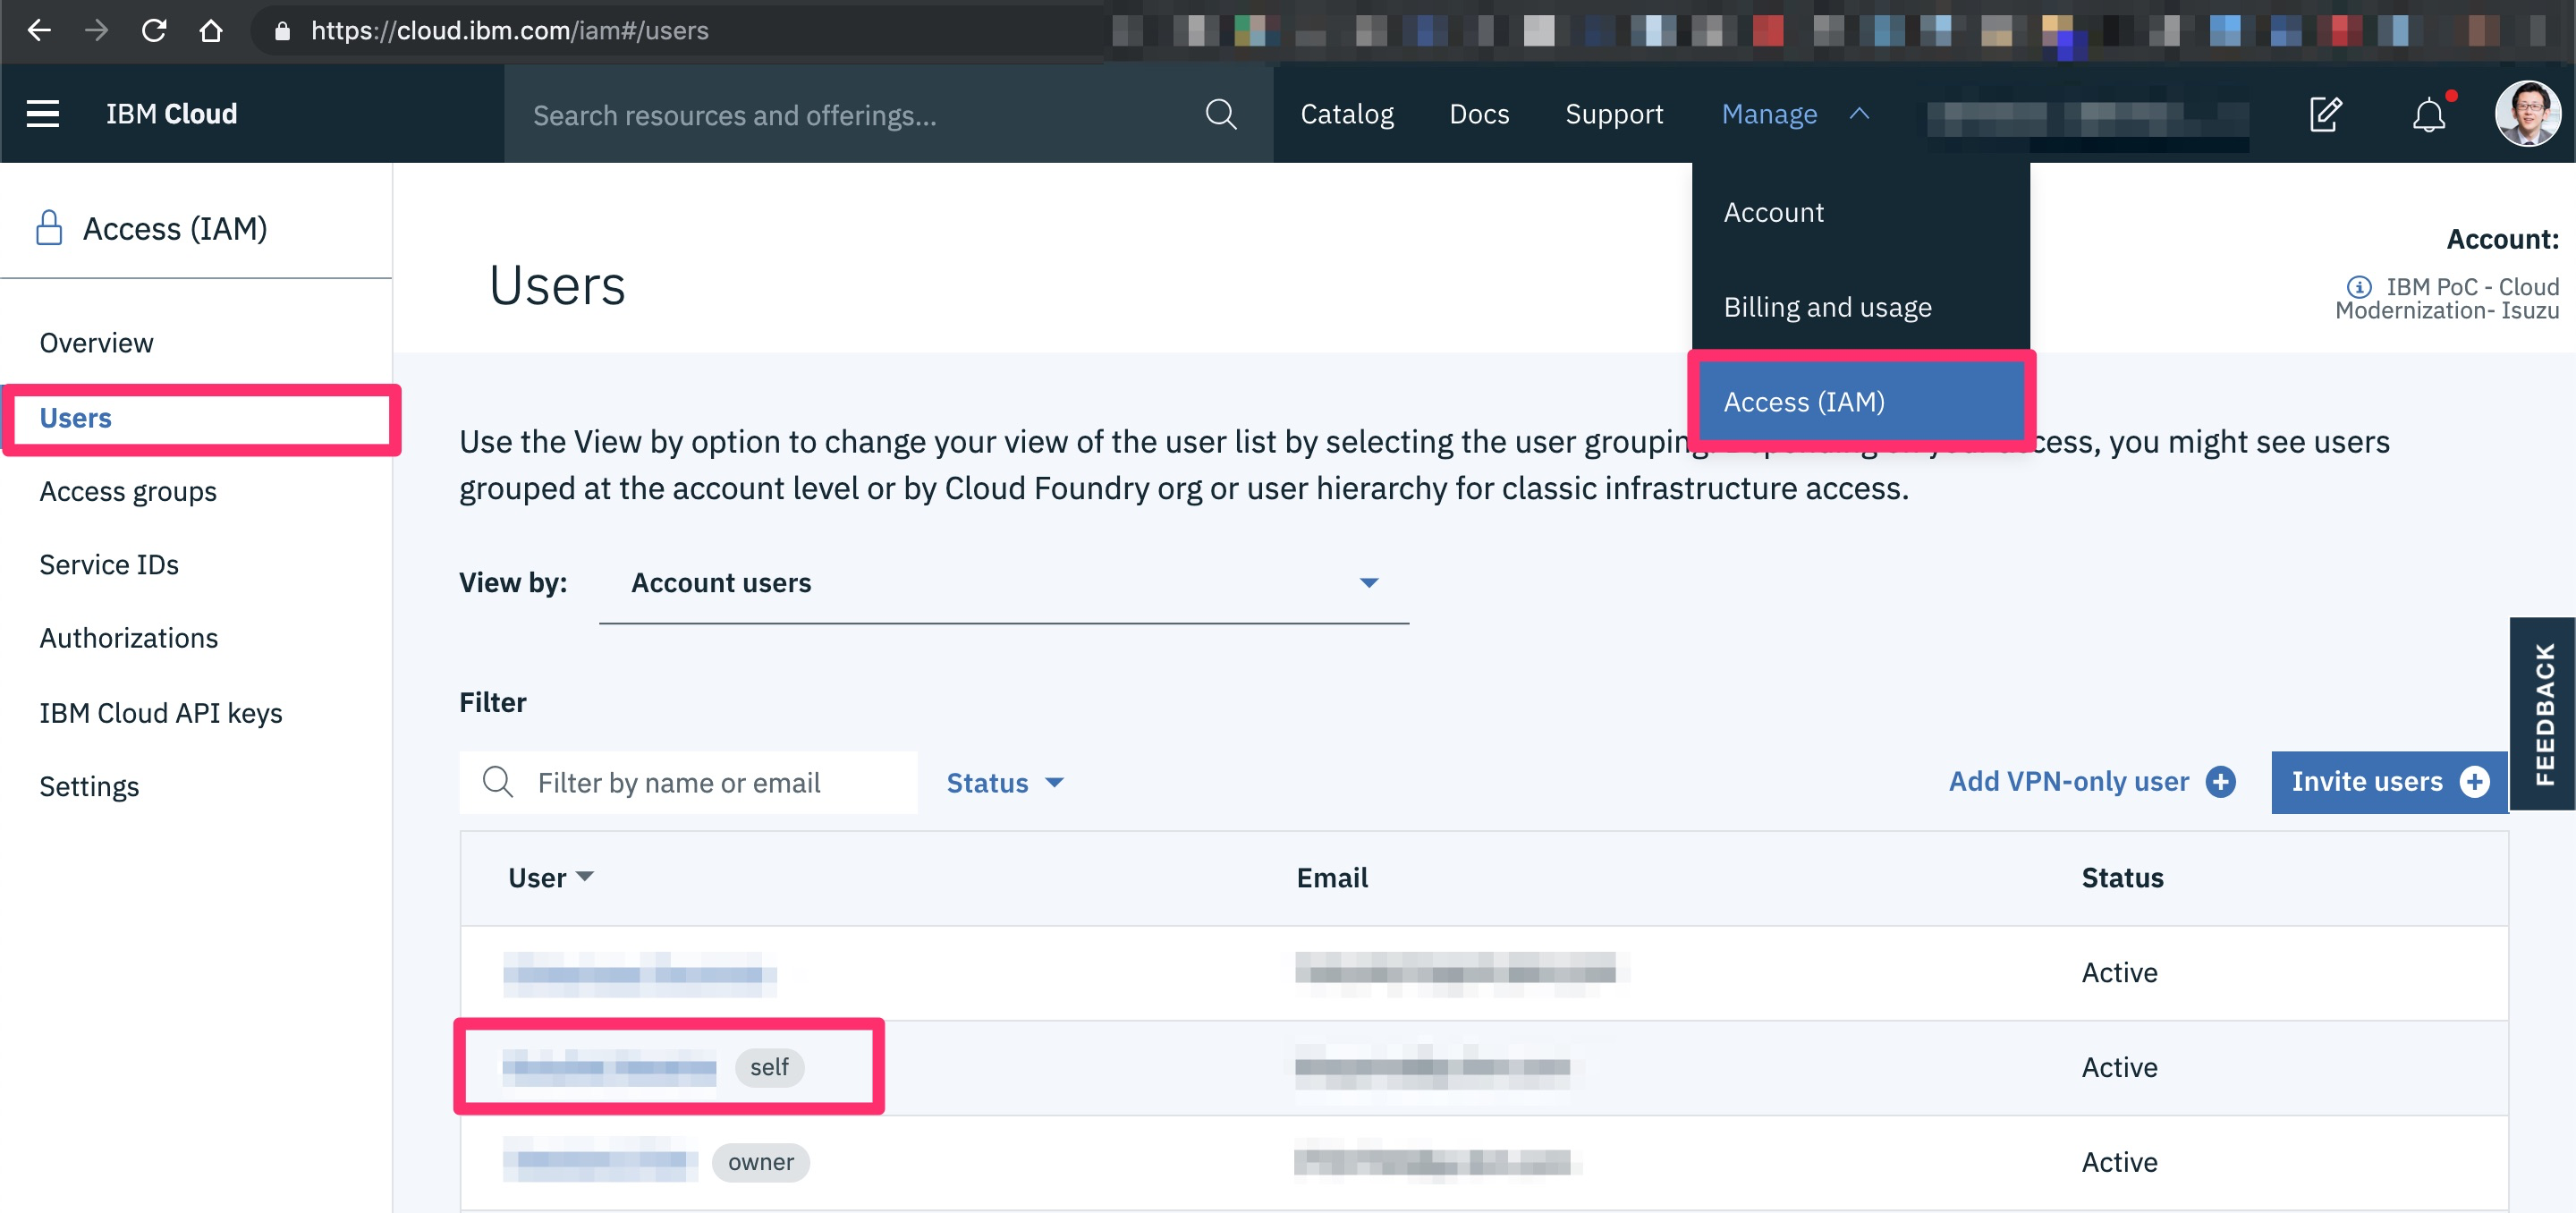
https://cloud.ibm.com/iam#/users から自分のユーザーをクリックします。
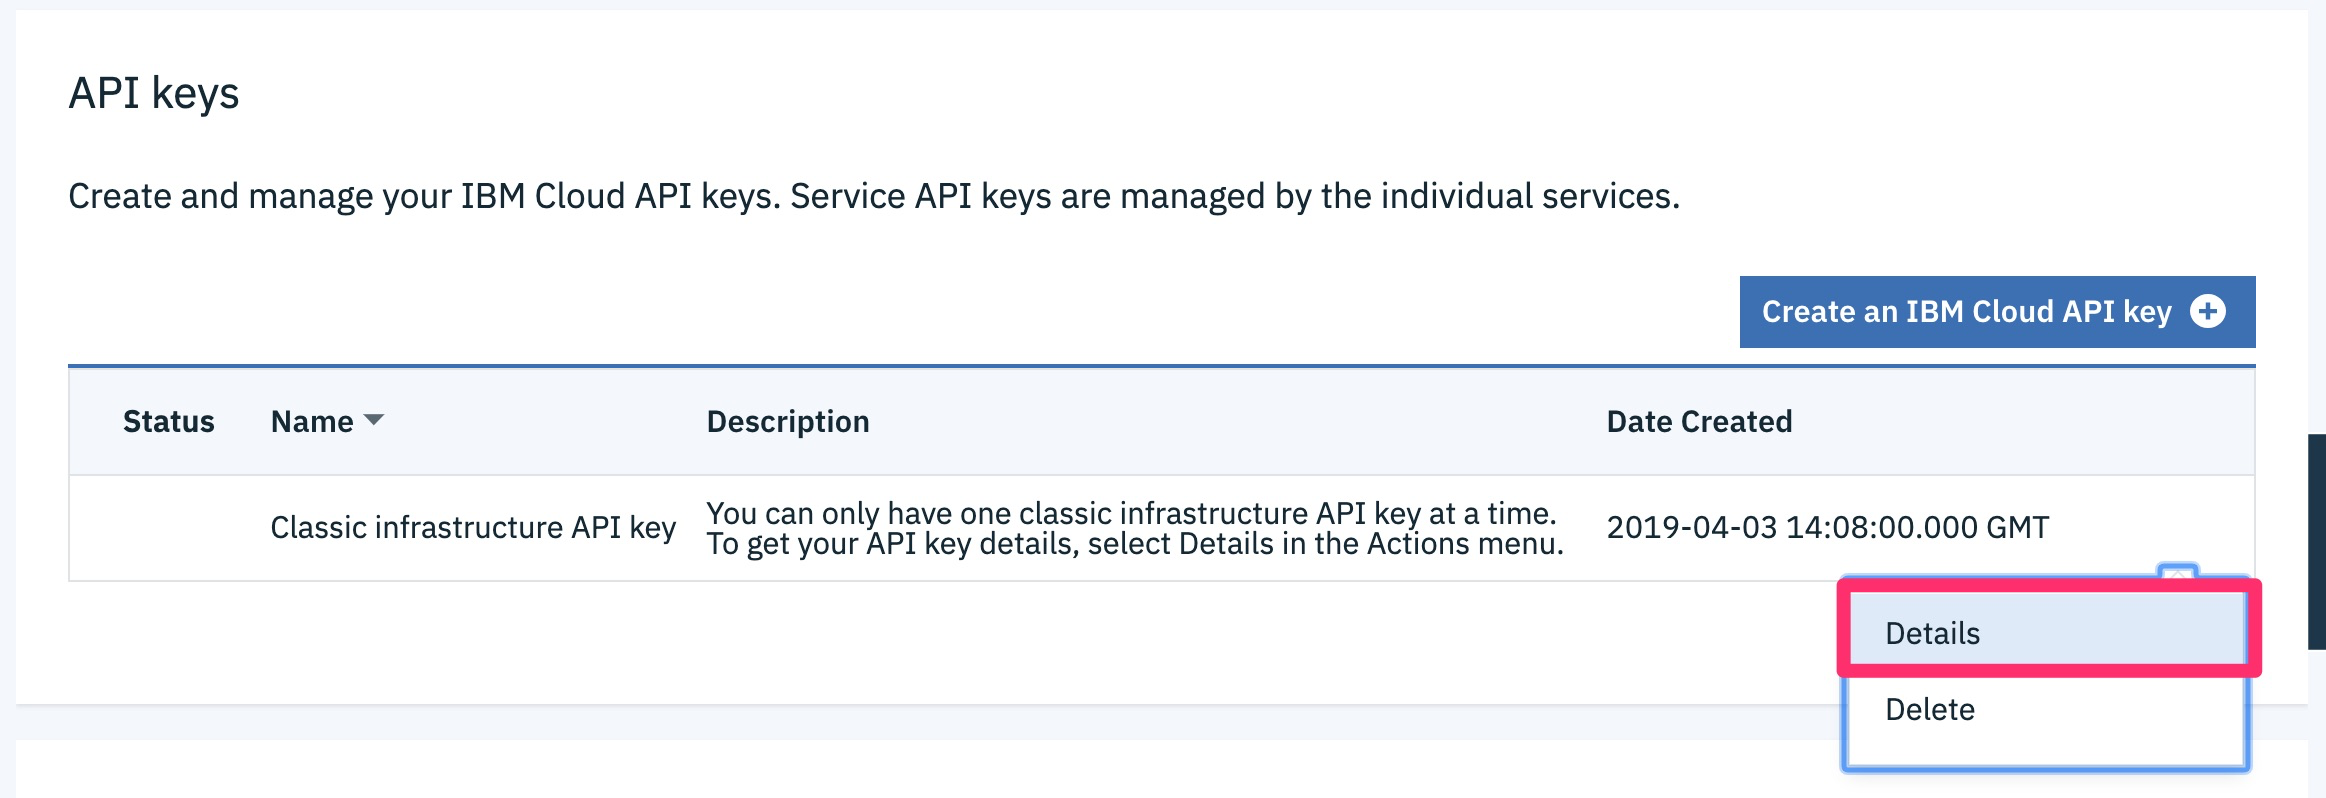
スクロールした先、下段の「API keys」から IaaS API key を発行します。
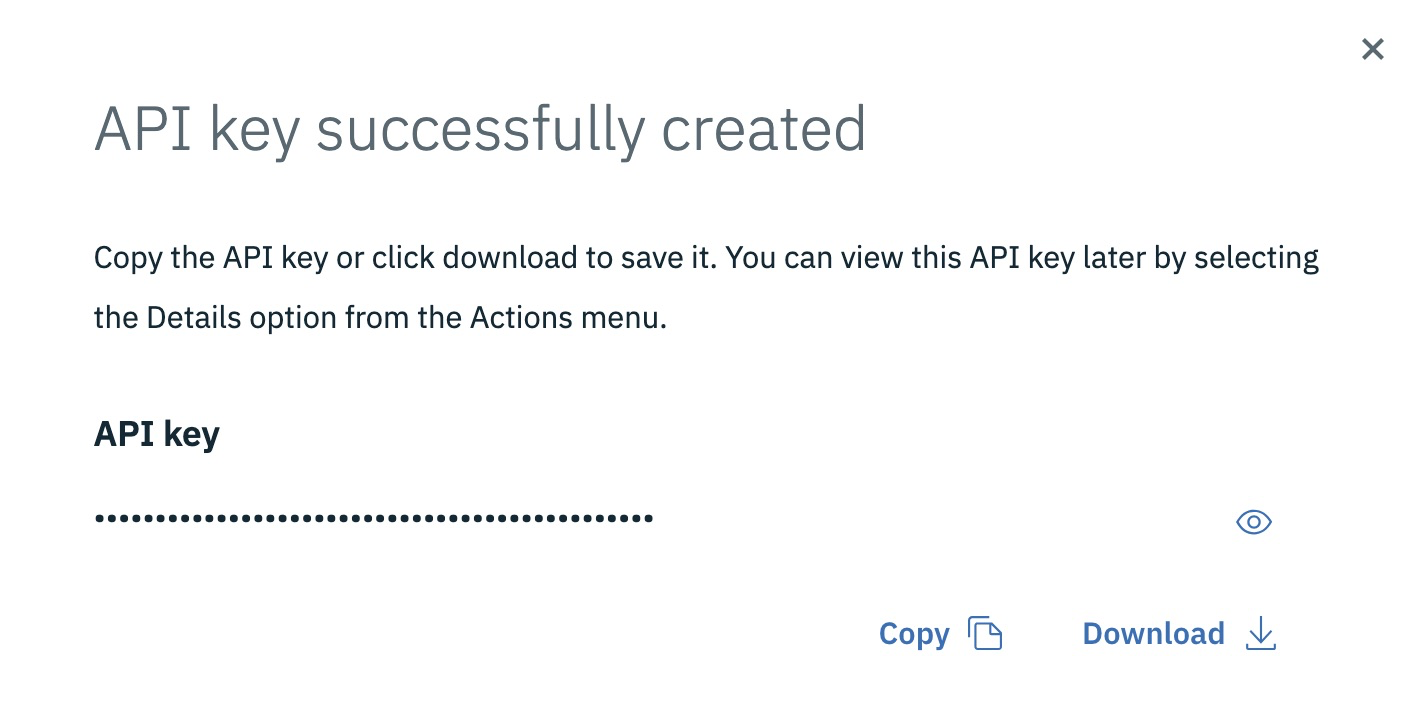
IaaS API key の発行に成功しました。
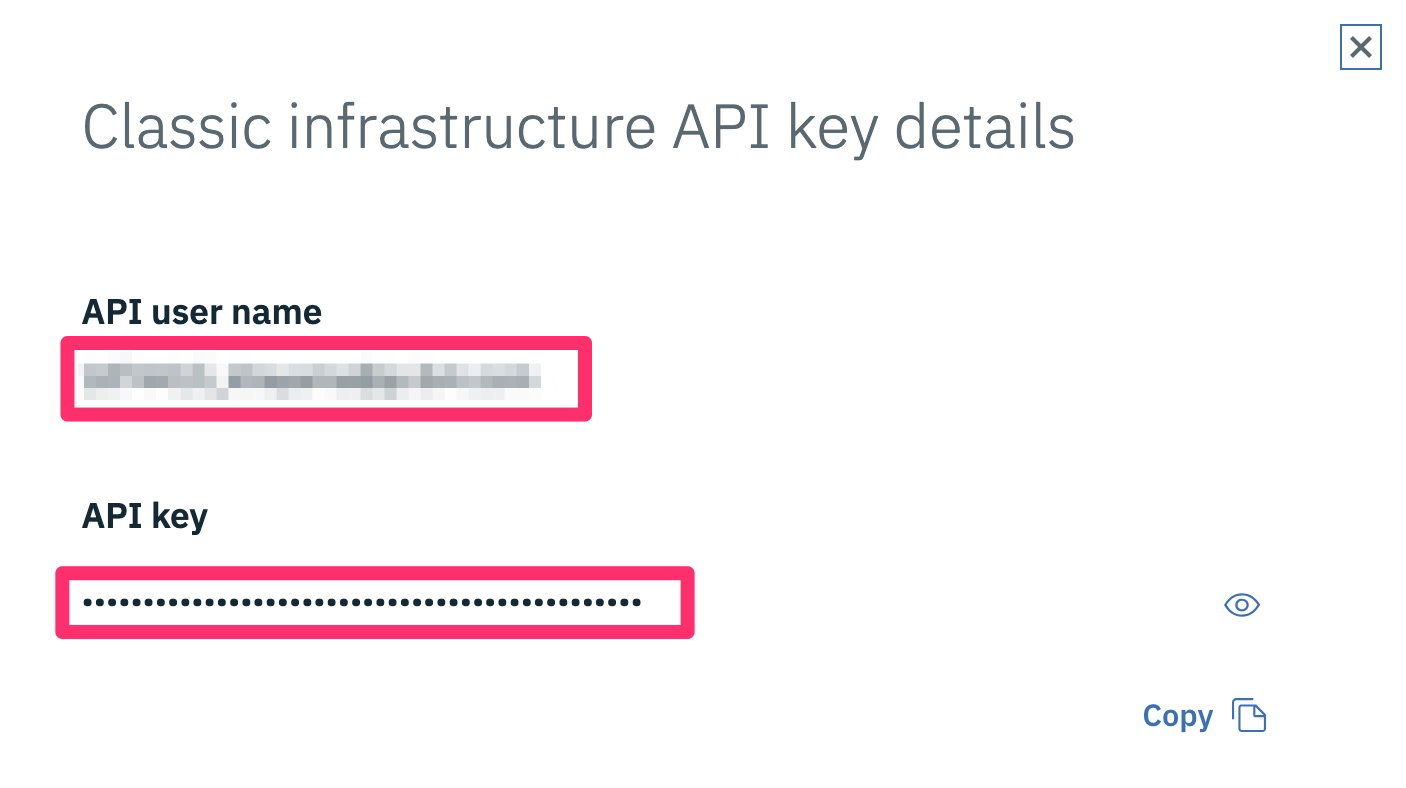
発行できた IaaS API key の詳細を表示します。
「API user name」と「API key」をメモに保存しておきます。
「slcli」のセットアップ
まずバージョンを確認します。
$ slcli --version
slcli (SoftLayer Command-line), version 5.7.1
先ほど取得した「API user name」と「API key」を使って、セットアップします。
ターゲットとなるアカウントの情報が出てきたかを確認してください。
以上で、完了です。
$ slcli setup
Username [xxxxx]: xxxxx@example.com
API Key or Password [xxxxx]:
Endpoint (public|private|custom) [https://api.softlayer.com/xmlrpc/v3.1]:
Timeout [0]:
:..............:..................................................................:
:         name : value                                                            :
:..............:..................................................................:
:     Username : xxxxx@example.com                                       :
:      API Key : xxxxx :
: Endpoint URL : https://api.softlayer.com/xmlrpc/v3.1                            :
:      Timeout : not set                                                          :
:..............:..................................................................:
Are you sure you want to write settings to "/Users/khayama/.softlayer"? [Y/n]: y
Configuration Updated Successfully
有効化されている場合
以下のコマンドを打つと結果が返ってきます。
$ slcli call-api SoftLayer_Network_Interconnect_Tenant getNetworkZones
:...........:
:   value   :
:...........:
: xxxxxxx-1 :
:...........:
有効化されていない場合
以下のコマンドを打っても結果が返ってきません。
$ slcli call-api SoftLayer_Network_Interconnect_Tenant getNetworkZones
参考
getNetworkZones - https://sldn.softlayer.com/ : https://sldn.softlayer.com/reference/services/SoftLayer_Network_Interconnect_Tenant/getNetworkZones/


