普通にアプリのプロジェクトを作成する
そのTargetととしてCustom Keyboardを作成します
File > New > Targetを選択
Custom Keyboardを選択(やっと!)
プロダクト名を適当につける。
コーディングしていきます
デフォルトで作られている UIInputViewController を継承した KeyboardViewController を編集していきます。
「あーね」って入力すると「あーね」しかでてこない超シンプルキーボードなので一度きれいにします。
きれいにした結果が下記です。
import UIKit

class KeyboardViewController: UIInputViewController {

    override func updateViewConstraints() {
        super.updateViewConstraints()

        // Add custom view sizing constraints here
    }

    override func viewDidLoad() {
        super.viewDidLoad()
    }

    override func didReceiveMemoryWarning() {
        super.didReceiveMemoryWarning()
        // Dispose of any resources that can be recreated
    }

    override func textWillChange(textInput: UITextInput) {
        // The app is about to change the document's contents. Perform any preparation here.
    }

    override func textDidChange(textInput: UITextInput) {
        // The app has just changed the document's contents, the document context has been updated.
    }

}
次にnibでKeyboardのviewを作ります。
作ったAneKeyboard.xibをキーボードViewにするため、KeyboardViewControllerの viewDidLoad に下記を付け加えます。
    override func viewDidLoad() {
        super.viewDidLoad()
        var v = UINib(nibName:"AneKeyboard", bundle:nil).instantiateWithOwner(self,options:nil)[0] as UIView
        self.inputView.addSubview(v)
    }
nibファイルを作って適当にボタンを配置してください。
File's Owner に KeyboardViewController を選択します。
こうすることで Ctrl + drag などで簡単にbindできるようになります。
「あーね」ボタン、「Next」ボタンを KeyboarViewController にバインドしてそれぞれ下記の関数を作ります。
    @IBAction func pushAne(sender: AnyObject) {
        // 「あーね」ボタン押下
    }

    @IBAction func pushNext(sender: AnyObject) {
        // 「Next」ボタン押下
    }
ボタンを押したときの処理を実装します。
    @IBAction func pushAne(sender: AnyObject) {
        // 「あーね」ボタン押下
        // こんな感じでテキストを挿入できます
        var proxy = textDocumentProxy as UITextDocumentProxy
        proxy.insertText("あーね")
    }

    @IBAction func pushNext(sender: AnyObject) {
        // 「Next」ボタン押下
        // 次のキーボードへ(これは必ず入れないといけないらしい)
        self.advanceToNextInputMode()
    }
以上で実装完了!
使ってみよう!
keyboardそのもののプロジェクトのまま立ち上げようとすると下記みたいな事になります。
???
実行するプロジェクトは一番はじめに作成した被Targetなプロジェクトになります。
実行すると、そのプロジェクトが立ち上がるのでホームキー(Command + Shift + H)を押して、ホームに行きましょう。
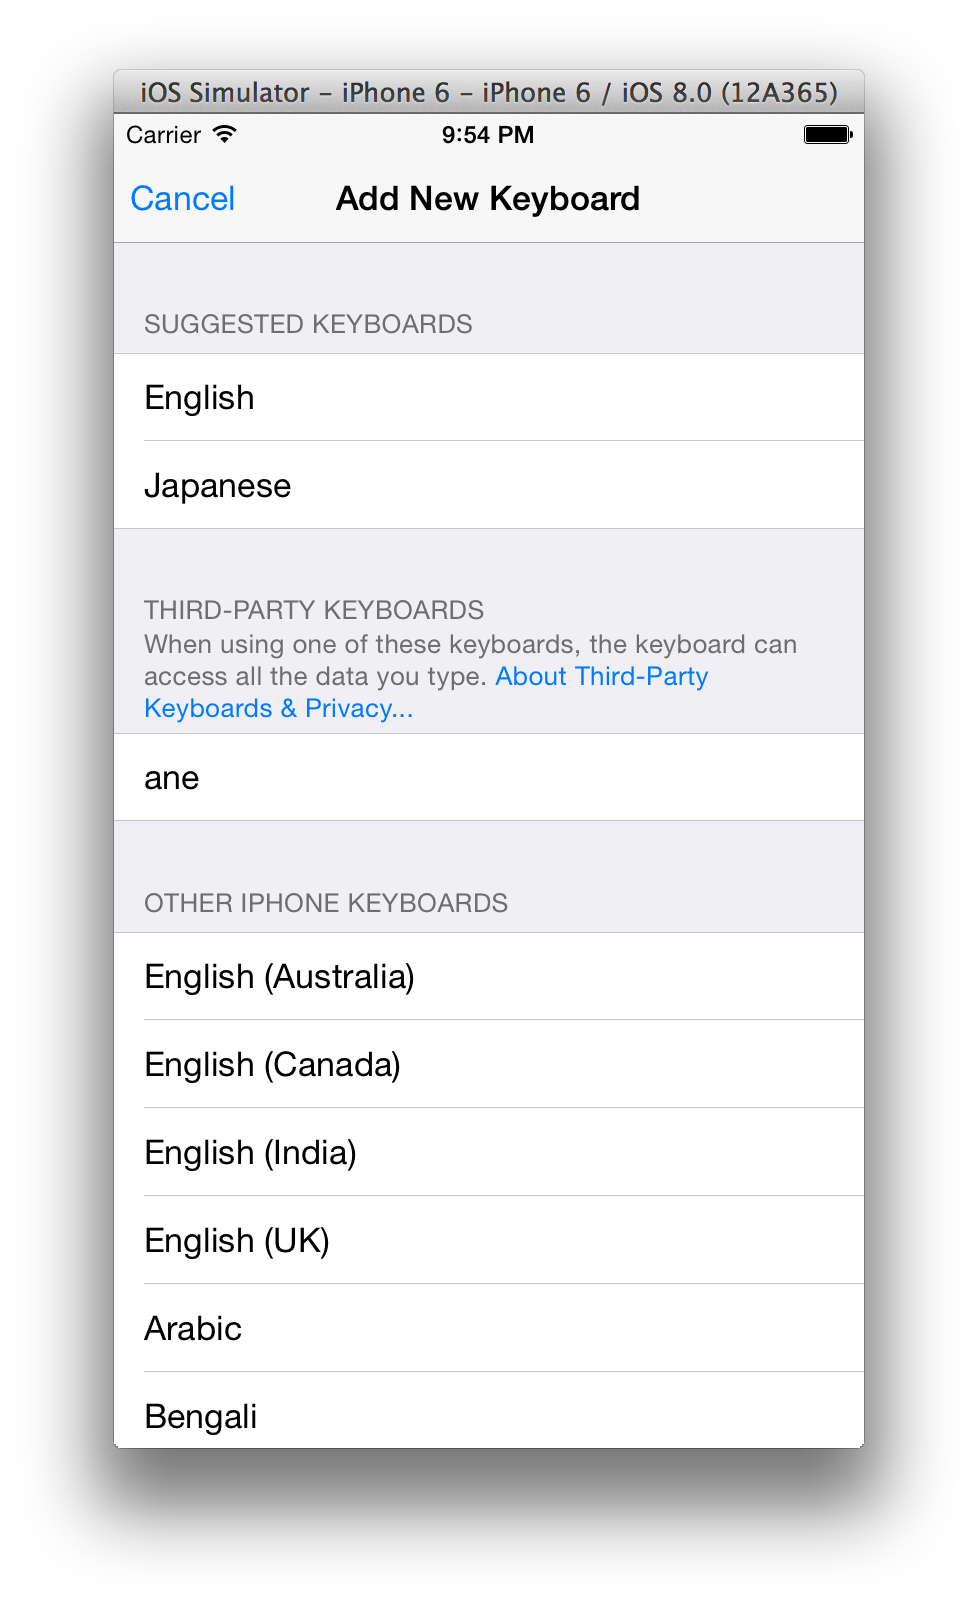
その後、Settings -> General -> Keyboard -> Keyboards とたどっていき、「Add New Keyboard...」を選択します。
画面中央の我らが「ane」を選択します。
これでキーボード設定完了です。
それではSpotlightで試してみましょう。
できました!


