###追記(2015.07.19)
新しく記事を投稿しました「SwiftでUIAlertControllerのヘルパーライブラリを書いた」
http://qiita.com/keygx/items/e3fea65870336fe6b46c
###追記(2015.07.17)
内容をパワーアップしてライブラリ化しました。
https://github.com/keygx/AlertHelperKit
UIAlertControllerでのアラート表示をやってくれるヘルパーです。
クリックされたボタン毎に処理を分けたい場合にも対応できます。
AlertHelper.swift
import UIKit

class AlertHelper: NSObject {

    class func showAlert (title: String?, message: String?, cancel: String?, destructive: [String]?, others: [String]?, parent: UIViewController, callback: (Int) -> ()) {

        // アラート要素が全てnilの場合は中止
        if title == nil && message == nil && cancel == nil && destructive == nil && others == nil {
            return
        }

        // アラート作成
        let alertController = UIAlertController(title: title?, message: message?, preferredStyle: .Alert)

        // キャンセルボタン処理
        if cancel != nil {
            let cancelAction = UIAlertAction(title: cancel!, style: .Cancel) {
                action in callback(0)
            }
            alertController.addAction(cancelAction)
        }

        let destructivOffset = 1
        var othersOffset = destructivOffset

        // Destructiveボタン処理
        if destructive != nil {
            for i in 0..<destructive!.count {
                let destructiveAction = UIAlertAction(title: destructive![i], style: .Destructive) {
                    action in callback(i + destructivOffset)
                }
                alertController.addAction(destructiveAction)

                ++othersOffset
            }
        }

        // その他ボタン処理
        if others != nil {
            for i in 0..<others!.count {
                let otherAction = UIAlertAction(title: others![i], style: .Default) {
                    action in callback(i + othersOffset)
                }
                alertController.addAction(otherAction)
            }
        }

        // アラート表示
        parent.presentViewController(alertController, animated: true, completion: nil)
    }
}
使い方
呼び出し側は、少々長い(引数が多いw)メソッドですが、こんな感じです。
- アラート内容にあわせて必要な項目を設定
- title、message、cancel、destructive、othersが不要な場合はnilも可
- destructive、othersは配列で複数設定が可能
- キャンセルボタンのbuttonIndexは常に0で、それ以外のボタンについては設定順に1〜を返却
下記にいくつかの例を挙げます。
サンプル1
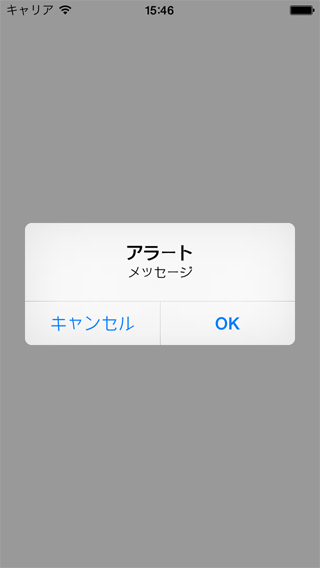
まずは定番の[キャンセル][OK]パターン。
AlertHelper.showAlert("アラート", message: "メッセージ", cancel: "キャンセル", destructive: nil, others: ["OK"], parent: self) {
    (buttonIndex: Int) in
    // 押されたボタンのインデックスにて処理を振り分ける
    switch buttonIndex {
        case 1 :
            // OK
            println("\(buttonIndex)")
            break
        default :
            // キャンセル
            println("\(buttonIndex)")
            break
    }
}
サンプル2
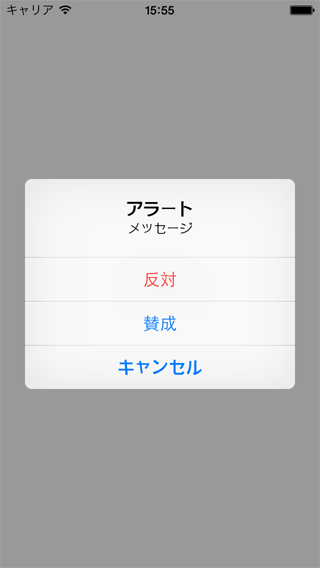
Destructiveスタイルの場合は下記の通り。
AlertHelper.showAlert("アラート", message: "メッセージ", cancel: "キャンセル", destructive: ["反対"], others: ["賛成"], parent: self) {
    (buttonIndex: Int) in
    // 押されたボタンのインデックスにて処理を振り分ける
    switch buttonIndex {
        case 1 :
            // 反対
            println("\(buttonIndex)")
            break
        case 2 :
            // 賛成
            println("\(buttonIndex)")
            break
        default :
            // キャンセル
            println("\(buttonIndex)")
            break
    }
}
サンプル3
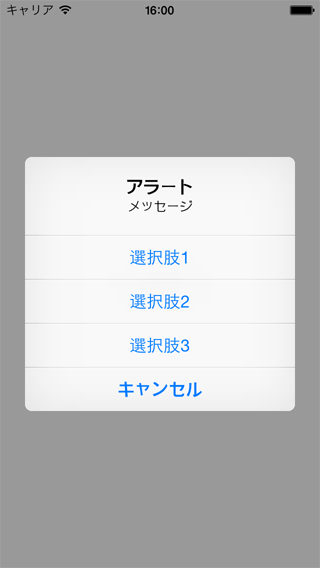
ボタンタイトルは配列で増やせます。それに合わせて受取側も増やします。
AlertHelper.showAlert("アラート", message: "メッセージ", cancel: "キャンセル", destructive: nil, others: ["選択肢1", "選択肢2", "選択肢3"], parent: self) {
    (buttonIndex: Int) in
    // 押されたボタンのインデックスにて処理を振り分ける
    switch buttonIndex {
        case 1 :
            // 選択肢1
            println("\(buttonIndex)")
            break
        case 2 :
            // 選択肢2
            println("\(buttonIndex)")
            break
        case 3 :
            // 選択肢3
            println("\(buttonIndex)")
            break
        default :
            // キャンセル
            println("\(buttonIndex)")
            break
    }
}
サンプル4
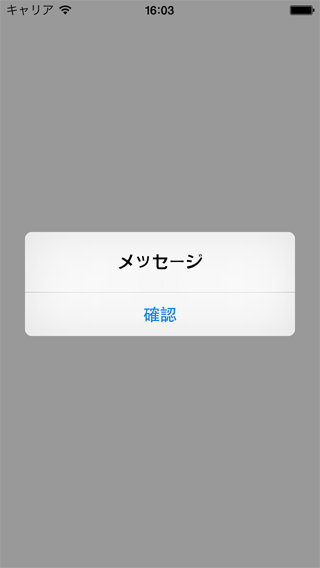
ユーザーに確認を促すような、閉じるだけの場合です。
AlertHelper.showAlert(nil, message: "メッセージ", cancel: "確認", destructive: nil, others: nil, parent: self) {
    (buttonIndex: Int) in
    // ボタンを押されてもなにもしない
}


