はじめに
Let's Encrypt で SSL 証明書を作成し、Ubuntu 20 で稼働する Nginx に対して SSL 設定をしてみました。
Azure VM + Nginx へ配置した Web API とやりとりするデータを暗号化することが狙いです。
参考:Python + Flask + MongoDB を利用した Web API の作成と Azure VM + Nginx への配置(ホロライブの動画配信予定を収集 その3)
環境
- Ubuntu 20 LTS (Azure VM)
- Nginx 1.18.0
- certbot 1.10.1
前提
Nginx が導入され、ポート 80 でアクセス(DNS による名前解決)できること。
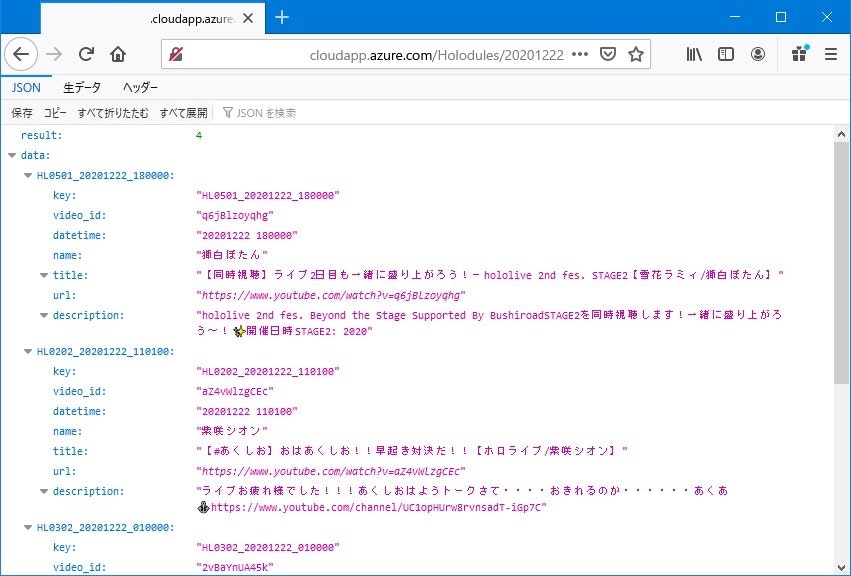
念のため、HTTP (ポート 80) で Web API にアクセスできることを確認しておきます。

準備
SSL を設定してポート 443 でアクセスするため、ポート 443 への受信も許可しておきます。
今回は、クラウド環境として Azure を利用したため、NSG でポート 443 への受信許可を追加しておきました。
Certbot を利用した Nginx への SSL 設定
Certbot を用いて、Let's Encrypt を利用した SSL 証明書を作成しました。
Ubuntu 20.04 と Nginx の組み合わせの場合は、下記手順で導入します。
Ubuntu 20.04 と Nginx の公式手順
Certbot とは
ウェブサイトに対して、Let's Encrypt 証明書を使用して HTTPS を有効にするための無料のオープンソース・ソフトウェア・ツールです。
Let's Encrypt とは
非営利団体である Internet Security Research Group (ISRG)により運営されている証明書認証局で、TLS の X.509 証明書を無料で発行しています。
SSL 証明書の作成
-
対象のサーバーに対して、sudo 権限を持つユーザーとして SSH 接続します。
-
snap パッケージをインストールするために、snapd をインストールします。
$ sudo apt install snapd -
snapd のバージョンが最新であることを確認します。
$ sudo snap install core; sudo snap refresh core -
Certbot の既存の OS パッケージをすべて削除します。
$ sudo apt remove certbot -
snapd を利用して、Certbot をインストールします。
$ sudo snap install --classic certbot -
/snap/bin/certbot に対してシンボリックリンクを作成します。
$ sudo ln -s /snap/bin/certbot /usr/bin/certbot -
Certbot を実行して証明書を生成します。(Nginx の自動的な構成変更は指定なし)
$ cd /etc/letsencrypt/
$ sudo certbot certonly --webroot -w <公開パス> -d <ドメイン> --renew-by-default --email <メールアドレス>
手順通りに進めた際に、.well-known/acme-challenge にファイルが無いよ。的な下記エラーが発生したため、上記のように、証明書を作成すると同時に公開パスを明示的に指定しています。
念のため、公開パス直下に .well-known/acme-challenge ディレクトリも作成しておきました。Challenge failed for domain hogehoge.cloudapp.azure.com http-01 challenge for hogehoge.cloudapp.azure.com Cleaning up challenges Some challenges have failed. IMPORTANT NOTES: - The following errors were reported by the server: Domain: hogehoge.cloudapp.azure.com Type: unauthorized Detail: Invalid response from http://hogehoge.cloudapp.azure.com/.well-known/acme-challenge/... [xxx.xxx.xxx.xxx]: "<html>\r\n<head><title>404 Not Found</title></head>\r\n<body>\r\n<center><h1>404 Not Found</h1></center>\r\n<hr><center>nginx/1.18.0 (Ub" To fix these errors, please make sure that your domain name was entered correctly and the DNS A/AAAA record(s) for that domain contain(s) the right IP address.また、何回か試行している際に、下記のようなエラーが発生するようになりました。
Another instance of Certbot is already running.プロセスを探して強制的に停止し、
# プロセスを探して強制的に停止
$ ps waux | grep cert
root      461580  0.0  0.1  11276  4984 pts/0    T    15:38   0:00 sudo certbot --nginx
root      461581  0.0  1.1  68672 46380 pts/0    T    15:38   0:00 /snap/certbot/793/bin/python3 /snap/certbot/793/bin/certbot --nginx
mcuser    462206  0.0  0.0   8160   672 pts/0    S+   15:52   0:00 grep --color=auto cert

$ sudo kill -9 461580
[1]+  Killed                  sudo certbot --nginx  (wd: ~)
(wd now: /etc/letsencrypt)

$ ps waux | grep cert
mcuser    462221  0.0  0.0   8160   740 pts/0    S+   15:53   0:00 grep --color=auto cert
.certbot.lock ファイルを探して削除することで解決しました。
# .certbot.lock ファイルを探して削除 $ sudo find / -type f -name ".certbot.lock" /var/lib/letsencrypt/.certbot.lock /var/log/letsencrypt/.certbot.lock /etc/nginx/.certbot.lock /etc/letsencrypt/.certbot.lock $ sudo rm /var/lib/letsencrypt/.certbot.lock $ sudo rm /var/log/letsencrypt/.certbot.lock $ sudo rm /etc/nginx/.certbot.lock $ sudo rm /etc/letsencrypt/.certbot.lock -
証明書の生成が完了すると、ログの場所や証明書やキーの情報が表示されます。
Saving debug log to /var/log/letsencrypt/letsencrypt.log Plugins selected: Authenticator webroot, Installer None Requesting a certificate for hogehoge.cloudapp.azure.com IMPORTANT NOTES: - Congratulations! Your certificate and chain have been saved at: /etc/letsencrypt/live/hogehoge.cloudapp.azure.com/fullchain.pem Your key file has been saved at: /etc/letsencrypt/live/hogehoge.cloudapp.azure.com/privkey.pem Your cert will expire on 2021-03-21. To obtain a new or tweaked version of this certificate in the future, simply run certbot again. To non-interactively renew *all* of your certificates, run "certbot renew" - If you like Certbot, please consider supporting our work by: Donating to ISRG / Let's Encrypt: https://letsencrypt.org/donate Donating to EFF: https://eff.org/donate-le -
証明書が生成されたことを確認します。
$ sudo -s
# ll /etc/letsencrypt/live/hogehoge.cloudapp.azure.com/
README cert.pem -> ../../archive/hogehoge.cloudapp.azure.com/cert1.pem chain.pem -> ../../archive/hogehoge.cloudapp.azure.com/chain1.pem fullchain.pem -> ../../archive/hogehoge.cloudapp.azure.com/fullchain1.pem privkey.pem -> ../../archive/hogehoge.cloudapp.azure.com/privkey1.pem
Nginx の SSL 設定
-
Nginx の設定ファイルを編集します。
# Web API 用に作成した Nginx の設定ファイルを編集します。
$ vi ~/holoapi/config/nginx.conf
# Nginx の既定の設定ファイルであればこんな感じ $ sudo vi /etc/nginx/sites-available/default -
SSL を有効化し、ssl_certificate に fullchain.pem(証明書)、ssl_certificate_key に privkey.pem(キー) を指定します。
... server { listen 80; # 443ポートでSSL listen 443 ssl; # SSL証明書 ssl_certificate /etc/letsencrypt/live/hogehoge.cloudapp.azure.com/fullchain.pem; # SSLキー ssl_certificate_key /etc/letsencrypt/live/hogehoge.cloudapp.azure.com/privkey.pem; # サーバー名(ドメイン) server_name hogehoge.cloudapp.azure.com; ... -
Nginx の設定ファイルを検証します。
$ sudo nginx -t -c ~/holoapi/config/nginx.conf nginx: the configuration file /home/mcuser/holoapi/config/nginx.conf syntax is ok nginx: configuration file /home/mcuser/holoapi/config/nginx.conf test is successful -
Nginx のプロセスを一旦停止して起動しなおしました。
# プロセスの停止
$ ps ax | grep nginx
 468229 ?        Ss     0:00 nginx: master process nginx -c /home/mcuser/holoapi/config/nginx.conf
 468230 ?        S      0:00 nginx: worker process
$ cat /var/run/nginx.pid
468229
$ sudo kill -QUIT $( cat /var/run/nginx.pid )
# 設定ファイルを指定して起動
$ sudo nginx -c ~/holoapi/config/nginx.conf
# 参考:設定ファイルの再読み込み
$ sudo nginx -s reload
# daemon プロセスの再起動であればこんな感じ $ sudo systemctl restart nginx # daemon プロセスの状態確認 $ sudo systemctl status nginx # 参考:設定ファイルの再読み込み $ sudo systemctl reload nginx -
利用中のポートを確認してみると、ポート 443 が LISTEN となっています。
$ ss -antu
Netid     State          Recv-Q     Send-Q          Local Address:Port               Peer Address:Port      Process
tcp       LISTEN         0          511                   0.0.0.0:443                     0.0.0.0:*
SSL 接続確認
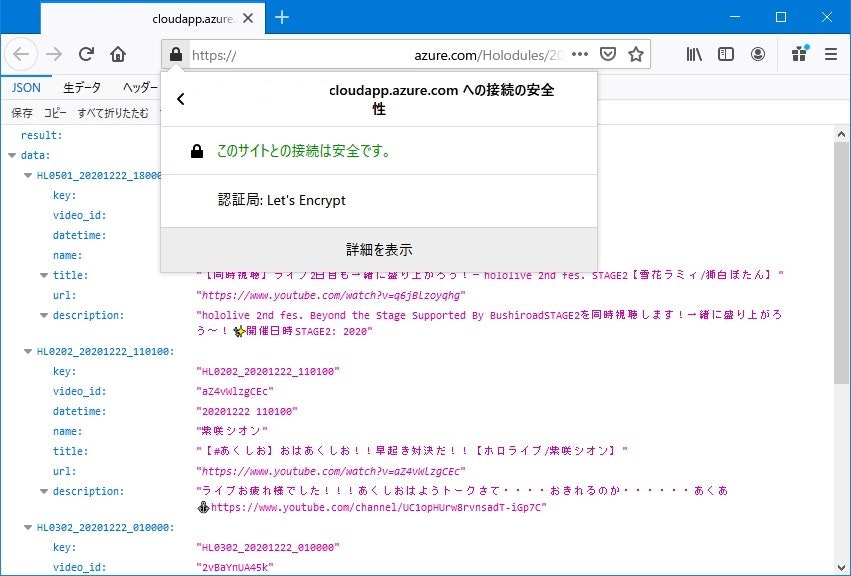
HTTPS (ポート 443) でアクセスできました。このサイトとの接続は安心とのことです。

Certbot を利用した SSL 証明書の削除
参考までに、作成した SSL 証明書の削除は、下記のように delete を指定して Certbot を実行します。
$ sudo certbot delete

Saving debug log to /var/log/letsencrypt/letsencrypt.log

Which certificate(s) would you like to delete?
- - - - - - - - - - - - - - - - - - - - - - - - - - - - - - - - - - - - - - - -
1: hogehoge.cloudapp.azure.com
- - - - - - - - - - - - - - - - - - - - - - - - - - - - - - - - - - - - - - - -
Select the appropriate numbers separated by commas and/or spaces, or leave input
blank to select all options shown (Enter 'c' to cancel): 1

- - - - - - - - - - - - - - - - - - - - - - - - - - - - - - - - - - - - - - - -
The following certificate(s) are selected for deletion:

  * hogehoge.cloudapp.azure.com

Are you sure you want to delete the above certificate(s)?
- - - - - - - - - - - - - - - - - - - - - - - - - - - - - - - - - - - - - - - -
(Y)es/(N)o: Y
Deleted all files relating to certificate hogehoge.cloudapp.azure.com.
これだけだと、Nginx の設定ファイルなどはそのままとなってしまうため、手動で設定ファイルを修正して再起動(または再読み込み)する必要があります。
Certbot を利用した SSL 証明書の自動更新確認
これまでの手順で導入した Certbot は、定期的に証明書の有効期限の自動更新を行いますが、renew --dry-run を指定して Certbot を実行することで、更新をテストできます。
ただし、今回もこれではエラーになってしまったため、
$ sudo certbot renew --dry-run
Saving debug log to /var/log/letsencrypt/letsencrypt.log

- - - - - - - - - - - - - - - - - - - - - - - - - - - - - - - - - - - - - - - -
Processing /etc/letsencrypt/renewal/hogehoge.cloudapp.azure.com.conf
- - - - - - - - - - - - - - - - - - - - - - - - - - - - - - - - - - - - - - - -
Cert not due for renewal, but simulating renewal for dry run
Plugins selected: Authenticator nginx, Installer nginx
Simulating renewal of an existing certificate for hogehoge.cloudapp.azure.com
Performing the following challenges:
http-01 challenge for hogehoge.cloudapp.azure.com
Using default addresses 80 and [::]:80 ipv6only=on for authentication.
Waiting for verification...
Challenge failed for domain hogehoge.cloudapp.azure.com
http-01 challenge for hogehoge.cloudapp.azure.com
Cleaning up challenges
Attempting to renew cert (hogehoge.cloudapp.azure.com) from /etc/letsencrypt/renewal/hogehoge.cloudapp.azure.com.conf produced an unexpected error: Some challenges have failed.. Skipping.
All renewal attempts failed. The following certs could not be renewed:
  /etc/letsencrypt/live/hogehoge.cloudapp.azure.com/fullchain.pem (failure)

- - - - - - - - - - - - - - - - - - - - - - - - - - - - - - - - - - - - - - - -
** DRY RUN: simulating 'certbot renew' close to cert expiry
**          (The test certificates below have not been saved.)

All renewal attempts failed. The following certs could not be renewed:
  /etc/letsencrypt/live/hogehoge.cloudapp.azure.com/fullchain.pem (failure)
** DRY RUN: simulating 'certbot renew' close to cert expiry
**          (The test certificates above have not been saved.)
- - - - - - - - - - - - - - - - - - - - - - - - - - - - - - - - - - - - - - - -
1 renew failure(s), 0 parse failure(s)

IMPORTANT NOTES:
 - The following errors were reported by the server:

   Domain: hogehoge.cloudapp.azure.com
   Type:   unauthorized
   Detail: Invalid response from
   http://hogehoge.cloudapp.azure.com/.well-known/acme-challenge/6uWFQz67cHvdXqevhQhIayObcJAgp-4uS3nQmwktOf8
   [20.46.183.35]: "<html>\r\n<head><title>404 Not
   Found</title></head>\r\n<body>\r\n<center><h1>404 Not
   Found</h1></center>\r\n<hr><center>nginx/1.18.0 (Ub"

   To fix these errors, please make sure that your domain name was
   entered correctly and the DNS A/AAAA record(s) for that domain
   contain(s) the right IP address.
このように、公開パスを明示的に指定して実行しました。
$ sudo certbot renew --dry-run --webroot -w <公開パス>
Saving debug log to /var/log/letsencrypt/letsencrypt.log

- - - - - - - - - - - - - - - - - - - - - - - - - - - - - - - - - - - - - - - -
Processing /etc/letsencrypt/renewal/hogehoge.cloudapp.azure.com.conf
- - - - - - - - - - - - - - - - - - - - - - - - - - - - - - - - - - - - - - - -
Cert not due for renewal, but simulating renewal for dry run
Plugins selected: Authenticator webroot, Installer None
Simulating renewal of an existing certificate for hogehoge.cloudapp.azure.com
Performing the following challenges:
http-01 challenge for hogehoge.cloudapp.azure.com
Using the webroot path <公開パス> for all unmatched domains.
Waiting for verification...
Cleaning up challenges

- - - - - - - - - - - - - - - - - - - - - - - - - - - - - - - - - - - - - - - -
new certificate deployed without reload, fullchain is
/etc/letsencrypt/live/hogehoge.cloudapp.azure.com/fullchain.pem
- - - - - - - - - - - - - - - - - - - - - - - - - - - - - - - - - - - - - - - -

- - - - - - - - - - - - - - - - - - - - - - - - - - - - - - - - - - - - - - - -
** DRY RUN: simulating 'certbot renew' close to cert expiry
**          (The test certificates below have not been saved.)

Congratulations, all renewals succeeded. The following certs have been renewed:
  /etc/letsencrypt/live/hogehoge.cloudapp.azure.com/fullchain.pem (success)
** DRY RUN: simulating 'certbot renew' close to cert expiry
**          (The test certificates above have not been saved.)
- - - - - - - - - - - - - - - - - - - - - - - - - - - - - - - - - - - - - - - -
Certbot を利用した SSL 証明書の更新
SSL 証明書の更新を実際に行う場合は下記コマンドを実行します。
$ sudo certbot renew
更新する必要がない場合はスキップされます。
Saving debug log to /var/log/letsencrypt/letsencrypt.log

- - - - - - - - - - - - - - - - - - - - - - - - - - - - - - - - - - - - - - - -
Processing /etc/letsencrypt/renewal/hogehoge.cloudapp.azure.com.conf
- - - - - - - - - - - - - - - - - - - - - - - - - - - - - - - - - - - - - - - -
Cert not yet due for renewal

- - - - - - - - - - - - - - - - - - - - - - - - - - - - - - - - - - - - - - - -

The following certs are not due for renewal yet:
  /etc/letsencrypt/live/hogehoge.cloudapp.azure.com/fullchain.pem expires on 2021-03-22 (skipped)
No renewals were attempted.
- - - - - - - - - - - - - - - - - - - - - - - - - - - - - - - - - - - - - - - -
/etc/letsencrypt/renewal/hogehoge.cloudapp.azure.com.conf の設定に従って更新を行うため、ポート 80 でアクセスする公開パスを意図的に指定したい場合などは設定を変更しておきます。
# renew_before_expiry = 30 days
version = 1.10.1
archive_dir = /etc/letsencrypt/archive/hogehoge.cloudapp.azure.com
cert = /etc/letsencrypt/live/hogehoge.cloudapp.azure.com/cert.pem
privkey = /etc/letsencrypt/live/hogehoge.cloudapp.azure.com/privkey.pem
chain = /etc/letsencrypt/live/hogehoge.cloudapp.azure.com/chain.pem
fullchain = /etc/letsencrypt/live/hogehoge.cloudapp.azure.com/fullchain.pem

# Options used in the renewal process
[renewalparams]
account = XXXXXXXXXXXXXXXXXXXXXXXXXXXXXXXX
authenticator = webroot
manual_public_ip_logging_ok = None
webroot_path = <公開パス>,
server = https://...
[[webroot_map]]
今回は証明書の生成や自動更新確認の時点で公開パスを指定していたため、すでに設定されていました。
おわりに
Azure VM + Nginx へ配置した Web API とやりとりするデータを暗号化することができました。
Nginx はほとんど利用したことがないですが、やりたいことを実現するための設定がシンプルでわかりやすいですね。
Let's Encrypt は、無料で SSL 証明書が利用できるため助かりました。
メリット・デメリットもいろいろあるようですが、一般的に販売されている SSL 証明書と、暗号強度などがほぼ同じということが驚きです。
SSL 証明書の有効期間が 90 日間ということで短いですが、自動更新の仕組みがあるため、通常利用に問題はなさそうです。
このまま利用して更新などを確認してこうと思います。