はじめに
次世代 Web 拡張フレームワーク「WXT」と「React (TypeScript)」を利用して、Youtube 動画のスクリーンショットを撮影する Chrome 拡張機能を作成しました。
作ったもの
Chrome 拡張機能として Youtube のページで動作し、1秒単位、0.1秒単位、疑似フレーム単位で、ししろん ♌ や すいちゃん☄️ をはじめとした様々な動画のベストポジションに移動して、PNG形式のスクリーンショットを撮影します。

なお、撮影画質(解像度)は再生している動画の画質に依存します。
WXT とは
WXT は Chrome 拡張機能の開発手順を簡素化し、モダンな開発手法に対応したフレームワークです。
WXT - Next-gen Web Extension Framework
WXT's simplifies the chrome extension development process by providing tools for zipping and publishing, the best-in-class dev mode, an opinionated project structure, and more. Iterate faster, develop features not build scripts, and use everything the JS ecosystem has to offer.
モチベーション
Google のサイトで Chrome 拡張機能の基本的な開発方法を学習し、HTML + CSS + JavaScript を組み合わせて Chrome 拡張機能を開発したのですが、せっかくなら TypeScript や React できれば Chakra-UI も利用して良い感じに開発したいなと探してみたところ、WXT を発見し試してみることにしました。
開発環境
- Windows 11
- PowerShell 7
- Visual Studio Code
- Node.js v22.7.0 (npm 10.8.2)
- wxt 0.19.7
- React 18.3.1
- TypeScript 5.5.4
- Chakra-UI 2.8.2
プロジェクトの作成から実行
プロジェクトを新規作成する
まずは、Node.js と npm のバージョンを確認しておきます。
> node --version
v22.7.0
> npm --version
10.8.2
Node.js は nvm を利用して導入しています。
wxt のサイトの手順に従ってプロジェクトを作成していきます。
> npx wxt@latest init youtube-snapshot

Need to install the following packages:
wxt@0.19.8
Ok to proceed? (y)
テンプレートとして react を選択しました。
npm warn deprecated inflight@1.0.6: This module is not supported, and leaks memory. Do not use it. Check out lru-cache if you want a good and tested way to coalesce async requests by a key value, which is much more comprehensive and powerful.
npm warn deprecated rimraf@2.4.5: Rimraf versions prior to v4 are no longer supported
npm warn deprecated glob@6.0.4: Glob versions prior to v9 are no longer supported

WXT 0.19.7
ℹ Initalizing new project
? Choose a template » - Use arrow-keys. Return to submit.
    vanilla
    vue
>   react
    solid
    svelte
現バージョンでは inflight がサポート終了かつメモリリークが発生しているなどの警告が表示されますが、いったんこのまま進めました。
パッケージマネージャーとして npm を選択しました。
WXT 0.19.7
ℹ Initalizing new project
√ Choose a template » react
? Package Manager » - Use arrow-keys. Return to submit.
>   npm
    pnpm
    yarn
    bun (experimental)
プロジェクトが作成されました。
WXT 0.19.7
ℹ Initalizing new project
√ Choose a template » react
√ Package Manager » npm
✔ Downloading template

✨ WXT project created with the react template.

Next steps:
  1. cd youtube-snapshot
  2. npm install
プロジェクトディレクトリに移動してパッケージをインストールします。
> cd .\youtube-snapshot\
> npm install
パッケージがインストールされました。
> wxt-react-starter@0.0.0 postinstall
> wxt prepare

WXT 0.19.7
ℹ Generating types...
✔ Finished in 3.654 s

added 570 packages, and audited 571 packages in 26s

155 packages are looking for funding
  run `npm fund` for details

found 0 vulnerabilities
プロジェクトを開発モードで実行する
これが WXT で感動した機能のひとつです。開発モードで実行するとブラウザが起動し拡張機能を利用可能な状態となります。
> npm run dev
開発モードを実行したままにしておくと、コードを保存した際にホットリロードしてくれるのでとても開発しやすいです。

プロジェクトをビルドする
プロジェクトをビルドすることで、TypeScript から JavaScript へのトランスパイルだけではなく、拡張機能用のマニフェストの生成も含めて、拡張機能のフォルダ階層に沿った出力をしてくれます。
> npm run build
マニフェストに出力される情報は、wxt.config.ts や package.json や HTML のタイトルなどで設定します。
> wxt-react-starter@0.0.0 build
> wxt build

WXT 0.19.7
ℹ Building chrome-mv3 for production with Vite 5.4.3
✔ Built extension in 1.212 s
  ├─ .output\chrome-mv3\manifest.json               433 B
  ├─ .output\chrome-mv3\popup.html                  457 B
  ├─ .output\chrome-mv3\background.js               10.42 kB
  ├─ .output\chrome-mv3\chunks\popup-6icMebcD.js    143.42 kB
  ├─ .output\chrome-mv3\content-scripts\content.js  13.84 kB
  ├─ .output\chrome-mv3\assets\popup-CJe7ZR0W.css   1.42 kB
  ├─ .output\chrome-mv3\assets\react-CqE24J1b.svg   4.13 kB
  ├─ .output\chrome-mv3\icon\128.png                3.07 kB
  ├─ .output\chrome-mv3\icon\16.png                 559 B
  ├─ .output\chrome-mv3\icon\32.png                 916 B
  ├─ .output\chrome-mv3\icon\48.png                 1.33 kB
  ├─ .output\chrome-mv3\icon\96.png                 2.37 kB
  └─ .output\chrome-mv3\wxt.svg                     1.07 kB
Σ Total size: 183.44 kB
✔ Finished in 1.734 s
プロジェクトを公開のために ZIP 化する
> npm run zip
Chrome 拡張機能として読み込む
- Chrome の URL 欄に chrome://extensions/ を入力して拡張機能画面を開きます
- 右上の デベロッパーモード を ON にします
- パッケージ化されていない拡張機能を読み込む をクリックし、ビルドしたフォルダ(.output/chrome-mv3)を選択します
Youtube 動画のスクリーンショット機能の組み込み
不要なファイルを削除する
プロジェクトの下記ファイルを削除しておきます。
- assets\react.svg
- entrypoints\popup\App.css
- entrypoints\popup\style.css
- public\wxt.svg
既存のファイルを修正する
プロジェクトの既存のファイルをいくつか修正します。
index.html の言語に日本語を指定しタイトルを変更します。
<!doctype html>
<html lang="ja">
  <head>
    <meta charset="UTF-8" />
    <meta name="viewport" content="width=device-width, initial-scale=1.0" />
    <title>Youtube Snapshot</title>
    <meta name="manifest.type" content="browser_action" />
  </head>
  <body>
    <div id="root"></div>
    <script type="module" src="./main.tsx"></script>
  </body>
</html>
main.tsx のスタイルシート指定を削除します。
import React from 'react';
import ReactDOM from 'react-dom/client';
import App from './App.tsx';

ReactDOM.createRoot(document.getElementById('root')!).render(
  <React.StrictMode>
    <App />
  </React.StrictMode>,
);
package.json の名前や説明およびバージョンなどを変更します。
{
  "name": "youtube-snapshot",
  "description": "YouTube Video Screenshot Extension",
  "author": "kerobot",
  "private": true,
  "version": "1.0.0",
  "type": "module",
  "scripts": {
    以下略
  }
}
wxt.config.ts のスタートアップページやパーミッションなどを変更します。
import { defineConfig } from 'wxt';

// See https://wxt.dev/api/config.html
export default defineConfig({
  modules: ['@wxt-dev/module-react'],
  runner: {
    // 開発モードで実行した際に起動するページ
    startUrls: ["https://www.youtube.com"],
  },
  manifest: {
    // バージョンや説明や名前は package.json に記述する
    author: 'kerobot', // 作者名を追加
    action: {
      default_popup: 'popup.html',
      default_icon: {16: 'icon/16.png'},
      // 既定のタイトルは popup.html の title タグに記述する
    },
    permissions: ['activeTab','declarativeContent','storage'],
    // マッチパターンは content.ts に記述する
  },
});
ポップアップページ(設定ページ)を作成する
まずは、拡張機能を設定するためのポップアップページから作成します。
Chakra-UI をインストールします。
> npm imstall @chakra-ui/react @emotion/react @emotion/styled framer-motion react-icons
テーマを追加します。
import { extendTheme } from "@chakra-ui/react";

// Chakra UI のテーマを拡張
export const theme = extendTheme({
    styles: {
      global: {
        body: {
          margin: '0',
          padding: '0',
        },
      },
    },
  });
ストレージに保管する設定の定義を追加します。
import { storage } from "wxt/storage";

// ストレージに保管する設定の型と初期値を含めて定義
export const snapshotShowFps =
  storage.defineItem<boolean>('local:snapshot-show-fps', {
    fallback: true,
  });
ストレージは chrome.storage を直接利用するのではなく、WXT によりラップされた wxt/storage を利用します。
他にもいろいろと便利な API が用意されています。
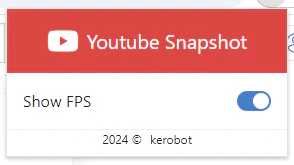
拡張機能の FPS 表示を設定するためのポップアップページを作成します。
import { useState, useEffect } from 'react';
import { ChakraProvider, Box, Flex, Icon, Text, Switch, Link, Divider } from '@chakra-ui/react';
import { theme } from '@/theme/theme';
import { FaYoutube } from 'react-icons/fa';
import { snapshotShowFps } from '@/utils/storage';

// ポップアップページのコンポーネント
export default function App() {
  const [showFps, setShowFps] = useState(false);

  // コンポーネント読み込み時に動作し、ストレージから設定値を取得する
  // useEffect での async の指定方法に注意
  useEffect(() => {
    const getShowFps = async () => {
      setShowFps(await snapshotShowFps.getValue());
    };
    getShowFps();
  }, []);

  // トグルスイッチを切り替えた際に呼び出され、設定値をストレージに保存する
  const handleToggle = async () => {
    setShowFps(!showFps);
    await snapshotShowFps.setValue(!showFps);
  };

  return (
    <ChakraProvider theme={theme}>
      <Box width="280px" mx="auto">
        <Flex justify="center" align="center" p={4} bg={'red.500'} color={'white'}>
          <Icon as={FaYoutube} boxSize={8} />
          <Text fontSize="xl" ml={2}>Youtube Snapshot</Text>
        </Flex>
        <Box p={4}>
          <Flex align="center" justify="space-between">
            <Text fontSize="medium">Show FPS</Text>
            <Switch isChecked={showFps} onChange={handleToggle} />
          </Flex>
        </Box>
        <Box mb={2} textAlign="center">
          <Divider />
          <Flex justify="center" align="center">
            <Text mr={2}>2024 ©</Text>
            <Link href="https://qiita.com/kerobot" isExternal>kerobot</Link>
          </Flex>
        </Box>
      </Box>
    </ChakraProvider>
  );
}
いったん開発モードで実行し、ポップアップページが動作することを確認します。
コンテンツスクリプト(サイトに組み込む処理)を作成する
先にフレームレートを計算するクラスを追加しておきます。
// フレームレートを計算するクラス
export class FrameRateCalculator {
    private lastFrameTime: number;
    private frameTimes: number[];
    private frameRate: number;

    constructor() {
        this.lastFrameTime = performance.now();
        this.frameTimes = [];
        this.frameRate = 0;
        this.calculateFrameRate();
    }

    // フレームレートを計算する
    private calculateFrameRate(): void {
        // 現在時刻と前回のフレーム時刻の差を100件まで保持して平均フレーム間隔を計算
        const now = performance.now();
        const delta = now - this.lastFrameTime;
        this.lastFrameTime = now;
        this.frameTimes.push(delta);
        if (this.frameTimes.length > 100) {
            this.frameTimes.shift();
        }
        const averageDelta = this.frameTimes.reduce((a, b) => a + b, 0) / this.frameTimes.length;
        // 1秒 = 1000ms / 平均フレーム間隔 = 疑似FPSとする
        this.frameRate = 1000 / averageDelta;
        // 次のフレームレート計算をリクエストする
        requestAnimationFrame(this.calculateFrameRate.bind(this));
    }

    // フレームレートを取得する
    public getFrameRate(): number {
        return this.frameRate;
    }
}
コンテンツスクリプトを移動します。
entrypoints\content.ts → entrypoints\content\index.tsx
Youtube 動画のスクリーンショット撮影機能を作成します。
import { snapshotShowFps } from "@/utils/storage";
import { FrameRateCalculator } from "@/utils/frame-rate-calculator";

// フレームレート計算クラスのインスタンスを作成
const frameRateCalculator = new FrameRateCalculator();
// FPS表示更新用のインターバルID
let frameRateInterval: NodeJS.Timeout;

// コンテンツスクリプトのメイン関数
export default defineContentScript({
  // マッチしたURLで拡張機能を有効にする
  matches: ['*://www.youtube.com/*'],
  main(ctx) {
    // 統合されたコンテンツUIを作成してマウントする
    const ui = createIntegratedUi(ctx, {
      position: 'inline',
      onMount: handleUiMount,
    });
    ui.mount();
  }
});

// YoutubeのコンテンツUIがマウントされた際に呼び出される
function handleUiMount() {
  // MutationObserverオブジェクトを作成し、handleMutations関数をコールバックとして指定
  const observer = new MutationObserver(handleMutations);
  // document.bodyを監視対象に設定し、子要素の追加・削除および全ての子孫要素の変更を監視
  observer.observe(document.body, { childList: true, subtree: true });
}

// DOMの変更を監視して処理を実行する
async function handleMutations() {
  // Youtube 動画上にボタンを追加
  addButtons();
  // ストレージを確認し、FPS表示ありの場合、FPS表示を追加
  const showFps = await snapshotShowFps.getValue();
  if (showFps) {
    createFrameRateDisplay();
  }
  // ストレージの変更を監視し、FPS表示の追加・削除を切り替える
  snapshotShowFps.watch(async (showFps) => {
    if (showFps) {
      createFrameRateDisplay();
    } else {
      removeFrameRateDisplay();
    }
  });
}

// Youtube 動画上にボタンを追加
function addButtons() {
  if (document.getElementById('custom-buttons-container'))
    return;

  // ボタンを配置するコンテナを作成
  const container = document.createElement('div');
  container.id = 'custom-buttons-container';
  Object.assign(container.style, {
    position: 'absolute',
    top: '10px',
    right: '30px',
    zIndex: '1000',
    display: 'flex',
    gap: '5px'
  });

  // 配置するボタンの定義
  const buttons = [
    { label: '-1', class: 'skiptime -1' },
    { label: '-.1', class: 'skiptime -0.1' },
    { label: '-f', class: 'skipframe -1' },
    { label: '+f', class: 'skipframe 1' },
    { label: '+.1', class: 'skiptime 0.1' },
    { label: '+1', class: 'skiptime 1' },
    { label: '📷', class: 'screenshot' }
  ];

  // ボタンのスタイルを定義
  const buttonStyle = {
    alignItems: 'center',
    justifyContent: 'center',
    padding: '5px',
    width: '30px',
    backgroundColor: 'rgba(255, 0, 0, 0.6)',
    color: '#ffffff',
    border: 'none',
    cursor: 'pointer',
    fontSize: '14px',
    borderRadius: '3px'
  };

  // ボタンを作成してコンテナに配置
  buttons.forEach(buttonConfig => {
    const button = document.createElement('button');
    button.innerText = buttonConfig.label;
    button.className = buttonConfig.class;
    Object.assign(button.style, buttonStyle);
    button.addEventListener('click', () => handleButtonClick(button.className));
    container.appendChild(button);
  });

  // Youtubeのプレイヤー要素を取得してコンテナを配置
  const player = document.querySelector('.html5-video-player');
  if (player) {
    player.appendChild(container);
  }
}

// FPS表示を作成する
function createFrameRateDisplay() {
  if (document.getElementById('frame-rate-display')) {
    return;
  }

  const frameRateDisplay = document.createElement('div');
  frameRateDisplay.id = 'frame-rate-display';
  Object.assign(frameRateDisplay.style, {
    padding: '5px',
    backgroundColor: 'rgba(0, 0, 0, 0.6)',
    color: '#ffffff',
    fontSize: '14px',
    borderRadius: '3px'
  });
  frameRateDisplay.innerText = '0FPS';

  const container = document.getElementById('custom-buttons-container');
  if (container) {
    container.insertBefore(frameRateDisplay, container.firstChild);
  }
  // FPS表示を更新するためのインターバルを設定
  frameRateInterval = setInterval(() => {
    const frameRate = frameRateCalculator.getFrameRate().toFixed(2);
    frameRateDisplay.innerText = `${frameRate}FPS`;
  }, 1000);
}

// FPS表示を削除する
function removeFrameRateDisplay() {
  const frameRateDisplay = document.getElementById('frame-rate-display');
  if (frameRateDisplay) {
    frameRateDisplay.remove();
    clearInterval(frameRateInterval);
  }
}

// ボタンクリック時の処理
function handleButtonClick(buttonClass: string) {
  // ボタンのクラス名からアクションと値を取得
  const [action, value] = buttonClass.split(' ');
  // アクションに応じた処理を実行
  switch (action) {
    case 'skiptime':
      skipTime(parseFloat(value));
      break;
    case 'skipframe':
      skipFrame(parseInt(value));
      break;
    case 'screenshot':
      takeScreenshot();
      break;
    default:
      alert('Unknown action');
  }
}

// 動画を指定した秒数分スキップする
function skipTime(seconds: number) {
  const video = document.querySelector('video');
  if (video) {
    video.currentTime += seconds;
  }
}

// 動画を指定したフレーム数分スキップする
function skipFrame(frames: number) {
  const video = document.querySelector('video');
  if (video) {
    const frameRate = frameRateCalculator.getFrameRate();
    const seconds = frames / frameRate;
    video.currentTime += seconds;
  }
}

// 動画のスクリーンショットを撮影する
function takeScreenshot() {
  const video = document.querySelector('video');
  if (video) {
    const canvas = document.createElement('canvas');
    canvas.width = video.videoWidth;
    canvas.height = video.videoHeight;
    const context = canvas.getContext('2d');
    if (!context) {
      alert('Failed to create canvas context');
      return;
    }
    context.drawImage(video, 0, 0, canvas.width, canvas.height);
    const dataURL = canvas.toDataURL('image/png');
    const link = document.createElement('a');
    link.href = dataURL;
    link.download = `snapshot_${getFormattedDate()}.png`;
    link.click();
  }
}

// 日付をフォーマットして返す
function getFormattedDate() {
  const now = new Date();
  const y = now.getFullYear();
  const m = (now.getMonth() + 1).toString().padStart(2, '0');
  const d = now.getDate().toString().padStart(2, '0');
  const h = now.getHours().toString().padStart(2, '0');
  const mi = now.getMinutes().toString().padStart(2, '0');
  const s = now.getSeconds().toString().padStart(2, '0');
  const ms = now.getMilliseconds().toString().padStart(3, '0');
  return `${y}${m}${d}_${h}${mi}${s}_${ms}`;
}
ディレクトリ構成は以下のようになりました。
├─.output
├─.wxt
├─entrypoints
│  ├─content
│  │  └─index.tsx
│  ├─popup
│  │  ├─App.tsx
│  │  ├─index.html
│  │  └─main.tsx
│  └─background.ts
├─public
│  └─icon
│     ├─16.png
│     ├─32.png
│     ├─48.png
│     ├─96.png
│     └─128.png
├─theme
│  └─theme.ts
├─utils
│  ├─frame-rate-calculator.ts
│  └─storage.ts
├─package-lock.json
├─package.json
├─tsconfig.json
└─wxt.config.ts
基本的には entrypoints ディレクトリのコンテンツ、ポップアップ、バックグラウンドに必要な処理を記述していくことになります。
今回はバックグラウンド(Service Worker)を利用していないので削除してもOKです。
アイコンは Canva の無料枠で作成したものを Krita で加工して揃えました。
完成

📷ぱしゃり
おわりに
次世代 Web 拡張フレームワークである「WXT」を初めて利用してみましたが、マニフェストの生成やホットリロードによる継続的な開発、クロスプラットフォームを意識したラッパー API など、拡張機能を開発しやすくする仕組みが盛りだくさんで楽しめました。
他に追加できそうな機能を思いついたら、後処理関連の見直しも含めて引き続き開発してみます。ボタンの表示位置変更やON/OFF切り替えも組み込みたいです。