TerraformでDiscord サーバーを構築する
1.はじめに
1.1 目的
この記事ではTerraformを使ってDiscord サーバーを構築する方法について解説します。
1.2 前提条件
- Terraformについて事前知識を持っていること
- Terraformの環境があること
- Discord Developer Portalにアカウントを持っていること
2. Discord Bot Tokenの取得
Discord Botを作成し、トークンを取得する手順は以下の通りです。
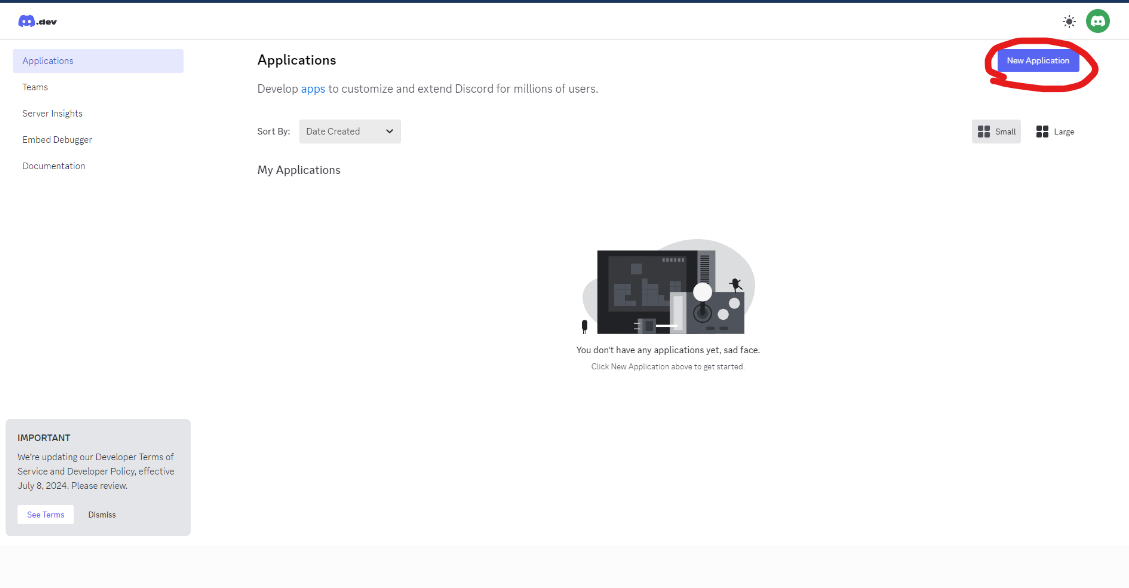
2.1 Discord Developer Portalにアクセス
- Discord Developer Portal にアクセスし、Discordアカウントでログインします。
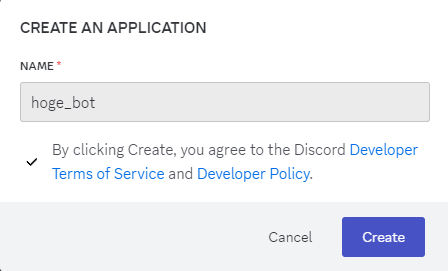
2.2 新しいアプリケーションを作成
2.3 ボットトークンの取得
- 左側のメニューから「Bot」を選択し、TOKENの「Reset Token」ボタンをクリックします。

- 「Yes, do it!」をクリックしてTOKENをRESETします。(パスワードの入力を求められた場合は、Discordアカウントのパスワードを入力してください)
- TOKENが表示されるので「COPY」をクリックしてTOKENを手元に保存してください。後ほど利用します。

3. Terraformの準備
Terraformを使用してDiscord サーバーを構築するための準備手順を以下に示します。
3.1 リポジトリをクローンする
まず、プロジェクトのリポジトリをクローンします。
$ git clone https://github.com/keny-N/terraform-discord.git
$ cd terraform-discord/env/hogegame
3.2 作成されるリソースを確認する
dry runの形で作成されるリソースをplanコマンドで確認する
$ terraform init
$ terraform plan
var.discord_bot_token
  Enter a value: {$ここにDiscord Bot Tokenを入力}


Terraform used the selected providers to generate the following execution plan. Resource actions are indicated with the following symbols:
  + create

Terraform will perform the following actions:

  # module.category.discord_category_channel.default will be created
  + resource "discord_category_channel" "default" {
      + id        = (known after apply)
      + name      = "普通のテキストカテゴリー"
      + position  = 0
      + server_id = (known after apply)
      + type      = "category"
    }

  # module.invite.discord_invite.invite will be created
  + resource "discord_invite" "invite" {
      + channel_id = (known after apply)
      + code       = (known after apply)
      + id         = (known after apply)
      + max_age    = 3600
      + max_uses   = 1
    }

  # module.server.discord_server.server will be created
  + resource "discord_server" "server" {
      + afk_timeout                   = 300
      + default_message_notifications = 0
      + explicit_content_filter       = 0
      + icon_hash                     = (known after apply)
      + id                            = (known after apply)
      + name                          = "hogegame"
      + region                        = "japan"
      + server_id                     = (known after apply)
      + splash_hash                   = (known after apply)
      + verification_level            = 0
    }

  # module.text_channel.discord_text_channel.general will be created
  + resource "discord_text_channel" "general" {
      + category                 = (known after apply)
      + id                       = (known after apply)
      + name                     = "テキストチャンネル1"
      + nsfw                     = false
      + position                 = 0
      + server_id                = (known after apply)
      + sync_perms_with_category = true
      + type                     = "text"
    }

Plan: 4 to add, 0 to change, 0 to destroy.

──────────────────────────────────────────────────────────────────────────────────────────────────────────────────────────────────────────────────────────────────────────────────────────────────────────────────────────────────────────

Note: You didn't use the -out option to save this plan, so Terraform can't guarantee to take exactly these actions if you run "terraform apply" now.
3.3 リソースを作成する
正常に実行されると実行結果の末尾にDiscordサーバーへの招待コードが表示されるのでそれを利用してサーバーへ参加する。
今回のリソース設定だと、一回で使いきりの招待コードが作成される
$ terraform apply
var.discord_bot_token
  Enter a value: {$ここにDiscord Bot Tokenを入力}


Terraform used the selected providers to generate the following execution plan. Resource actions are indicated with the following symbols:
  + create

Terraform will perform the following actions:

  # module.category.discord_category_channel.default will be created
  + resource "discord_category_channel" "default" {
      + id        = (known after apply)
      + name      = "普通のテキストカテゴリー"
      + position  = 0
      + server_id = (known after apply)
      + type      = "category"
    }

  # module.invite.discord_invite.invite will be created
  + resource "discord_invite" "invite" {
      + channel_id = (known after apply)
      + code       = (known after apply)
      + id         = (known after apply)
      + max_age    = 3600
      + max_uses   = 1
    }

  # module.server.discord_server.server will be created
  + resource "discord_server" "server" {
      + afk_timeout                   = 300
      + default_message_notifications = 0
      + explicit_content_filter       = 0
      + icon_hash                     = (known after apply)
      + id                            = (known after apply)
      + name                          = "hogegame"
      + region                        = "japan"
      + server_id                     = (known after apply)
      + splash_hash                   = (known after apply)
      + verification_level            = 0
    }

  # module.text_channel.discord_text_channel.general will be created
  + resource "discord_text_channel" "general" {
      + category                 = (known after apply)
      + id                       = (known after apply)
      + name                     = "テキストチャンネル1"
      + nsfw                     = false
      + position                 = 0
      + server_id                = (known after apply)
      + sync_perms_with_category = true
      + type                     = "text"
    }

Plan: 4 to add, 0 to change, 0 to destroy.

Do you want to perform these actions?
  Terraform will perform the actions described above.
  Only 'yes' will be accepted to approve.

  Enter a value: yes

module.server.discord_server.server: Creating...
module.server.discord_server.server: Creation complete after 3s [id=xxxxxxxxxxx]
module.category.discord_category_channel.default: Creating...
module.category.discord_category_channel.default: Creation complete after 0s [id=xxxxxxxxxxx]
module.text_channel.discord_text_channel.general: Creating...
module.text_channel.discord_text_channel.general: Creation complete after 1s [id=xxxxxxxxxxx]
module.invite.discord_invite.invite: Creating...
module.invite.discord_invite.invite: Creation complete after 1s [id=5ZSFFgb]
4. Discordサーバーへ参加する
4.1 招待リンクからサーバーへ参加
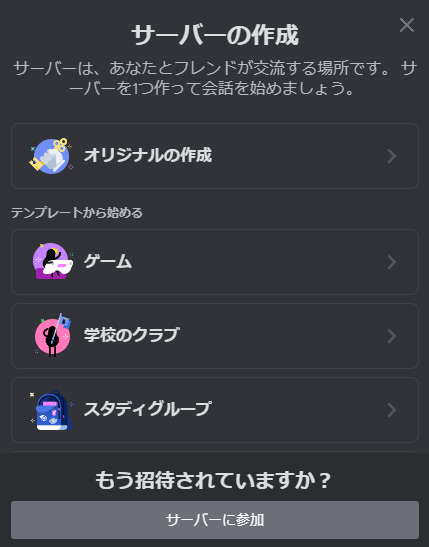
1.Discordを起動し、「サーバーの作成」から「サーバーに参加」をクリックする
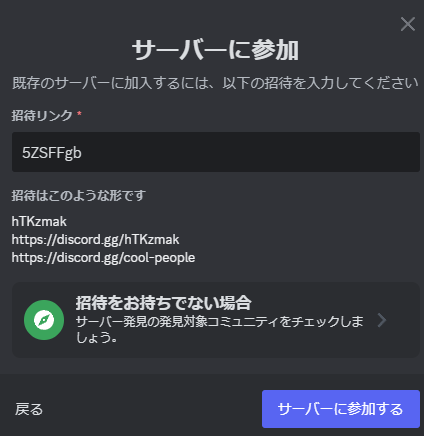
2.招待リンクを入力する欄があるので、先ほどterraform apply実行時に取得した招待コードを入力し、「サーバーに参加する」をクリックする
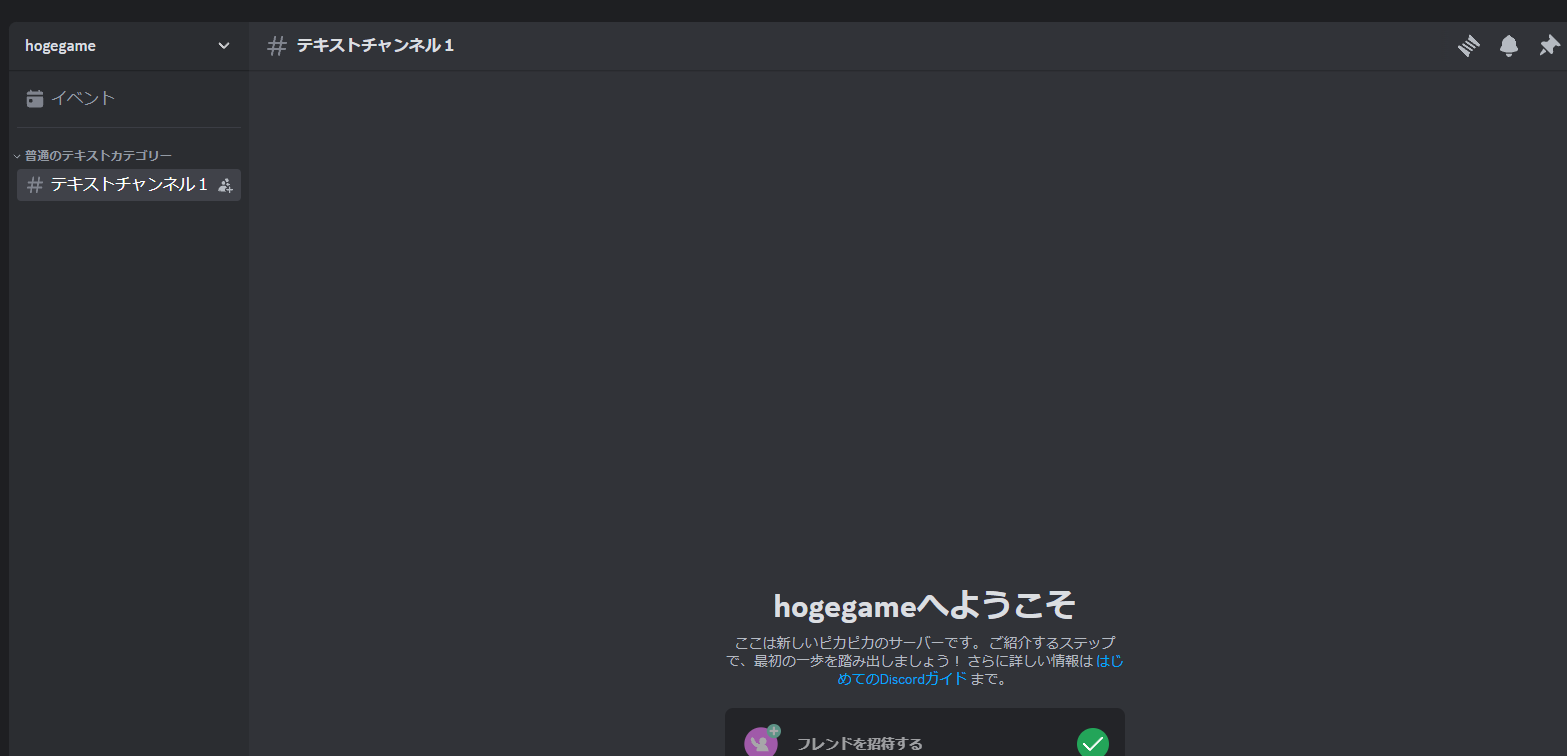
3.サーバーに入れたら成功
5. Terraform設定の説明
主要な箇所を簡潔に説明させていただきます。
5.1 local.tf ファイルの説明
このファイルは、Terraformのローカル設定を定義しており、このファイルの設定値からサーバー名などを決めています。なのでこのサーバーの値を変えることでサーバー名などを変更することが可能です
locals {
  server_name = "hogegame"                  // サーバー名
  region = "japan"                          // サーバーリージョン
  category_name = "普通のテキストカテゴリー"  // カテゴリーネーム
  text_channel_name = "テキストチャンネル1" // テキストチャンネル名
}
5.2 利用したプロバイダーの説明
Discordプロバイダーとして、aequasi/discordを利用しております。
6.感想
最近、業務でTerraformを触ることがあったのでDiscordサーバーを作成してみました。
今回は、最小限なサーバーのみを作成しましたが設定に応じてテキストやボイスチャンネルを作成したり、特定の人には特定のロールを付与したりすることも可能なので拡張することも可能なのでおもしろそうなことができそうであれば拡張していきたいなと思いました。
