0
0

Delete article

Deleted articles cannot be recovered.

Draft of this article would be also deleted.

Are you sure you want to delete this article?

More than 3 years have passed since last update.

Anaconda3のpython環境構築手順

Last updated at Posted at 2020-11-15

#この記事について
AnacondaをWindows10に導入し仮想環境を作成するまでの手順を記載します。
仮想環境はプロジェクトごとの固有な設定やライブラリをインストールする際に他のプロジェクトに影響を与えないように開発するための便利な方法です。

筆者の環境
OS:Windows10
CPU:AMD Ryzen 5 PRO 350Uw / Radeon Vega Mobile Gfx 2.10Ghz
メモリ:8.00GB

#インストール
###ダウンロード
以下のサイトよりダウンロードし、インストーラーに従ってインストールします。(すべて推奨設定)
https://www.anaconda.com/products/individual

#仮想環境の作成
###プロンプトの起動
インストールするとスタートメニューに作成Anaconda3の起動メニューが作成される。
Anaconda Promptを起動する
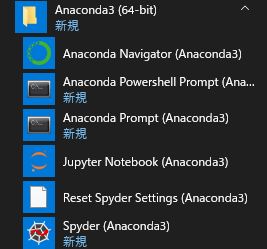
image.png

###仮想環境の作成

#仮想環境の確認
conda info -e

#仮想環境の作成
#conda create -n [任意の環境名]
conda create -n hogehoge

#仮想環境の確認
conda info -e

#仮想環境の起動
#activate [作成した環境名]
activate hogehoge

これで仮想環境の作成は完了です。

0
0
0

Register as a new user and use Qiita more conveniently

  1. You get articles that match your needs
  2. You can efficiently read back useful information
  3. You can use dark theme
What you can do with signing up
0
0

Delete article

Deleted articles cannot be recovered.

Draft of this article would be also deleted.

Are you sure you want to delete this article?