概要
Swift でiOSアプリを作成する際に、
CoreMLを用いて機械学習モジュールを取り入れてみようと思い、それのモックアップを作ってみました。
かなり今更感のある実装+少し前の実装にはなってしまいましたが、それについて少し書いてみたいと思います。
プログラムはこちらに上げています。
構成
機械学習モデル
構成としては、CoreML を使って、既存のモデルから MobileNetv2をそのままダウンロードし、
Resourcesの中にダウンロードして、それをそのまま使います。
こちらにいろいろなモデルが学習済みで格納されているので、全部試してみたいという思いがありましたが、まずは一つ試してみてはどうでしょうか。
もし自分でモデルを生成したい場合は、Keras などでモデルを作成した後、
CoreMLへと変換する必要がありそうです。
その変換については今回は言及しませんが、いろいろな記事があるのでそちらを参照してみてください。
Swiftでの実装
今回はUIKitを用いて実装を行います。
また、個人的にはStoryboardを用いずにProgramatic にレイアウトを実装するのが好きなので、
今回はStoryboardを使わない形で実装を行っています。
Storyboard を使わないという意志がある場合
Storyboardを使わない場合は、少しだけ手順が必要です。
まず初手でMain.storyboardを消去し、
SceneDelegateを以下のように変更します。
class SceneDelegate: UIResponder, UIWindowSceneDelegate {

    var window: UIWindow?


    func scene(_ scene: UIScene, willConnectTo session: UISceneSession, options connectionOptions: UIScene.ConnectionOptions) {
        // Use this method to optionally configure and attach the UIWindow `window` to the provided UIWindowScene `scene`.
        // If using a storyboard, the `window` property will automatically be initialized and attached to the scene.
        // This delegate does not imply the connecting scene or session are new (see `application:configurationForConnectingSceneSession` instead).
        guard let windowScene = (scene as? UIWindowScene) else { return }
        let window = UIWindow(windowScene: windowScene)
        window.rootViewController = TabBarViewController()
        window.makeKeyAndVisible()
        self.window = window
    }
また、今回は簡単なTabbar(アプリの下部にある画面切り替えのタブ)を使って簡単に画面遷移したかったので、
TabBarViewControllerを作ってここに追加しています。
必要でなければコメントアウトすることも可能です。
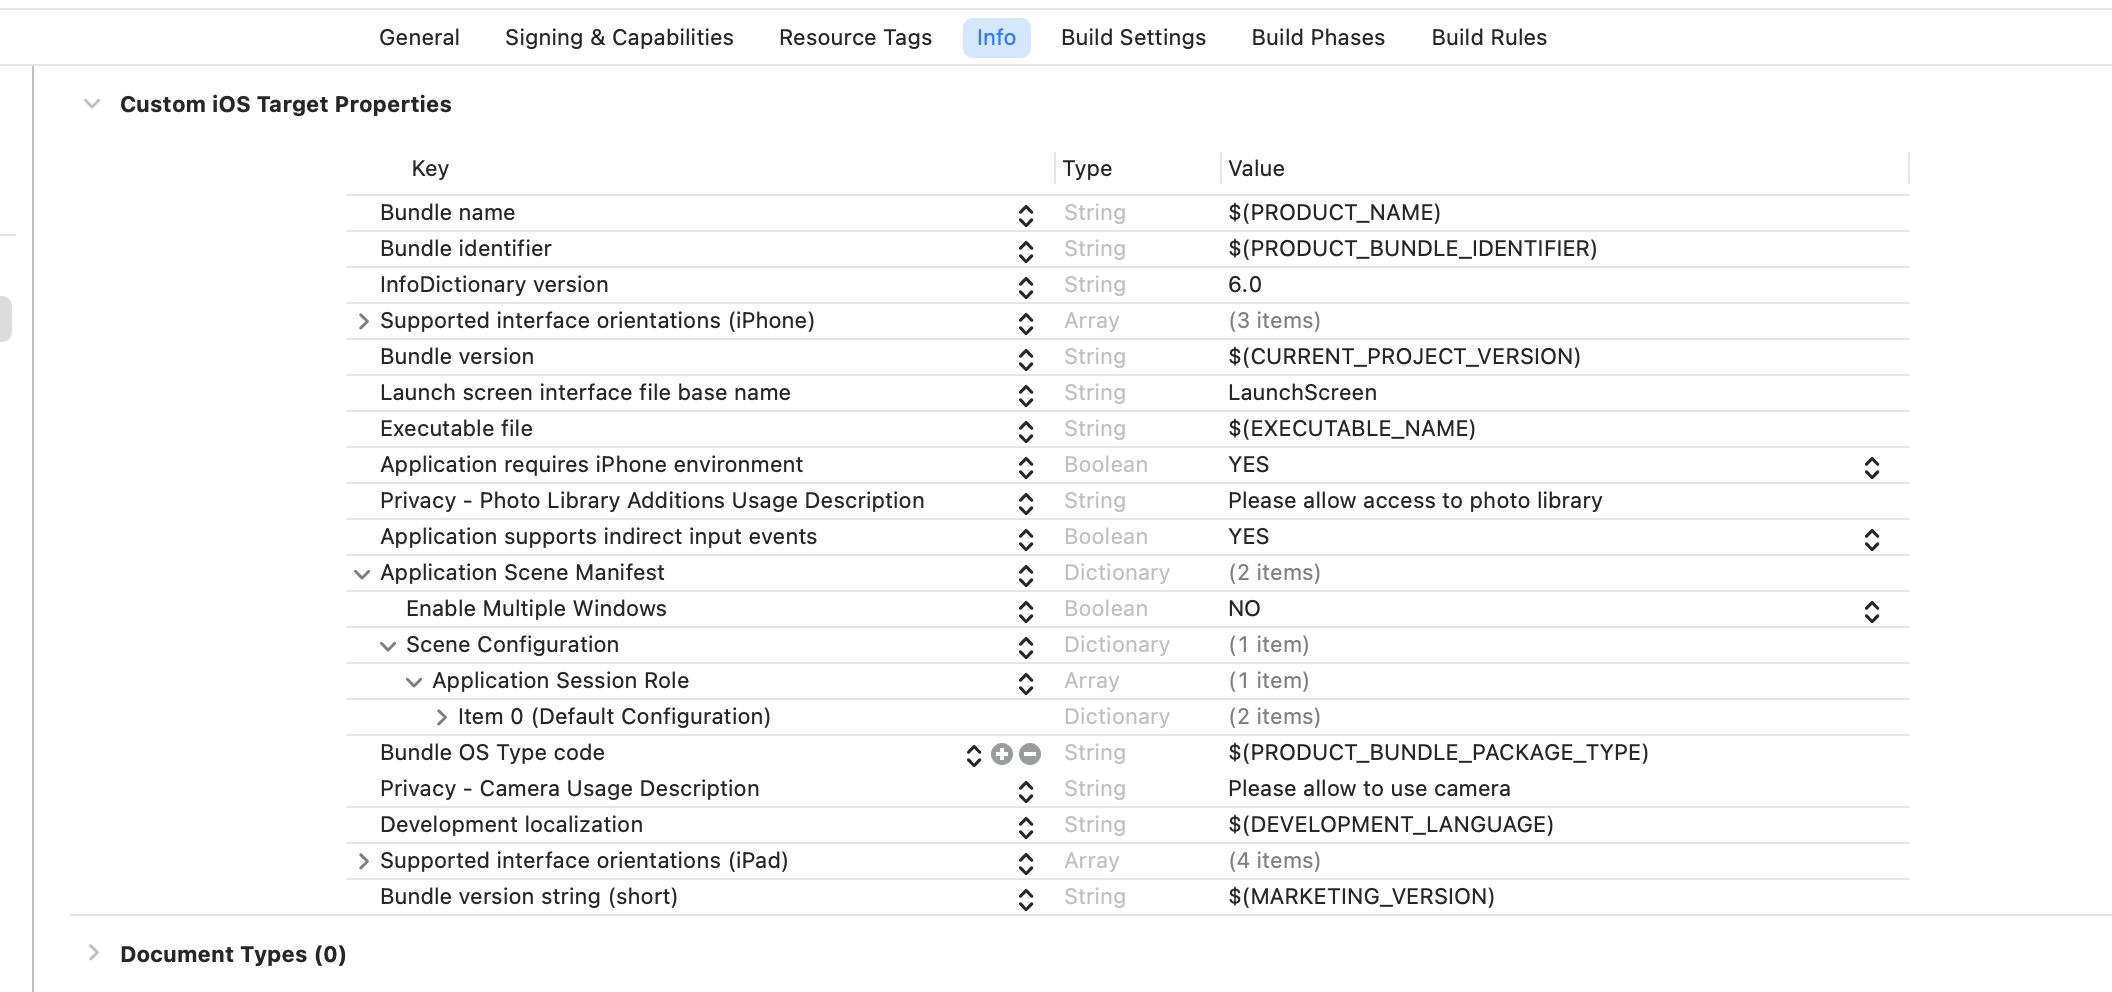
さらに、Infoで
Application Scene Manifest --> Scene Configuration -->
の中のStoryboardの行を削除します。そうするとビルドが通るはずです。
ホーム画面の実装
コードは最小限にしていますが、背景が赤になるようにあえて色を変えています。

画像認識をする画面
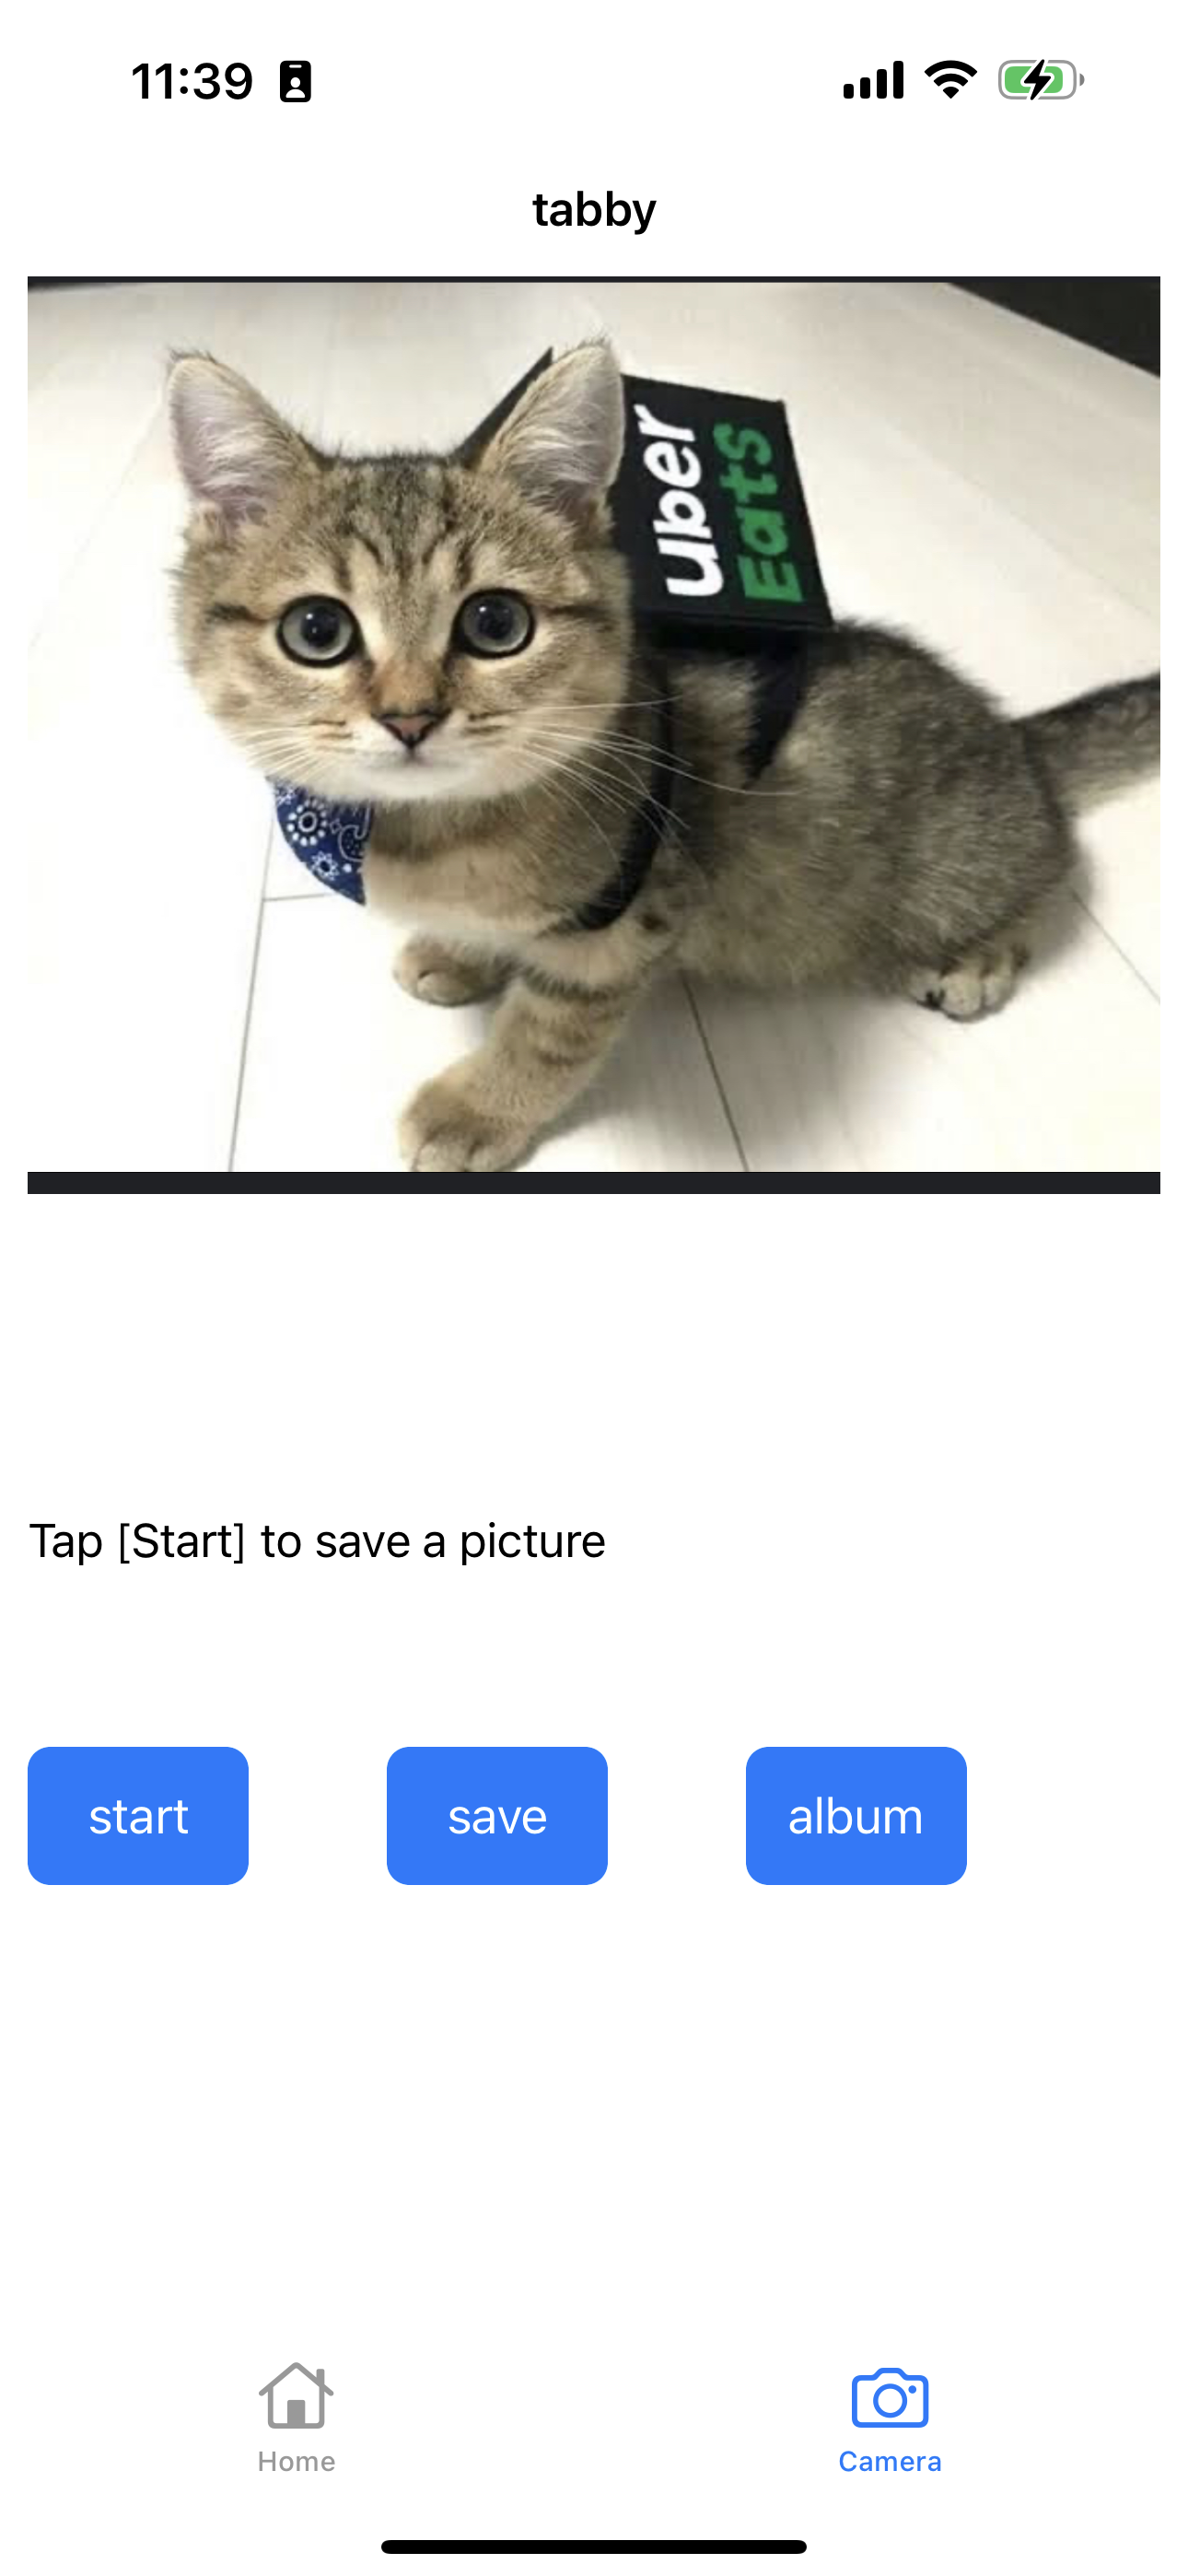
Cameraタブに遷移すると、お決まりのUIImagePickerControllerを用いて
画像を取得した後、UIImagePickerControllerDelegateの関数内で、CoreMLを用いた画像識別を実行しています。
Tabbyは茶トラ猫という英単語で、モデルにより画像に写っているものがなんなのか識別されていることがわかります。
extension CameraViewController: UIImagePickerControllerDelegate{
    func imagePickerController(_ picker: UIImagePickerController, didFinishPickingMediaWithInfo info: [UIImagePickerController.InfoKey : Any]) {
        if let userSelectedImage = info[.originalImage] as? UIImage{
            imageView.image = userSelectedImage

            detectImageObject(image: userSelectedImage)
        }

        imagePicker.dismiss(animated: true, completion: nil)
    }

    /// 画像からオブジェクトを検出・結果を出力
    func detectImageObject(image: UIImage) {
        // VNCoreMLModel(for: xx.modle): xxは使用するCore MLモデルによって変わります
        guard let ciImage = CIImage(image: image), let model = try? VNCoreMLModel(for: MobileNetV2Int8LUT().model) else {
            return
        }
        // Core MLモデルを使用して画像を処理する画像解析リクエスト
        let request = VNCoreMLRequest(model: model) { (request, error) in
            // 解析結果を分類情報として保存
            guard let results = request.results as? [VNClassificationObservation] else {
                return
            }

            // 画像内の一番割合が大きいオブジェクトを出力する
            if let firstResult = results.first {
                let objectArray = firstResult.identifier.components(separatedBy: ",")
                if objectArray.count == 1 {
                    self.navigationItem.title = firstResult.identifier
                } else {
                    self.navigationItem.title = objectArray.first
                }
            }
        }

        // 画像解析をリクエスト
        let handler = VNImageRequestHandler(ciImage: ciImage)

        // リクエストを実行
        do {
            try handler.perform([request])
        }
        catch {
            print(error)
        }
    }

}
まとめ
今回は、Swift(UIKit) + CoreML で簡単に画像認識アプリを作成してみました。
モデルも公式に上がっているMobileNetを使用したので、あまり苦戦することなくアプリ自体は構成することができました。
次のステップとして、いろいろなモデルを使用して、推論を動かしてみると、データの取り方などからUIKitの勉強にもなるのでいいステップかなと思っています。
もしくは、SwiftUIなどを使ってML推論をすることもまあいいアイディアかなとは思っています。
みなさんもいいSwiftライフを。
今回はこの辺で。
追記
CoreMLのモデルは、暗号化を施してモデルを保護することができることができることを初めて知りました。
試してみたいですね、、。

