はじめに
・Flask と JavaScript を勉強し始めた方向けとなります
・TheCatAPI.com : Betaを使用して、猫の画像をAjaxリクエストで取得するアプリを作成します
Fetch API で猫の画像を取得するFlaskアプリを作成する
Flaskを用意します。
Flaskがまだちょっとよくわからないという方は以下の記事を確認してください。
【Pythonで多分人気2位のWebアプリケーションフレームワーク】Flaskの基本をわかりやすくまとめる
構成は以下です。
app.py
templates
└─hello.html
from flask import Flask, render_template
app = Flask(__name__)

@app.route('/')
def hello_world():
    return render_template('hello.html')

if __name__ == "__main__":
    app.run(debug=True)
<!DOCTYPE html>
<html lang="en">
<head>
    <meta charset="UTF-8">
    <meta name="viewport" content="width=device-width, initial-scale=1.0">
    <title>hello</title>
    <h1>hello</h1>
</head>
<body>

</body>
</html>
上記でFlaskを起動させるとブラウザ上で以下の画面が出ます。

JavaScript内でAPIをたたく版
それではFetch APIで猫の画像を表示させていきます。
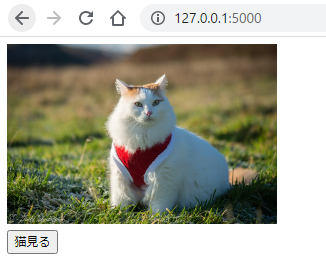
ボタンをクリックして猫の画像を出すようにします。
HTMLの全体のコードが以下です
<!DOCTYPE html>
<html lang="en">
<head>
    <meta charset="UTF-8">
    <meta name="viewport" content="width=device-width, initial-scale=1.0">
    <title>hello</title>
    <style>
        .w300 {
            width: 300px;
        }
    </style>
</head>
<body>
    <form id="form">
        <div id="image"></div>
        <button id="lookCatButton" type="button">猫見る</button>
    </form>
    <script>
        const url = 'https://api.thecatapi.com/v1/images/search?size=full';
        const options = {
            method: 'GET'
        }

        function getCatImage(url, options){
            return fetch(url, options)
            .then( response => response.json() );
        }
        async function getImage(url, options){
            const response = await getCatImage(url, options);
            const imageDiv = document.getElementById("image");
            const imageElement = document.createElement("img");
            imageElement.src = response[0].url;
            imageElement.className = "w300";
            imageDiv.appendChild(imageElement);
        }
        document.getElementById("lookCatButton")
        .addEventListener("click", () =>{
            getImage(url, options)
        })
    </script>
</body>
</html>
説明
Fetch API では1つ目の引数にリクエスト先のURL、2つ目にoptionsを設定できます。
今回は以下のようにURLとoptionsを定義します。
const url = 'https://api.thecatapi.com/v1/images/search?size=full';
const options = {method: 'GET'};
optionsではリクエストのメソッドとしてGETを指定します。
optionについて詳しく知りたい方は以下を参照すると良いです。
https://developer.mozilla.org/ja/docs/Web/API/Fetch_API/Using_Fetch
https://developer.mozilla.org/ja/docs/Web/API/WindowOrWorkerGlobalScope/fetch
fetchの返り値はpromiseで返ってくるため、**.then()メソッドが使えます。
かつ.then()**ではコールバック関数が使えるので、中にアロー関数で引数が1つなので () を省略し、かつ唯一のステートメント return なので {} を省略して書いています。
fetch(url, options)
.then( response => response.json() );
省略しないアロー関数で書くと以下のようになります。
fetch(url, options)
.then( (response) => {
    return response.json()
});
fetchを使用する際、リクエストを送ってレスポンスが返ってくる前に、その後ろに書いたコードが実行されることがあります。
そのためasyn/awaitを使用して、fetch を実行してレスポンスが返ってきてから後続のコードを実行させるようにしています。
asyncファンクションを定義して、その中でfetchを使用した関数にawaitを付けて変数に入れます。以下の箇所です
async function getImage(url, options){
    const response = await getCatImage(url, options);
その後に猫ちゃんの画像URLをappendChildして表示させるようにしています。
一連の処理はボタンをクリックしてから実行させるようにしているため、addEventListenerでclickされたら実行するようにしています。
document.getElementById("lookCatButton")
.addEventListener("click", () =>{
    getImage(url, options)
})
これでボタンを押すたびに猫ちゃんの画像が表示されるようになりました。

あえてpython側でAPIたたく版
上述の通り、fetchでは1つ目の引数にリクエストを送るURLが必要であるため、Flaskのルーティングでリクエスト先のURLを作成します。
そこで猫ちゃんAPIのデータを取得するコードと、レスポンスとして返す際にjsonでダンプさせるためにjsonifyでreturnします。
以下のコードにしました。
/get_dataを追加しています。
from flask import Flask, render_template, jsonify
import requests
app = Flask(__name__)


@app.route('/get_data')
def get_data():
    url = 'https://api.thecatapi.com/v1/images/search?size=full' #猫ちゃんAPI
    response = requests.get(url)
    cat_img_url = eval(response.text)[0]['url'] #ここでイメージURLを取得
    response_data = {
        'cat_img_url' : cat_img_url
    }
    return jsonify(response_data) #jsonifyでjs側に返却する


@app.route('/')
def hello_world():
    return render_template('hello.html')

if __name__ == "__main__":
    app.run(debug=True)
JavaScript側では、リクエスト先のURLを、先ほど設定したルーティング先の ./get_data に変更します。
const url = './get_data';
pythonからはjsonにダンプされた値が入るため、python側で設定した「cat_img_url」を取得するようにします。
imageElement.src = response.cat_img_url;
それ以外はすべて同じにして、全体では以下のコードとなります。
<!DOCTYPE html>
<html lang="en">
<head>
    <meta charset="UTF-8">
    <meta name="viewport" content="width=device-width, initial-scale=1.0">
    <title>Document</title>
    <style>
        .w300 {
            width: 300px;
        }
    </style>
</head>
<body>
    <form id="form">
        <div id="image"></div>
        <button id="lookCat" type="button">猫見る</button>
    </form>
    <script>
        const url = './get_data';
        const options = {
            method: 'GET'
        }

        function getCatImage(url, options){
            return fetch(url, options)
            .then( response => response.json() );
        }
        async function getImage(url, options){
            const response = await getCatImage(url, options);
            const imageDiv = document.getElementById("image");
            const imageElement = document.createElement("img");
            imageElement.src = response.cat_img_url;
            imageElement.className = "w300";
            imageDiv.appendChild(imageElement);
        }
        document.getElementById("lookCat")
        .addEventListener("click", () =>{
            getImage(url, options)
        })
    </script>
</body>
</html>
これでボタンををクリックすると、python側で画像イメージを取得して表示させることができます。
ちなみに今回追加したルーティング先を直接アクセスしてみると以下の内容が表示されます。

おわりに
今回python側でリクエストするのとJavaScript側でリクエストするパターンの2つでfetch リクエスト、レスポンスをしてみたのは頭の整理としてとても良かったです。
参考文献
最新Ajaxリクエスト通信、Fetch APIについてメモ
【Pythonで多分人気2位のWebアプリケーションフレームワーク】Flaskの基本をわかりやすくまとめる
MDN web docs - Fetch API
MDN web docs - Fetch の使用
MDN web docs - Callback function (コールバック関数)
MDN web docs - アロー関数
MDN web docs - async function