※ 記事の内容を更新しました(下記参照)
事前準備
- Homebrew
-
MavensMate-Desktop
- Visual Studio Codeのmavensmate拡張機能を動かすためにバージョンがv0.0.11-beta.6のものを使用する必要があります
-
nodebrew
- npmコマンド用です
Visual Studio Codeのインストール
brew cask update
brew cask install visual-studio-code
拡張機能をインストール
サイドバーで拡張機能を開き、下記を検索・インストールします。
- mavensmate
- Force.com開発用拡張機能
- vetur
- Vueファイルの構文チェック・シンタックスハイライト・ドキュメントのフォーマットを行うための拡張機能
ビルド環境作成
適当な場所にフォルダを作成し、フォルダ内に下記ファイルを作成します。
package.json
パッケージ管理ファイルです。
scriptsのwebpackの引数には最終的にアップロードする静的リソース名を設定します(今回はVueTest)。
{
  "devDependencies": {
    "typescript": "^2.2.2",
    "vue": "^2.2.6",
    "vue-loader": "^11.3.4",
    "vue-template-compiler": "^2.2.6",
    "vue-ts-loader": "0.0.3",
    "vue-typescript-import-dts": "^3.0.1",
    "webpack": "^2.3.3",
    "webpack-sfdc-deploy-plugin": "^1.1.9"
  },
  "scripts": {
    "build-VueTest": "webpack --env.resource_name=VueTest",
    "watch-VueTest": "webpack -w --env.resource_name=VueTest"
  }
}
webpack.config.js
ビルド設定ファイルです。
package.jsonのscriptsで設定したresource_nameと一致するフォルダをビルドして、そのresource_nameでForce.com環境へ静的リソースとしてアップロードします。
var Webpack = require('webpack')
var SfdcDeployPlugin = require('webpack-sfdc-deploy-plugin')

module.exports = function (env_) {
  return {
    entry: './src/' + env_.resource_name + '/index.ts',
    output: {
      filename: './build/' + env_.resource_name + '/bundle.js'
    },
    devtool: 'source-map',
    module: {
      loaders: [
        { test: /\.ts$/, loader: 'vue-ts-loader' },
        { test: /\.vue$/, loader: 'vue-loader' }
      ]
    },
    resolve: { alias: { vue: 'vue/dist/vue.js' } },
    plugins: [
      new Webpack.LoaderOptionsPlugin({
        options: {
          resolve: { extensions: ['.ts', '.vue'] },
          vue: {
            loaders: { js: 'vue-ts-loader' }
          }
        }
      }),
      new SfdcDeployPlugin({
        credentialsPath: __dirname + '/sfdc-org-config.js',
        filesFolderPath: './build/' + env_.resource_name,
        staticResourceName: env_.resource_name
      })
    ]
  }
}
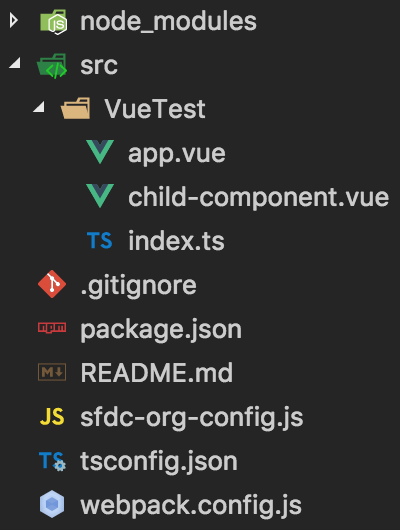
ビルド前プロジェクト構成イメージ

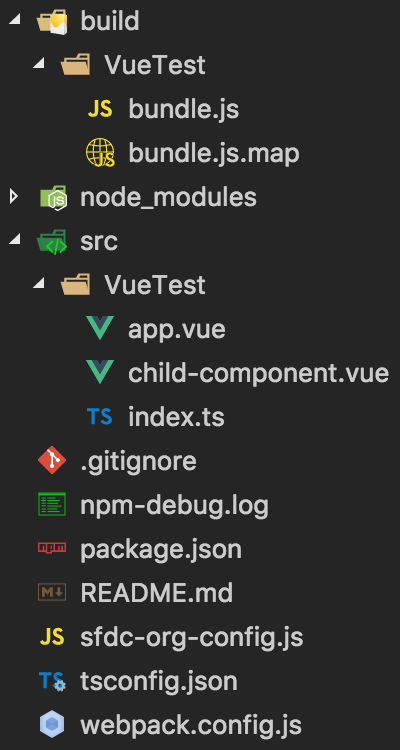
ビルド後プロジェクト構成イメージ

sfdc-org-config.js
Force.comアップロード時のログイン情報記述ファイルです。
Force.comのログイン情報を記述します(webpack-sfdc-deploy-pluginが**Sandbox環境のログインに対応していない**ので方法は後述)。
module.exports = {
  username: 'user@test.com',
  password: 'password',
  token: ''
}
tsconfig.json
TypeScriptの設定ファイルです。
vue-typescript-import-dtsはimport fromで.vueファイルをインポートできるようにします。
{
  "compilerOptions": {
    "module": "es2015",
    "moduleResolution": "node",
    "types": [
      "vue-typescript-import-dts"
    ],
    "allowSyntheticDefaultImports": true
  }
}
パッケージインストール
作成したフォルダまでターミナルで移動し、npm iを実行してpackage.jsonで定義したパッケージをインストールします。
ソース作成
TypeScript + Vue
srcフォルダを作成、その配下にpackage.jsonのscriptsに設定した静的リソース名(VueTest)のフォルダを作成し、下記ソースを作成します。
index.ts
import Vue from 'vue'

import App from './app.vue'


new Vue({
  el: '#app',
  render: _ => _(App)
})
app.vue
<template>
  <div>
    {{text}}
    <child-component>
    </child-component>
  </div>
</template>

<script>
import ChildComponent from './child-component.vue'

export default {
  data() {
    return { text: 'foobar' }
  },
  components: {
    'child-component': ChildComponent
  }
}
</script>
child-component.vue
<template>
  <input type="button"
         :value="button_name"
         @click="showAlert" />
</template>

<script>
export default {
  data() {
    return { button_name: 'foo' }
  },
  methods: {
    showAlert(): void {
      alert('bar')
    }
  }
}
</script>
アップロード
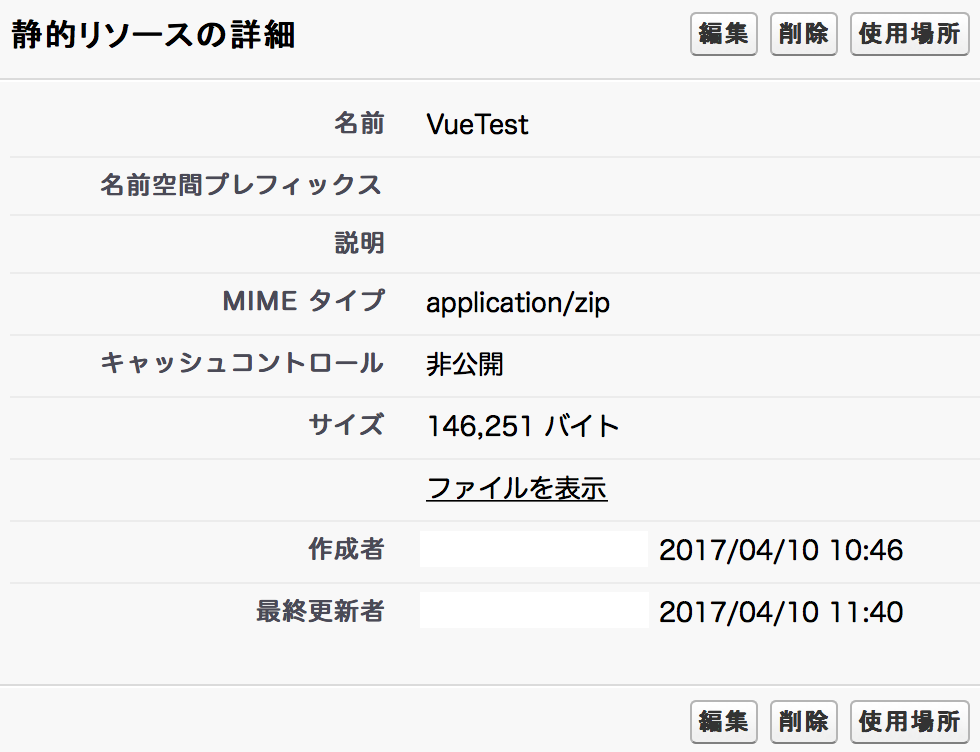
フォルダルートでnpm run build-VueTestを実行することで、静的リソースがアップロードされます。

Visualforce
-
command + shift + P→mnpとタイピング →MavensMate: New Projectを選択し、Force.com環境のソースを取得する- 取得後、
Open in VscodeでVisual Studio Codeでプロジェクトフォルダを開く
- 取得後、
-
command + shift + P→mnvpとタイピング →MavensMate: New Visualforce Pageを選択し、VueTest.pageを作成する
VueTest.page
静的リソースのVueTestの中には、ZIP圧縮された中にbundle.jsが含まれているのでそれをインポートします。
<apex:page
  sidebar="false"
  showHeader="false"
  standardStylesheets="false"
  applyBodyTag="false"
  applyHtmlTag="false"
  docType="html-5.0">

<html>

  <head>
    <meta charset="UTF-8" />
  </head>

  <body style="margin: 0;">
    <div id="app"></div>
    <script src="{!URLFOR($Resource.VueTest, 'bundle.js')}"></script>
  </body>

</html>

</apex:page>
実行結果

まとめ
- 上記サンプル + Sandbox環境ログインに対応したものをGitHubに上げました
- sfdc-org-config.jsにログインURLを設定できる
urlプロパティを追加 - webpack.config.jsに静的リソースのキャッシュコントロールを設定する
isPublicプロパティを追加- 上記修正はプルリクエスト済み
- sfdc-org-config.jsにログインURLを設定できる
- 使用する際ルートフォルダで
npm iでパッケージインストールしてから使用してください - 補足ですが、
npm run watch-VueTestでファイル監視状態になるので毎回npm run watch-VueTestでビルドしなくでもファイル保存だけでビルド → アップロードが走ります