AOPの使用例として、ログ、キャッシュ、トランザクション管理、処理時間計測、例外対応などが有名だと思います。
今回、業務システムで使えそうなものを作ってみたいと思います。
業務システムで使用するテーブルには、作成者、作成日時、更新者、更新日時を保持することが多いと思います。
これらの項目をアプリケーション側で設定してもいいのですが、設定漏れがあったり、本質的でない処理をいろいろなところに書かなければいけなかったりで、結構面倒です。
そこで、AOPを使って、これらの項目を設定してみます。
図で示すと、(ビジネスロジックを実装した@Serviceクラスから)Mapperのcreate*メソッドとupdate*メソッドへの呼び出しをJoin Pointとし、Mapperの引数のモデルオブジェクトに対して、作成者、作成日時、更新者、更新日時を設定してみるということです。

作成者と更新者はSpring Securityの認証情報を使用します。
データ周りのフレームワークはMyBatis、データベースはPostgreSQLを使用しています。
環境
- Spring Framework 4.3.2
- Spring Security 4.1.3
- Thymeleaf 3.0.0
- GlassFish Server Open Source Edition 4.1
- JDK 1.8
- MyBatis 3.4.1
- PostgreSQL 9.4
ソースコードはこちらにあります。
https://github.com/kenjihori/spring
前提
各テーブルに下記の項目を持ちます。
| データ項目名 | データ型 | データ項目名(日本語) |
|---|---|---|
| CREATED_BY_ID | VARCHAR | 作成者ID |
| CREATE_DATETIME | DATETIME | 作成日時 |
| LAST_UPDATED_BY_ID | VARCHAR | 更新者ID |
| LAST_UPDATE_DATETIME | DATETIME | 更新日時 |
そして、テーブルとマッピングされるモデルクラスにも以下のプロパティを持ちます。
| 項目名 | データ型 |
|---|---|
| createdById | String |
| createdTimestamp | Date |
| updatedById | String |
| updatedTimestamp | Date |
Mapperのルールは以下とします。
- Mapperのクラス名 → *Mapper
- insertのメソッド名 → create*
- updateのメソッド名 → update*
- insert、updateのメソッドの引数はテーブルと同じ項目を保持するモデルクラス
Spring Securityを使用して、ログインユーザーの認証情報を保持します。
Spring Securityによる認証の詳細は、今回のテーマから離れるので、概略にとどめておきます。
AuthenticationManagerとして登録したLoginComponentでは、ログイン画面で入力したユーザー名(username)を元に、MyAppUserService(@Service)クラス経由でデータベースよりユーザー情報を取得します。
そして、SpringのUserDetailsを拡張したLoginUserInfoにユーザー情報を格納して返却します。
このLoginUserInfoを後ほど認証情報として利用します。
@Service
public class LoginComponent implements UserDetailsService {

    @Autowired
    private MyAppUserService myAppUserService;

    @Transactional(readOnly = true)
    public UserDetails loadUserByUsername(String username) throws UsernameNotFoundException {

        MyAppUser myAppUser = myAppUserService.findMyAppUser(username);
        if (myAppUser == null) {
            throw new UsernameNotFoundException("MyAppUser ID " + username + " Not Found");
        }
        return new LoginUserInfo(myAppUser, AuthorityUtils.NO_AUTHORITIES);

    }
}
Aspectの作成
それでは早速、Aspectを作成します。
@Aspect
@Component
public class MapperAspect {

    @Before("execution(* com.mycompany.myapp.domain.mapper.*Mapper.create*(..)) || " +
            "execution(* com.mycompany.myapp.domain.mapper.*Mapper.update*(..))")
    public void setCommonProperty(JoinPoint jp) throws Throwable {

        // Mapperのメソッド名を取得
        MethodSignature signature = (MethodSignature) jp.getSignature();
        Method method = signature.getMethod();
        String methodName = method.getName();

        // Spring Securityの認証情報を取得
        LoginUserInfo loginUserInfo = null;
        Authentication authentication = SecurityContextHolder.getContext().getAuthentication();
        if(authentication.getPrincipal() instanceof LoginUserInfo) {
            loginUserInfo = LoginUserInfo.class.cast(authentication.getPrincipal());
        }

        // 現在日時の取得
        Date now = new Date();

        // Mapperの第一引数(モデルオブジェクト)を取得
        Object[] args = jp.getArgs();
        Object dto = args[0];

        // create*メソッドは作成者・作成日時・更新者・更新日時をセット
        if(methodName.startsWith("create")) {
            setCreatedProperty(loginUserInfo, now, dto);
            setUpdatedProperty(loginUserInfo, now, dto);
        // update*メソッドは更新者・更新日時をセット
        } else if(methodName.startsWith("update")) {
            setUpdatedProperty(loginUserInfo, now, dto);
        }

    }

    // 作成者IDと作成日時をセット
    private void setCreatedProperty(LoginUserInfo loginUserInfo, Date now, Object dto) throws Throwable {

        // Mapperの引数にsetCreatedByIdメソッドがある場合、認証情報をセット
        Method setCreatedById = ReflectionUtils.findMethod(dto.getClass(), "setCreatedById", String.class);
        if(setCreatedById != null) {
            setCreatedById.invoke(dto, loginUserInfo.getId());
        }

        // Mapperの引数にsetCreatedTimestampメソッドがある場合、現在日時をセット
        Method setCreatedTimestamp  = ReflectionUtils.findMethod(dto.getClass(), "setCreatedTimestamp", Date.class);
        if(setCreatedTimestamp != null) {
            setCreatedTimestamp.invoke(dto, now);
        }

    }

    // 更新者IDと更新日時をセット
    private void setUpdatedProperty(LoginUserInfo loginUserInfo, Date now, Object dto) throws Throwable {

        // Mapperの引数にsetUpdatedByIdメソッドがある場合、認証情報をセット
        Method setUpdatedById  = ReflectionUtils.findMethod(dto.getClass(), "setUpdatedById", String.class);
        if(setUpdatedById != null) {
            setUpdatedById.invoke(dto, loginUserInfo.getId());
        }

        // Mapperの引数にsetUpdatedTimestampメソッドがある場合、現在日時をセット
        Method setUpdatedTimestamp  = ReflectionUtils.findMethod(dto.getClass(), "setUpdatedTimestamp", Date.class);
        if(setUpdatedTimestamp != null) {
            setUpdatedTimestamp.invoke(dto, now);
        }

    }

}
まず、@Beforeの引数で、Join PointをPointcut式で指定します。
対象のパッケージ、Mapperのクラス名(*Mapper)、メソッド名(create*もしくはupdate*)を指定します。
@Before("execution(* com.mycompany.myapp.domain.mapper.*Mapper.create*(..)) || " +
        "execution(* com.mycompany.myapp.domain.mapper.*Mapper.update*(..))")
Spring Securityの認証情報は、SecurityContextHolderから取得できます。
LoginUserInfo loginUserInfo = null;
Authentication authentication = SecurityContextHolder.getContext().getAuthentication();
if(authentication.getPrincipal() instanceof LoginUserInfo) {
    loginUserInfo = LoginUserInfo.class.cast(authentication.getPrincipal());
}
そして、Mapperのメソッド名に応じて、createメソッドの場合は作成者・作成日時を、updateメソッドの場合は作成者・作成日時・更新者・更新日時をセットします。モデルオブジェクトのメソッドを呼び出すため、SpringのReflectionUtilsを利用しています。
作成者IDの設定例
Method setCreatedById = ReflectionUtils.findMethod(dto.getClass(), "setCreatedById", String.class);
if(setCreatedById != null) {
    setCreatedById.invoke(dto, loginUserInfo.getId());
}
画面からMapperまでの流れ
Aspectができたので、IDと名称を持つ商品テーブルの新規作成と更新をやってみたいと思います。
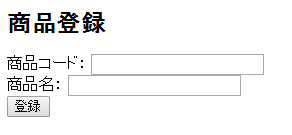
登録画面のイメージ
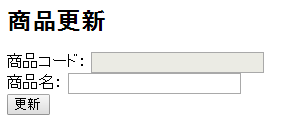
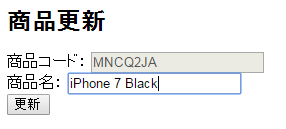
更新画面のイメージ
コントローラーはこちらです。
登録処理(createメソッド)では、フォームの内容をモデルに格納し、サービスクラスを呼び出します。
更新処理(updateメソッド)では、更新画面表示時(showメソッド)にsessionに格納したモデルに対して、フォームの内容で上書きし、サービスクラスに渡します。
@Controller
public class ItemController {
    // 省略
    @RequestMapping(value = "item", method = RequestMethod.POST)
    public String create(@ValidatedItemForm form, BindingResult bindingResult, Model model) {
        // 省略
        // フォームからモデルを作成
        Item item = new Item();
        item.setId(form.getItemCode());;
        item.setName(form.getItemName());
        // 商品を登録
        itemService.createItem(item);
        // 完了画面に遷移
        model.addAttribute("itemForm", form);
        return "itemComplete";
    }

    @RequestMapping(value = "item/{itemCode}", method = RequestMethod.GET)
    public String show(HttpSession session, @PathVariable("itemCode") String itemCode, ItemForm form, Model model) {
        // 商品を取得
        Item item = itemService.findItem(itemCode);
        // セッションに格納
        session.setAttribute("sessioitem", item);
        // 更新画面に遷移
        model.addAttribute("item", item);
        return "itemUpdate";
    }

    @RequestMapping(value = "item/{itemCode}", method = RequestMethod.POST)
    public String update(HttpSession session, @Validated ItemForm form, BindingResult bindingResult, Model model) {
        // 省略
        // 更新画面表示時にセッションに格納したモデルクラスに対して、フォームの内容で更新
        Item item = (Item)session.getAttribute("sessioitem");
        item.setName(form.getItemName());
        // 商品を更新
        itemService.updateItem(item);
        // 完了画面に遷移
        model.addAttribute("itemForm", form);
        return "itemComplete";
    }
}
サービスクラスはMapperを呼び出すだけです。
@Service
public class ItemService {

    @Autowired
    ItemMapper itemMapper;

    public void createItem(Item item) {
        itemMapper.createItem(item);
    }

    public void updateItem(Item item) {
        itemMapper.updateItem(item);
    }

}
Mapperはメソッド定義だけで、SQLはマッピングファイルに作成しています。
public interface ItemMapper {

    void createItem(Item item);

    void updateItem(Item item);

}
<insert id="createItem" parameterType="Item">
INSERT INTO item (
    id,
    name,
    created_by_id,
    created_timestamp,
    updated_by_id,
    updated_timestamp
) VALUES (
    #{id},
    #{name},
    #{createdById},
    #{createdTimestamp},
    #{updatedById},
    #{updatedTimestamp}
)
</insert>
<update id="updateItem" parameterType="Item">
UPDATE item SET
    name = #{name},
    updated_by_id = #{updatedById},
    updated_timestamp = #{updatedTimestamp}
WHERE
    id = #{id}
</update>
動作確認
それでは、実際に登録処理をしてみます。
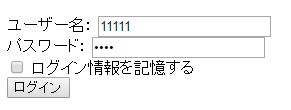
ユーザー「11111」でログインし、商品を登録します。

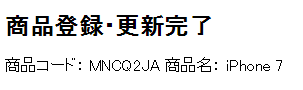
登録されたデータを見てみると、

確かに作成者・作成日時・更新者・更新日時が設定されています。
続いて、更新処理をしてみます。
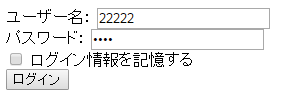
ユーザーを変えて、「22222」でログインし、先ほど登録した商品名を変更してみます。
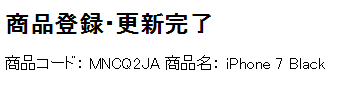
こちらも、データを見てみると、

更新者と更新日時が正しく設定されました。
さいごに
AOPをSpring Frameworkで使用すると、楽観ロック、権限チェック(ログインユーザーと登録データのチェックなど)などいろいろと応用ができそうです。
他の例も今後投稿してみたいと思います。