Listコンポーネント
NativeBaseのListコンポーネントを使ってみます。
前提ライブラリ
本記事は、「NativeBase」、「React Navigation」の導入を前提としています。一からプロジェクトを作成する場合には、以下の記事を参考に環境作成してください。
【React Native】NativeBase導入
【React Native】React Navigation を使ってみる(画面遷移編)
基本形
以下のようにListコンポーネント内にListItemコンポーネントを配置して「テーブルビュー」を実現します。
<List>
  <ListItem first>
    <Left>
      <Text>テキスト1</Text>
    </Left>
  </ListItem>
  <ListItem first>
    <Left>
      <Text>テキスト2</Text>
    </Left>
  </ListItem>
</List>
注意点
公式ドキュメントにもあまり書いてないのですが、厳密な意味での「NativeBaseのListコンポーネント(Listタグ)」は、実は、deprecatedとなっています。学習としてではなく、実務に使いたいときは最後にある[FlatList]を使用する必要があります。(わかりにくいですね)
様々なセルの表現
Normal.js
import React, {Component} from 'react';
import { Container, Header, Left, Body, Right, Title, Button } from 'native-base';
import { Content, List, ListItem, Text, Icon, Switch, Thumbnail } from 'native-base';

type Props = {};
export default class App extends Component<Props> {
  render() {
    return (
      <Container>
        <Header>
          <Left>
            <Button transparent onPress={() => this.props.navigation.goBack()}>
              <Icon name='arrow-back' />
            </Button>
          </Left>
          <Body>
            <Title>ノーマル</Title>
          </Body>
          <Right />
        </Header>
        <Content>
          <List>
            <ListItem first>
              <Left>
                <Text>Accessory:none</Text>
              </Left>
            </ListItem>
            <ListItem>
              <Left>
                <Text>Accessory:Disclosure Indicator</Text>
              </Left>
              <Right>
                <Icon name="arrow-forward" />
              </Right>
            </ListItem>
            <ListItem>
              <Left>
                <Text>Accessory:Checkmark</Text>
              </Left>
              <Right>
                <Icon type="Octicons" name="check" style={{fontSize: 20, color:'blue'}}/>
              </Right>
            </ListItem>
            <ListItem icon>
              <Left>
                <Button style={{ backgroundColor: "#007AFF" }}>
                  <Icon active name="wifi" />
                </Button>
              </Left>
              <Body>
                <Text>Icon</Text>
              </Body>
              <Right>
                <Switch value={false} />
              </Right>

            </ListItem>
            <ListItem thumbnail>
              <Left>
                <Thumbnail square source={ require('../images/face.jpg') } />
              </Left>
              <Body>
                <Text>Thumbnail</Text>
                <Text note numberOfLines={1}>サムネイルの説明</Text>
              </Body>
            </ListItem>
            <ListItem last>
              <Left>
                <Text>Last</Text>
              </Left>
            </ListItem>
           </List>
        </Content>
      </Container>
    );
  }
}
| iOS | Android |
|---|---|
 |
 |
|
セクションの表現
Section.js
import React, {Component} from 'react';
import { Container, Header, Left, Body, Right, Title, Button } from 'native-base';
import { Content, List, ListItem, Text, Icon } from 'native-base';

type Props = {};
export default class App extends Component<Props> {
  render() {
    return (
      <Container>
        <Header>
          <Left>
            <Button transparent onPress={() => this.props.navigation.goBack()}>
              <Icon name='arrow-back' />
            </Button>
          </Left>
          <Body>
            <Title>セクション</Title>
          </Body>
          <Right />
        </Header>
        <Content>
          <List>
            <ListItem itemDivider>
              <Text>A</Text>
            </ListItem>
            <ListItem>
              <Left>
                <Text>Apple</Text>
              </Left>
            </ListItem>
            <ListItem>
              <Left>
                <Text>airbnb</Text>
              </Left>
            </ListItem>
            <ListItem itemDivider>
              <Text>G</Text>
            </ListItem>
            <ListItem last>
              <Left>
                <Text>Google</Text>
              </Left>
            </ListItem>
           </List>
        </Content>
      </Container>
    );
  }
}
| iOS | Android |
|---|---|
 |
 |
データをダイナミックに使用して
Dynamic.js
import React, { Component } from 'react';
import { Container, Header, Content, List, ListItem, Left, Right, Body, Text, Title, Button, Icon } from 'native-base';

export default class DynamicListExample extends Component {
  constructor(props){
    super(props);

    this.items = [];

    for (i = 1; i < 100; i++) {
      let label = ( "0" + i ).substr(-3);
      this.items.push(label);
    }
  }

  render() {
    return (
      <Container>
        <Header>
          <Left>
            <Button transparent onPress={() => this.props.navigation.goBack()}>
              <Icon name='arrow-back' />
            </Button>
          </Left>
          <Body>
            <Title>ダイナミック</Title>
          </Body>
          <Right />
        </Header>
        <Content>
          <List dataArray={this.items}
            renderRow={(item) =>
              <ListItem>
                <Text>{item}</Text>
              </ListItem>
            }>
          </List>
        </Content>
      </Container>
    );
  }
}
| iOS | Android |
|---|---|
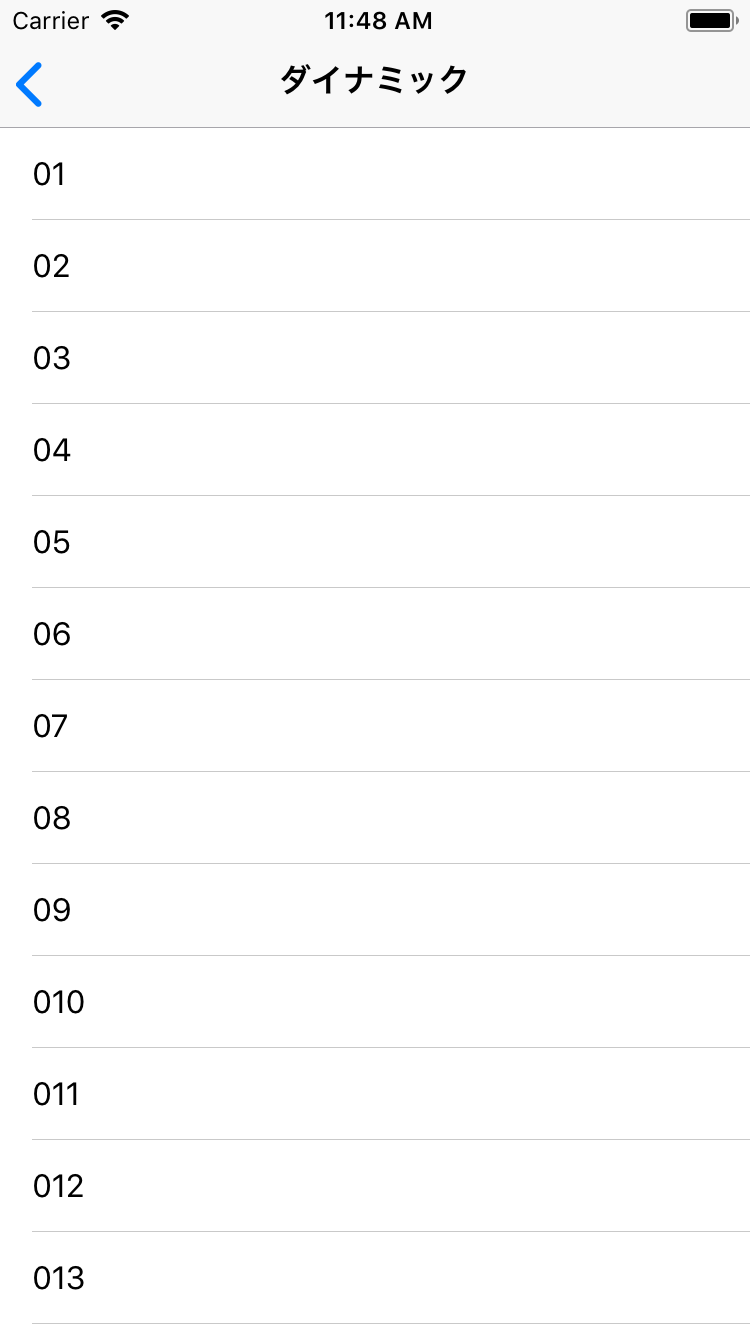 |
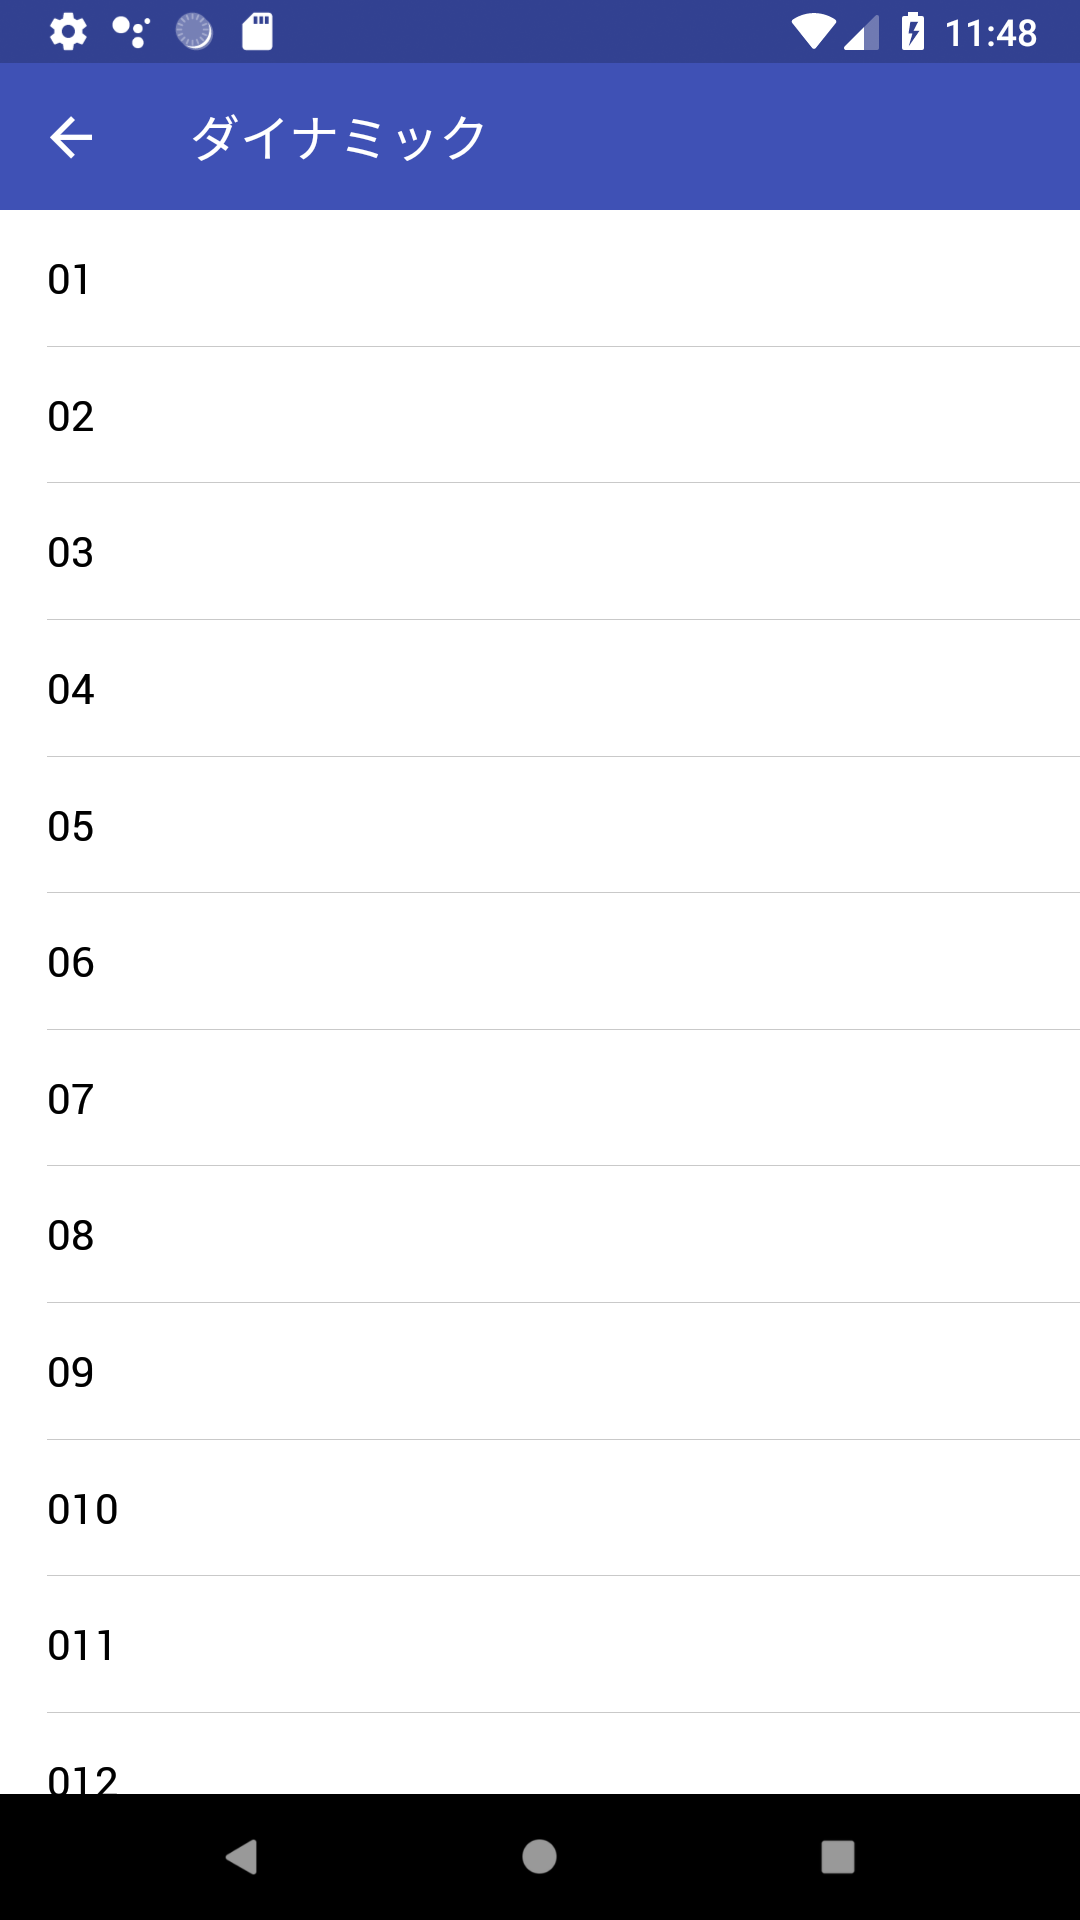 |
データをダイナミックに使用して(データが多い場合)
前の方法では行が多くなった場合、著しく動作が遅くなる現象が確認できました。(上記例では100行で問題はありませんでしたが、1000行だと問題が発生しました)
ネイティブアプリでテーブルビューを使用する場合、セルを再利用することにより、パフォーマンスを向上させていますが、上記の基になっていると思われる React Native の ListView ではそういった仕組みはないと思われます。行数が多くなることが予測される場合は、「FlatList」を使用する必要があります。
FlatList.js
import React, {Component} from 'react';
import { FlatList } from "react-native";
import { Container, Header, Left, Body, Right, Title } from 'native-base';
import { Content, ListItem, Text } from 'native-base';

type Props = {};
export default class App extends Component<Props> {
  constructor() {
    super();
    this.items = [];

    for (i = 1; i < 1000; i++) {
      let key = ( "0" + i ).substr(-3);
      item ={key: key, label: "Item" + key}
      this.items.push(item);
    }
  }

  renderItem = ({ item }) => {
    return (
      <ListItem style={{ marginLeft: 0 }}>
        <Body>
          <Text>{item.label}</Text>
        </Body>
      </ListItem>
    );
  };
  render() {
    return (
      <Container>
        <Header>
          <Left />
          <Body>
            <Title>FlatList</Title>
          </Body>
          <Right />
        </Header>
        <Content>
        <FlatList
          data={this.items}
          renderItem={({item}) =>
            <ListItem>
              <Text>{item.label}</Text>
            </ListItem>
          }
          keyExtractor={item => item.key}
        />
        </Content>
      </Container>
    );
  }
}
動作の例
| iOS | Android |
|---|---|
 |
 |
リポジトリ
本記事で作成したものは以下で公開していますので、参考にしてください。
https://github.com/k-neo/ReactNativeCourseList