この記事では、開発したボットを Microsoft Teams に接続する方法を紹介します。
前提
すでに Microsoft Teams を使っていることとします。まだ使っていない場合は、以下のサイトから Office 365 E3 体験版を申し込んでください。
https://products.office.com/ja-jp/business/office-365-enterprise-e3-business-software

利用するボットの準備
今回は手軽につかえる Azure Bot Service で作成します。既にボットがある場合はスキップ。
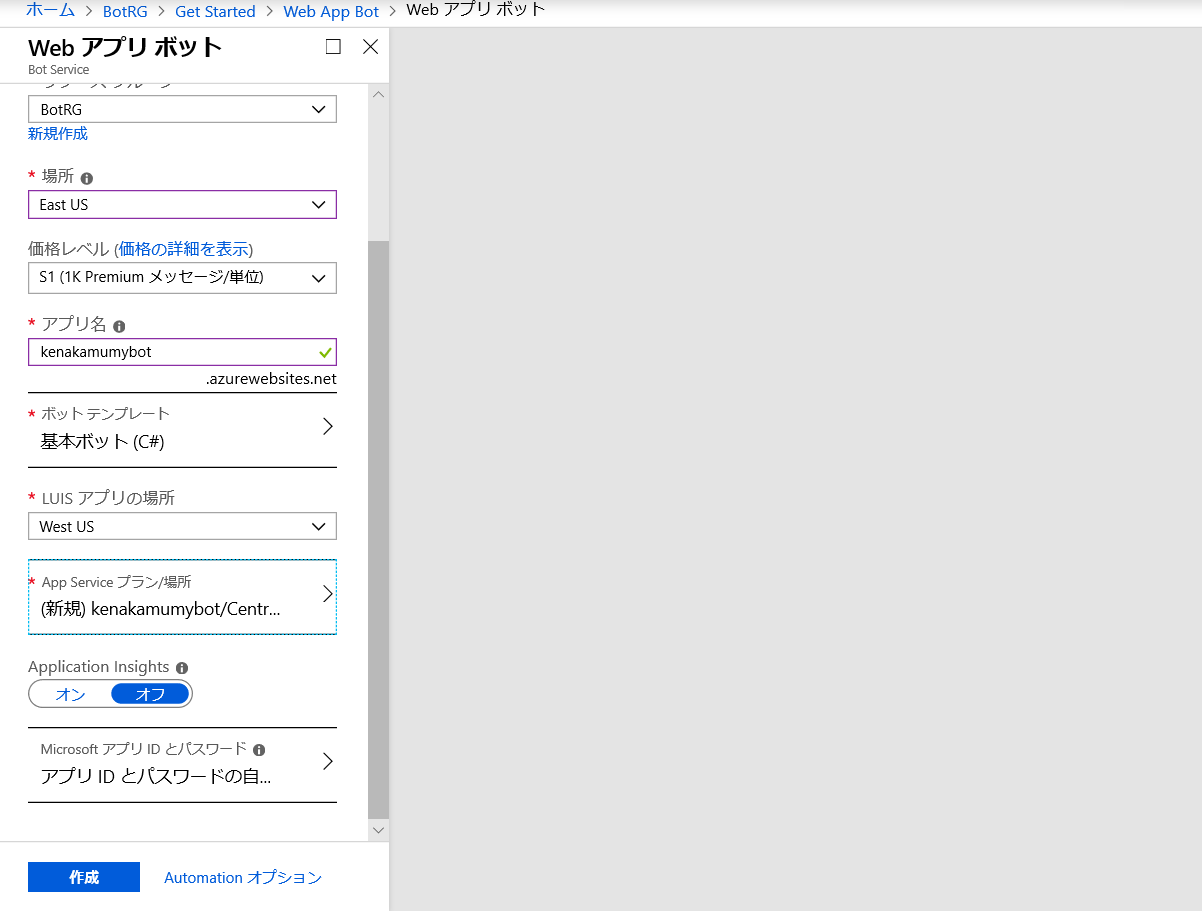
1. https://portal.azure.com より Azure ポータルにログイン。任意のリソースグループで「Web App Bot」を作成。
2. 任意のボットを作成。ここでは C# 基本ボットを選択。
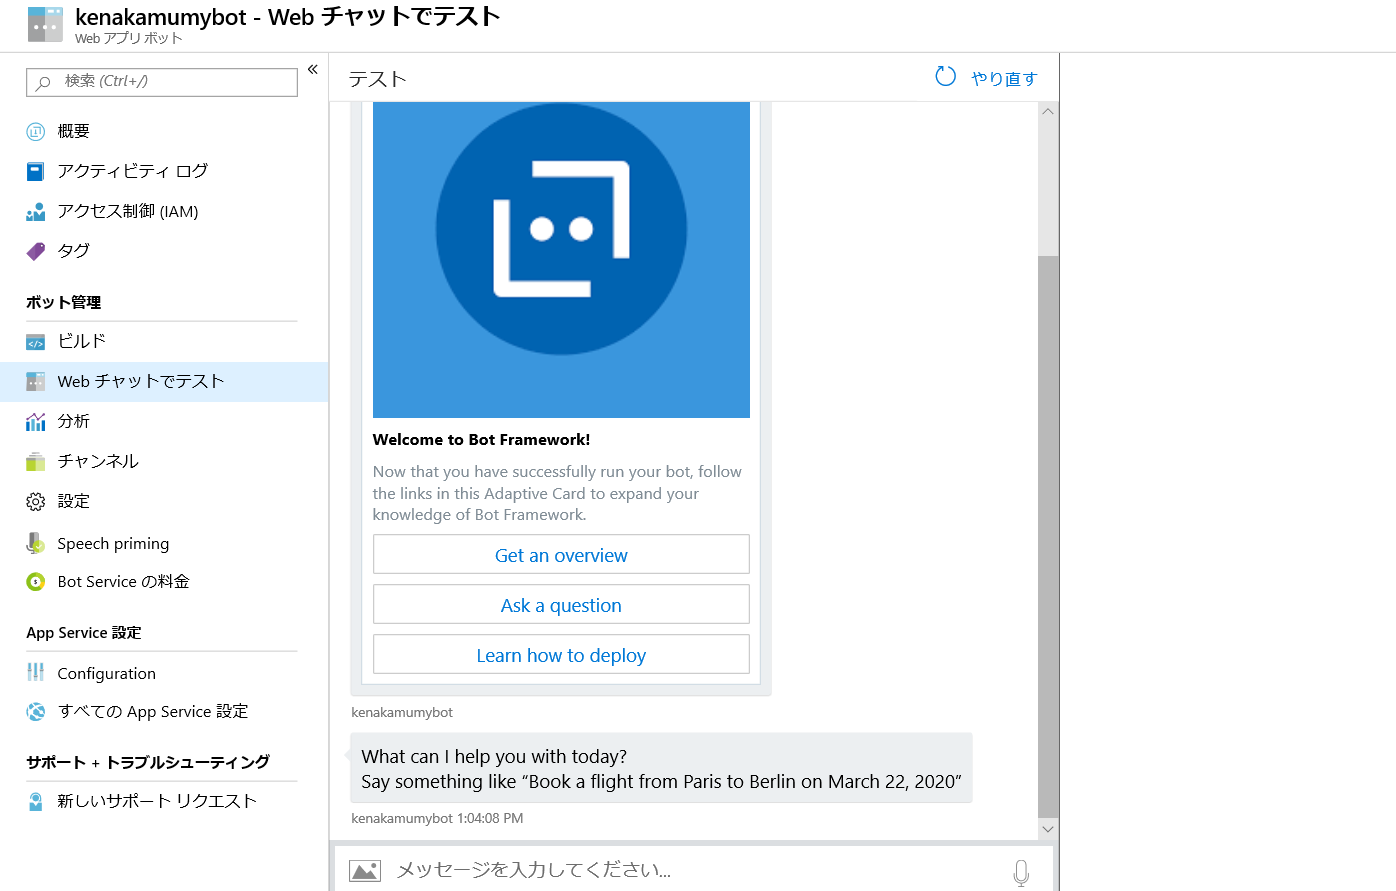
3. 作成完了後、Web チャットテストで動作を確認。
4.「チャネル」メニューより「Teams」を選択して保存。特別な設定は不要。

Teams への展開
Teams へ展開するには、サイドローディング用のパッケージを作成します。今回は GUI ですべて構成してみます。
1. Teams より「アプリ」を選択し、「App Studio」を検索。インストール。

2. アプリで「開く」を選択。

3. Manifest editor タブから「Create new app」をクリック。

4. 名前や説明、パッケージ名、バージョンを設定。App ID は「Generate」から自動生成。

5.「Capabilities」より「Bots」を選択し「Set up」をクリック。

6.「Existing bot」を選択し、既存のボットから接続したいボットを選択。名前やスコープを設定して保存。

7.「Finish」より「Test and distribute」を選択し、「Install」をクリック。

8.「インストール」をクリック。

9. ボットに話しかけて動作を確認。

10. 全体への展開は「Finish」の「Submit」をクリック。ウィザードに従って公開。
まとめ
Microsoft Teams はサイドローディングが必要という点で少し特殊ですが、それが分かれば他のチャネル同様に扱えます。是非お試しください。