目的
Windows10上にdocker実行環境を構築したいが、今後Linux上で動作することも想定して、docker for windowsではなく、Linux(仮想環境)上でのdocker環境を構築する。
ゴール
ゴールは以下。
- Virtualboxのインストール完了
- Vagrantのインストール完了
- VagrantからのUbuntu18.04インストール完了
- Ubuntu18.04上でdocker runが実行できること
作業内容
VirtualboxとVagrantのインストール
以下からインストーラを取得。
ダブルクリックでインストール。
-
Virtualbox
https://download.virtualbox.org/virtualbox/5.2.18/VirtualBox-5.2.18-124319-Win.exe -
Vagrant
https://releases.hashicorp.com/vagrant/2.1.5/vagrant_2.1.5_x86_64.msi
VagrantからのUbuntu18.04インストール
適当な場所にディレクトリを作成(操作はCmderから実施)
λ mkdir vagrant-docker
λ cd vagrant-docker/
λ vagrant init
A `Vagrantfile` has been placed in this directory. You are now
ready to `vagrant up` your first virtual environment! Please read
the comments in the Vagrantfile as well as documentation on
`vagrantup.com` for more information on using Vagrant.
Vagrantfileができているので編集する。
vb.memoryは初回起動後に適当な数値に変更(ここで指定したサイズがswapに持っていかれるので)
Vagrant.configure("2") do |config|
  config.vm.box = "ubuntu/bionic64"
  config.vm.network "private_network", ip: "192.168.33.10"
  # config.vm.provider "virtualbox" do |vb|
  #   # Customize the amount of memory on the VM:
  #   vb.memory = "1024"
  # end
end
λ vagrant up
Bringing machine 'default' up with 'virtualbox' provider...
==> default: Box 'ubuntu/bionic64' could not be found. Attempting to find and install...
    default: Box Provider: virtualbox
    default: Box Version: >= 0
==> default: Loading metadata for box 'ubuntu/bionic64'
    default: URL: https://vagrantcloud.com/ubuntu/bionic64
==> default: Adding box 'ubuntu/bionic64' (v20181008.0.0) for provider: virtualbox
    default: Downloading: https://vagrantcloud.com/ubuntu/boxes/bionic64/versions/20181008.0.0/providers/virtualbox.box
    default: Download redirected to host: cloud-images.ubuntu.com
    default:
==> default: Successfully added box 'ubuntu/bionic64' (v20181008.0.0) for 'virtualbox'!
==> default: Importing base box 'ubuntu/bionic64'...
==> default: Matching MAC address for NAT networking...
==> default: Checking if box 'ubuntu/bionic64' is up to date...
==> default: Setting the name of the VM: vagrant-docker_default_1539063382656_13047
Vagrant is currently configured to create VirtualBox synced folders with
the `SharedFoldersEnableSymlinksCreate` option enabled. If the Vagrant
guest is not trusted, you may want to disable this option. For more
information on this option, please refer to the VirtualBox manual:

  https://www.virtualbox.org/manual/ch04.html#sharedfolders

This option can be disabled globally with an environment variable:

  VAGRANT_DISABLE_VBOXSYMLINKCREATE=1

or on a per folder basis within the Vagrantfile:

  config.vm.synced_folder '/host/path', '/guest/path', SharedFoldersEnableSymlinksCreate: false
==> default: Clearing any previously set network interfaces...
There was an error while executing `VBoxManage`, a CLI used by Vagrant
for controlling VirtualBox. The command and stderr is shown below.

Command: ["hostonlyif", "create"]

Stderr: 0%...
Progress state: E_FAIL
VBoxManage.exe: error: Failed to create the host-only adapter
VBoxManage.exe: error: Operation canceled by the user
VBoxManage.exe: error: Details: code E_FAIL (0x80004005), component VirtualBoxWrap, interface IVirtualBox
VBoxManage.exe: error: Context: "enum RTEXITCODE __cdecl handleCreate(struct HandlerArg *)" at line 94 of file VBoxManageHostonly.cpp
なんかエラーが出ている。。。
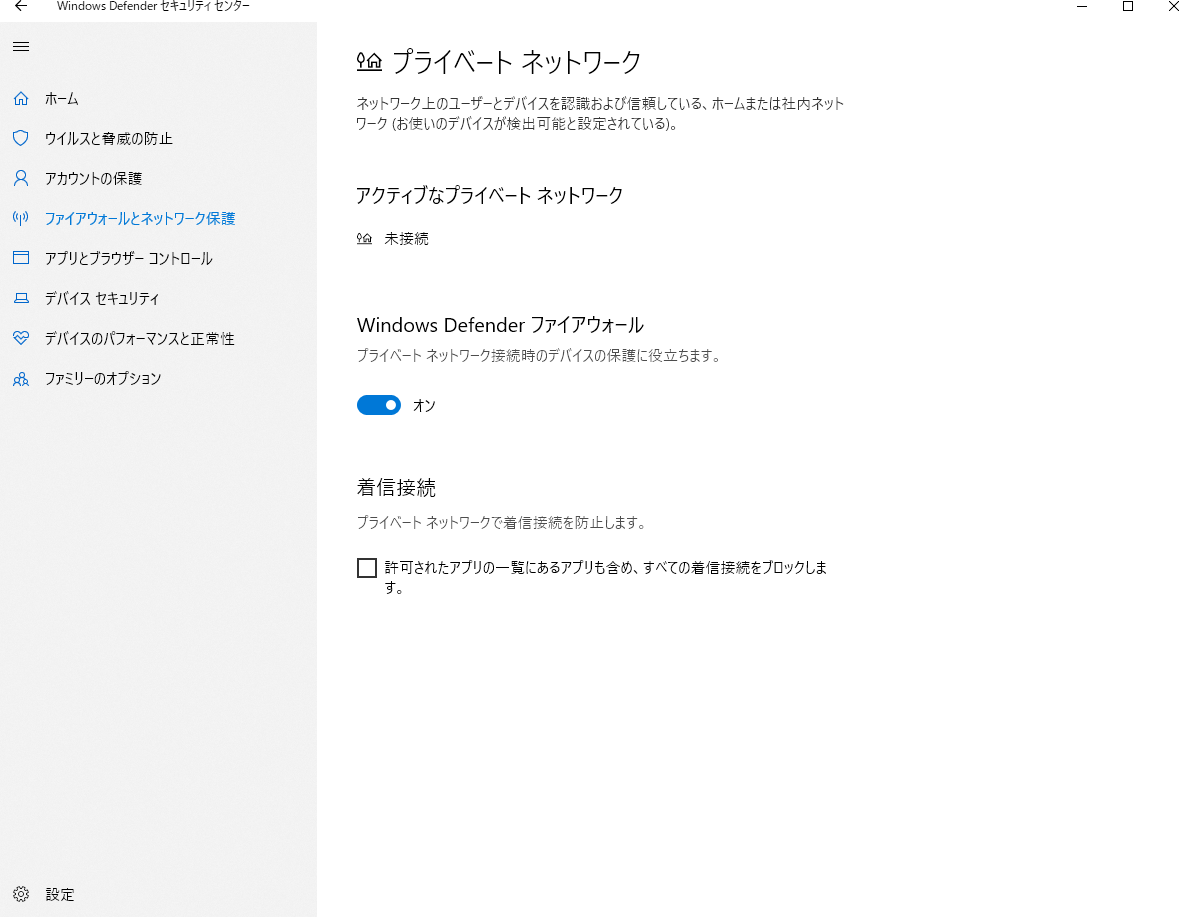
どうやらウィルス対策ソフトが悪さをしているっぽい。Windows Defenderのファイアウォールでプライベートネットワークのファイアウォールを「オン -> オフ」に変更。
これで通った。
λ vagrant up
Bringing machine 'default' up with 'virtualbox' provider...
==> default: Checking if box 'ubuntu/bionic64' is up to date...
==> default: Clearing any previously set network interfaces...
==> default: Preparing network interfaces based on configuration...
    default: Adapter 1: nat
    default: Adapter 2: hostonly
==> default: Forwarding ports...
    default: 22 (guest) => 2222 (host) (adapter 1)
==> default: Running 'pre-boot' VM customizations...
==> default: Booting VM...
==> default: Waiting for machine to boot. This may take a few minutes...
    default: SSH address: 127.0.0.1:2222
    default: SSH username: vagrant
    default: SSH auth method: private key
    default: Warning: Connection aborted. Retrying...
    default:
    default: Vagrant insecure key detected. Vagrant will automatically replace
    default: this with a newly generated keypair for better security.
    default:
    default: Inserting generated public key within guest...
    default: Removing insecure key from the guest if it's present...
    default: Key inserted! Disconnecting and reconnecting using new SSH key...
==> default: Machine booted and ready!
==> default: Checking for guest additions in VM...
==> default: Configuring and enabling network interfaces...
==> default: Mounting shared folders...
    default: /vagrant => C:/Users/xxxx/data/vagrant-docker
一度成功したら、その後は接続できるみたいなので、Windows Defenderのファイアウォールでプライベートネットワークのファイアウォールを「オフ -> オン」に変更
接続確認
λ vagrant ssh
Welcome to Ubuntu 18.04.1 LTS (GNU/Linux 4.15.0-36-generic x86_64)
これでOK
dockerのインストール
上記URLの記載に従って、淡々とコマンドを打っていく
vagrant@ubuntu-bionic:~$ sudo apt-get install apt-transport-https ca-certificates curl software-properties-common
vagrant@ubuntu-bionic:~$ curl -fsSL https://download.docker.com/linux/ubuntu/gpg | sudo apt-key add -
vagrant@ubuntu-bionic:~$ sudo add-apt-repository "deb [arch=amd64] https://download.docker.com/linux/ubuntu $(lsb_release -cs) stable"
vagrant@ubuntu-bionic:~$ sudo apt-get update
vagrant@ubuntu-bionic:~$ sudo apt-get install docker-ce
起動確認
vagrant@ubuntu-bionic:~$ sudo docker run hello-world
Unable to find image 'hello-world:latest' locally
latest: Pulling from library/hello-world
d1725b59e92d: Pull complete
Digest: sha256:0add3ace90ecb4adbf7777e9aacf18357296e799f81cabc9fde470971e499788
Status: Downloaded newer image for hello-world:latest

Hello from Docker!
略
dockerの起動確認まで完了
毎回sudoつけるのも面倒なので、vagrantユーザをdockerグループに追加
vagrant@ubuntu-bionic:~$ sudo usermod -aG docker
※ 一度SSHセッションを抜けて再度SSHでログインする。
vagrant@ubuntu-bionic:~$ docker run hello-world

Hello from Docker!
スナップショットの取得
この状態でvagrantのsnapshotを取っておく。
SSHセッションを抜けたあとで以下のコマンドを実行
λ vagrant snapshot save ubuntu1804-docker-init
λ vagrant snapshot list
ubuntu1804-docker-init
復旧する際は以下とのこと。
λ vagrant snapshot restore ubuntu1804-docker-init
