CollectionView
CollectionViewは複数のアイテムを一覧表示させることができるUIコンポーネントの一つで、実際の開発現場でも非常に利用する場面が多いです。
今回も備忘録として基本の設定の仕方を備忘録として残していきます。
作成方法
Xcodeの立ち上げを行い設定を行なっていきます。
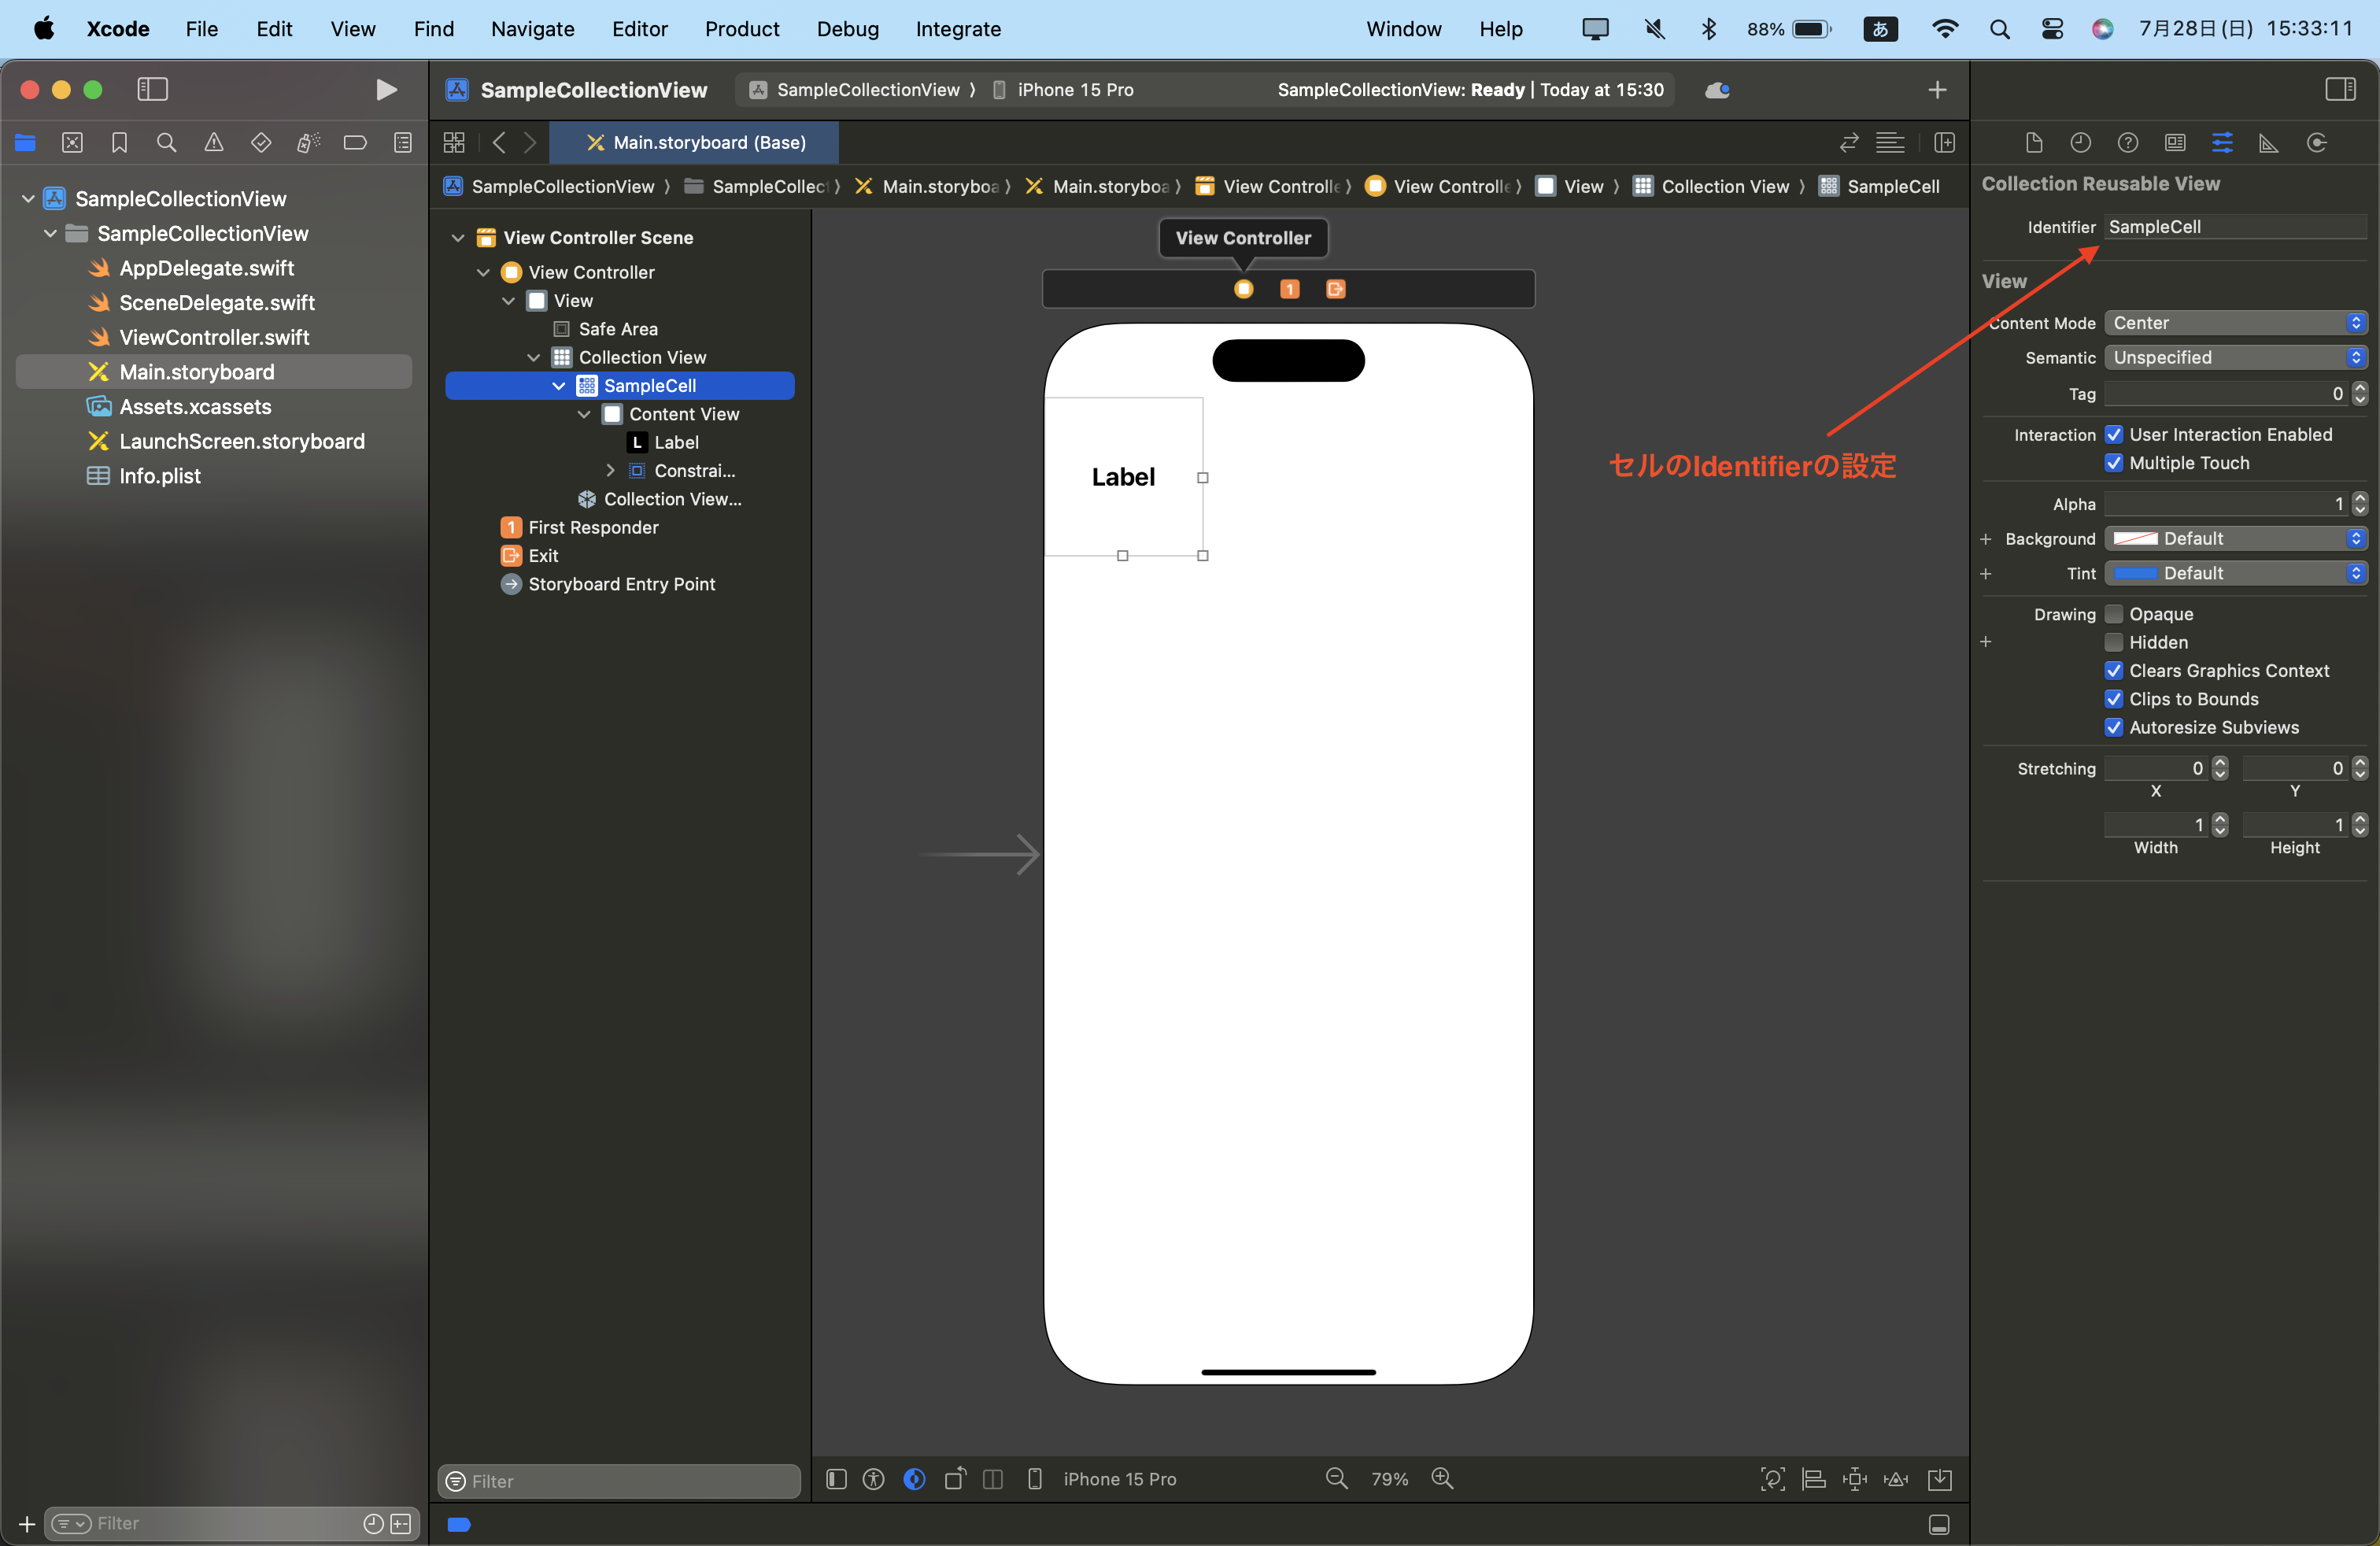
まずはCollectionViewをセットします。セットが完了したらCellのIdentifierの設定をします。
(名前はSampleCellとします)
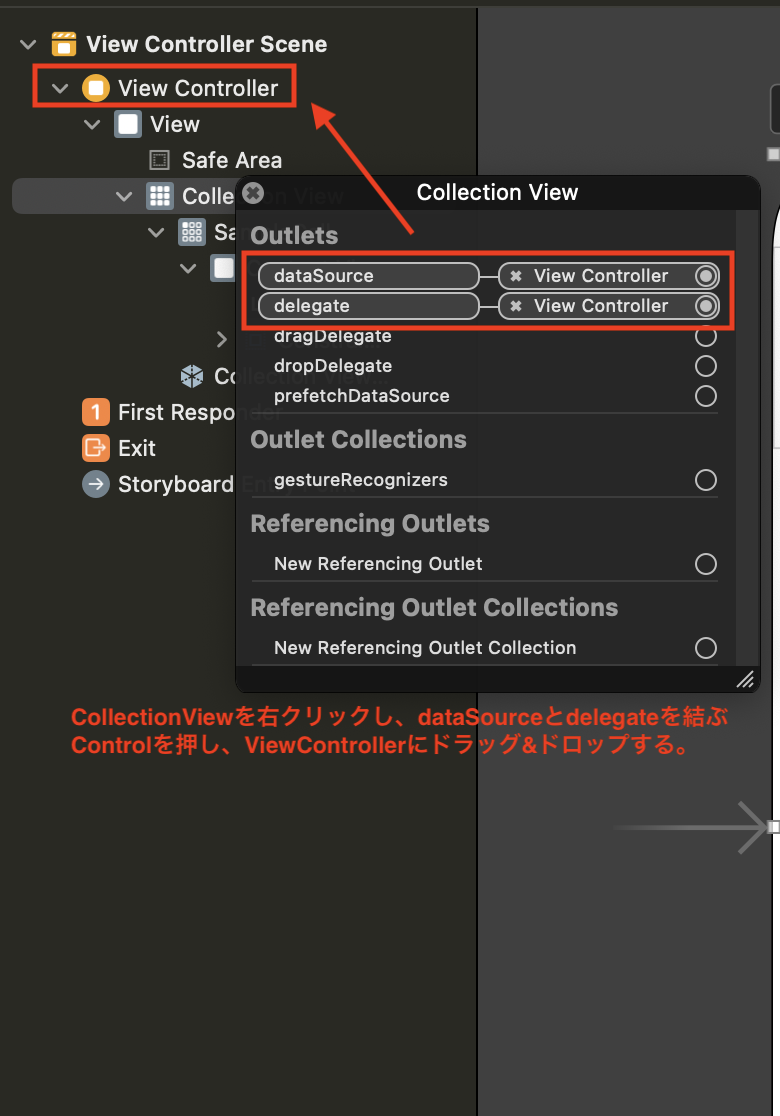
そしてdataSorceとdelegateを、ViewControllerに繋げます。

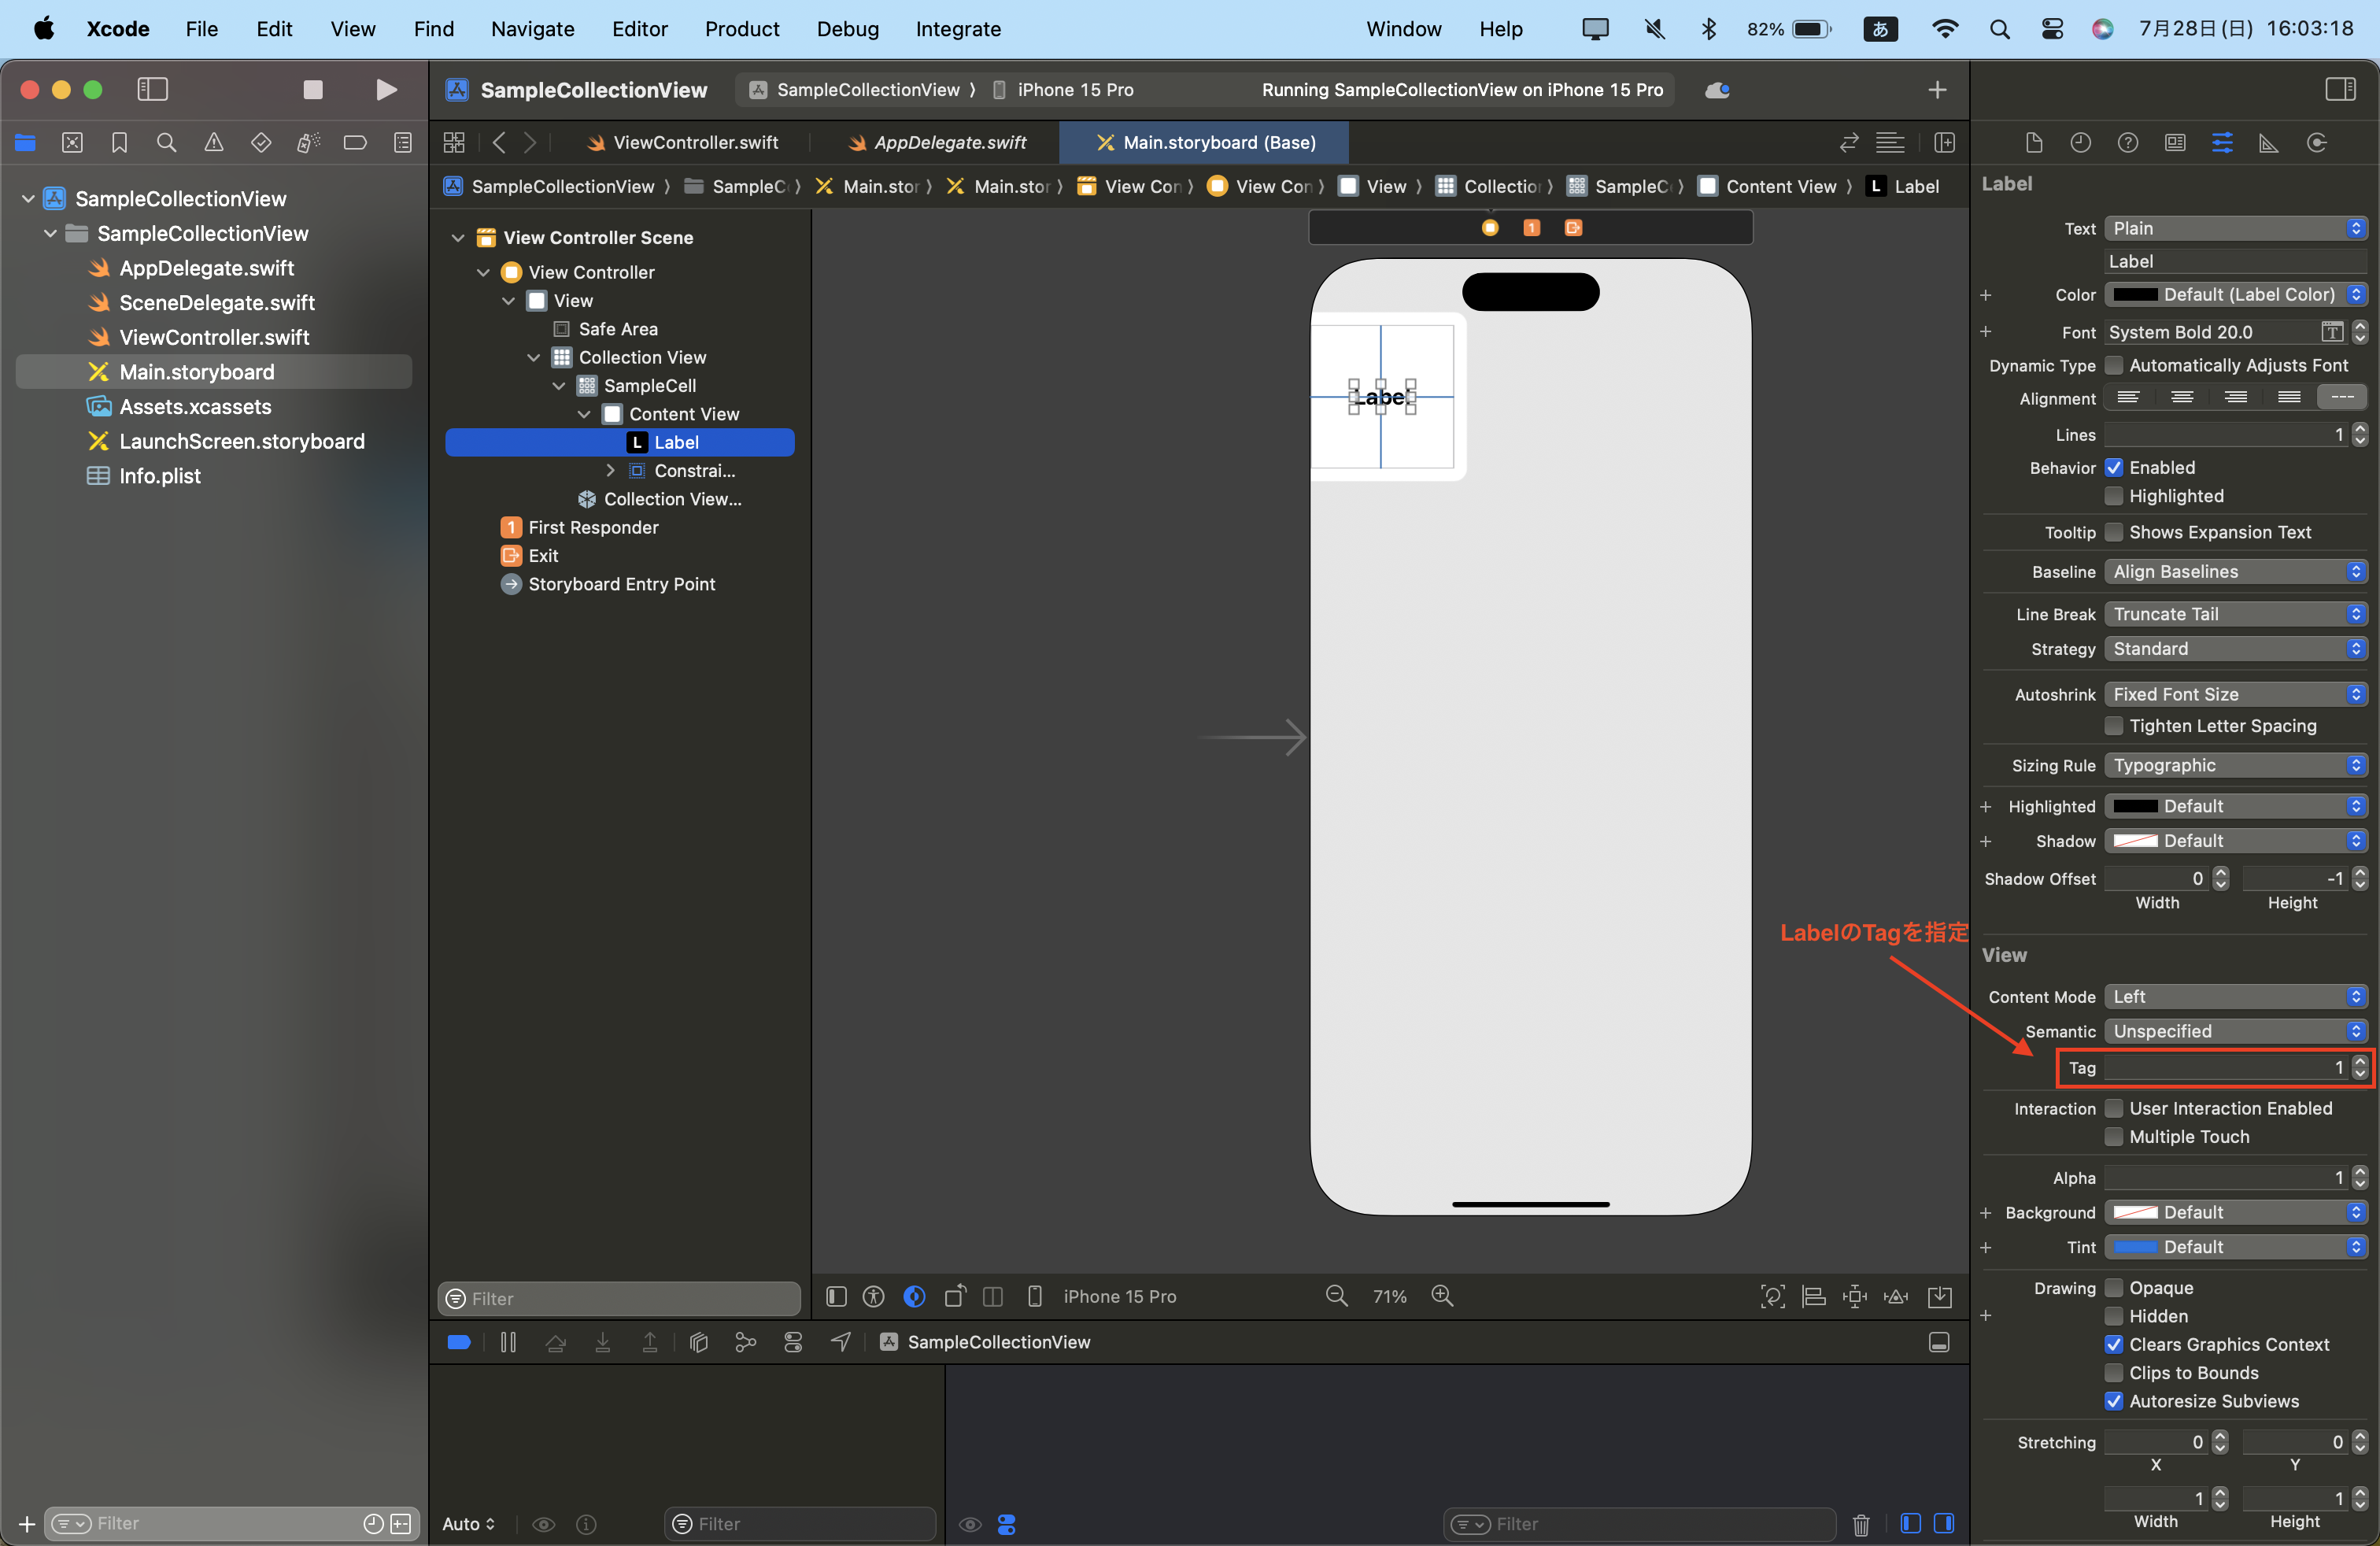
配置する文字データをLabelにセットするので、Labelにtag番号を指定しておきます。

コード記述
title.swift
import UIKit

final class ViewController: UIViewController {

    private let collectionLabels = ["sample1", "sample2", "sample3", "sample4", "sample5", "sample6"]

    override func viewDidLoad() {
        super.viewDidLoad()

    }
}

extension ViewController: UICollectionViewDataSource {
    // セクション数
    func numberOfSections(in collectionView: UICollectionView) -> Int {
        return 1
    }

    // セル数
    func collectionView(_ collectionView: UICollectionView, numberOfItemsInSection section: Int) -> Int {
        return collectionLabels.count
    }

    // セルに値をセット
    func collectionView(_ collectionView: UICollectionView, cellForItemAt indexPath: IndexPath) -> UICollectionViewCell {
        // widthReuseIdentifierにはStoryboardで設定したセルのIDを指定
        let cell = collectionView.dequeueReusableCell(withReuseIdentifier: "SampleCell", for: indexPath)

        // セルのラベルに値をセット。viewWithTagにはタグの番号を指定
        let title = cell.contentView.viewWithTag(1) as! UILabel
        title.text = collectionLabels[indexPath.row]

        // セルに枠線をセット
        cell.layer.borderColor = UIColor.lightGray.cgColor // 外枠の色
        cell.layer.borderWidth = 2.0 // 枠線の太さ

        return cell
    }
}

// セルのサイズを調整する
extension ViewController: UICollectionViewDelegateFlowLayout {

    // MARK: - UICollectionViewDelegateFlowLayout
    func collectionView(_ collectionView: UICollectionView, layout collectionViewLayout: UICollectionViewLayout, sizeForItemAt indexPath: IndexPath) -> CGSize {

        let horizontalSpace: CGFloat = 10

        // 2列にするためのセルの幅
        let cellSize: CGFloat = (self.view.frame.width - horizontalSpace * 3) / 2

        return CGSize(width: cellSize, height: cellSize)
    }

    func collectionView(_ collectionView: UICollectionView, layout collectionViewLayout: UICollectionViewLayout, minimumLineSpacingForSectionAt section: Int) -> CGFloat {
        return 15.0 // 行間
    }
}
UICollectionViewDelegateFlowLayouでCellの行間や幅、指定次第で行数をこちら側でカスタマイズしセットすることができます。
まとめ
基本中の基本となる実装ですがCollectionViewを調べてみると知らない機能はまだあり、奥は深いなと思います。
引続き学習を進めていきます。
