はじめに
HEREでエンジニアをしておりますkekishidaと申します。
この度、デベロッパーコミュニティにおいて、
もっと多くの人にHEREのロケーションサービス製品群を知ってほしいことから、何回かに分けて、
基本的な機能のご紹介ができればと思います。
一部の機能については既に他の皆様の記事で紹介いただいておりますので、
多少重複する部分があったり、割愛する部分もあったりしますが、
その際はご容赦ください。
やりたいこと
さて、極めて私的なお話しですが、先月にオーストラリアのシドニーへ旅行に
行ってまいりました。
“しかし“、コロナ禍の影響で某旅行向けの本が2019-2022まで更新されておらず、
いっそのこと自分で作ってしまえ!
ということで、HERE APIを駆使し、シドニーの歩き方というReact Webアプリを作成しました。
実現したこと
- 目的地の地図を見る。
- 目的地までの時間を知る
- 目的地の混雑状況(リアルタイム)を知る
- 目的地付近のレストランを検索する
となります。
使用したAPI
- 目的地の地図を見る。 => HERE Maps API for JavaScript
- 目的地までの時間を知る => HERE Routing API & HERE Public Transit API
- 目的地の混雑状況(リアルタイム)を知る => HERE Traffic API
- 目的地付近のレストランを検索する => HERE Geocoding & Search API
最後に、今回はオーストラリアの地図データを使用しておりますため、一部日本では実現していない
ものもございます。それらの機能は、順次日本向けにも実装されていきます!!。
また、Reactに関する知識は初心者レベルですので、その点もご容赦ください。
アプリのイメージ
以下のイメージがアプリの全景になります。
旅行ガイドの代替なので、観光スポットを"Favorite"リストということで右側に配置しております。
それぞれのFavoriteをクリックすることで、現在位置から目的地までの経路、距離と到達時間を求めることが出来ます。

下記のリストでは目的地付近で呟かれたTweetを列挙するようにしております。
またこれらのTweetが呟かれた地点についても上記のように、クラスタリング分析機能を使用して地図上に描画しております。
こうすることで、目的地付近でTweetされた地点及びその数を把握し、現場の様子を窺い知ることが出来ます。

目的地付近の情報を収集するためのサーチ機能も追加してみました。
TripAdvisorのAPIと連携しております。(こちらは別回で解説する予定です。)
地図を描いてみよう
まずは第1回目ということで、地図を描いてみます。
すでに他の皆様がデベロッパー登録や基本的な地図の描画方法などの基本的なところをカバーして頂いておりますので、
これまでにカバーされていない地図描画のノウハウをいくつかご紹介いたします。
HERE MapのReactへの組み込み例 〜シンプルなコンポーネント〜
地図データ全体をReactコンポーネント化することで、
上位コンポーネント(下のサンプルではgps)の変化に伴い、自動的にそれらを
地図上に反映させることが可能になります。
なお、以下のサンプルはあえて日本向けの地図を使用しております。
そうすることでオーストラリアにおいてもいくつかのPOI情報が日本語化されます。
こちらのサンプルは現在位置の更新をベースとした最もシンプルなパターンになります。
現在位置が変更されることで、地図が再描画されます。
DisplayMap.js (その1)
import * as React from 'react';

export const DisplayMap = React.memo(({ gps }) => {
  // Create a reference to the HTML element we want to put the map on
  const mapRef = React.useRef(null);
  /**
   * Create the map instance
   * While `useEffect` could also be used here, `useLayoutEffect` will render
   * the map sooner
   */
    // React.useEffect(() => {
   React.useLayoutEffect(() => {
    // `mapRef.current` will be `undefined` when this hook first runs; edge case that
    if (!mapRef.current) return;
    const H = window.H;
    const platform = new H.service.Platform({
        apikey: {API KEY} // こちらはAPIKEYなので、取得されましたものをそれぞれ入力ください。
    });
    const defaultLayers = platform.createDefaultLayers();
    // configure an OMV service to use the `core` endpoint
    var omvService = platform.getOMVService({ path: "v2/vectortiles/core/mc" });
    var baseUrl = "https://js.api.here.com/v3/3.1/styles/omv/oslo/japan/";

    // create a Japan specific style
    var style = new H.map.Style(`${baseUrl}normal.day.yaml`, baseUrl);

    // instantiate provider and layer for the base map
    var omvProvider = new H.service.omv.Provider(omvService, style);
    var omvlayer = new H.map.layer.TileLayer(omvProvider, { max: 22 ,dark:true});

    // instantiate (and display) a map:
    var map = new H.Map(mapRef.current, omvlayer, {
        zoom: 16,
        center: { lat: gps.latitude, lng: gps.longitude },
    });

    // add a resize listener to make sure that the map occupies the whole container
    window.addEventListener("resize", () => map.getViewPort().resize());

    // MapEvents enables the event system
    // Behavior implements default interactions for pan/zoom (also on mobile touch environments)
    var behavior = new H.mapevents.Behavior(new H.mapevents.MapEvents(map));
    // Create the default UI components
    var ui = H.ui.UI.createDefault(map, defaultLayers);
    // Marker code goes here
    var LocationOfMarker = { lat: gps.latitude, lng: gps.longitude };
    var pngIcon = new H.map.Icon('<svg xmlns="http://www.w3.org/2000/svg" width="24" height="24" viewBox="0 0 24 24"><path d="M12 2c2.131 0 4 1.73 4 3.702 0 2.05-1.714 4.941-4 8.561-2.286-3.62-4-6.511-4-8.561 0-1.972 1.869-3.702 4-3.702zm0-2c-3.148 0-6 2.553-6 5.702 0 3.148 2.602 6.907 6 12.298 3.398-5.391 6-9.15 6-12.298 0-3.149-2.851-5.702-6-5.702zm0 8c-1.105 0-2-.895-2-2s.895-2 2-2 2 .895 2 2-.895 2-2 2zm10.881-2.501c0-1.492-.739-2.83-1.902-3.748l.741-.752c1.395 1.101 2.28 2.706 2.28 4.5s-.885 3.4-2.28 4.501l-.741-.753c1.163-.917 1.902-2.256 1.902-3.748zm-3.381 2.249l.74.751c.931-.733 1.521-1.804 1.521-3 0-1.195-.59-2.267-1.521-3l-.74.751c.697.551 1.141 1.354 1.141 2.249s-.444 1.699-1.141 2.249zm-16.479 1.499l-.741.753c-1.395-1.101-2.28-2.707-2.28-4.501s.885-3.399 2.28-4.5l.741.752c-1.163.918-1.902 2.256-1.902 3.748s.739 2.831 1.902 3.748zm.338-3.748c0-.896.443-1.698 1.141-2.249l-.74-.751c-.931.733-1.521 1.805-1.521 3 0 1.196.59 2.267 1.521 3l.74-.751c-.697-.55-1.141-1.353-1.141-2.249zm16.641 14.501c0 2.209-3.581 4-8 4s-8-1.791-8-4c0-1.602 1.888-2.98 4.608-3.619l1.154 1.824c-.401.068-.806.135-1.178.242-3.312.949-3.453 2.109-.021 3.102 2.088.603 4.777.605 6.874-.001 3.619-1.047 3.164-2.275-.268-3.167-.296-.077-.621-.118-.936-.171l1.156-1.828c2.723.638 4.611 2.016 4.611 3.618z"/></svg>', { size: { w: 56, h: 56 } });

    // Create a marker using the previously instantiated icon:
    var marker = new H.map.Marker(LocationOfMarker, { icon: pngIcon });

    // Add the marker to the map:
    map.addObject(marker);

    // Optionally,
    //Show the marker in the center of the map
    map.setCenter(LocationOfMarker)

    //Zooming so that the marker can be clearly visible
    map.setZoom(16)
    // This will act as a cleanup to run once this hook runs again.
    // This includes when the component un-mounts
    return () => {
      map.dispose();
    };
  }, []); // This will run this hook every time this ref is updated
  return <div className="map h-screen" ref={mapRef}  />;
});
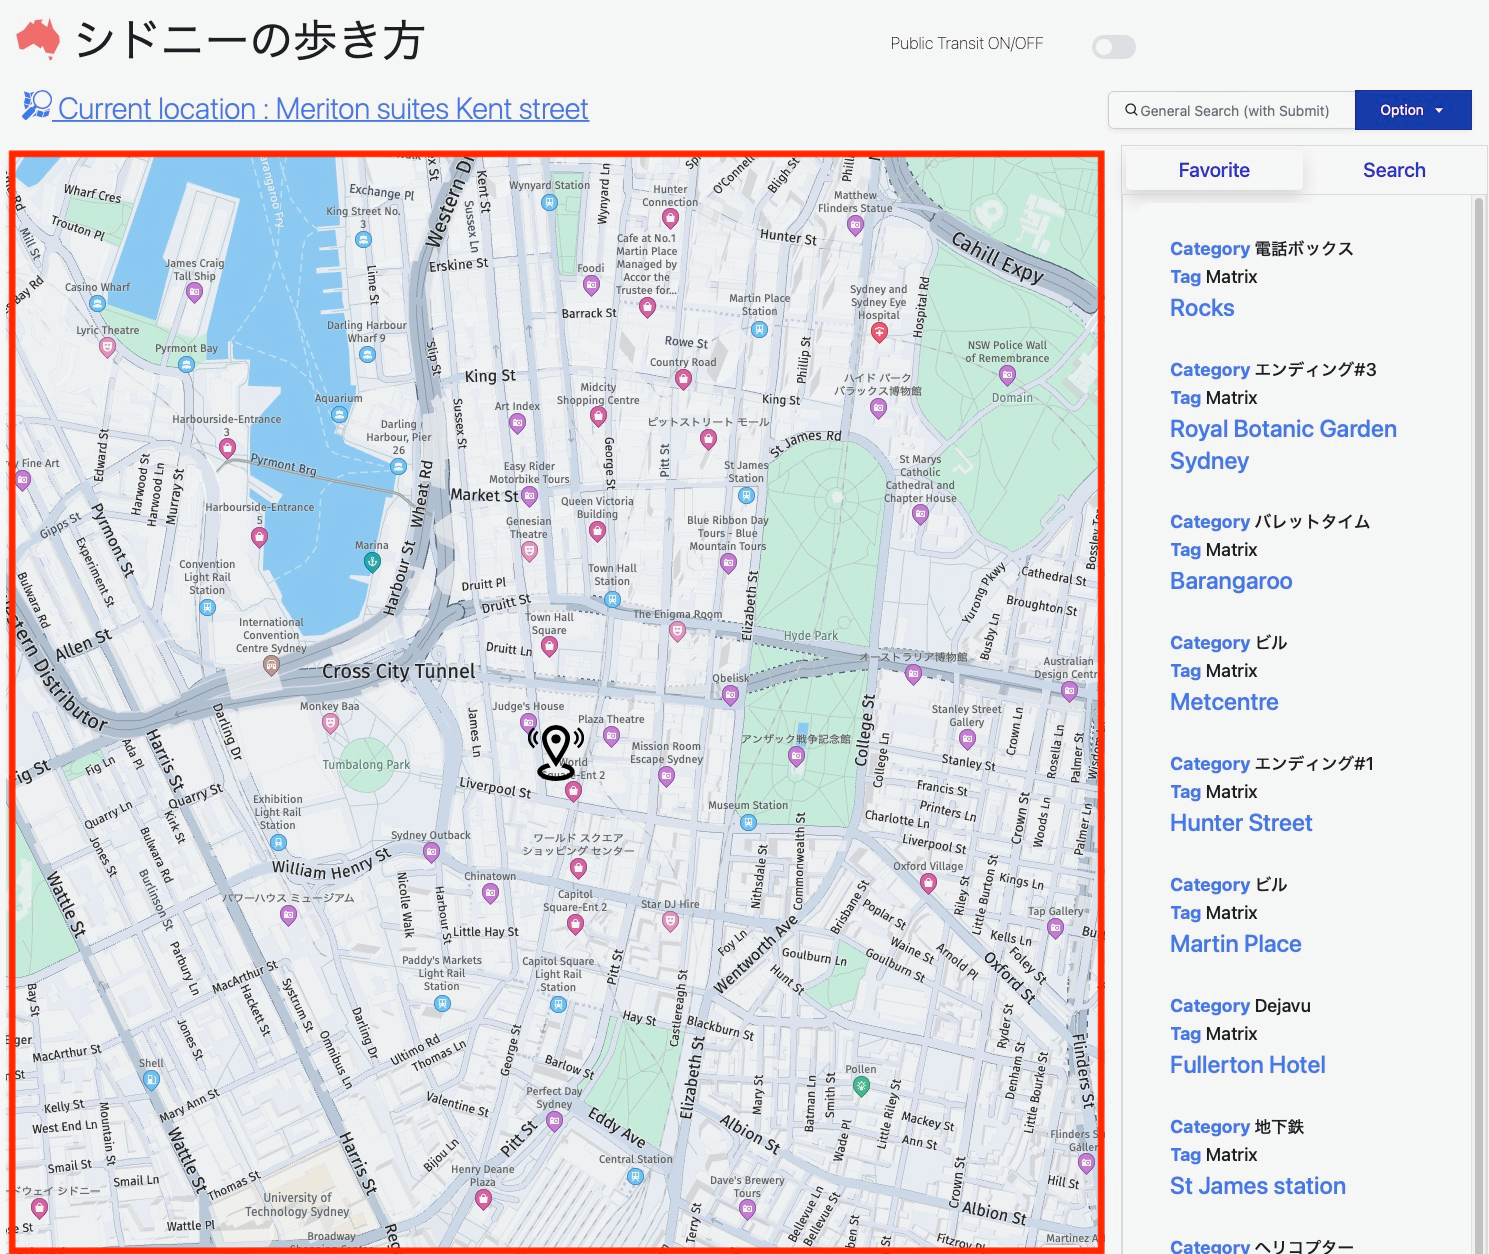
完成イメージは以下のようになります。(ちょうど赤枠がこちらのReactコンポーネントになります。)

おまけ
シドニーは映画マトリックスのロケ地としても有名です。主人公ネオが勤めていたソフトウェア会社のビル及びマトリックスで最も有名なシーンのバレットタイムが撮影されたビルなどが点在しております。
ネオのソフトウェア会社ビル
バレットタイムビル
それらを確認するために3Dビューに変更して確認してみます。
追加コード
次のコードを追加するだけです。
map.getViewModel().setLookAtData({tilt: 70});
完成イメージ
以下赤枠が左側からバレットタイムのビル、右側がネオのソフトウェア会社になります。

ズームインするとそれぞれ、なんとなくイメージが描かれていると思います。
(というわけで私の観光に役立ちました!)
ネオのソフトウェア会社ビル

バレットタイムビル

おわりに
今回は地図の描画に特化した基本的なノウハウの紹介となりましたがいかがでしたでしょうか?
HERE APIを使用することで、地図をベースとした様々なアプリケーションを作成することができます。
次回以降も引き続きゆるく、HEREのその他ロケーションサービス製品群を紹介できればと考えております。
差し当たっては、クラスタリング分析機能をカバーする予定です。


