はじめに
HEREでエンジニアをしておりますkekishidaです。
今回はHEREロケーションサービス製品群の花形(?)Routingサービスについて取り上げてみたいと思います。一般のITエンジニアの皆様にとっては、Routingというとパケット伝達の経路情報を思い浮かべるかもしれません。しかし、ここでご紹介するRoutingは実世界の経路情報、すなわち、カーナビで提供されるようなルート検索サービスとなります。
HEREでは様々なRoutingサービスを扱っております。
- HERE Routing API
- HERE Isoline Routing API
- HERE Matrix Routing API
- HERE Waypoints Sequence API
- HERE Public Transit API
- HERE Route Matching API
その中で、前回、前々回から使用しているサンプルアプリケーションでは以下の2つのRoutingサービスを利用しております。
これらのRoutingサービスは通常REST APIで提供されますが、Maps API for Javascriptでは、それらのサービスを関数として提供しており、自分のアプリケーション(Reactコンポーネント)に容易にRoutingサービスを組み込むことが可能です。カーナビにも使用されているRouting機能を自分のアプリにお手軽に組み込めると思うとうれしくないですか?
それでは、サンプルアプリケーションのイメージを確認します。
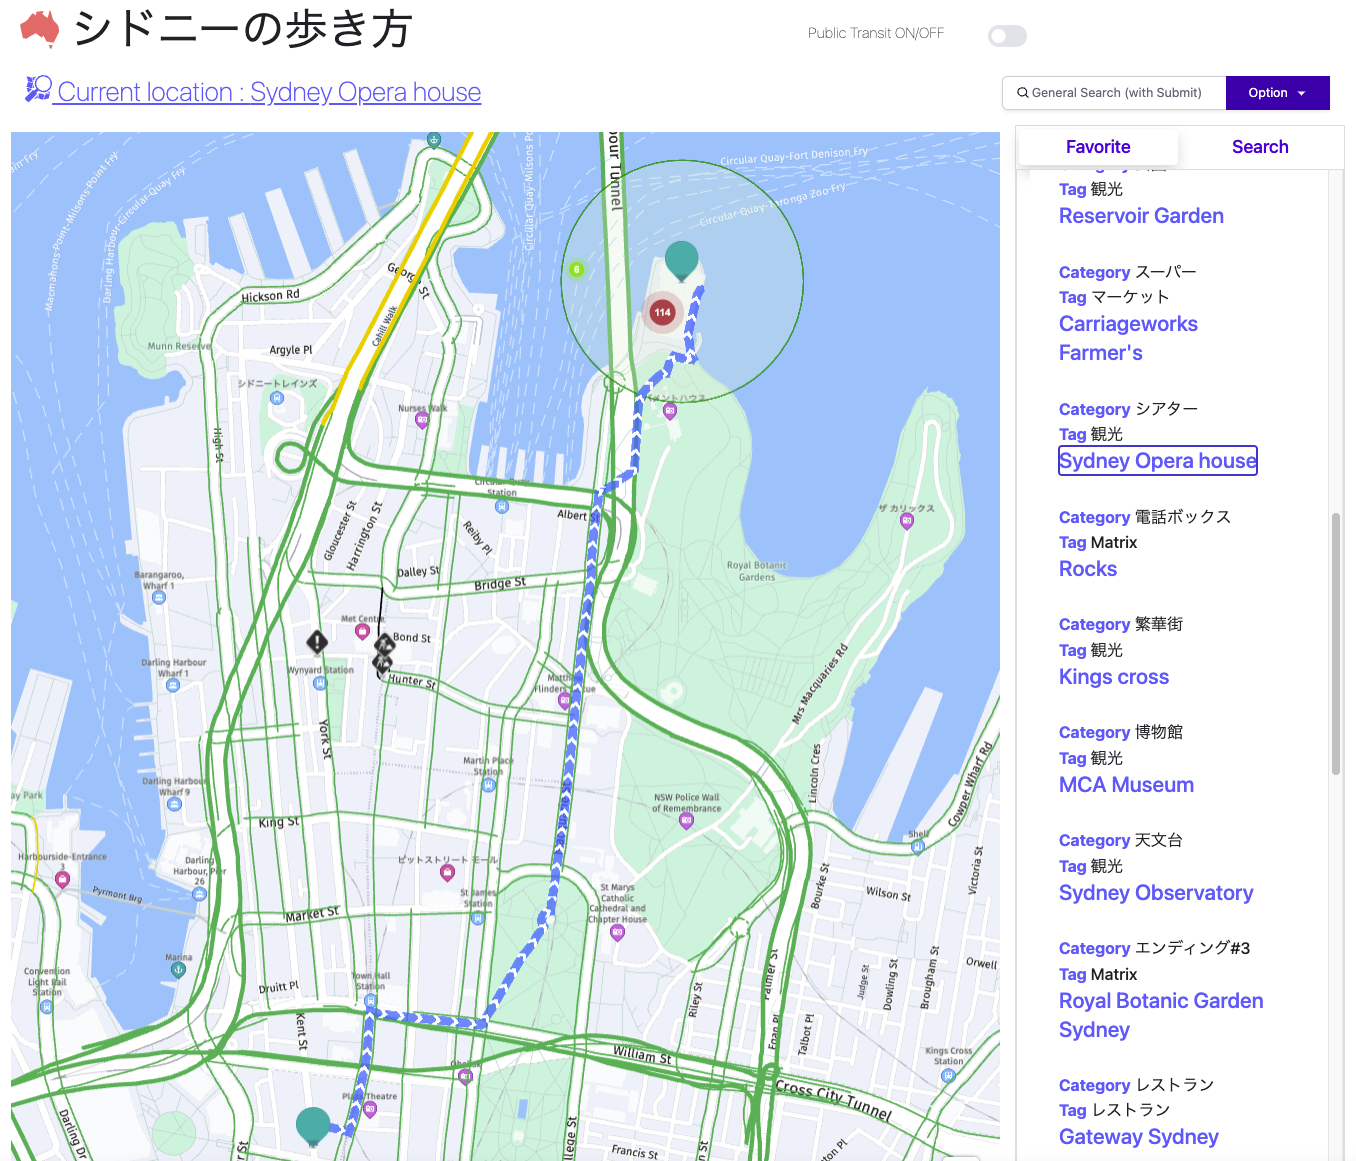
歩行者モード 1
シドニーオペラハウスへの歩行者モードでのルート検索となりますが、なるべく最短経路のルートを通過しています。
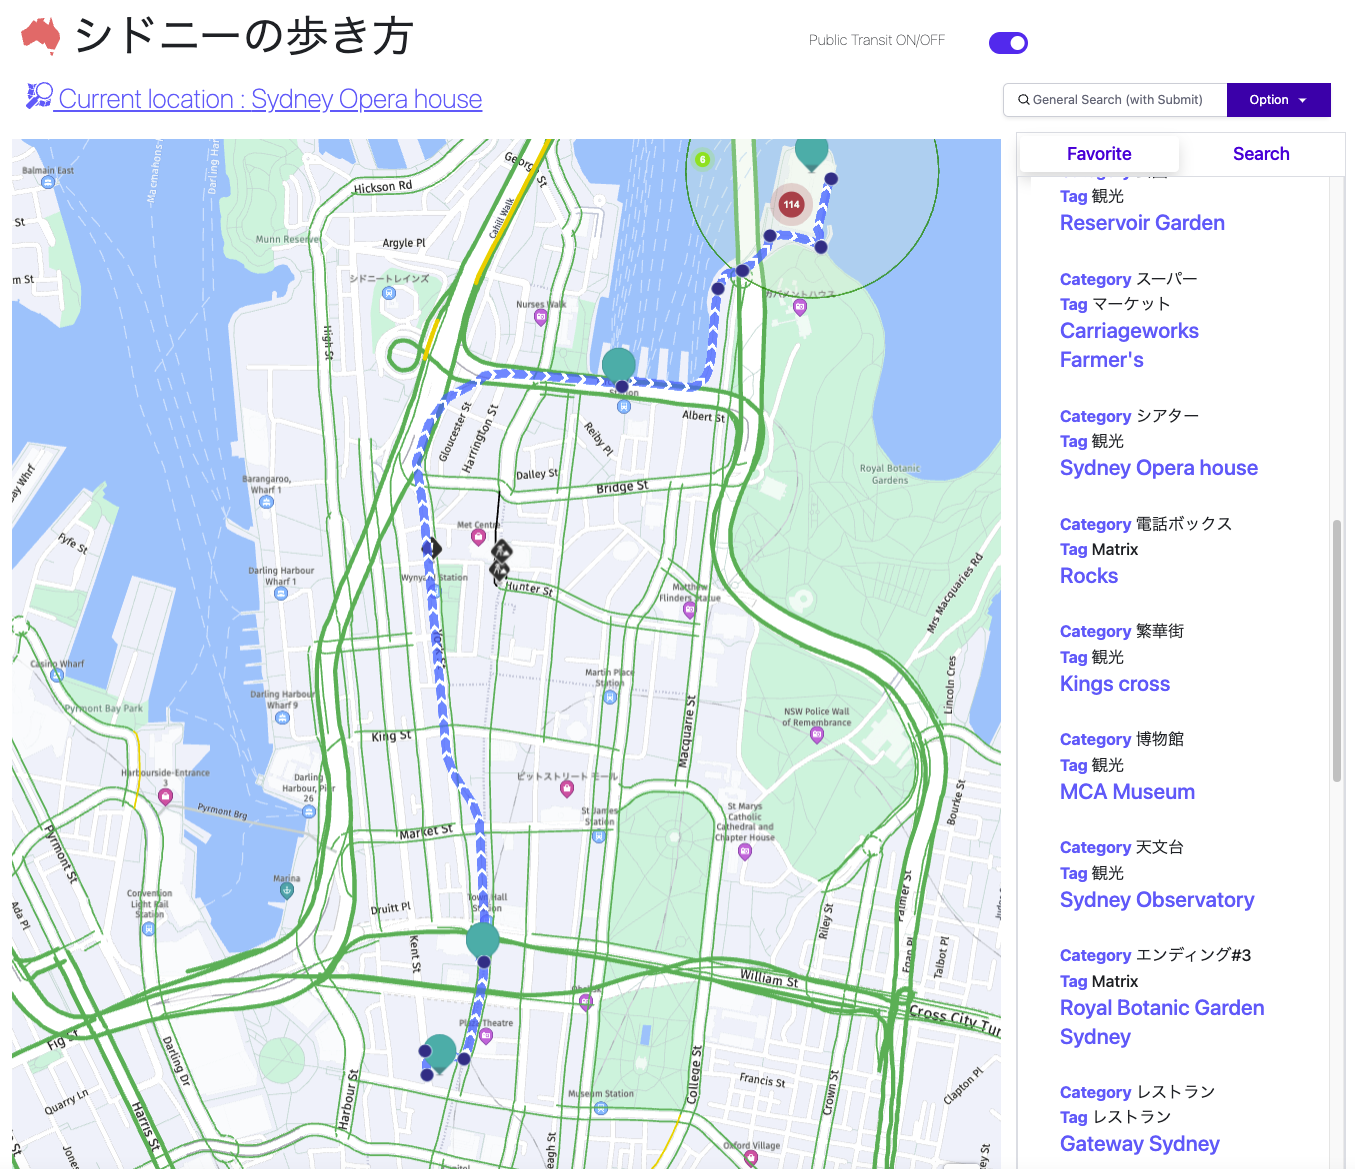
公共交通機関モード 2
シドニーオペラハウスへの公共交通機関モードでのルート検索となりますので、途中でトラムに乗り換えて目的地に到達しております。
Routing機能をReactコンポーネントに組み込もう
Routing機能を説明するにあたって、既に多くの皆様がRouting APIについて取り上げて頂いております。なるべく重複することがない様に以下にリンクをあらためて追加しました。
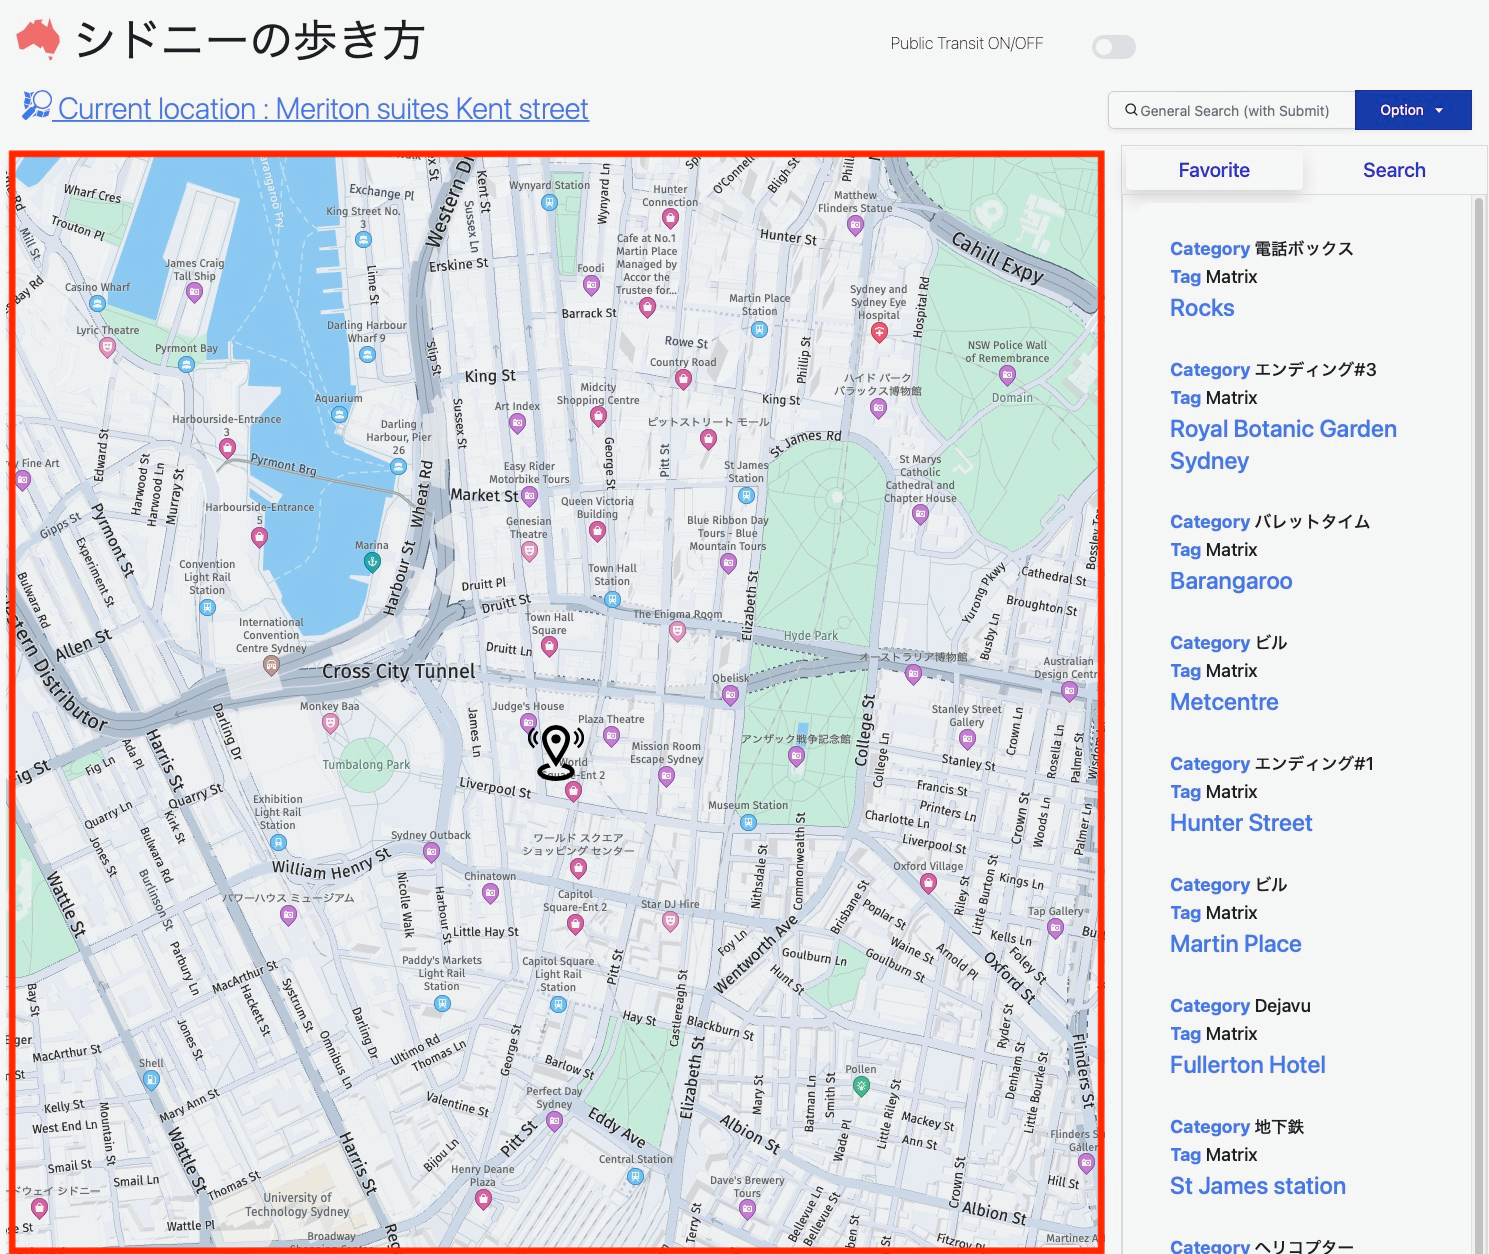
それでは、第1回目で作成したまっさらなReact地図コンポーネントから、Routing機能を使える様に仕立て上げる体で進めていきます!!(赤枠がまっさらなReact地図コンポーネント)
以下は改めてまっさらなReact地図コンポーネントのコードとなります。
import * as React from 'react';

export const DisplayMap = React.memo(({ gps }) => {
  // Create a reference to the HTML element we want to put the map on
  const mapRef = React.useRef(null);
  /**
   * Create the map instance
   * While `useEffect` could also be used here, `useLayoutEffect` will render
   * the map sooner
   */
    // React.useEffect(() => {
   React.useLayoutEffect(() => {
    // `mapRef.current` will be `undefined` when this hook first runs; edge case that
    if (!mapRef.current) return;
    const H = window.H;
    const platform = new H.service.Platform({
        apikey: {API KEY} // こちらはAPIKEYなので、取得されましたものをそれぞれ入力ください。
    });
    const defaultLayers = platform.createDefaultLayers();
    // configure an OMV service to use the `core` endpoint
    var omvService = platform.getOMVService({ path: "v2/vectortiles/core/mc" });
    var baseUrl = "https://js.api.here.com/v3/3.1/styles/omv/oslo/japan/";

    // create a Japan specific style
    var style = new H.map.Style(`${baseUrl}normal.day.yaml`, baseUrl);

    // instantiate provider and layer for the base map
    var omvProvider = new H.service.omv.Provider(omvService, style);
    var omvlayer = new H.map.layer.TileLayer(omvProvider, { max: 22 ,dark:true});

    // instantiate (and display) a map:
    var map = new H.Map(mapRef.current, omvlayer, {
        zoom: 16,
        center: { lat: gps.latitude, lng: gps.longitude },
    });

    // add a resize listener to make sure that the map occupies the whole container
    window.addEventListener("resize", () => map.getViewPort().resize());

    // MapEvents enables the event system
    // Behavior implements default interactions for pan/zoom (also on mobile touch environments)
    var behavior = new H.mapevents.Behavior(new H.mapevents.MapEvents(map));
    // Create the default UI components
    var ui = H.ui.UI.createDefault(map, defaultLayers);
    // Marker code goes here
    var LocationOfMarker = { lat: gps.latitude, lng: gps.longitude };
    var pngIcon = new H.map.Icon('<svg xmlns="http://www.w3.org/2000/svg" width="24" height="24" viewBox="0 0 24 24"><path d="M12 2c2.131 0 4 1.73 4 3.702 0 2.05-1.714 4.941-4 8.561-2.286-3.62-4-6.511-4-8.561 0-1.972 1.869-3.702 4-3.702zm0-2c-3.148 0-6 2.553-6 5.702 0 3.148 2.602 6.907 6 12.298 3.398-5.391 6-9.15 6-12.298 0-3.149-2.851-5.702-6-5.702zm0 8c-1.105 0-2-.895-2-2s.895-2 2-2 2 .895 2 2-.895 2-2 2zm10.881-2.501c0-1.492-.739-2.83-1.902-3.748l.741-.752c1.395 1.101 2.28 2.706 2.28 4.5s-.885 3.4-2.28 4.501l-.741-.753c1.163-.917 1.902-2.256 1.902-3.748zm-3.381 2.249l.74.751c.931-.733 1.521-1.804 1.521-3 0-1.195-.59-2.267-1.521-3l-.74.751c.697.551 1.141 1.354 1.141 2.249s-.444 1.699-1.141 2.249zm-16.479 1.499l-.741.753c-1.395-1.101-2.28-2.707-2.28-4.501s.885-3.399 2.28-4.5l.741.752c-1.163.918-1.902 2.256-1.902 3.748s.739 2.831 1.902 3.748zm.338-3.748c0-.896.443-1.698 1.141-2.249l-.74-.751c-.931.733-1.521 1.805-1.521 3 0 1.196.59 2.267 1.521 3l.74-.751c-.697-.55-1.141-1.353-1.141-2.249zm16.641 14.501c0 2.209-3.581 4-8 4s-8-1.791-8-4c0-1.602 1.888-2.98 4.608-3.619l1.154 1.824c-.401.068-.806.135-1.178.242-3.312.949-3.453 2.109-.021 3.102 2.088.603 4.777.605 6.874-.001 3.619-1.047 3.164-2.275-.268-3.167-.296-.077-.621-.118-.936-.171l1.156-1.828c2.723.638 4.611 2.016 4.611 3.618z"/></svg>', { size: { w: 56, h: 56 } });

    // Create a marker using the previously instantiated icon:
    var marker = new H.map.Marker(LocationOfMarker, { icon: pngIcon });

    // Add the marker to the map:
    map.addObject(marker);

    // Optionally,
    //Show the marker in the center of the map
    map.setCenter(LocationOfMarker)

    //Zooming so that the marker can be clearly visible
    map.setZoom(16)
    // This will act as a cleanup to run once this hook runs again.
    // This includes when the component un-mounts
    return () => {
      map.dispose();
    };
  }, []); // This will run this hook every time this ref is updated
  return <div className="map h-screen" ref={mapRef}  />;
});
Routingサービスの組み込み
まず、ポイントとなってくるのが、上記コードで冒頭に作成しているHERE Platformオブジェクトです。
    const platform = new H.service.Platform({
        apikey: {API KEY} // こちらはAPIKEYなので、取得されましたものをそれぞれ入力ください。
    });
こちらのオブジェクトに新たなロケーションサービスを追加していくことでサービスを組み込みます。
例えばHERE Routing APIを使用したい場合であれば、以下の様にします。
let router = platform.getRoutingService(null, 8);
HERE Public Transit APIを使用するのであれば、以下の通りです。
let router = platform.getPublicTransitService();
Routingサービス実装のフレームワーク
それでは、上記で追加したRoutingサービスをベースにして、Routing機能を実現するための大きなフレームワークについて説明したいと思います。
こちらのHERE公式サンプルに記載されている内容に全て含まれておりますが、もう少し日本語で噛み砕いてみたいと思います。
以下の6つの要素になります。
//Routing機能の追加
let route = platform.getRoutingService(null, 8);
//またはlet router = platform.getPublicTransitService();

//Error用のCallback関数の定義
let onError = (error) => {
    //エラー処理を記載
}
//Routing機能のREST API結果受領後のCallback関数の定義
let onResult = function(result) {
    // REST APIの結果をどう調理して、地図上に表示するのかを記載
}
//Routing機能REST API向けのインプットパラメータの定義
let routingParameters = {
    // REST APIのいわゆるインプットパラメータ
};
//Routing機能REST API呼び出し関数の定義
let calculateRoute = () => {
    :
    //ここでAPIを読んでます
    router.calculateRoute(routingParameters, onResult, onError);
    :
}
//Routing機能REST API呼び出し
calculateRoute();
なんとなく、シンプルにRouting機能が追加できる気になってきませんか?あとはそれぞれの枠組みの中に必要な機能を肉付けするだけです。
1. インプットパラメータの定義
まずは、Routing APIをコールしなくてはいけないので、そのインプットパラメータを肉付けします。
      let routingParameters = {
        'transportMode': 'pedestrian',
        'return': 'polyline'
      };
今回は歩行者モードなので、transportModeをpedestrian、そしてRouting自体も目的地へ経路の線を描くだけなのでreturnをpolylineと指定します。こちらのインプットパラメータ自体は他にもいろいろなパラメータを指定できます。詳細は以下のHERE公式ガイドに記載されております。
2. API呼び出し関数の定義
そして、いよいよAPIをコールしますが。以下のrouter.calculateRoute()の引数に先ほどのroutingParameters, onResult/onErrorのコールバック関数を渡してあげます。
      let calculateRoute = () => {
        if (!origin || !destination) return;

        routingParameters.origin = origin.latitude+","+origin.longitude;
        routingParameters.destination = destination.latitude+","+destination.longitude;

        router.calculateRoute(routingParameters, onResult, onError);
      }
あれ? origin(出発地)とdestination(目的地)はどこにも定義していないと思われた方、正解です。これらorigin,destinationをこのReactコンポーネントの外から渡してあげます。すなわち、以下の様なJSONパラメータをReact地図コンポーネントにpropsとしてorigin,destinationを渡してあげれば良いのです。
{'latitude' : '-33.87597091898053', 'longitude': '151.20577761110076'}
export const DisplayMap = React.memo(({ origin, destination }) => {
  // Create a reference to the HTML element we want to put the map on
  const mapRef = React.useRef(null);
:
:
3. APIレスポンス受領後のコールバック関数の定義
続いて先ほどrouter.calculateRoute()で渡したonResultの肉付けをします。すなわち、こちらでREST APIのJSON Responseデータを加工処理します。
      let onResult = function(result) {
        if (result.routes.length) {
          result.routes[0].sections.forEach((section) => {
              // REST APIで返送されたエンコードされたpolyline情報をLineStringオブジェクトに変換
              let linestring = H.geo.LineString.fromFlexiblePolyline(section.polyline);
              // LineStringオブジェクトをさらにPolylineオブジェクトへ変換
              let routeLine = new H.map.Polyline(linestring, {
                style: { strokeColor: 'blue', lineWidth: 3 }
              });
              // REST APIで返送された出発地の位置情報よりマーカーオブジェクトを作成
              let startMarker = new H.map.Marker(section.departure.place.location);
              // REST APIで返送された目的地の位置情報よりマーカーオブジェクトを作成
              let endMarker = new H.map.Marker(section.arrival.place.location);
              // 上記のオブジェクトを地図上に描画
              map.addObjects([routeLine, startMarker,endMarker]);
              // 地図のズームレベルを出発地と目的地に最適化
              map.getViewModel().setLookAtData({bounds: routeLine.getBoundingBox()},{zoom: 8});
          });
        }
      };
上記で行っている内容は、REST APIで返送されたデータを地図で描画できるオブジェクトにそれぞれ変換しているだけになります。
以下の二つのHERE公式ガイドが参考になります。
4. 完成イメージ
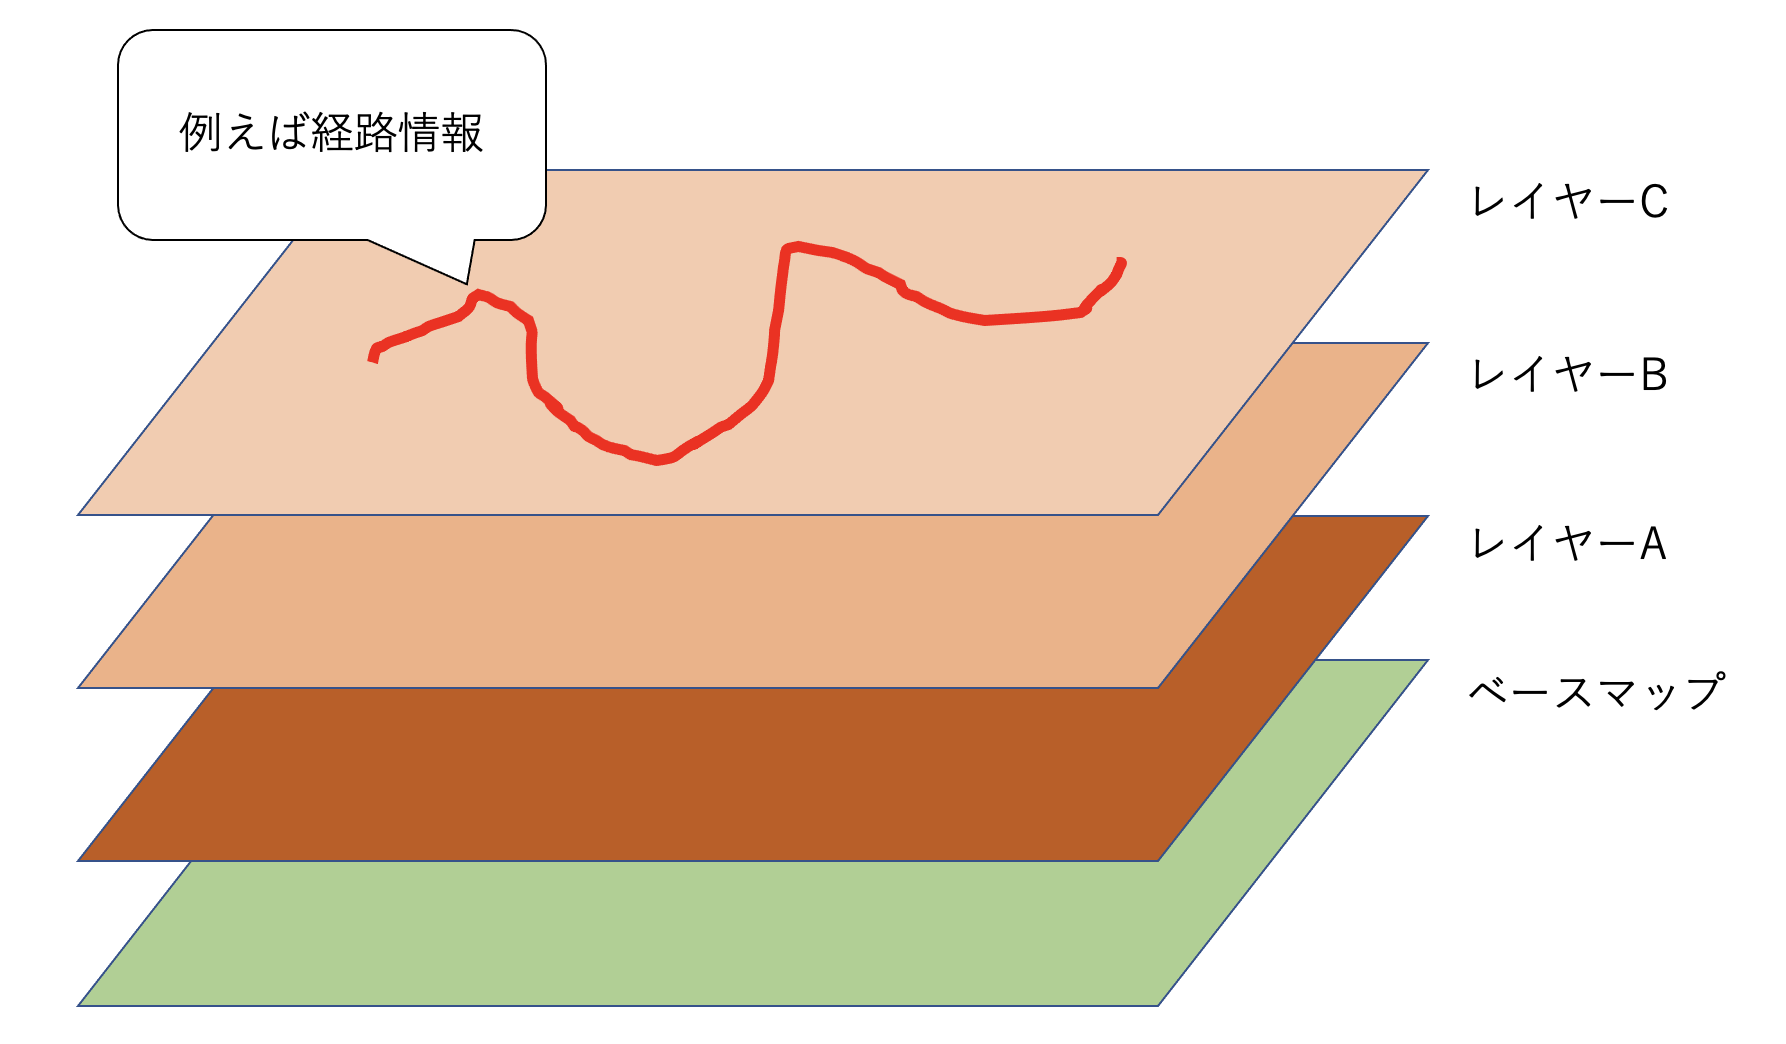
それでは、最後に全部足し合わせる(折重ねる)と以下の様になります。
(第2回目でも説明しましたが以下の様なイメージです。)
import * as React from 'react';

export const DisplayMap = React.memo(({ origin, destination }) => {
  // Create a reference to the HTML element we want to put the map on
  const mapRef = React.useRef(null);
   React.useLayoutEffect(() => {
    // `mapRef.current` will be `undefined` when this hook first runs; edge case that
    if (!mapRef.current) return;
    const H = window.H;
    const platform = new H.service.Platform({
        apikey: {API KEY} // こちらはAPIKEYなので、取得されましたものをそれぞれ入力ください。
    });
    const defaultLayers = platform.createDefaultLayers();
    // configure an OMV service to use the `core` endpoint
    var omvService = platform.getOMVService({ path: "v2/vectortiles/core/mc" });
    var baseUrl = "https://js.api.here.com/v3/3.1/styles/omv/oslo/japan/";

    // create a Japan specific style
    var style = new H.map.Style(`${baseUrl}normal.day.yaml`, baseUrl);

    // instantiate provider and layer for the base map
    var omvProvider = new H.service.omv.Provider(omvService, style);
    var omvlayer = new H.map.layer.TileLayer(omvProvider, { max: 22 ,dark:true});

    // instantiate (and display) a map:
    var map = new H.Map(mapRef.current, omvlayer, {
        zoom: 16,
        center: { lat: origin.latitude, lng: origin.longitude },
    });

    // add a resize listener to make sure that the map occupies the whole container
    window.addEventListener("resize", () => map.getViewPort().resize());

    // MapEvents enables the event system
    // Behavior implements default interactions for pan/zoom (also on mobile touch environments)
    var behavior = new H.mapevents.Behavior(new H.mapevents.MapEvents(map));
    // Create the default UI components
    var ui = H.ui.UI.createDefault(map, defaultLayers);
    //Routing機能の追加
    let router = platform.getRoutingService(null, 8);

    let onError = (error) => {
      alert(error.message);
    }
    //Routing機能のREST API結果受領後のCallback関数の定義
    let onResult = function(result) {
        if (result.routes.length) {
          result.routes[0].sections.forEach((section) => {
              // REST APIで返送されたエンコードされたpolyline情報をLineStringオブジェクトに変換
              let linestring = H.geo.LineString.fromFlexiblePolyline(section.polyline);
              // LineStringオブジェクトをさらにPolylineオブジェクトへ変換
              let routeLine = new H.map.Polyline(linestring, {
                style: { strokeColor: 'blue', lineWidth: 3 }
              });
              // REST APIで返送された出発地の位置情報よりマーカーオブジェクトを作成
              let startMarker = new H.map.Marker(section.departure.place.location);
              // REST APIで返送された目的地の位置情報よりマーカーオブジェクトを作成
              let endMarker = new H.map.Marker(section.arrival.place.location);
              // 上記のオブジェクトを地図上に描画
              map.addObjects([routeLine, startMarker,endMarker]);
              // 地図のズームレベルを出発地と目的地に最適化
              map.getViewModel().setLookAtData({bounds: routeLine.getBoundingBox()},{zoom: 8});
          });
        }
    };
    //Routing機能REST API向けのインプットパラメータの定義
    let routingParameters = {
        'transportMode': 'pedestrian',
        'return': 'polyline'
    };
    //Routing機能REST API呼び出し関数の定義
    let calculateRoute = () => {
        if (!origin || !destination) return;

        routingParameters.origin = origin.latitude+","+origin.longitude;
        routingParameters.destination = destination.latitude+","+destination.longitude;

        router.calculateRoute(routingParameters, onResult, onError);
    }
    //Routing機能REST API呼び出し
    calculateRoute();
    return () => {
      map.dispose();
    };
  }, []); // This will run this hook every time this ref is updated
  return <div className="map h-screen" ref={mapRef}  />;
});
オリジナルのまっさらのReact地図コンポーネントは、現在地の変更に伴い地図が再描画されるつくりでしたが、上記の改造版では出発地と目的地が変更される度に地図とその経路情報が再描画される作りとなりました。コード量も思ったほど多くないはずです。
おまけ
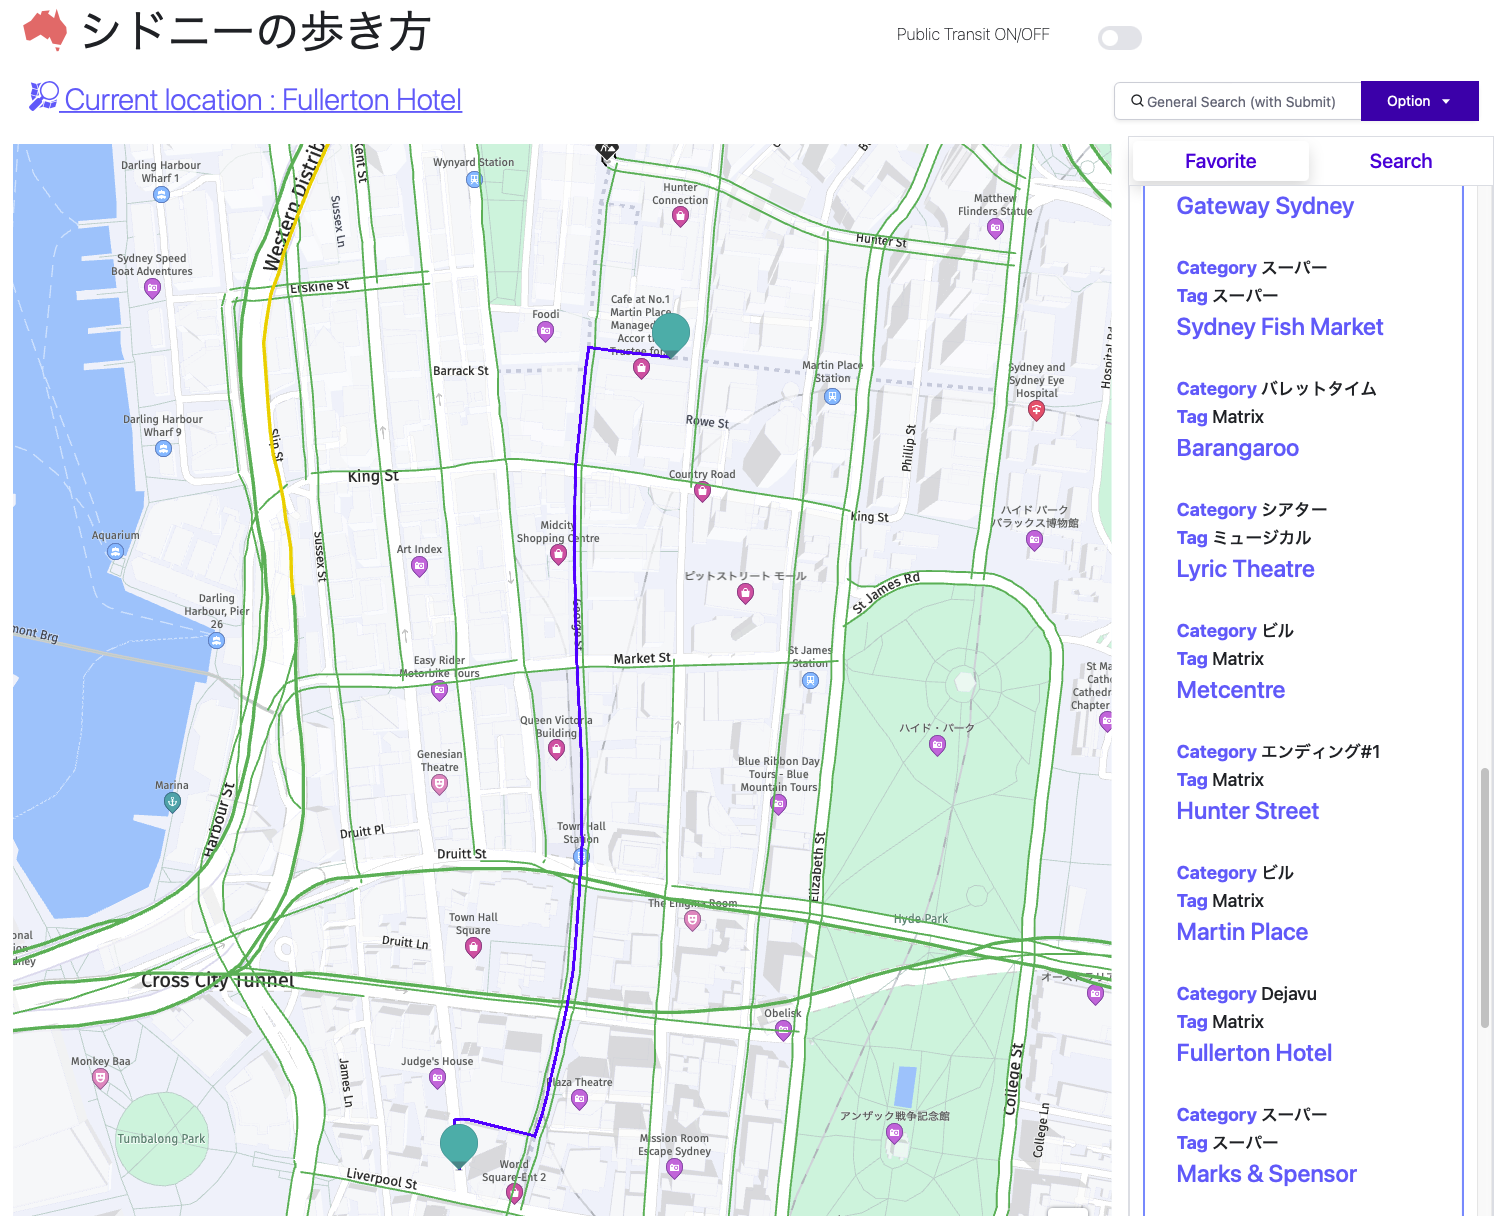
完成したコードを利用して、1回目に続き、映画マトリックスのロケ地を(擬似)探訪してみたいと思います。マトリックスシリーズの中でキーとなるデジャブを象徴する黒猫を見るシーンがあるのですが、そちらのロケ地(フラトンホテル)になります。

実は先ほど作成したコードは最もシンプルなRouting機能の実装だったので出発地と目的地のマーカーとシンプルなブルーラインを描いているだけですが、正しく目的地のフラトンホテル(上部のマーカー)に向けて経路が描かれております。
おわりに
いかがでしたでしょうか?今回はRouting基本編ということで、わりと丁寧にRouting機能の実装方法について解説したつもりです。自分のアプリに簡単にカーナビレベルの機能が実装出来るワクワク感を伝えることができたならば幸いです。次回はRouting応用編と題して、日本地図を題材に、見た目を良くしたり、情報量を多くしたりする方法や、その他のRoutingサービスについて解説できればと思います。