はじめに
こんにちは、エンジニアのkeitaMaxです。
前回の続きです。
前回の記事
今回は、SotrybookをGitHubにプッシュした際に自動でデプロイをして、UIの変更などを自動でテストして教えてもらう機能を作成していきたいと思います。
主に以下のURLをもとに作成していきたいと思います。Chromaticを使用します。
Chromaticとは何か
Chromatic は、ブラウザー間で考えられるすべての UI 状態をスキャンして、視覚的および機能的なバグを検出するビジュアル テストおよびレビュー ツールです。レビュー担当者を割り当て、ディスカッションを解決して、チームの承認を効率化します。
(引用元:https://www.chromatic.com/)
Chromaticとは、Storybookをデプロイして、UIのテストを自動でしてくれたり、UIを簡単に共有することができるようになるツールです。
Chromaticに登録する
まずはChromatic登録します。以下のURLのサイトに登録します。
登録が完了すると、以下のようにインストールを促されるので、コマンドをたたいてインストールします。
npm install --save-dev chromatic
npx chromatic --project-token={トークン}
すると、package.jsonに
"chromatic": "npx chromatic --project-token=$CHROMATIC_PROJECT_TOKEN"
と行が追加されています。
CHROMATIC_PROJECT_TOKENの部分はPrivateなトークンなので、ここには載せておりません。
また、Gitには上げないようにしてください。
Gitにトークンを設定
このトークンを以下のURLを参考にGitに設定します。
Gitの自動テストをするリポジトリの設定を開きます。
その後、Secrets and variables>Actions>Repository secretsに設定します。
GitHub Actionsを設定
.github/worlflow/chromatic.ymlファイルを作成します。
name: Chromatic

on: [pull_request]

jobs:
  chromatic-deployment:
    name: Deploy Storybook to chromatic
    runs-on: ubuntu-latest
    timeout-minutes: 7
    steps:
      - name: Checkout repository
        uses: actions/checkout@v2
        with:
          fetch-depth: 0
      - name: Install dependencies
        run: npm ci
      - name: Publish to Chromatic
        uses: chromaui/action@v1
        with:
          token: ${{ secrets.github_token }}
          projectToken: ${{ secrets.CHROMATIC_PROJECT_TOKEN }}
これでGitにPushしてみましょう。
するとGitでは以下のような表示になっています。
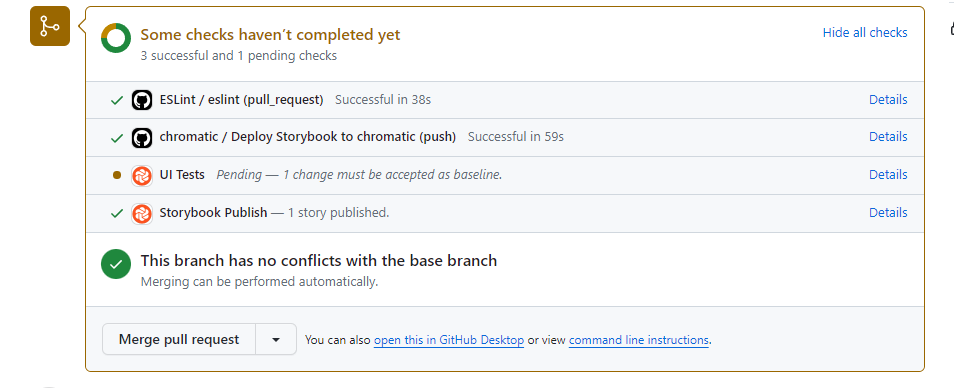
UI Testsだけチェックが入っていませんが、これは前回とUIが変わった場所があるため、確認してくれと言っています。
Detailsを押してみると以下のようになっています。
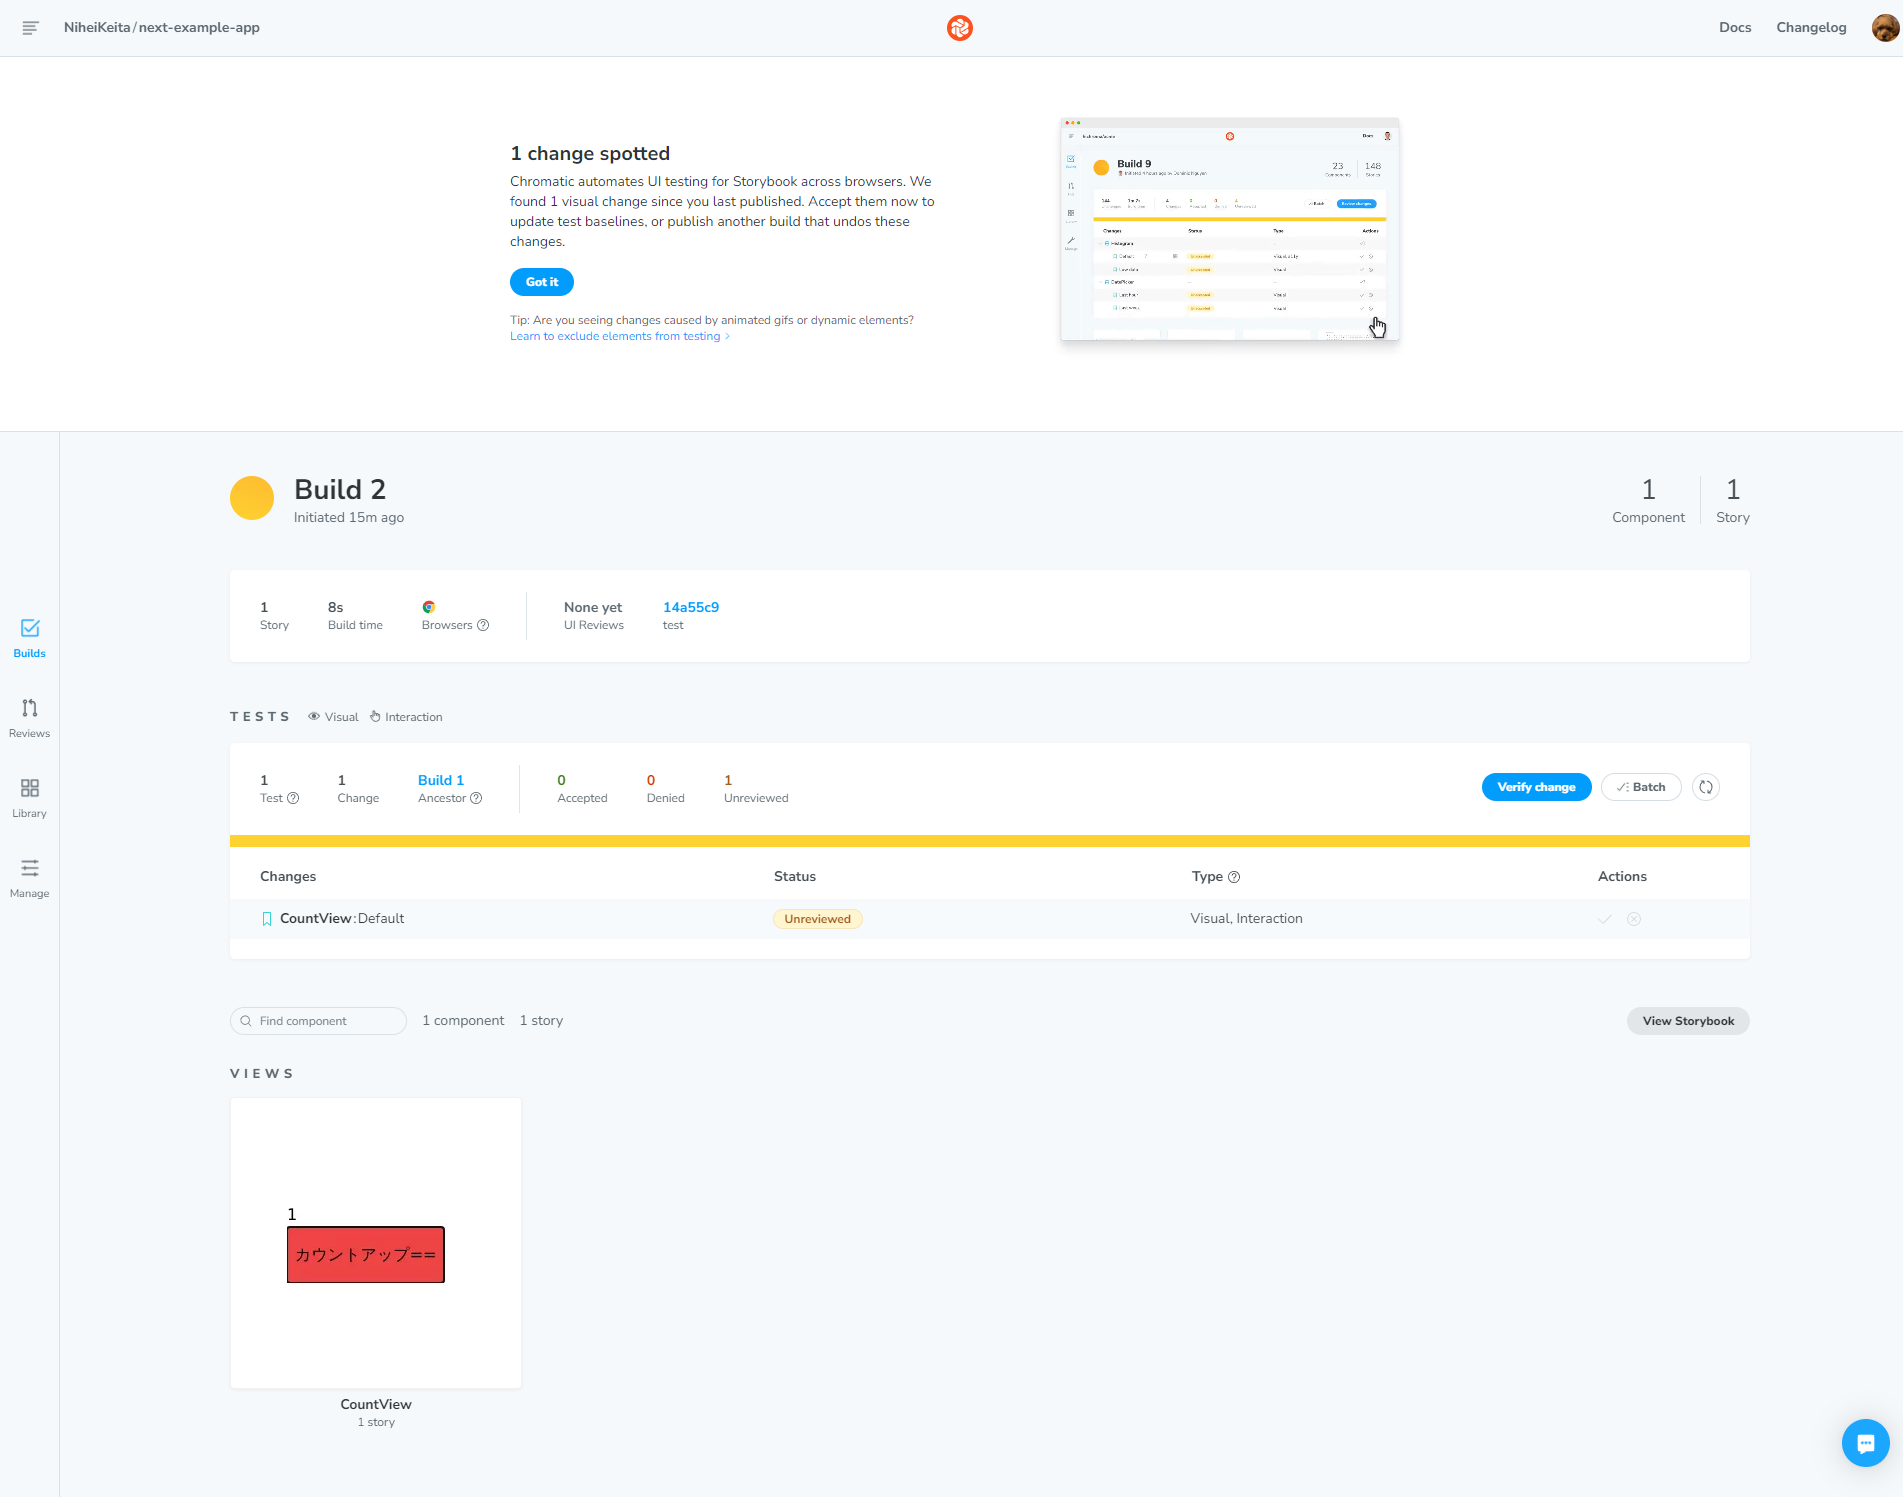
この画面のverify changeからAcceptを押して変更を承認します。
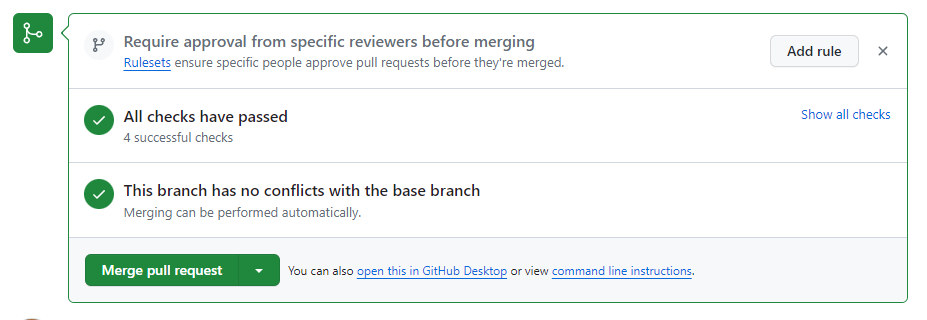
その後、プルリクに戻るとすべてにチェックが付き、マージできる状態になります。
前に書いたStorybookのテストを失敗させてみる
前々回くらいにStorybookで書いたテストを失敗させてみようと思います。
Storybookの自動テストは以下の記事で作成しました。
成功していたテストコードを以下のように修正してみます。
import { expect } from '@storybook/jest';
import { Meta, StoryObj } from '@storybook/react';
import { screen, userEvent } from '@storybook/testing-library';
import { CountView } from '.';

const meta: Meta<typeof CountView> = {
  title: 'views/CountView',
  component: CountView,
  tags: ['autodocs'],
}
export default meta

type Story = StoryObj<typeof meta>

export const Default: Story = {
  args: {

  },
  render: function Render() {
    return <CountView />
  },
}
Default.play = async () => {
  const button = await screen.findByTestId('button');
  expect(button).toBeInTheDocument();
  expect(screen.queryByTestId('countText')?.innerHTML).toBe("2"); //ここを修正 正しくは"0"になる
  await userEvent.click(button);
  expect(screen.queryByTestId('countText')?.innerHTML).toBe("1");
}
この状態でPushして自動テストを走らせてみます。すると以下のようにテストが失敗します。

ここのUI Testの横のDetailsを押すと、先ほど修正したコードでエラーになっているよというようなメッセージが出てきます。

これを、正しく動く状態にしてPushしてみます。
すると以下のように自動テストが成功し、マージできる状態になります。

これでNext.jsのStorybookを使用した自動テストをGitHub上で動かせるようになりました。
さいごに
思ったより自動テストは楽に導入することができました。
これからはNext.jsでできる自動テストを増やしていくのと、バックエンド側のPHPなどでも自動テストを導入していきたいと思います。
また、後々自動デプロイのほうもやっていこうと思っています。
やり方が違ったり、もっといいやり方があるというご指摘がある方はコメントしていただけると幸いです。
最後まで読んでいただきありがとうございました。
参考文献
次の記事