はじめに
今回は、単一の画像から3Dオブジェクトを推定する新モデル「Stable Zero123」をWSLで動かし、好きな画像・写真から3D化する手順をまとめました。
以下の環境で検証しています。
| 項目 | |
|---|---|
| OS | Ubuntu 22.04(WSL 2) |
| CPU | AMD Ryzen 7 5700X |
| メインメモリ | 64GB |
| GPU | NVIDIA GeForce RTX 3090 |
1. WSL+CUDA+cuDNN環境の構築
こちらの記事が大変参考になりました。今回はPython 3.10.6、CUDA 11.8の環境をつくりました。
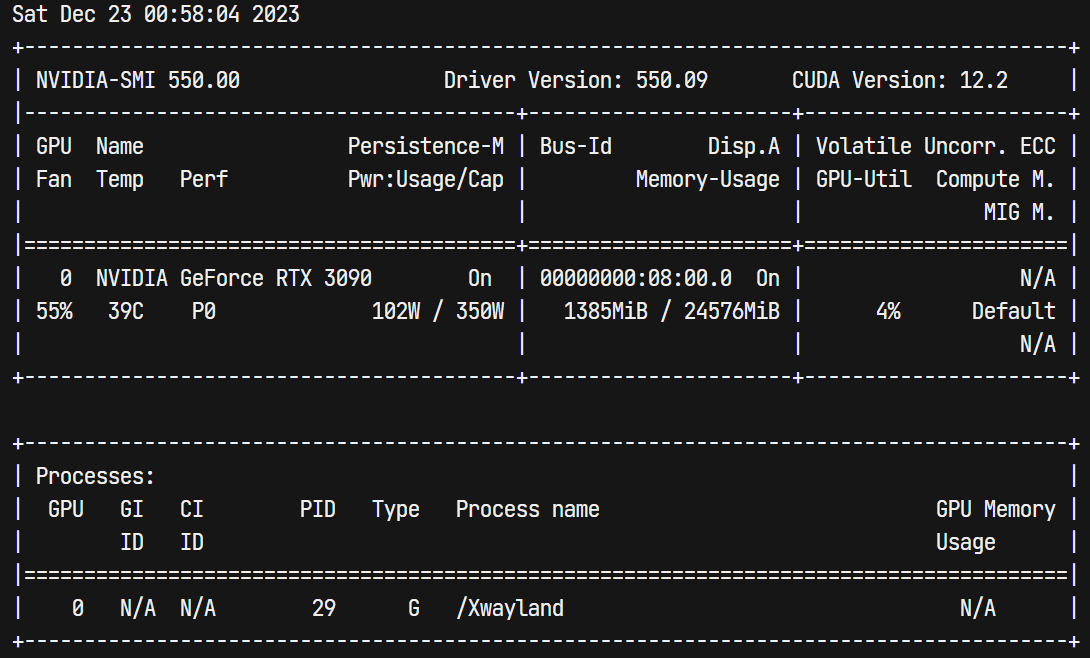
以下のコマンドで正しくGPUを認識しており、かつCUDAが使えるようになっているか確認してください。
nvidia-smi
nvcc -V
nvcc: NVIDIA (R) Cuda compiler driver
Copyright (c) 2005-2022 NVIDIA Corporation
Built on Wed_Sep_21_10:33:58_PDT_2022
Cuda compilation tools, release 11.8, V11.8.89
Build cuda_11.8.r11.8/compiler.31833905_0
2. threestudioのインストール
こちらのREADME.md通りに操作してもどうしてもエラーになってしまい(nerfacc、tiny-cuda-nnのビルドに失敗する)、あきらめかけていたところ、私の環境では以下の対応で問題なく動作しました!
- 仮想環境ではなく、元のPython環境にそのままインストールする(ゴリ押しです...)
- 以下の設定を
~/.bashrcに追記し、source ~/.bashrcで反映させておく
export PATH="/usr/local/cuda/bin:$PATH"
export PATH="~/.local/bin:$PATH"
export LD_LIBRARY_PATH="/usr/local/cuda/lib64:$LD_LIBRARY_PATH"
export LIBRARY_PATH="/usr/local/cuda/lib64/stubs:$LIBRARY_PATH"
- README.mdに従ってライブラリのビルド・インストールを進める
pip install torch torchvision --index-url https://download.pytorch.org/whl/cu118
pip install ninja
pip install -r requirements.txt
- Stable Zero123の学習済み重みをダウンロード
wget -P load/zero123/ https://huggingface.co/stabilityai/stable-zero123/resolve/main/stable_zero123.ckpt
3. threestudioの学習設定の変更
以下のコマンドを実行すれば単一画像から3Dオブジェクトを推定する学習が開始されますが、手元のGPUでも実行できるように設定が必要です。
バッチサイズや評価時の解像度によってGPUの占有VRAMが大きくなってしまうため、24GBのVRAMを搭載しているRTX 3090でもデフォルトの設定ではVRAM使用量が振り切ってしまいました。。
python3 launch.py --config configs/stable-zero123.yaml --train --gpu 0 data.image_path=./load/images/anya_front_rgba.png
Stable Zero123を利用して単一画像から3Dオブジェクトを推定するための設定ファイルthreestudio/configs/stable-zero123.yamlを編集します。私の環境の場合、以下のような設定であれば問題なくスムーズに学習できました。
name: "zero123-sai"
tag: "${data.random_camera.height}_${rmspace:${basename:${data.image_path}},_}"
exp_root_dir: "outputs"
seed: 0

data_type: "single-image-datamodule"
data: # threestudio/data/image.py -> SingleImageDataModuleConfig
  image_path: ./load/images/hamburger_rgba.png
  height: [128, 256, 256]
  width: [128, 256, 256]
  resolution_milestones: [200, 300]
  default_elevation_deg: 5.0
  default_azimuth_deg: 0.0
  default_camera_distance: 3.8
  default_fovy_deg: 20.0
  requires_depth: ${cmaxgt0orcmaxgt0:${system.loss.lambda_depth},${system.loss.lambda_depth_rel}}
  requires_normal: ${cmaxgt0:${system.loss.lambda_normal}}
  random_camera: # threestudio/data/uncond.py -> RandomCameraDataModuleConfig
    height: [64, 128, 256]
    width: [64, 128, 256]
    batch_size: [1, 1, 1]
    resolution_milestones: [200, 300]
    eval_height: 256
    eval_width: 256
    eval_batch_size: 1
    elevation_range: [-10, 80]
    azimuth_range: [-180, 180]
    camera_distance_range: [3.8, 3.8]
    fovy_range: [20.0, 20.0] # Zero123 has fixed fovy
    progressive_until: 0
    camera_perturb: 0.0
    center_perturb: 0.0
    up_perturb: 0.0
    light_position_perturb: 1.0
    light_distance_range: [7.5, 10.0]
    eval_elevation_deg: ${data.default_elevation_deg}
    eval_camera_distance: ${data.default_camera_distance}
    eval_fovy_deg: ${data.default_fovy_deg}
    light_sample_strategy: "dreamfusion"
    batch_uniform_azimuth: False
    n_val_views: 30
    n_test_views: 120

system_type: "zero123-system"
system:
  geometry_type: "implicit-volume"
  geometry:
    radius: 2.0
    normal_type: "analytic"

    # use Magic3D density initialization instead
    density_bias: "blob_magic3d"
    density_activation: softplus
    density_blob_scale: 10.
    density_blob_std: 0.5

    # coarse to fine hash grid encoding
    # to ensure smooth analytic normals
    pos_encoding_config:
      otype: HashGrid
      n_levels: 16
      n_features_per_level: 2
      log2_hashmap_size: 19
      base_resolution: 16
      per_level_scale: 1.447269237440378 # max resolution 4096
    mlp_network_config:
      otype: "VanillaMLP"
      activation: "ReLU"
      output_activation: "none"
      n_neurons: 64
      n_hidden_layers: 2

  material_type: "diffuse-with-point-light-material"
  material:
    ambient_only_steps: 100000
    textureless_prob: 0.05
    albedo_activation: sigmoid

  background_type: "solid-color-background" # unused

  renderer_type: "nerf-volume-renderer"
  renderer:
    radius: ${system.geometry.radius}
    num_samples_per_ray: 128
    return_comp_normal: ${cmaxgt0:${system.loss.lambda_normal_smooth}}
    return_normal_perturb: ${cmaxgt0:${system.loss.lambda_3d_normal_smooth}}

  prompt_processor_type: "dummy-prompt-processor" # Zero123 doesn't use prompts
  prompt_processor:
    pretrained_model_name_or_path: ""
    prompt: ""

  guidance_type: "stable-zero123-guidance"
  guidance:
    pretrained_config: "./load/zero123/sd-objaverse-finetune-c_concat-256.yaml"
    pretrained_model_name_or_path: "./load/zero123/stable_zero123.ckpt"
    vram_O: ${not:${gt0:${system.freq.guidance_eval}}}
    cond_image_path: ${data.image_path}
    cond_elevation_deg: ${data.default_elevation_deg}
    cond_azimuth_deg: ${data.default_azimuth_deg}
    cond_camera_distance: ${data.default_camera_distance}
    guidance_scale: 3.0
    min_step_percent: [50, 0.7, 0.3, 200]  # (start_iter, start_val, end_val, end_iter)
    max_step_percent: [50, 0.98, 0.8, 200]

  freq:
    ref_only_steps: 0
    guidance_eval: 0

  loggers:
    wandb:
      enable: false
      project: "threestudio"
      name: None

  loss:
    lambda_sds: 0.1
    lambda_rgb: [100, 500., 1000., 400]
    lambda_mask: 50.
    lambda_depth: 0. # 0.05
    lambda_depth_rel: 0. # [0, 0, 0.05, 100]
    lambda_normal: 0. # [0, 0, 0.05, 100]
    lambda_normal_smooth: [100, 7.0, 5.0, 150, 10.0, 200]
    lambda_3d_normal_smooth: [100, 7.0, 5.0, 150, 10.0, 200]
    lambda_orient: 1.0
    lambda_sparsity: 0.5 # should be tweaked for every model
    lambda_opaque: 0.5

  optimizer:
    name: Adam
    args:
      lr: 0.01
      betas: [0.9, 0.99]
      eps: 1.e-8

trainer:
  max_steps: 600
  log_every_n_steps: 1
  num_sanity_val_steps: 0
  val_check_interval: 100
  enable_progress_bar: true
  precision: 16

checkpoint:
  save_last: true # save at each validation time
  save_top_k: -1
  every_n_train_steps: 100 # ${trainer.max_steps}
4. 3D化実行!
いよいよ準備が整いました。CUDAのメモリエラーに対処するために以下のようにコマンドを実行すると問題なく学習が進みました。
env PYTORCH_CUDA_ALLOC_CONF=max_split_size_mb:100 python3 launch.py --config configs/stable-zero123.yaml --train --gpu 0 data.image_path=./load/images/anya_front_rgba.png
サンプル画像
- サンプル画像として入っていたアーニャの画像を学習させたところ、以下のようになりました。
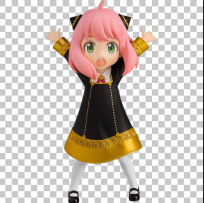

解像度を下げたのでかなりぼやけていますが、後ろ姿も自然に生成されていることが分かります!
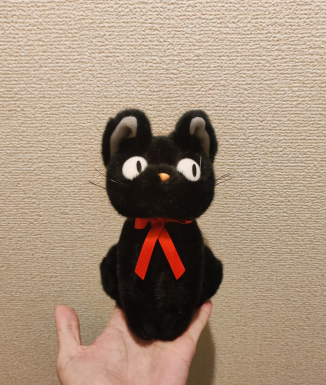
好きな画像を用意して実行
今回は家にあるジジのぬいぐるみの写真を撮り、適当に透過させjiji_rgba.pngとして保存しました。
env PYTORCH_CUDA_ALLOC_CONF=max_split_size_mb:100 python3 launch.py --config configs/stable-zero123.yaml --train --gpu 0 data.image_path=./load/images/jiji_rgba.png
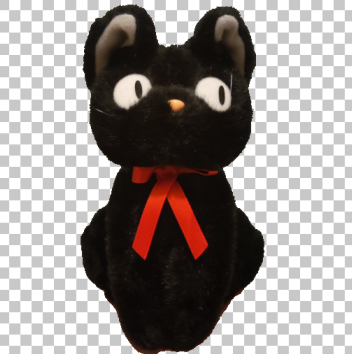
頭の後ろに穴ができてしまいましたが、暗く見にくい画像でありながら前足と後ろ足をうまく推定できています!
首の赤いリボンもしっかりしています。
さいごに
WSLを使ってローカルマシンでStable Zero123を動かす検証をご紹介しました!
適当に撮った写真でもかなり自然な3Dオブジェクトを推定できそうです。
最後までお読みいただきありがとうございました!