前回の続きからUITableViewのテストをする
##テストコードを書く準備
###UITableViewを用意
ViewController.swiftを編集
ViewController.swift
import UIKit

// プロトコルを追加
class ViewController: UIViewController, UITableViewDelegate, UITableViewDataSource {

    // Tableで使用する配列を用意
    let items = ["test1", "test2", "test3", "test4", "test5"]

    override func viewDidLoad() {
        super.viewDidLoad()
        // Do any additional setup after loading the view, typically from a nib.

        // Viewの高さと幅を取得
        let width: CGFloat = self.view.frame.width
        let height: CGFloat = self.view.frame.height

        // Status Barの高さを取得
        let barHeight: CGFloat = UIApplication.sharedApplication().statusBarFrame.size.height

        // TableViewを作成
        let tableView: UITableView = UITableView(frame: CGRect(x: 0, y: barHeight, width: width, height: height - barHeight))

        // Cell名を登録
        tableView.registerClass(UITableViewCell.self, forCellReuseIdentifier: "cell")

        // DataSourceを設定
        tableView.dataSource = self

        // Delegateを設定
        tableView.delegate = self

        // Viewに追加
        self.view.addSubview(tableView)
    }

    override func didReceiveMemoryWarning() {
        super.didReceiveMemoryWarning()
        // Dispose of any resources that can be recreated.
    }

    // Cellの総数を返す
    func tableView(tableView: UITableView, numberOfRowsInSection section: Int) -> Int {
        return items.count
    }

    // Cellに値を設定
    func tableView(tableView: UITableView, cellForRowAtIndexPath indexPath: NSIndexPath) -> UITableViewCell {
        // Cellを取得
        let cell = tableView.dequeueReusableCellWithIdentifier("cell", forIndexPath: indexPath) as UITableViewCell

        // Cellに値を設定
        cell.textLabel!.text = items[indexPath.row]

        return cell
    }

}
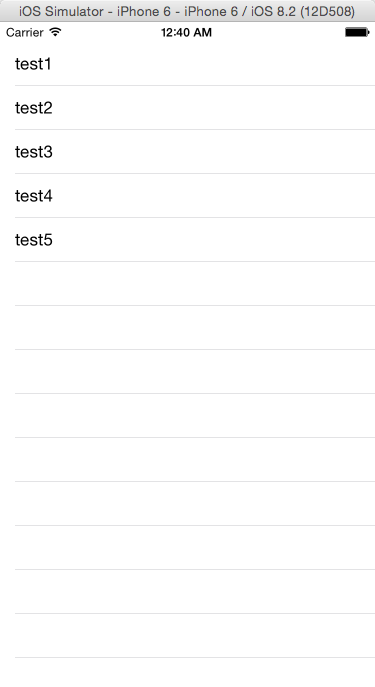
こんな感じのができる
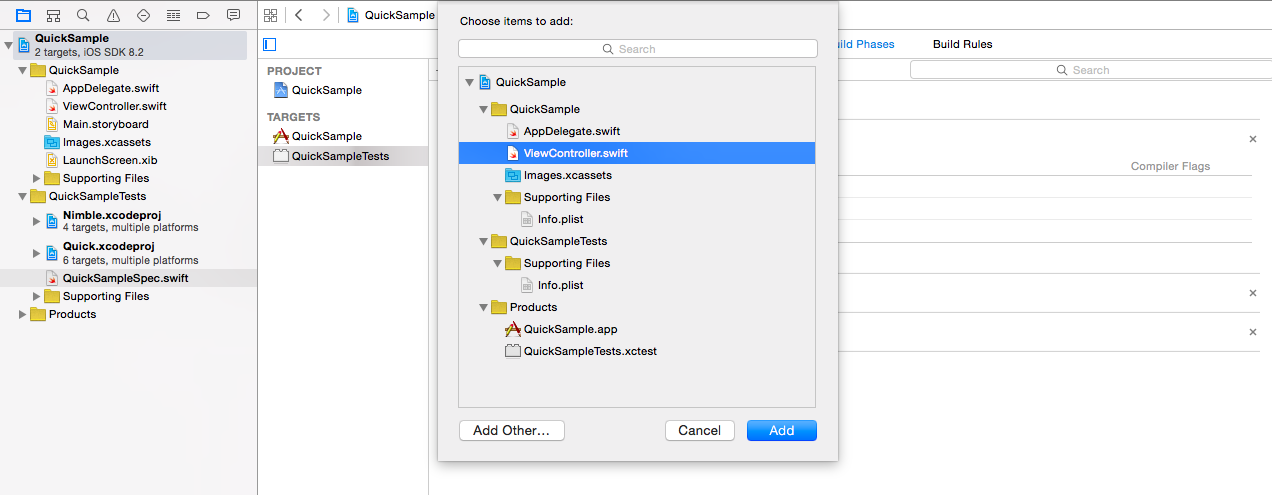
###Compile Sourcesにテスト対象を追加する
ここから
ViewController.swiftを追加する
追加されてればおk
##テストコードを書く
viewを取得してテストを書いてく。
QuickSampleSpec.swift
import UIKit
import Quick
import Nimble

class QuickSampleSpec: QuickSpec {
    override func spec() {
        var viewController: ViewController!

        beforeEach {
            viewController = ViewController()
        }

        describe("viewDidLoad") {
            beforeEach {
                // viewが描画されるために必要らしい
                let _ =  viewController.view
            }

            it("first cell is test1") {
                // Tableviewを取得
                let tableView = viewController.view.subviews.first as UITableView

                // IndexPathを作成
                let indexPath = NSIndexPath(forRow: 0, inSection: 0)

                // Cellを取得
                let cell = viewController.tableView(tableView, cellForRowAtIndexPath: indexPath)

                // Cellのラベルを検証
                expect(cell.textLabel?.text).to(equal("test1"))
            }

            it("second cell is test2") {
                let tableView = viewController.view.subviews.first as UITableView
                let indexPath = NSIndexPath(forRow: 1, inSection: 0)
                let cell = viewController.tableView(tableView, cellForRowAtIndexPath: indexPath)
                expect(cell.textLabel?.text).to(equal("test2"))
            }
        }
    }
}
こんな感じ。
##テストを走らせる
⌘ + U
いいねいいね!
#3はそのうち


