Result
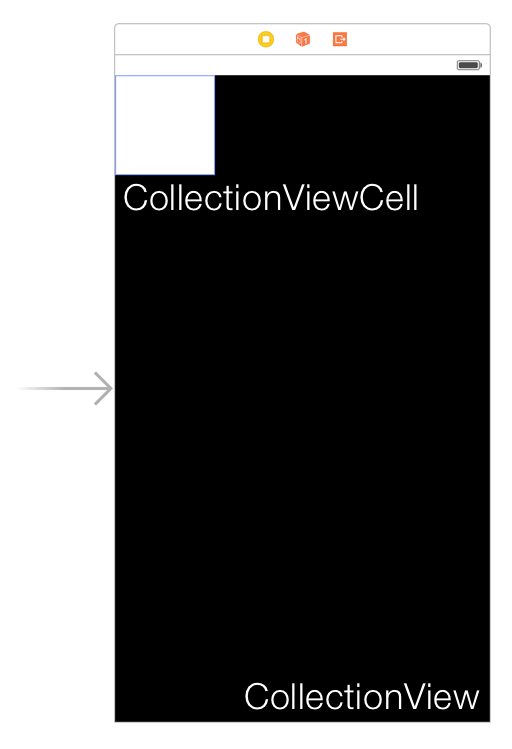
- セル (CollectionViewCell) を3列に表示
- 各セル上にお気に入りボタンのようなものを右下に表示

4:07 AMとかなってるのはご愛嬌で!🌙
コードドゾー
https://github.com/keisei1092/celltest
Init
- New -> Project -> iOS -> Single View Application
- Main.Storyboard
- CollectionViewを置く
- CollectionViewの背景を黒、CollectionViewCellの背景を白にしておく
- (↓画像ではCollectionViewCellの縦横が100になってるけど気にしないでください)
- CollectionViewCellを選択してAttibutes InspectorのCollection Reusable ViewのIdentifierにCellと入力しておく

- Collection ViewからView ControllerへControl+ドラッグして、dataSourceとdelegateをチェック

- Collection View Flow LayoutのMin Spacingを2とかにしとく

これで準備完了です
CollectionViewCellを均等に配置する
コードを書きます。
import UIKit

class ViewController: UIViewController, UICollectionViewDelegate, UICollectionViewDataSource, UICollectionViewDelegateFlowLayout {

    override func viewDidLoad() {
        super.viewDidLoad()
        // Do any additional setup after loading the view, typically from a nib.
    }

    override func didReceiveMemoryWarning() {
        super.didReceiveMemoryWarning()
        // Dispose of any resources that can be recreated.
    }

    func collectionView(collectionView: UICollectionView, cellForItemAtIndexPath indexPath: NSIndexPath) -> UICollectionViewCell {
        return collectionView.dequeueReusableCellWithReuseIdentifier("Cell", forIndexPath: indexPath) as UICollectionViewCell
    }

    func numberOfSectionsInCollectionView(collectionView: UICollectionView) -> Int {
        return 1
    }

    func collectionView(collectionView: UICollectionView, numberOfItemsInSection section: Int) -> Int {
        return 20;
    }

    func collectionView(collectionView: UICollectionView, layout collectionViewLayout: UICollectionViewLayout, sizeForItemAtIndexPath indexPath: NSIndexPath) -> CGSize {
        return CGSizeMake(self.view.frame.size.width / 3 - 2, self.view.frame.size.width / 3 - 2)
    }

}
- 保存して実行
- 動かすデバイスを変えても3列で綺麗に表示されましたか?
ボタンを右下に表示する
- Buttonを配置
- 適当に「★」とかにしとく
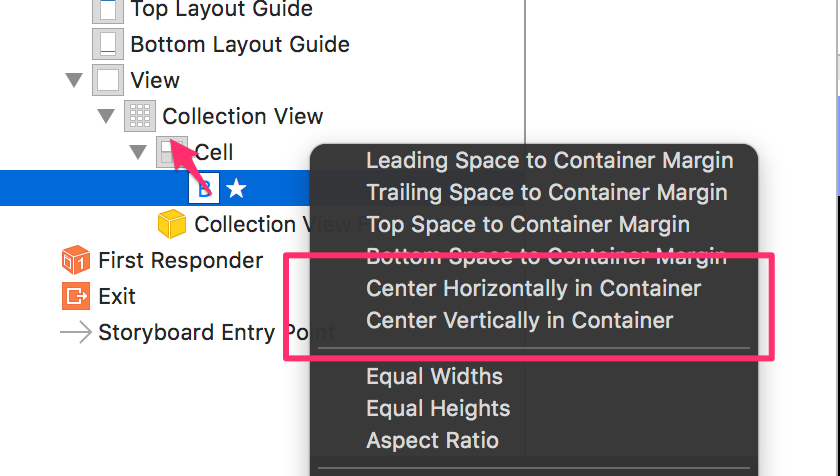
- 「★」からCellへControl+ドラッグして、Center Horizontally in ContainerとCenter Vertically in Containerをチェック

- Size InspectorのDescendant Constraintsで作った制約(Align Center X to: ★)をダブルクリックして

- Multiplierを1.666とかにする
- 同じくCenter.Yも

- できたら、Storyboard上の★を選択して、Storyboardメイン編集画面の下にあるツールのうち一番右のものをクリックしてUpdate Frames(↑画像の右下をご覧ください!)
- これで右下になったはずです
- Center.XとCenter.YのMultiplierの値をいじれば、好きな場所にパーツを配置できますね。