Espressoとは、Googleが公開しているAndroid用のUIテスティングフレームワークです。
使い方は以下のように、onView でViewを指定して、performで操作を行って、checkで照合します。
@Test
public void greeterSaysHello() {
    onView(withId(R.id.name_field)).perform(typeText("Steve"));
    onView(withId(R.id.greet_button)).perform(click());
    onView(withText("Hello Steve!")).check(matches(isDisplayed()));
}
わかりやすい仕組みなので導入は簡単なのですが、
使用頻度の高いperform(click())を使っていると
「perform(click())どういう仕組みなんだ..?」
とモヤモヤしたのでperform(click())のソースコードの処理を追ってみました。
Android SDK28、EspressoのバージョンはAndroidXの3.1.1で調べています。
click()の種類
androidx.test.espresso.action.ViewActionsにはclickメソッドが3つあります。
サンプルコードにあるのは一番目の引数なしのものです。
- click()
- click(int inputDevice, int buttonState)
- click(ViewAction rollbackAction)
APIリファレンスにはclick()は以下と同様と書いてあります。
click(InputDevice.SOURCE_UNKNOWN, MotionEvent.BUTTON_PRIMARY)
二つの引数の概要は以下となります。
InputDevice
InputDeviceはAndroid本体の定数で入力デバイスを表す定数群です。
SOURCE_の前置詞がつくものははビットフラグになっており、SOURCE_UNKNOWN他にSOURCE_KEYBOARD, SOURCE_DPAD,
SOURCE_TOUCHSCREENなど入力元を表していることがわかります。
click()ではSOURCE_UNKNOWNなので入力元を特定していないようです。
MotionEvent
MotionEventはAndroid本体の定数で入力デバイスを表すビットフラグです。
BUTTON_の前置詞を持つものはボタン用の定数で以下7つがあります。
| Key | Description |
|---|---|
BUTTON_PRIMARY |
Button constant: Primary button (left mouse button). |
BUTTON_SECONDARY |
Button constant: Secondary button (right mouse button). |
BUTTON_TERTIARY |
Button constant: Tertiary button (middle mouse button). |
BUTTON_BACK |
Button constant: Back button pressed (mouse back button). |
BUTTON_FORWARD |
Button constant: Forward button pressed (mouse forward button). |
BUTTON_STYLUS_PRIMARY |
Button constant: Primary stylus button pressed. |
BUTTON_STYLUS_SECONDARY |
Button constant: Secondary stylus button pressed. |
click()ではBUTTON_PRIMARYなのでマウスの左クリックに相当する、通常のクリック処理のようです。
click()の処理
ViewActionsにあるclick()は以下の箇所になります。
各設定を指定したGeneralClickActionのインスタンスを作成し、アサートを行ったあとに返しています。
:
public static ViewAction click() {
    return actionWithAssertions(
        new GeneralClickAction(
            Tap.SINGLE,
            GeneralLocation.VISIBLE_CENTER,
            Press.FINGER,
            InputDevice.SOURCE_UNKNOWN,
            MotionEvent.BUTTON_PRIMARY));
}
:
GeneralClickActionの引数
第1引数: Tap
以下3つがあります。
| Key | Description |
|---|---|
| SINGLE | シングルタップ |
| LONG | ロングタップ |
| DOUBLE | ダブルタップ |
定数ではなくEnumです。Tapperをimplementし、
それぞれperform時の処理が書かれています。
public enum Tap implements Tapper {
  SINGLE {
    @Override
    public Tapper.Status sendTap(
        UiController uiController, float[] coordinates, float[] precision) {
      return sendTap(uiController, coordinates, precision, 0, 0);
    }
    :
第2引数: GeneralLocation
| Key | Description |
|---|---|
| TOP_LEFT | Viewの左上 |
| TOP_CENTER | Viewの上中央 |
| TOP_RIGHT | Viewの右上 |
| CENTER_LEFT | Viewの左中央 |
| CENTER | Viewの中央 |
| CENTER_RIGHT | Viewの右中央 |
| BOTTOM_LEFT | Viewの左下 |
| BOTTOM_CENTER | Viewの下中央 |
| BOTTOM_RIGHT | Viewの右下 |
| VISIBLE_CENTER | 見える範囲のViewの中央 |
こちらも定数ではなくEnumです。CoordinatesProviderをimplementしています。
click()に使用されているVISIBLE_CENTERだけ見える範囲と特殊ですが基本的にはViewの座標を取得できるようになっています。
public enum GeneralLocation implements CoordinatesProvider {
  TOP_LEFT {
    @Override
    public float[] calculateCoordinates(View view) {
      return getCoordinates(view, Position.BEGIN, Position.BEGIN);
    }
  },
  :
第3引数: Press
| Key | Size (mm) | Comment |
|---|---|---|
| PINPOINT | 1x1 | |
| FINGER | 16x16 | average width of the index finger is 16 – 20 mm. |
| THUMB | 25x25 | average width of an adult thumb is 25 mm (1 inch). |
同じくEnumです。クリックエリアを返すためのPrecisionDescriberをimplementしています。
click()ではFINGERなので16x16mmのタップとして認識されるようです。
上を見るに親指も選択できます。
16mmは若干大きすぎる気がします..。
public enum Press implements PrecisionDescriber {
  PINPOINT {
    @Override
    public float[] describePrecision() {
      float[] pinpoint = {1f, 1f};
      return pinpoint;
    }
  },
  :
第4引数、第5引数は上述なので省略。
次はGeneralClickActionの処理を追ってみます。
perform(click())の処理
前編 - クリック処理の概要
https://developer.android.com/reference/android/support/test/espresso/ViewAction
https://developer.android.com/reference/android/support/test/espresso/action/GeneralClickAction.html
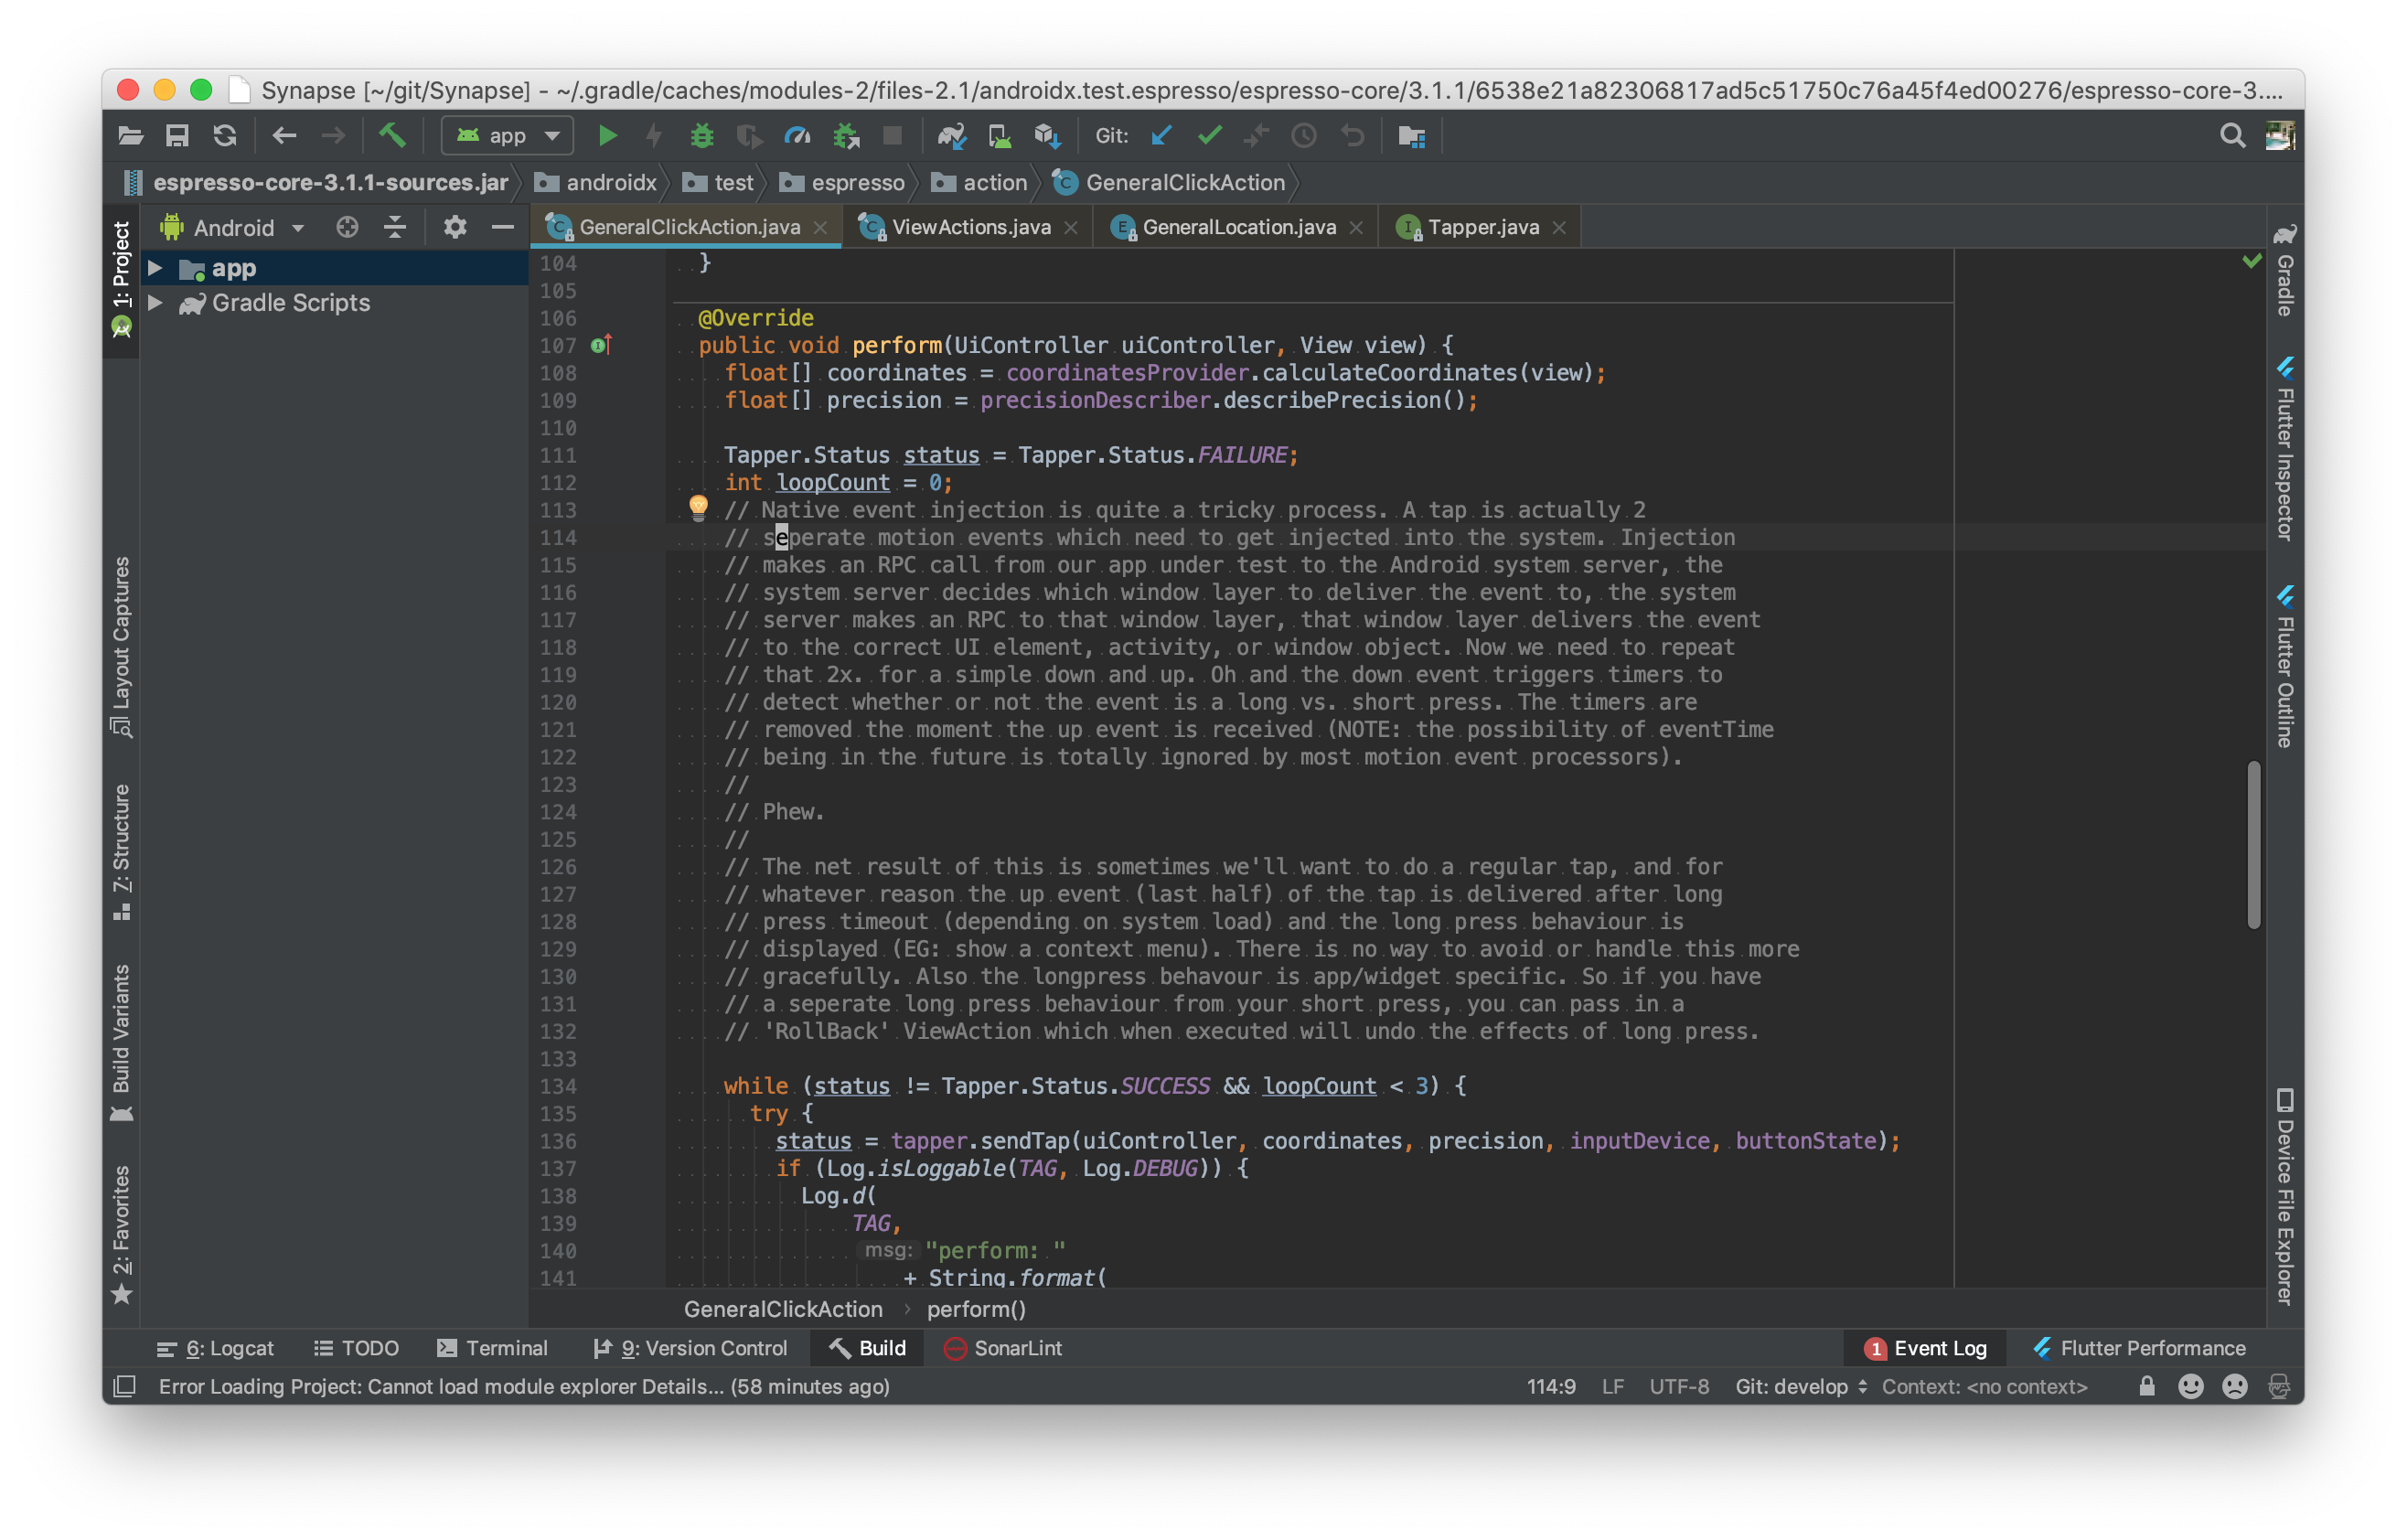
GeneralClickActionのperform処理のソースコードには
RPGの置き手紙イベントのような大きめのコメントがあります。

コメント部分を訳してみました。
ネイティブイベントの注入はかなり面倒なプロセスです。
「タップ」は実際には、システムに2つ別々に注入する必要があるモーションイベントです。
注入はテスト対象のアプリからAndroidシステムサーバーにRPC呼び出しを行います。
システムサーバーはどのウィンドウ層にイベントを配信するかを決定し、そのウィンドウ層にRPCを作成し、
そのウィンドウレイヤーはイベントを正しいUI要素、アクティビティ、またはウィンドウオブジェクトに配信します。
今回はダウン・アップのためにこれを2回繰り返します。
あっ、ダウンイベントはイベントが長押しか短押しかどうかを検出するためにタイマーをトリガします。
アップイベントを受信した瞬間にタイマーが削除されます。
(注:eventTimeが将来になる可能性はほとんどのモーションイベントプロセッサでは完全に無視されます)

ふぅ。

この結果として、通常のタップを実行したい場合に、
何らかの理由でタップのアップイベント(後半)が長押しタイムアウト(システム負荷による)の後に配信され、
長押しの動作が表示されることがあります。(例:コンテキストメニューの表示)
これを優雅に回避または処理する方法はありません。
また、長押しの動作はアプリ/ウィジェット固有のものです。
短押しとは異なる長押しの動作がある場合は、実行時に長押しの効果を元に戻す「'RollBack' ViewAction」を渡すことができます。
要するにclick()では指をつける-はなすの2つのイベントをすばやく発行することで
「クリック操作」をしているとのこと。
以下3つのコードから、
MotionEvent#obtainでAndroidのモーションイベントを作成し、
UiController#injectMotionEvent でイベントを注入している事がわかります。
-
- androidx.test.espresso.action.GeneralClickAction
-
- androidx.test.espresso.action.Tap
-
- androidx.test.espresso.action.MotionEvents

呼び出し階層をまとめると以下のようになります。
下記の中でMotionEventがAndroidSDKの処理。その他はEspressoの処理となります。
- GeneralClickAction#perform
  - Tap#sendSingleTap
      - MotionEvents#sendDown
        - MotionEvent#obtain //ダウンイベントの作成
        - UiController#injectMotionEvent //ダウンイベントの注入
      - MotionEvents#sendUp
        - MotionEvent#obtain //アップイベントの作成
        - UiController#injectMotionEvent //アップイベントの注入
ここまででclick()を実現するための要素がわかりました。
後編 - イベントの注入方法
実際にinjectMotionEvent部分でどのようにイベントを注入しているか見ていきます。
Espressoは内部でDaggerを使用しており、UiControllerはインターフェイスで外から注入する形となっています。
そのためinjectMotionEvent呼び出し以降のコードは少し追いづらくなっています。
以下の順でソースコードを追いました。
-
- androidx.test.espresso.base.UiControllerModule
-
- androidx.test.espresso.base.UiControllerImpl
-
- androidx.test.espresso.Espresso
-
- androidx.test.espresso.BaseLayerComponent (classes.jar)
-
- androidx.test.espresso.GraphHolder (classes.jar)
-
- androidx.test.espresso.base.BaseLayerModule
-
- androidx.test.espresso.base.InputManagerEventInjectionStrategy
上記から実処理がある BaseLayerModule、InputManagerEventInjectionStrategy に絞って説明します。
BaseLayerModule
以下はBaseLayerModuleで、EventInjectorを提供しているprovideEventInjectorメソッドを抜粋したものです。
このクラスはDaggerのModuleに属するため、エントリポイントのEspressoクラスからBaseLayerComponent経由で呼ばれます。
MotionEventをinjectするためのEventInjectorに必要なEventInjectionStrategyを作成しています。
SDK Version16以上ではInputManager、7から15ではWindowManagerを使用する処理になっています。
:
  @Provides
  @Singleton
  public EventInjector provideEventInjector() {
    // On API 16 and above, android uses input manager to inject events. On API < 16,
    // they use Window Manager. So we need to create our InjectionStrategy depending on the api
    // level. Instrumentation does not check if the event presses went through by checking the
    // boolean return value of injectInputEvent, which is why we created this class to better
    // handle lost/dropped press events. Instrumentation cannot be used as a fallback strategy,
    // since this will be executed on the main thread.
    int sdkVersion = Build.VERSION.SDK_INT;
    EventInjectionStrategy injectionStrategy = null;
    if (sdkVersion >= 16) { // Use InputManager for API level 16 and up.
      InputManagerEventInjectionStrategy strategy = new InputManagerEventInjectionStrategy();
      strategy.initialize();
      injectionStrategy = strategy;
    } else if (sdkVersion >= 7) {
      // else Use WindowManager for API level 15 through 7.
      WindowManagerEventInjectionStrategy strategy = new WindowManagerEventInjectionStrategy();
      strategy.initialize();
      injectionStrategy = strategy;
    } else {
      throw new RuntimeException(
          "API Level 6 and below is not supported. You are running: " + sdkVersion);
    }
    return new EventInjector(injectionStrategy);
  }
:
昨今はSDK Version16以上が一般的なので
InputManagerEventInjectionStrategyの処理を追います。
InputManagerEventInjectionStrategy
このクラスに実際のイベントを実行する処理が書いてあります。
以下のメソッドを抜粋します。
- initialize
- innerInjectMotionEvent
InputManagerEventInjectionStrategy#initialize
InputManagerEventInjectionStrategyの初期化処理です。
InputManagerの非公開メソッドである
android.hardware.input.InputManager#injectInputEvent
をリフレクションにより呼び出せるようにしています。
:
  void initialize() {
    if (initComplete) {
      return;
    }

    try {
      Log.d(TAG, "Creating injection strategy with input manager.");

      // Get the InputManager class object and initialize if necessary.
      Class<?> inputManagerClassObject = Class.forName("android.hardware.input.InputManager");
      Method getInstanceMethod = inputManagerClassObject.getDeclaredMethod("getInstance");
      getInstanceMethod.setAccessible(true);

      instanceInputManagerObject = getInstanceMethod.invoke(inputManagerClassObject);

      injectInputEventMethod =
          instanceInputManagerObject
              .getClass()
              .getDeclaredMethod("injectInputEvent", InputEvent.class, Integer.TYPE);
      injectInputEventMethod.setAccessible(true);

      // Setting event mode to INJECT_INPUT_EVENT_MODE_WAIT_FOR_FINISH to ensure
      // that we've dispatched the event and any side effects its had on the view hierarchy
      // have occurred.
      Field motionEventModeField =
          inputManagerClassObject.getField("INJECT_INPUT_EVENT_MODE_WAIT_FOR_FINISH");
      motionEventModeField.setAccessible(true);
      syncEventMode = motionEventModeField.getInt(inputManagerClassObject);

      if (Build.VERSION.SDK_INT >= 28) {
        // Starting from android P it is not allowed to access this field with reflection, hardcoded
        // this value as workaround.
        asyncEventMode = 0;
      } else {
        Field asyncMotionEventModeField =
            inputManagerClassObject.getField("INJECT_INPUT_EVENT_MODE_ASYNC");
        asyncMotionEventModeField.setAccessible(true);
        asyncEventMode = asyncMotionEventModeField.getInt(inputManagerClassObject);
      }

      setSourceMotionMethod = MotionEvent.class.getDeclaredMethod("setSource", Integer.TYPE);
      initComplete = true;
    } catch (ClassNotFoundException e) {
      throw new RuntimeException(e);
    } catch (IllegalAccessException e) {
      throw new RuntimeException(e);
    } catch (InvocationTargetException e) {
      throw new RuntimeException(e);
    } catch (NoSuchMethodException e) {
      throw new RuntimeException(e);
    } catch (NoSuchFieldException e) {
      throw new RuntimeException(e);
    }
  }
:
InputManagerEventInjectionStrategy#innerInjectMotionEvent
実際にモーションイベントを注入しているメソッドinnerInjectMotionEventが以下です。
以下箇所で、initialize()で準備したInputManager#injectInputEvent
の実行を確認することができました。
injectInputEventMethod.invoke(instanceInputManagerObject, motionEvent, eventMode);
# ちなみにisFromTouchpadInGlassDeviceはGoogleグラスの判定です(!)
:
private boolean innerInjectMotionEvent(MotionEvent motionEvent, boolean shouldRetry, boolean sync)
      throws InjectEventSecurityException {
    try {
      // Need to set the event source to touch screen, otherwise the input can be ignored even
      // though injecting it would be successful.
      // TODO: proper handling of events from a trackball (SOURCE_TRACKBALL) and joystick.
      if ((motionEvent.getSource() & InputDevice.SOURCE_CLASS_POINTER) == 0
          && !isFromTouchpadInGlassDevice(motionEvent)) {
        // Need to do runtime invocation of setSource because it was not added until 2.3_r1.
        setSourceMotionMethod.invoke(motionEvent, InputDevice.SOURCE_TOUCHSCREEN);
      }
      int eventMode = sync ? syncEventMode : asyncEventMode;
      return (Boolean)
          injectInputEventMethod.invoke(instanceInputManagerObject, motionEvent, eventMode);
    } catch (IllegalAccessException e) {
      : //例外処理が長く続くので省略
}
:
上記処理がUiController#injectMotionEvent呼び出し時の処理となり
perform(click())が実現されるようです。
まとめ - Espressoのperform(click())とは
どういうものなのか
以下の5つの条件に当てはまる操作
- 入力デバイスについては特定しない (
InputDevice.SOURCE_UNKNOWN) - マウスの左クリックに相当するボタンを押すアクション (
MotionEvent.BUTTON_PRIMARY) - ロングタップやダブルタップではい (
Tap.SINGLE) - 見える場所の中央座標を対象としている (
GeneralLocation.VISIBLE_CENTER) - 範囲は16x16mmの人差し指相当 (
Press.FINGER)
どういう処理なのか
-
click()ではGeneralClickActionを作成しアサートしている -
perform()時にGeneralClickActionからMotionEvent#obtainでイベント作成し本体アプリに注入している- DOWNイベントとUPイベントの2つのイベントを発行している
- 注入方法は
android.hardware.input.InputManager#injectInputEventのリフレクション