初めに
今日はタイトルにも書いたようにGoogle Home(Assistant)+Node-Red+Raspberry Piで家電を操作していきたいと思います。今回操作する家電は、エアコン(暖房)です。
ちなみにこちらの記事はスマートホーム自作 Advent Calendar 2020の22日目の記事となります。
用意するもの
- Raspberry Pi 一式
- IrMagician
- RaspberrypiとIrMagicianをつなぐためのコード
- 操作したい家電
Noderedの設定
Noderedのインストール
次のコマンドを実行してください。
sudo apt -y install nodered npm nodejs
Noderedの実行
次のコマンドを実行してください。
node-red&
その後、http://[ラズパイのIP]:1880/にアクセスしてください。
Node-RED Google Assistant Bridgeの設定
まずこちらのサイトにアクセスし、サインアップしてください(すでに登録済みの場合はログインしてください)。
次にログインしてDevicesタブをひらいてください。(下の画像の周りより黒くなっている部分)

そしたら、下のほうにあるAdd Deviceをクリック!(下の画像)

デバイスの追加
先ほどのAdd Deviceをクリックすると下記のような画面が出てきます。
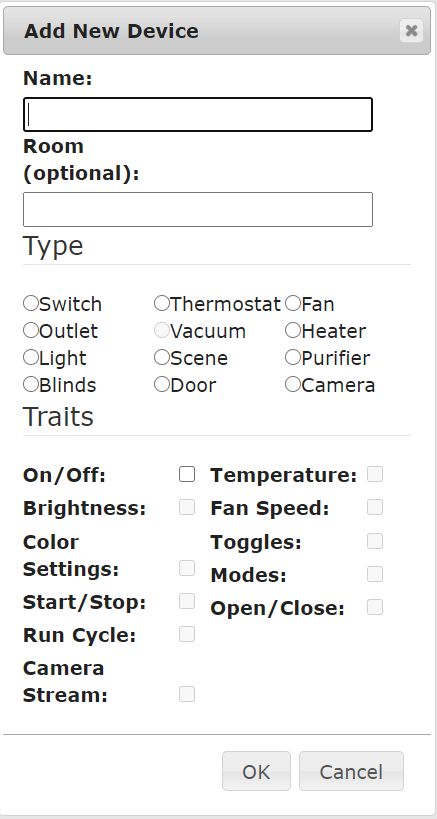
今回の記事では暖房(エアコン)を操作したいので次のような設定にします。
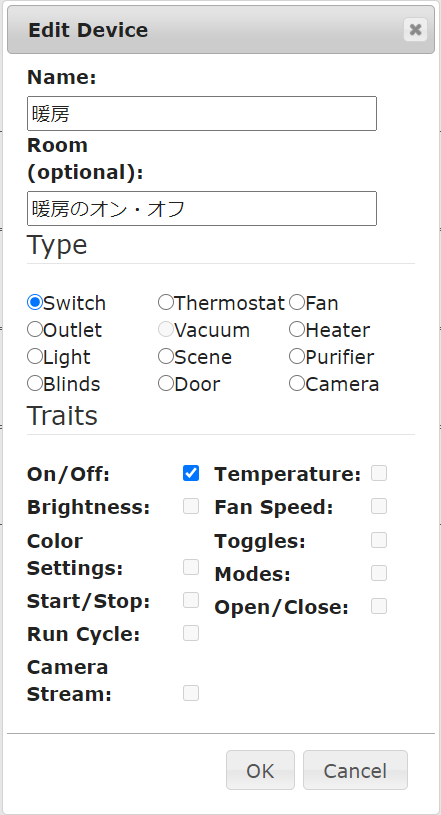
Name欄に暖房を入力します。これは、GoogleHomeに「暖房つけて」などとの言葉を認識させるためのものなので絶対に書いてください。
Roomは、「リビング」などと書きますがオプションなので書かなくても大丈夫です。(私は説明にしています)
Typeは、スイッチ、カメラ、温度計などのタイプを設定します。
最後のTraitsは、どのようなアクションをするかを決めます。今回の場合はエアコンをつけたり消したりしたいのでOn/Offにチェックを入れます。
設定が終了したらOKを押してその画面を閉じましょう。
ほかの家電も追加したければ同じ手順を繰り返せばOKです!
Google Homeアプリと連携
ここでやっと先ほどのNode-RED Google Assistant BridgeをGoogle Homeに連携していきます!!(画像などで説明します。)
まず左上の+ボタンを押し次の画面に行きます。
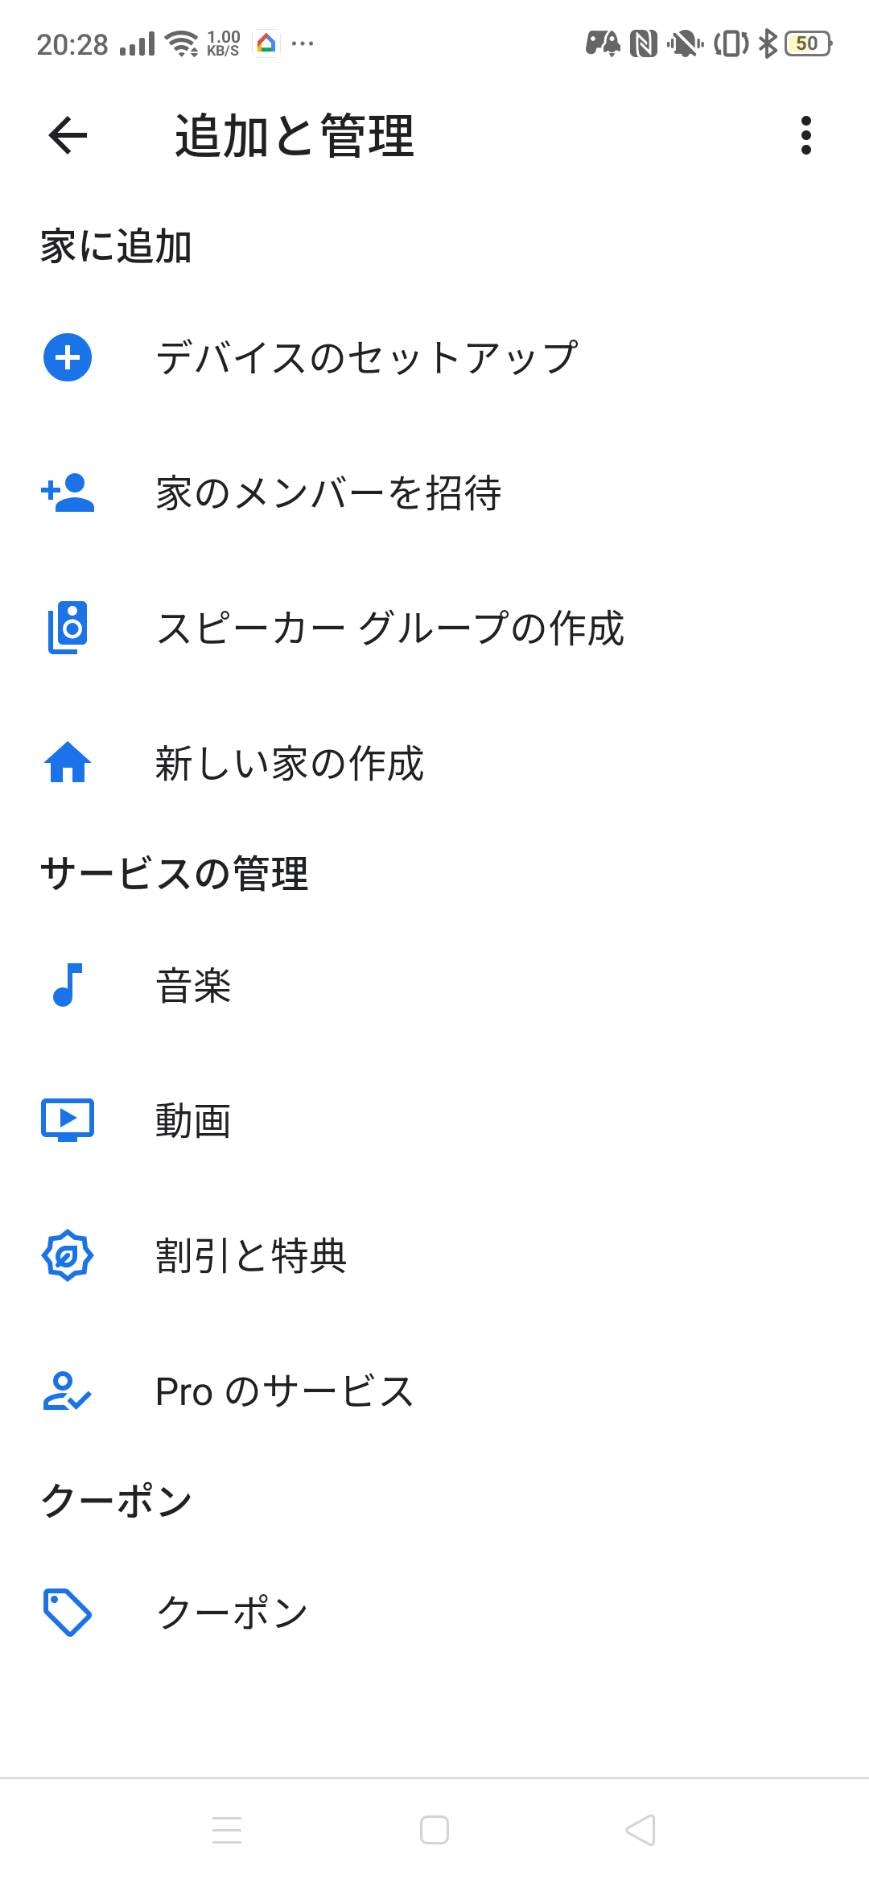
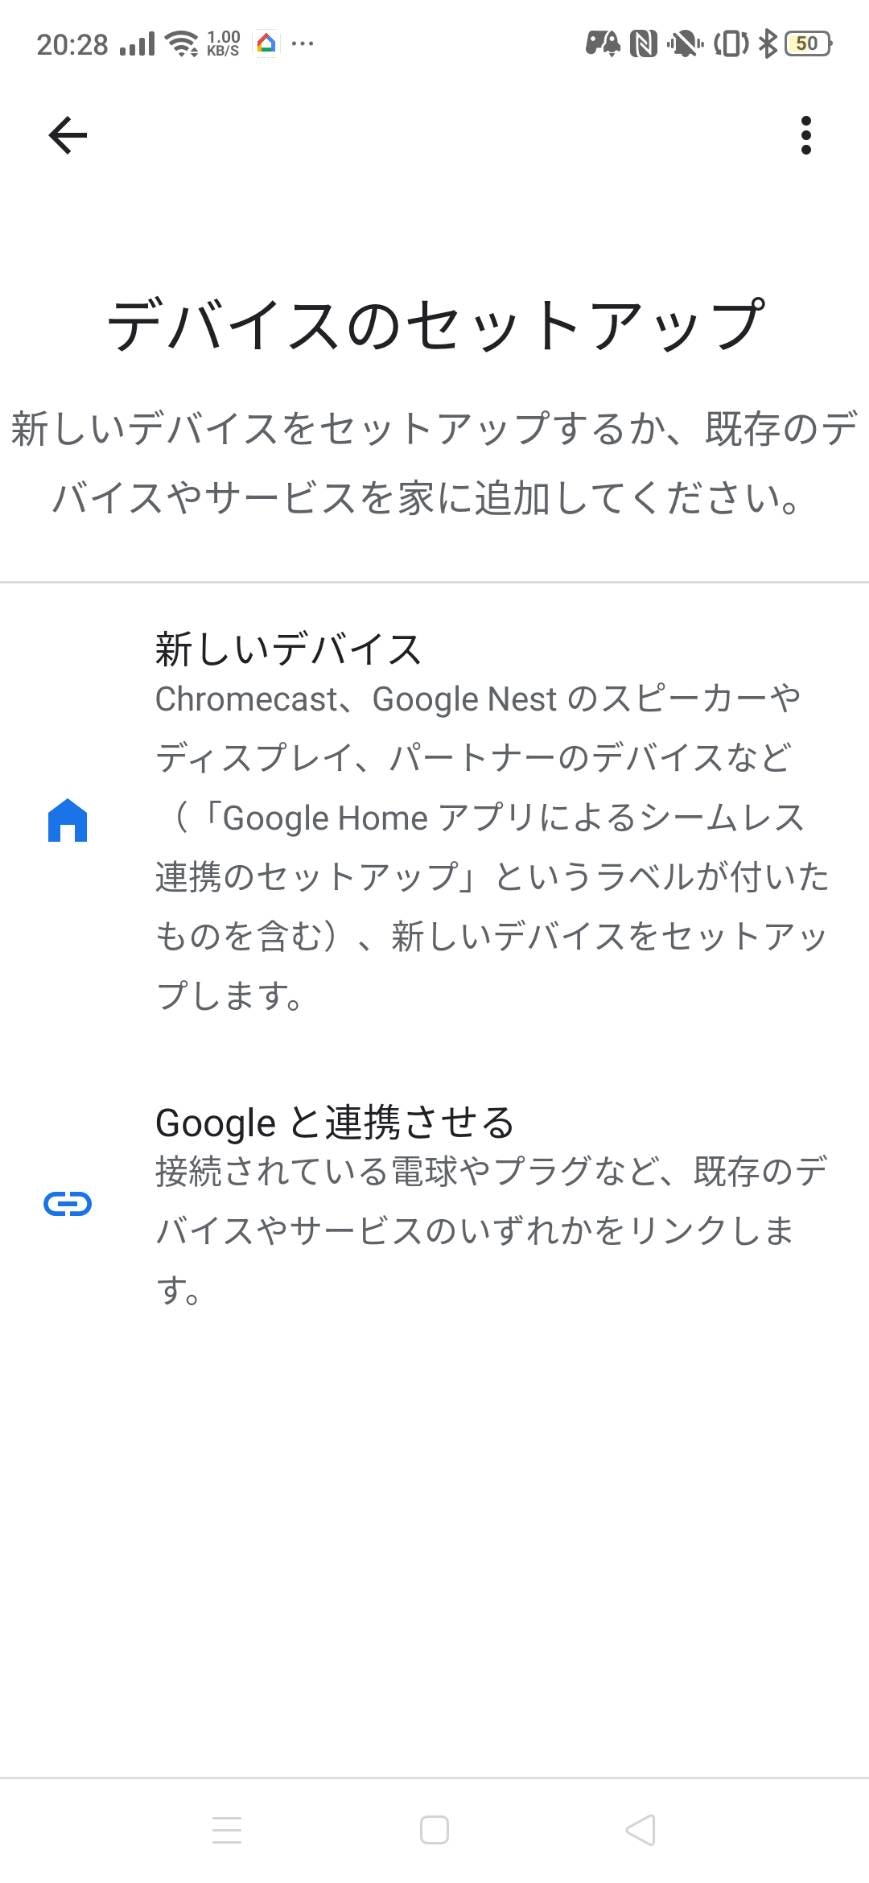
次にデバイスのセットアップを押し次の画面でGoogleと連携させるをタップしてください。
次に検索欄でNR-GABと検索してください。多分これは、Node-RED Google Assistant Bridgeの略だと思います。
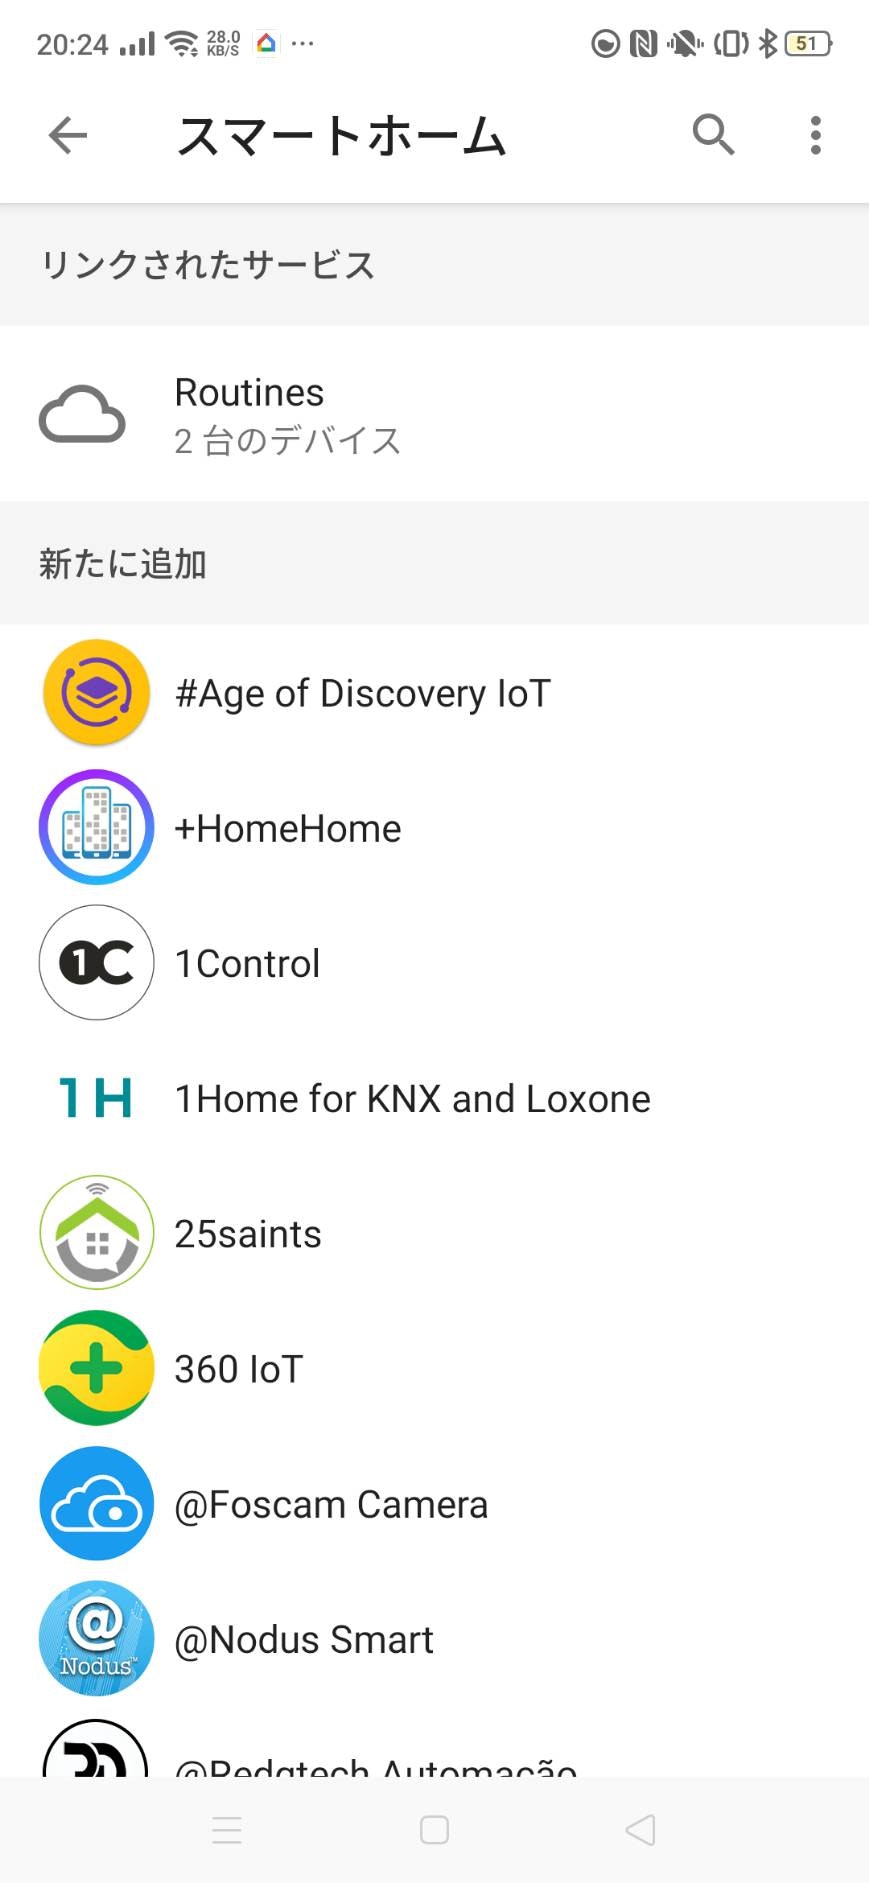
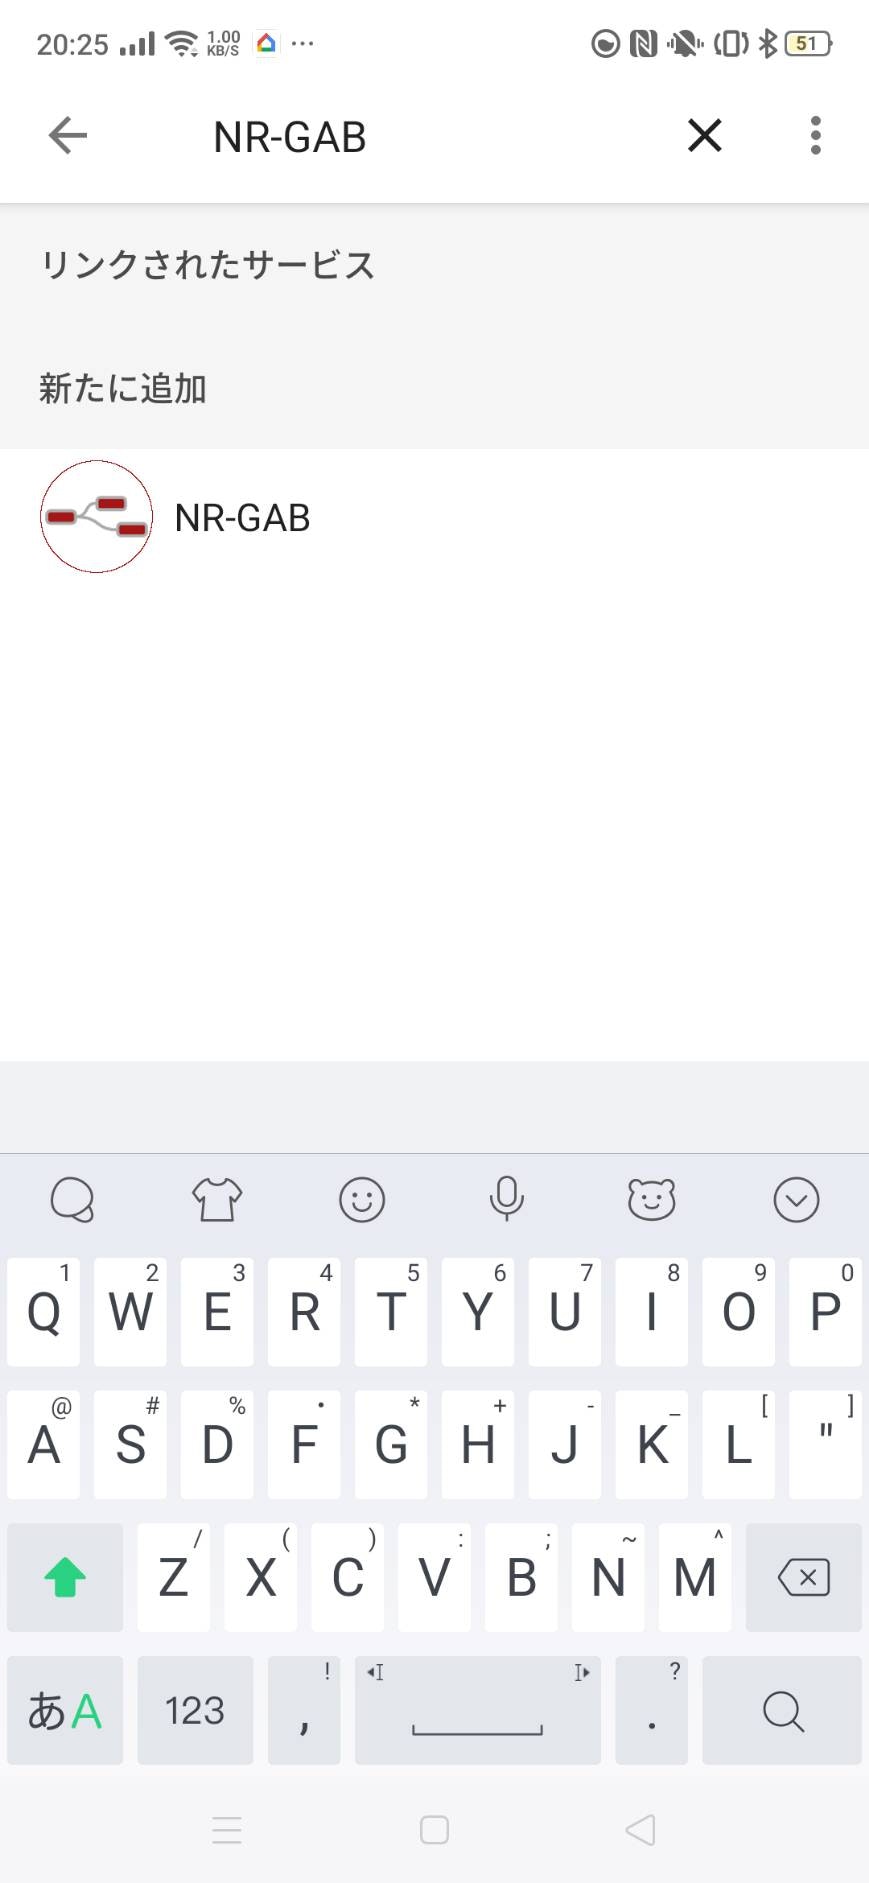
次にそれをタップし、ログインしてください。
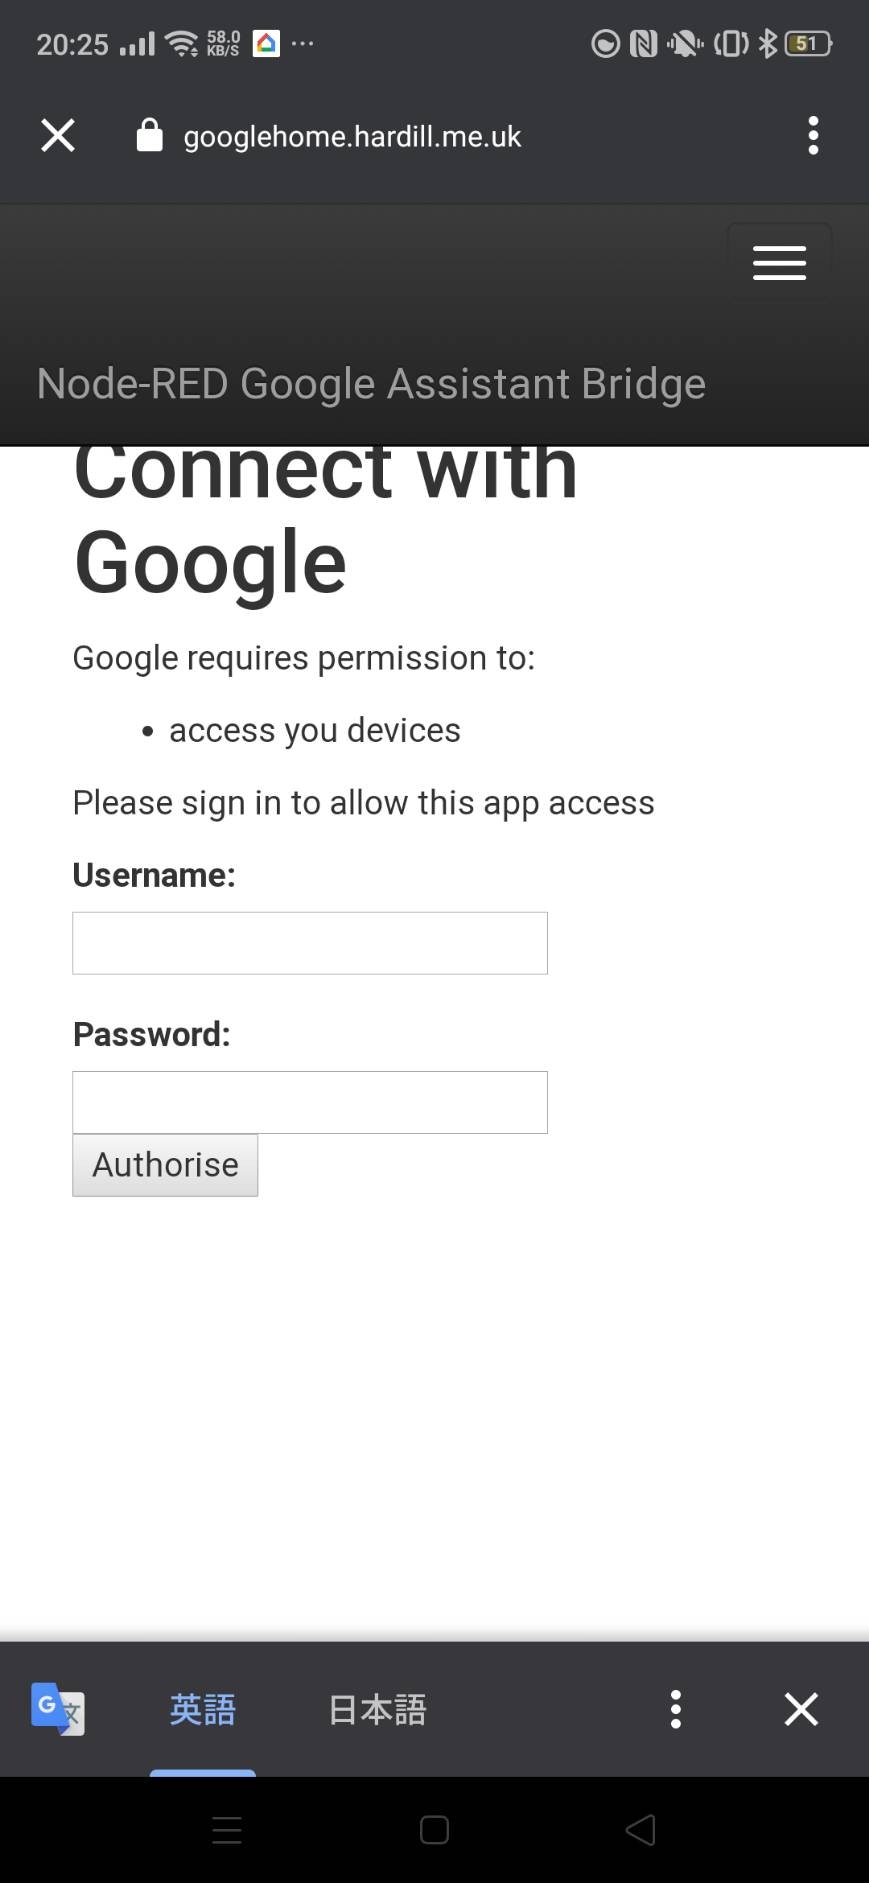
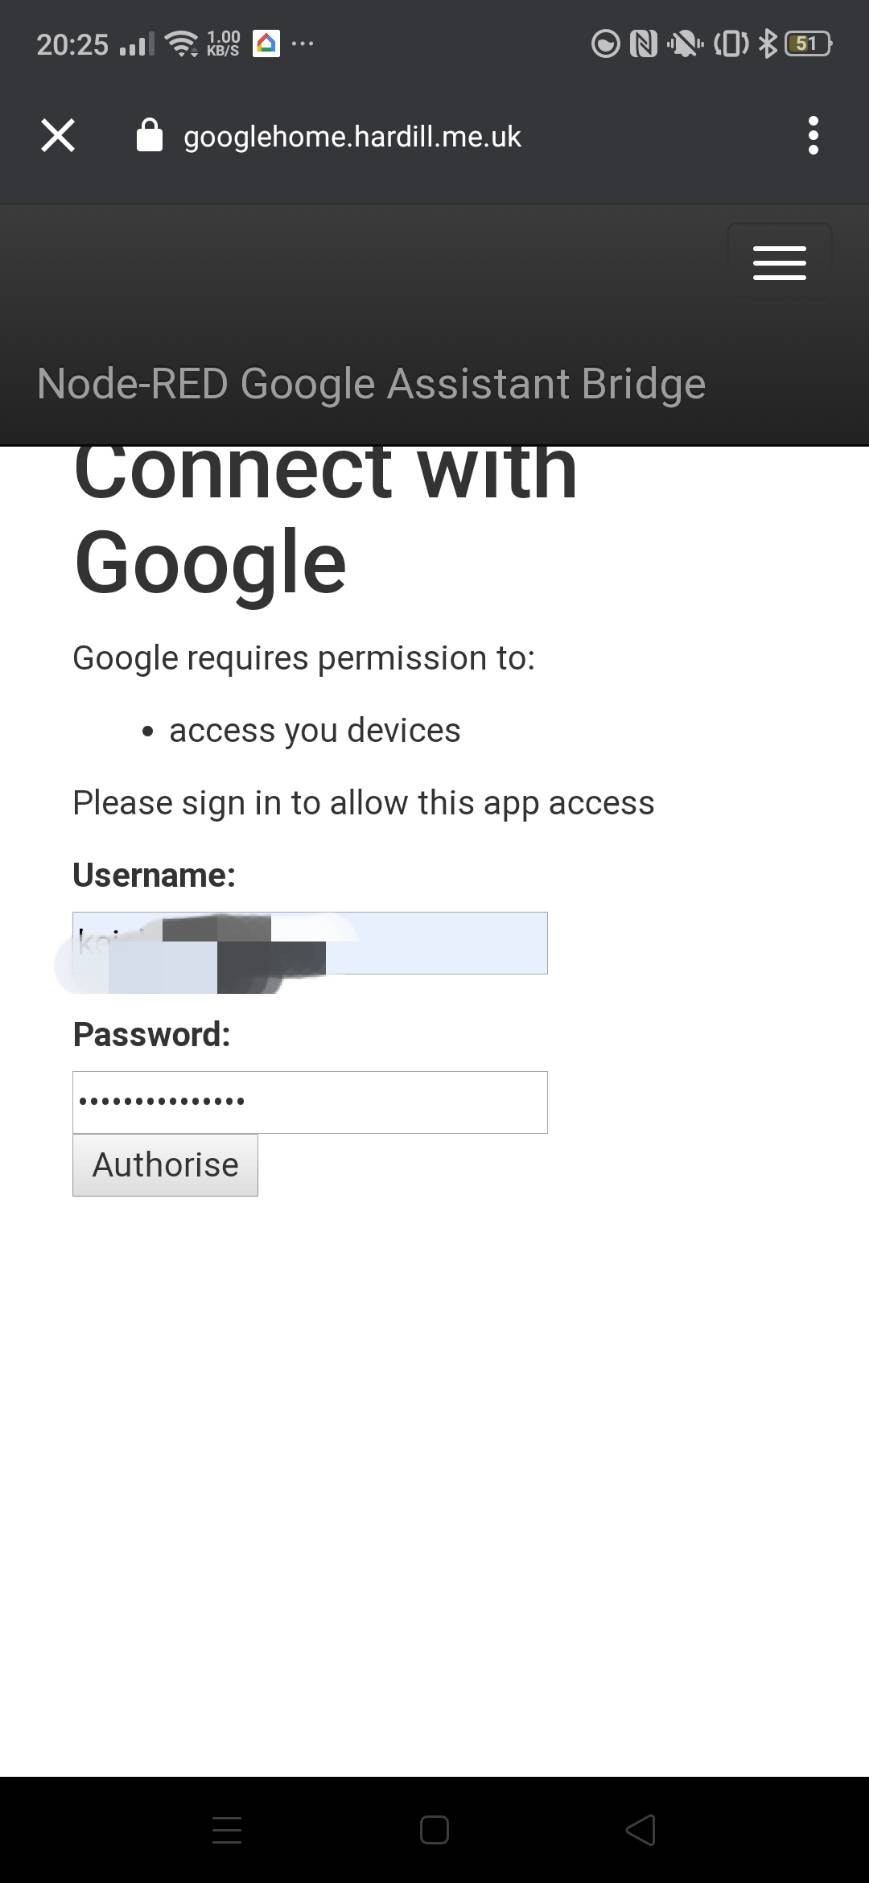
Authoriseを押して次のような画面になったら成功です。(時々成功しないときがあります。)

Google Home のホーム画面に戻ると次のように表示されていると思います。
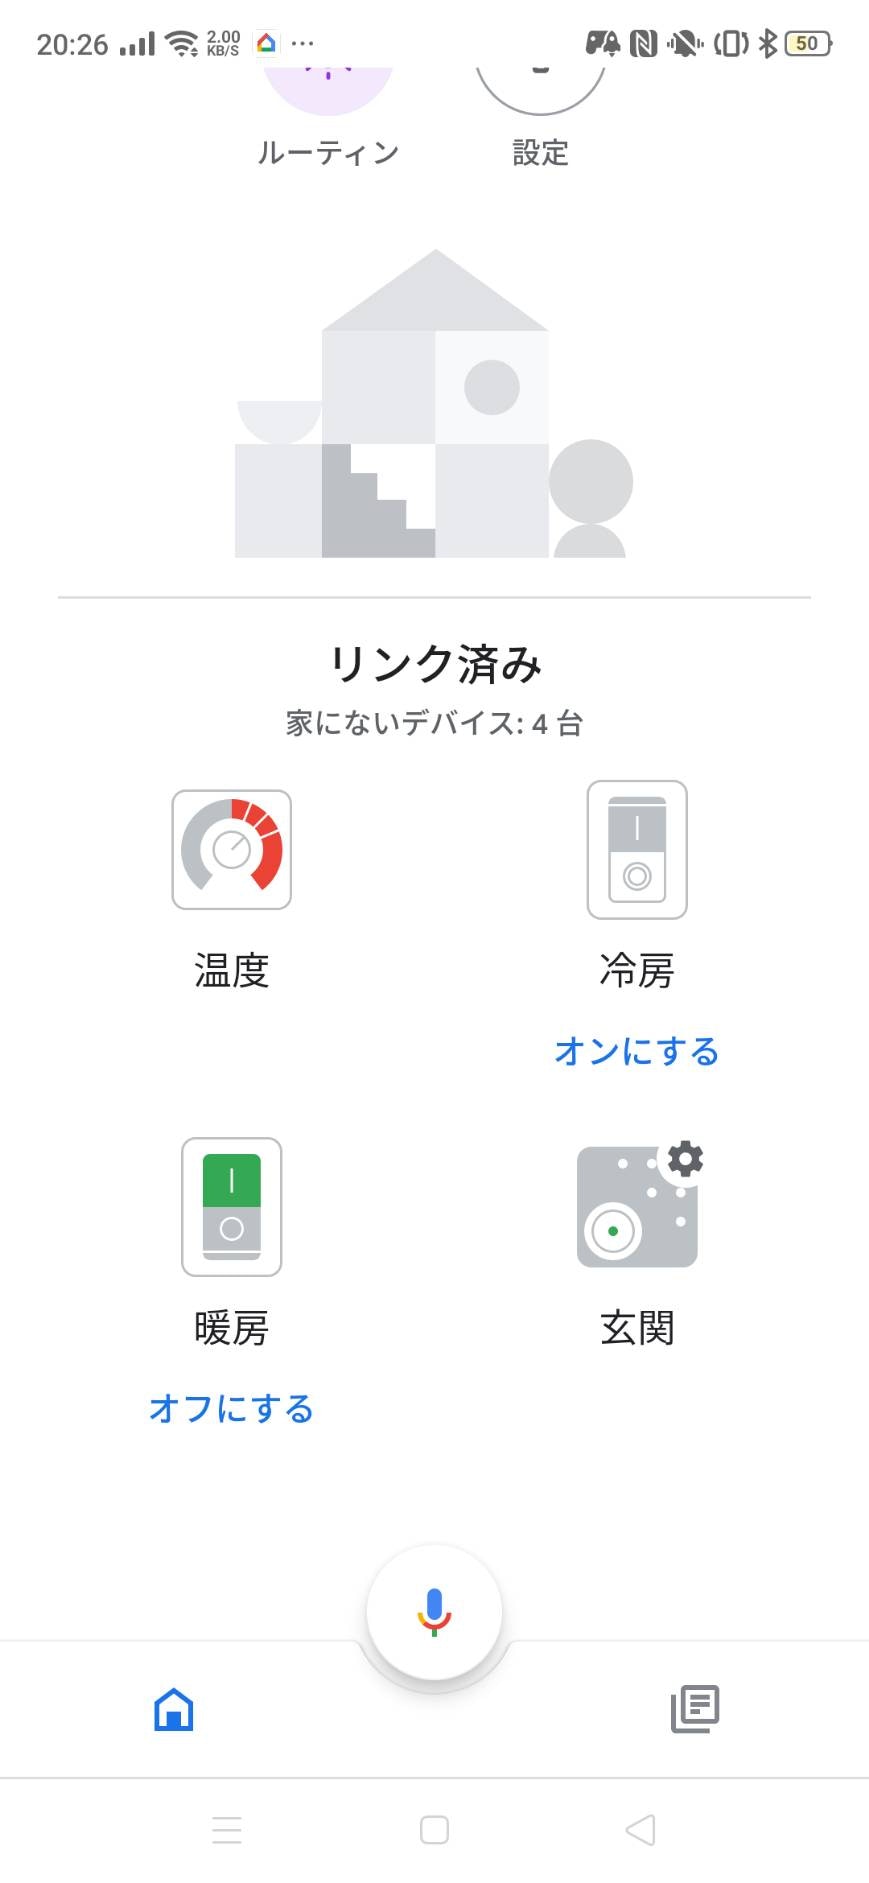
(いろいろ追加していますが気にしないでください。)
Raspberry Pi側の設定
pythonコード
まずホームディレクトリにirm.pyを追加します。引用元
# -*- coding: utf-8 -*-

import sys
import serial
import time
import json
import argparse
import os

here = os.path.abspath(os.path.dirname(__file__))
ir_serial = serial.Serial("/dev/ttyACM0", 9600, timeout = 1)
#ir_serial = serial.Serial("/dev/tty.usbmodem01231", 9600, timeout = 1)

def captureIR(path):
  print "Capturing IR..."
  ir_serial.write("c\r\n")
  time.sleep(3.0)
  msg = ir_serial.readline()
  print msg
  if path and not 'Time Out' in msg:
    saveIR(path)

def playIR(path):
  if path and os.path.isfile(path):
    print ("Playing IR with %s ..." % path)
    f = open(path)
    data = json.load(f)
    f.close()
    recNumber = len(data['data'])
    rawX = data['data']

    ir_serial.write("n,%d\r\n" % recNumber)
    ir_serial.readline()

    postScale = data['postscale']
    ir_serial.write("k,%d\r\n" % postScale)
    #time.sleep(1.0)
    msg = ir_serial.readline()
    #print msg

    for n in range(recNumber):
        bank = n / 64
        pos = n % 64
        if (pos == 0):
          ir_serial.write("b,%d\r\n" % bank)

        ir_serial.write("w,%d,%d\n\r" % (pos, rawX[n]))

    ir_serial.write("p\r\n")
    msg = ir_serial.readline()
    print msg
    #ir_serial.close()
  else:
    print "Playing IR..."
    ir_serial.write("p\r\n")
    time.sleep(1.0)
    msg = ir_serial.readline()
    print msg

def saveIR(path):
  print ("Saving IR data to %s ..." % path)
  rawX = []
  ir_serial.write("I,1\r\n")
  time.sleep(1.0)
  recNumberStr = ir_serial.readline()
  recNumber = int(recNumberStr, 16)

  ir_serial.write("I,6\r\n")
  time.sleep(1.0)
  postScaleStr = ir_serial.readline()
  postScale = int(postScaleStr, 10)

  #for n in range(640):
  for n in range(recNumber):
      bank = n / 64
      pos = n % 64
      if (pos == 0):
          ir_serial.write("b,%d\r\n" % bank)

      ir_serial.write("d,%d\n\r" % pos)
      xStr = ir_serial.read(3)
      xData = int(xStr, 16)
      rawX.append(xData)

  data = {'format':'raw', 'freq':38, 'data':rawX, 'postscale':postScale}

  f = open(path, 'w')
  json.dump(data, f)
  f.close()
  print "Done !"

if __name__ == "__main__":
  # parse options
  parser = argparse.ArgumentParser(description='irMagician CLI utility.')
  parser.add_argument('-c', '--capture', action="store_true", dest="cap", help="capture IR data", default=False)
  parser.add_argument('-p', '--play', action="store_true", dest="play", help="play IR data", default=False)
  parser.add_argument('-s', '--save', action="store_true", dest="save", help="save IR data", default=False)
  parser.add_argument('-f', '--file', action="store", dest="file", help="IR data file (json)", default=False)

  args = parser.parse_args()

  if args.play:
    playIR(args.file)

  if args.save and args.file:
    saveIR(args.file)

  if args.cap:
    captureIR(args.file)

  # release resources
  ir_serial.close()
(言い忘れていましたがプログラム中のir_serial = serial.Serial("/dev/ttyACM0", 9600, timeout = 1)はls /dev/ttyACM*を実行してその実行結果に書き換えてください。)
これを実行する前に
sudo pip install pyserial
を実行しましょう。
次にリモコンの信号をキャプチャーします。次のコマンドを実行し、受講装置に赤外線を発行してください。
python irm.py -c
するとこのような表示が出てくると思います。
Capturing IR...
... 568
このような数字が表示されたら
python irm.py -p
でテストしましょう。
いけたら
python irm.py -s -f [保存したいファイル名].json
で保存しましょう。ちなみに私はdan-on.jsonとdan-off.jsonという名前にしました。
オン・オフどちらも保存出来たら、http://[ラズパイのIP]:1880/にアクセスしてNode-REDのホームに行きましょう。
Node-Redでの設定
まず、http://[ラズパイのIP]:1880/にアクセスしてNode-REDのホームに行きましょう。
そうしたら下のjsonをコピーしてNode-Redに読み込ませましょう。
[{"id":"80b46a87.2013b8","type":"tab","label":"フロー 1","disabled":false,"info":""},{"id":"ec50fd0f.fcf77","type":"exec","z":"80b46a87.2013b8","command":"python /home/pi/irm.py -p -f /home/pi/dan-on.json","addpay":false,"append":"","useSpawn":"false","timer":"5","oldrc":false,"name":"","x":290,"y":200,"wires":[[],[],[]]},{"id":"681e240b.3ebf0c","type":"exec","z":"80b46a87.2013b8","command":"python /home/pi/irm.py -p -f /home/pi/air-off.json","addpay":false,"append":"","useSpawn":"false","timer":"5","oldrc":false,"name":"","x":280,"y":260,"wires":[[],[],[]]},{"id":"8e29b1a.4f1da5","type":"switch","z":"80b46a87.2013b8","name":"","property":"_raw.execution.params.on","propertyType":"msg","rules":[{"t":"true"},{"t":"false"}],"checkall":"true","repair":false,"outputs":2,"x":220,"y":100,"wires":[["ec50fd0f.fcf77"],["681e240b.3ebf0c"]]},{"id":"6bccbda0.afab34","type":"debug","z":"80b46a87.2013b8","name":"","active":true,"tosidebar":true,"console":false,"tostatus":false,"complete":"true","targetType":"full","x":470,"y":40,"wires":[]},{"id":"6caa7022.ddceb","type":"google-home","z":"80b46a87.2013b8","conf":"","device":"5973","acknowledge":true,"name":"","topic":"","x":140,"y":40,"wires":[["8e29b1a.4f1da5","6bccbda0.afab34"]]}]
読み込ませたら、このようになるはずです。

このようになっていればOKです。
次にGoogle Assistantsをクリックし設定を開きます。
Account欄が「新規に google-home-conf を追加」になっていることを確認してその横の鉛筆(編集)ボタンを押してください。
UsernameとPassword欄に「Node-RED Google Assistant Bridgeの設定」でセットしたユーザー名とパスワードを入れてください。
追加を押すとプロパティのDevice欄に登録した家電の名前が入ってきていると思うのでそれを選択してください。

出てこない場合は横の再読み込みマークをクリックしてください。
次に上から1つ目execノードをクリックして暖房をつけるためのコマンドをフルパスで入力してください。この記事と同じ名前にしている場合は設定不要です。
上から2つ目のexecノードも同じようにします。
そしたら完了を押し画面右上のデプロイボタンを押したら完成です!
完成
完成した作品を撮りましたのでぜひ見てください。
完成品