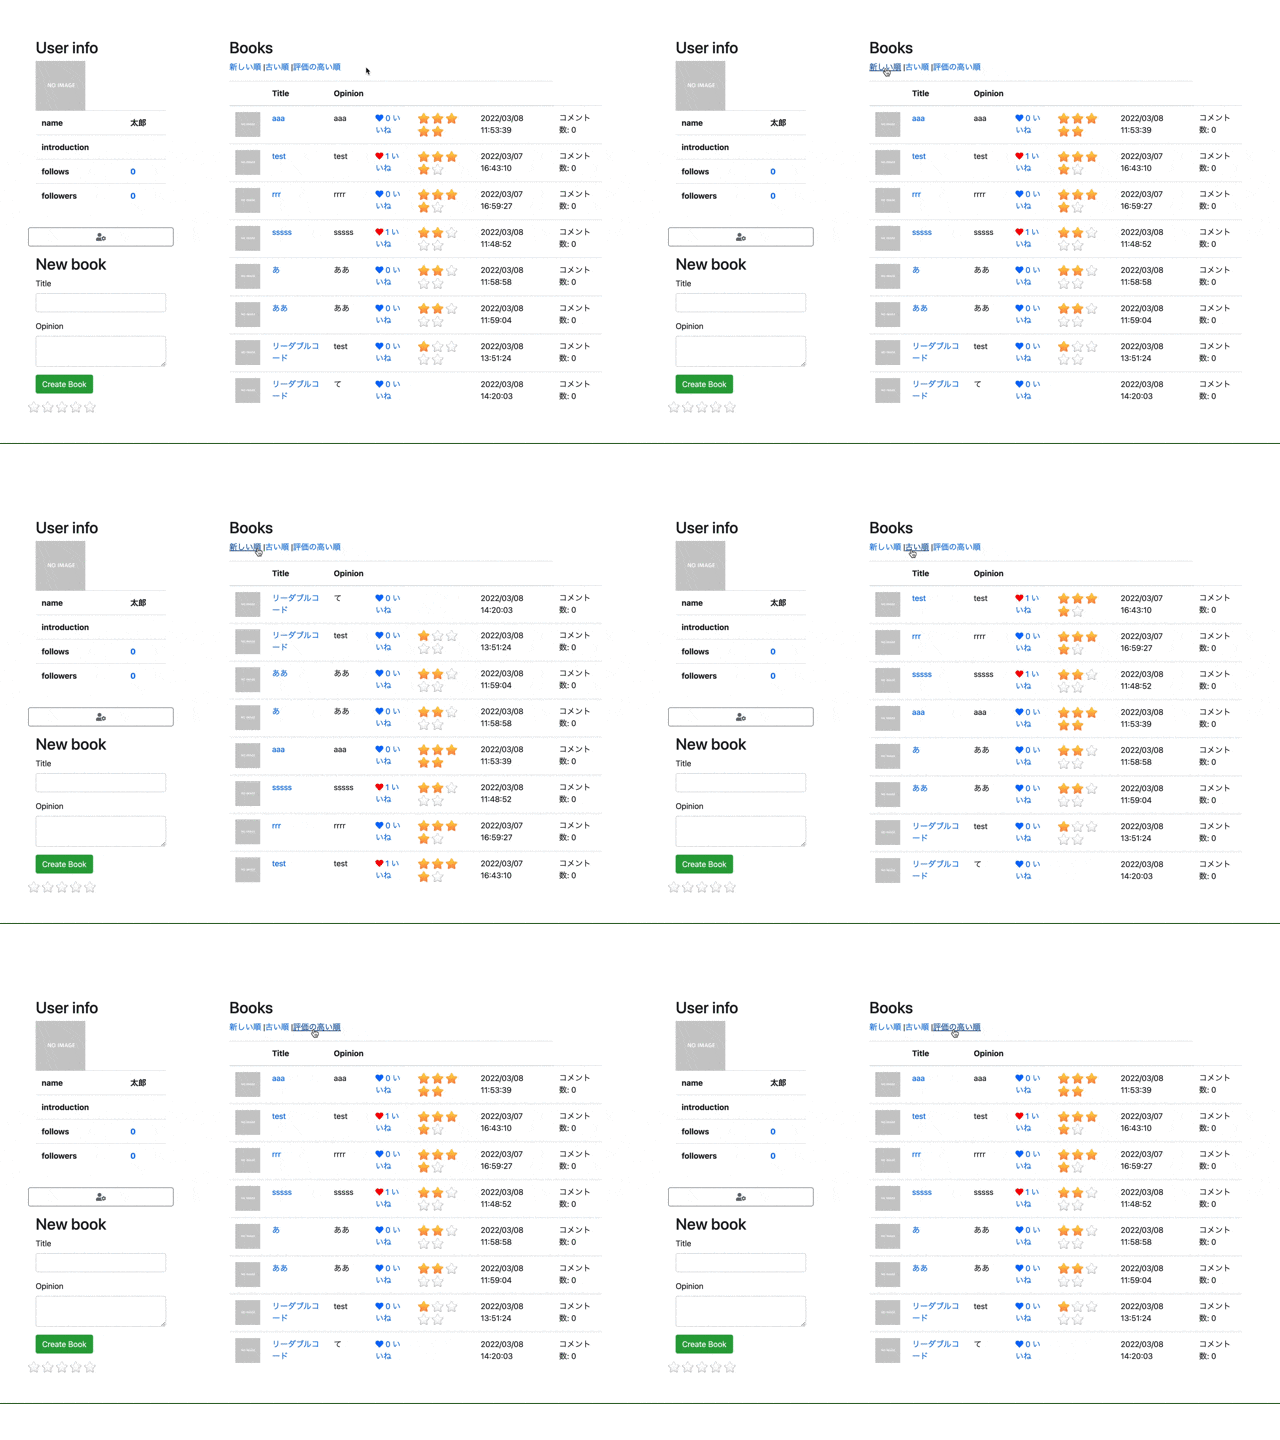
はじめに
前回実装した星レビュー機能へ
星レビュー評価の高い順、投稿日が新しい古い順に並び替えできるように機能を追加していきます。
- 前回の記事
今回実装していく流れ
- モデルにカラムデータの取り出し方を指示する記述をする
- コントローラーのアクションを追記する
- ビューにソートするためのリンクを作る
- 日時を日本時間へ変更する
開発環境
- ruby 2.6.3p62
- Rails 6.1.4
完成図
1. モデルにカラムデータの取り出し方を指示する記述をする
scopeヘルパーを使って
class Book < ApplicationRecord
  belongs_to :user
  has_many :book_comments, dependent: :destroy
  has_many :favorites, dependent: :destroy

  validates :title,presence:true
  validates :body,presence:true,length:{maximum:200}

+  scope :latest, -> {order(created_at: :desc)}
+  scope :old, -> {order(created_at: :asc)}
+  scope :star_count, -> {order(star: :desc)}

  def favorited_by?(user)
    favorites.where(user_id: user.id).exists?
  end
scope :latest, -> {order(created_at: :desc)}
order・・・データの取り出し
Latest・・・任意の名前で定義する
order(created_at: :desc)
created_at・・・投稿日のカラム
desc・・・昇順
asc・・・降順
Latestの指示があれば投稿日カラムを昇順で取り出して
ってことだと思います。
次にLatestの指示というのをコントローラーアクションに記述していきます。
2. コントローラーのアクションを追記する
indexアクションへどのようにデータを表示させるか条件分岐を記述します。
class BooksController < ApplicationController
  before_action :authenticate_user!
  before_action :ensure_correct_user, only: [:edit, :update, :destroy]

  def show
    @book = Book.find(params[:id])
    @book_comment = BookComment.new
  end

  def index
+   if params[:latest]
+     @books = Book.latest
+   elsif params[:old]
+     @books = Book.old
+   elsif params[:star_count]
+     @books = Book.star_count
+    else
+     @books = Book.all
+   end

    @book = Book.new
  end
.
.
.
end
if params[:latest]
ビューからの指示を受けるための名前を定義します。
これは後でビューへ記述するlatestと繋がっています。
@books = Book.latest
このlatestは先ほどモデルへ記述したlatestへ繋がっています。
同じ名前でややこしいですが、処理の流れを理解するとわかりやすいと思います。
では、次にビューへソートするためのリンクを作っていきます。
3. ビューにソートするためのリンクを作る
3-1.一覧ページにソートリンクをつける
<div class='container px-5 px-sm-0'>
  <%= render 'layouts/errors', obj: @book %>
  <div class='row'>
    <div class='col-md-3'>
      <h2>User info</h2>
      <%= render 'users/info', user: current_user %>
      <h2 class="mt-3">New book</h2>
      <%= render 'form', book: @book %>
    </div>
    <div class='col-md-8 offset-md-1'>
      <h2>Books</h2>
      <p>
+       <%= link_to '新しい順', books_path(latest: "true") %>
+       |<%= link_to '古い順', books_path(old: "true") %>
+       |<%= link_to '評価の高い順', books_path(star_count: "true") %>
      </p>
      <%= render 'index', books: @books%>
    </div>
  </div>
</div>
<%= link_to '新しい順', books_path(latest: "true") %>
リンク先は一覧ページで呼び出すアクションをそれぞれ定義した名前を設定します。
これでソート機能はできたのですが、投稿日の表記がないので投稿日の表示をしていきます。
3-2. 時間表示を日本時間にする
初めにconfigでタイムゾーンを日本語に設定します。
  class Application < Rails::Application

+   config.time_zone = 'Asia/Tokyo'

  end
end
今回すすめていく日本時間表示のやり方は、lメソッドを使って日本時間表示していきます。
・
・
・
    <% books.each do |book| %>
・
・
・

+       <td><%= l book.created_at %></td>
次に、config/application.rbに以下の設定を追加してください。
  class Application < Rails::Application

    config.time_zone = 'Asia/Tokyo'
+   config.i18n.default_locale = :ja

  end
end
次に、config/localesフォルダにja.ymlファイルを作成し、以下の内容を記述します。
ja:
  time:
    formats:
      default: "%Y/%m/%d %H:%M:%S"
これで、日本時間表示にできていると思います。
時間設定の概要は、参考した記事のリンクを貼っておきますので参照ください。
以上で完成になります。
参考した記事
- ソート機能で参考にした記事
- 表示を日本時間にするときに参考した記事
