こんにちは、株式会社エイチームコマーステックのkazzです。
私たちは、HasuraとNextjsという技術を使い、Obremoというペットフード販売プロダクトを開発しています。
今回は、そのHasuraとNextjsの組み合わせで実際に手を動かして環境構築をしてみましたので、ざっくりとした手順を備忘録としてまとめたいと思います。
構成
バックエンドはDockerイメージのHasura、データベースはPostgreSQL、フロントはNextjsとApolloClientを採用しています。HasuraとNextjsの環境構築と、ApolloClientを利用しクライアント連携を行い、データベース上のデータをブラウザに表示するところまで行います。
今回は、プロダクション環境をHasuraCloud上で動作させ、ローカル環境をDockerイメージで動作させるような想定で構成させます。(この編ではローカル環境のみ扱っています)
Hasura
Hasuraはバックエンドで動作するGraphQLエンジンです。面倒な設定不要で比較的サクッと始められます。付属のGUI環境でデータベースやHasuraの便利機能をWebクライアント上から操作することができ、Hasura単体で開発も運用もめっちゃ楽になります。
PaaSとして動作するHasuraCloudが便利ですが、公式で配布されているDockerイメージを使うとオンプレでも起動させることができます。
ローカル環境インストール・起動
公式から、PostgreSQLとHasuraがひとまとまりになっているdocker-coposeファイルが提供しているので活用します。
mkdir hasura-and-nextjs
cd hasura-and-nextjs
curl https://raw.githubusercontent.com/hasura/graphql-engine/stable/install-manifests/docker-compose/docker-compose.yaml -o docker-compose.yml
docker-compose up -d
テーブル・データ作成
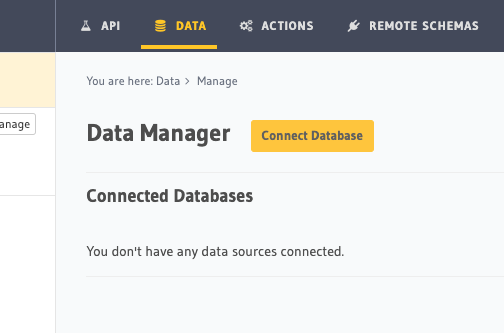
コンソールへアクセスし、DATAタブからデータベースのあれこれを操作できます。
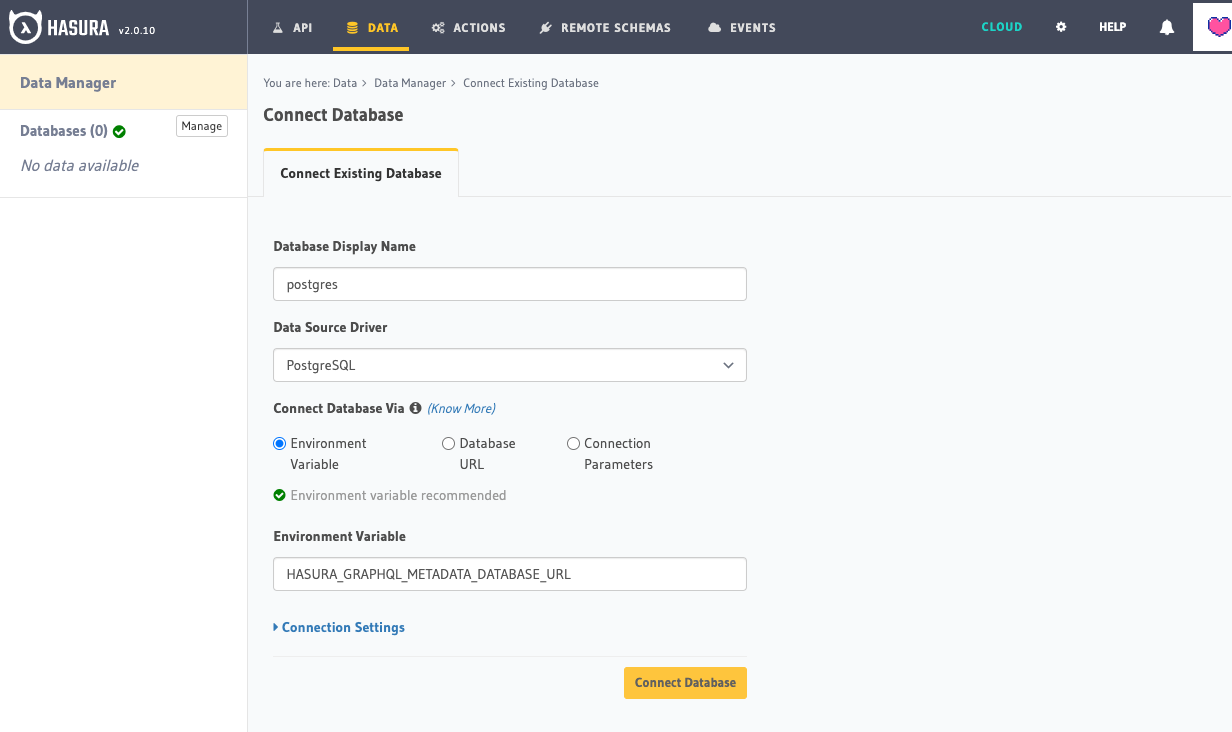
まずは、接続先のDBを設定します。今回はdocker-compose.ymlに設定されている環境変数からURLを取得するように設定しています。
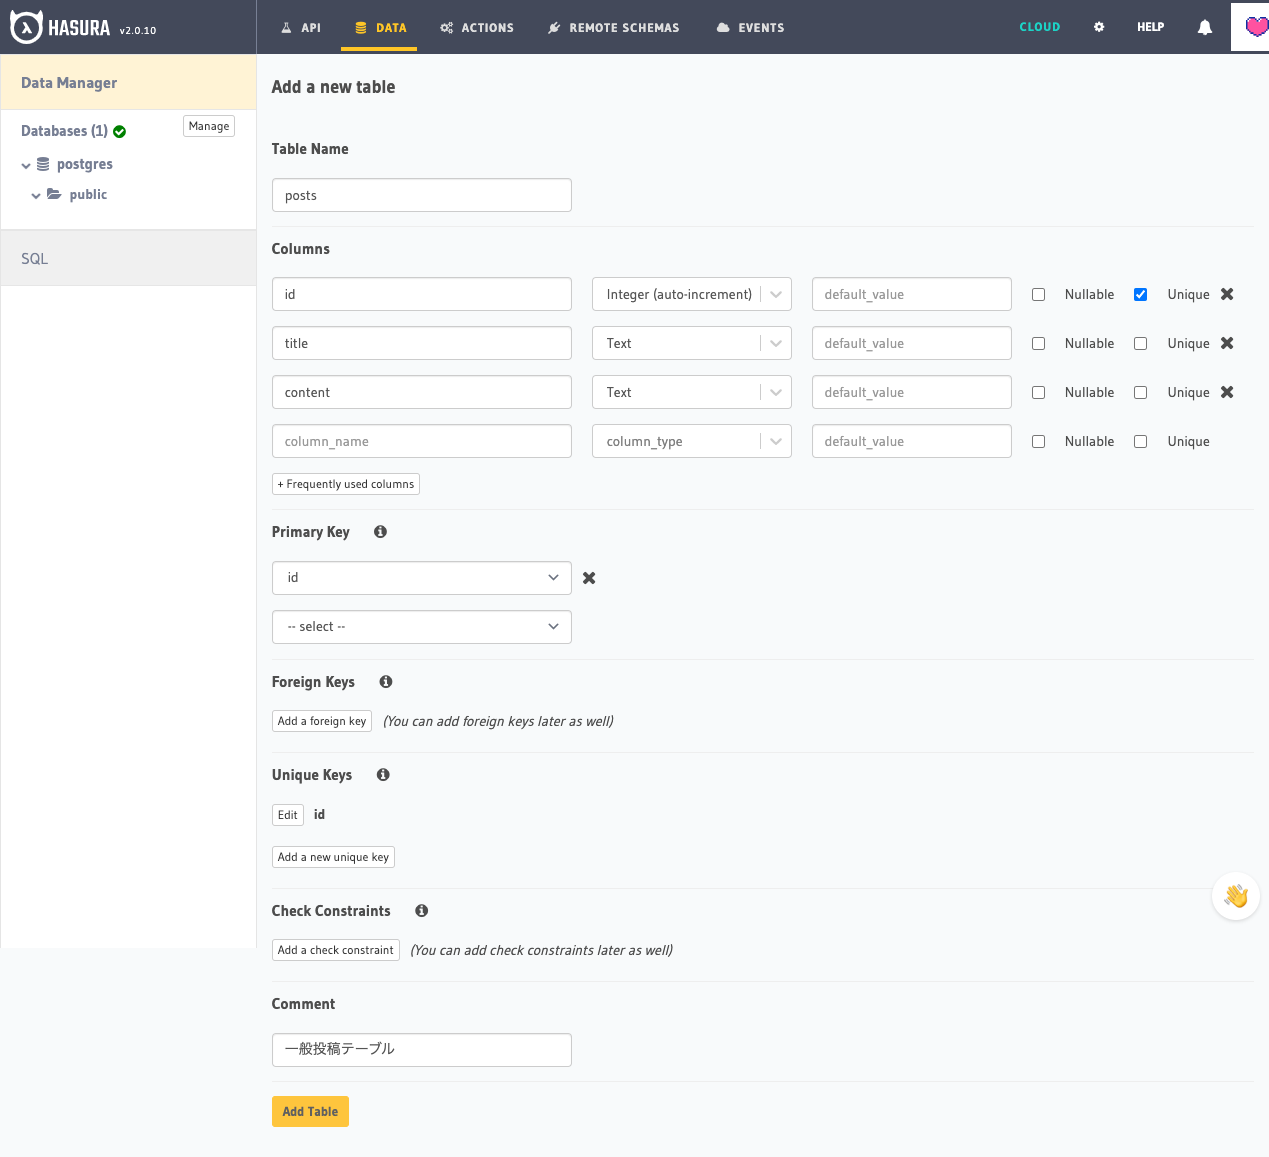
接続できたら、テーブルを作成します。
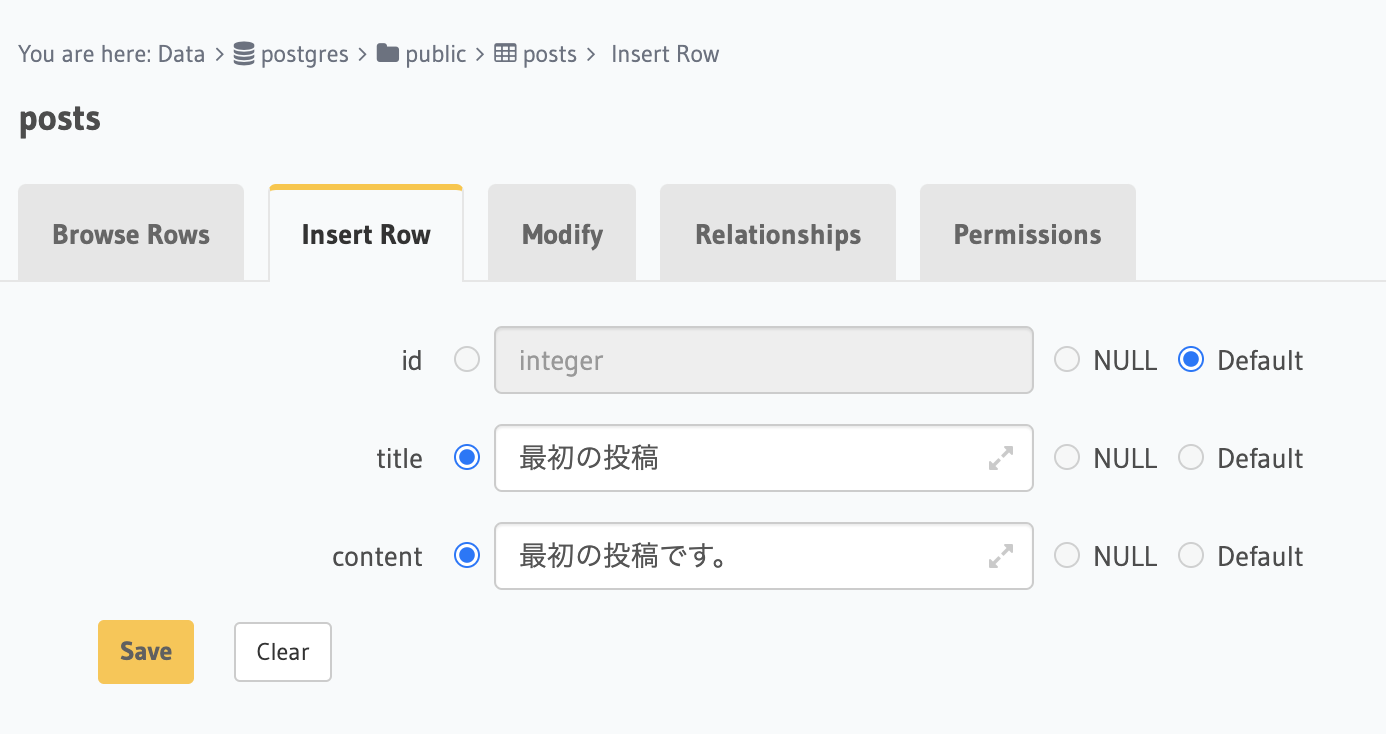
レコードも追加します。
Nextjs
Hasuraバックエンドと連携するWebクライアントフレームワークです。Reactベースで開発でき、SPA、SR、SSG、ISRなど、多彩な利用シーンに対応できます。
今回は、Nextjsに搭載されていない機能をApolloClientというライブラリを使って補います。Apolloは、主にNextjsとGraphQLの繋ぎ込みに利用します。
インストール
npx create-next-app@latest --ts
> Ok to proceed? (y)
> ✔ What is your project named? … front
cd front
npm i
npm run dev
追加で、これから必要なライブラリもインストールします。
npm install @apollo/client graphql cross-fetch @graphql-codegen/cli
front/pages/index.tsxをよしなに修正して起動してみると

Hasuraとクライアントの連携
Codegenでスキーマの同期設定
Hasuraで定義したスキーマをNextjsで使用できる型定義などを出力してくれるgraphql-codegenというツールがあるので、そちらも導入します。
npx graphql-codegen init
initをすると、対話形式で設定できます。
 ◯ Backend - API or server
 ◯ Application built with Angular
❯◉ Application built with React
 ◯ Application built with Stencil
 ◯ Application built with other framework or vanilla JS
? What type of application are you building? Application built with Re
act
? Where is your schema?: (path or url) http://localhost:8080/v1/graphq
l
? Where are your operations and fragments?: queries/**/*.ts
? Pick plugins: TypeScript (required by other typescript plugins), Typ
eScript Operations (operations and fragments), TypeScript React Apollo
 (typed components and HOCs)
? Where to write the output: types/graphqlSchema.tsx
? Do you want to generate an introspection file? No
? How to name the config file? codegen.yml
? What script in package.json should run the codegen? graphql-codegen
こちらで設定した通り、ディレクトリを作成します。
mkdir queries
mkdir types
queriesにクライアントから実行したいGraphQLコードを定義します。
import { gql } from "@apollo/client";

export const GET_POSTS = gql`
  query GetPost {
    posts(limit: 10) {
      content
      title
      id
    }
  }
`;
codegenのinit時にcodegenのエイリアスがpackage.jsonのscriptに定義されており、そちらを手動で実行します。実行すると、types/graphqlSchema.tsに型定義などが出力されます。
npm run graphql-codegen
> graphql-codegen
> graphql-codegen --config codegen.yml

(node:33488) ExperimentalWarning: stream/web is an experimental feature. This feature could change at any time
(Use `node --trace-warnings ...` to show where the warning was created)
(node:33488) ExperimentalWarning: buffer.Blob is an experimental feature. This feature could change at any time
  ✔ Parse configuration
  ✔ Generate outputs
出力されたコードには、型定義やAPICall時に実行可能な関数などがまとまっています。
import { gql } from '@apollo/client';
import * as Apollo from '@apollo/client';
export type Maybe<T> = T | null;
export type InputMaybe<T> = Maybe<T>;
export type Exact<T extends { [key: string]: unknown }> = { [K in keyof T]: T[K] };
export type MakeOptional<T, K extends keyof T> = Omit<T, K> & { [SubKey in K]?: Maybe<T[SubKey]> };
export type MakeMaybe<T, K extends keyof T> = Omit<T, K> & { [SubKey in K]: Maybe<T[SubKey]> };
const defaultOptions =  {}
/** All built-in and custom scalars, mapped to their actual values */
export type Scalars = {
  ID: string;
  String: string;
  Boolean: boolean;
  Int: number;
  Float: number;
};

...下に続く
ApolloClientで実際にfetchして画面に表示
以下のnextjsの公式exampleを参考に、実装を進めます。
https://github.com/vercel/next.js/blob/canary/examples/with-apollo/lib/apolloClient.js
ApolloClientでの連携に必要なインスタンスを生成するためのファイルを作成していきます。
mkdir libs
touch apolloClient.ts
import {
  ApolloClient,
  HttpLink,
  InMemoryCache,
  NormalizedCacheObject,
} from "@apollo/client";
import "cross-fetch/polyfill";

let apolloClient: ApolloClient<NormalizedCacheObject> | undefined;
const createApolloClient = () => {
  return new ApolloClient({
    ssrMode: typeof window === "undefined",
    link: new HttpLink({
      // .env.development.localに`NEXT_PUBLIC_HASURA_URL='http://localhost:8080/v1/graphql'` と定義しておきます
      uri: process.env.NEXT_PUBLIC_HASURA_URL,
    }),
    cache: new InMemoryCache(),
  });
};
export const initializeApollo = (initialState = null) => {
  const _apolloClient = apolloClient ?? createApolloClient();
  // For SSG and SSR always create a new Apollo Client
  if (typeof window === "undefined") return _apolloClient;
  // Create the Apollo Client once in the client
  if (!apolloClient) apolloClient = _apolloClient;

  return _apolloClient;
};
こちらを_app.tsxで実行して、配下のコンポーネントがApolloClientを利用できるようにします。
import "../styles/globals.css";
import type { AppProps } from "next/app";
import { ApolloProvider } from "@apollo/client";
import { initializeApollo } from "../libs/apolloClient";

function MyApp({ Component, pageProps }: AppProps) {
  const client = initializeApollo();
  return (
    <ApolloProvider client={client}>
      <Component {...pageProps} />
    </ApolloProvider>
  );
}

export default MyApp;
実際にindex.tsxでfetchしてみましょう。
import { useQuery } from "@apollo/client";
import type { NextPage } from "next";
import { GET_POSTS } from "../queries/posts";
import { GetPostQuery } from "../types/graphqlSchema";

const Home: NextPage = () => {
  const { data, error } = useQuery<MyQueryQuery>(GET_POSTS);
  return (
    <div>
      {data?.posts.map((post) => (
        <div key={`post-${post.id}`}>
          {post.id} {post.title}
          <br />
          {post.content}
        </div>
      ))}
    </div>
  );
};

export default Home;
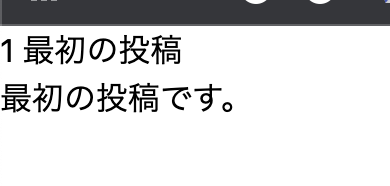
ページを開くとデータが表示されました!
プロダクション環境構築編
〆
次回アドベントカレンダーの投稿は、「難しく考えずにベイジアンABテストを試してみた」です。
最後まで読んでいただきありがとうございました!