 Flutterの記事を整理し本にしました
- 本稿の記事を含む様々な記事を体系的に整理し本にまとめました
- 今後はこちらを最新化するため、最新情報はこちらをご確認ください
- 25万文字を超える超大作になっています!!
まとめ記事
はじめに
- FIrebaseを用いた通知機能を試してみましたので、そのまとめになります。
概要
Firebase CloudMessaging(以下FCM)は、ユーザにプッシュ通知を送信するための環境を提供します。
バックグラウンドでも動作できるため、アプリを起動していなくても通知を受け取れるようになります。
注意1
公式サイトに記載がある通り、iOSシミュレータでは動作しないことが周知されています。
注意2
本チャプターでは、Androidのみを対象に行います。
※iOSで設定するためには、APNs認証キーの設定や権限の要求など、Androidよりもいくつか手順が多いので注意してください。
準備
まずは、必要なパッケージをインストールします。
firebase_core: ^1.1.0
firebase_messaging: ^9.1.3
flutter_local_notifications: ^5.0.0+4
firebase_coreとfirebase_messagingはFCM関連のパッケージです。local_notificationはフォアグラウンドで受けとったメッセージを通知として処理するために用いるパッケージです。
tokenの取得
実装
まず、送信先となる端末ごとのtokenを確認する必要があります。
Tokenは下記のように、非同期のgetTokenメソッドで取得することができます。
_firebaseMessaging.getToken().then((String token) {
  print("$token");
});
処理の全体像は下記のようになります。
上記のtoken取得をinitstateで行っているだけです。
この時点ではまだメッセージの受信はできません。
import 'package:firebase_core/firebase_core.dart';
import 'package:flutter/material.dart';

import 'package:firebase_messaging/firebase_messaging.dart';

Future<void> main() async {
  // Firebaseの初期化用
  WidgetsFlutterBinding.ensureInitialized();
  await Firebase.initializeApp();

  runApp(MyApp());
}

class MyApp extends StatelessWidget {
  @override
  Widget build(BuildContext context) {
    return MaterialApp(
      title: 'Flutter Demo',
      theme: ThemeData(
        primarySwatch: Colors.blue,
        visualDensity: VisualDensity.adaptivePlatformDensity,
      ),
      home: MyHomePage(title: 'Flutter Demo'),
    );
  }
}

class MyHomePage extends StatefulWidget {
  MyHomePage({Key key, this.title}) : super(key: key);
  final String title;

  @override
  _MyHomePageState createState() => _MyHomePageState();
}

class _MyHomePageState extends State<MyHomePage> {
  FirebaseMessaging _firebaseMessaging = FirebaseMessaging.instance;

  @override
  void initState() {
    super.initState();

    _firebaseMessaging.getToken().then((String token) {
      print("$token");
    });

  }

  @override
  Widget build(BuildContext context) {
    return Scaffold(
        appBar: AppBar(
          title: Text(widget.title),
        ),
        body: Center(
            child: Column(
          mainAxisAlignment: MainAxisAlignment.center,
          children: <Widget>[
            Text("FCMテスト"),
          ],
        )));
  }
}
動作イメージ
I/flutter (19699): cuKvQ621SAyZzfYgEoscnc:AP*****Tnf5Ru8lLU_*****KRdDe-4kPlzCIv*****p3UDU6Ml6A256yeRQ*****nKmH4*****wqx02ezs*****alkwT7X4QjG*****c0yM6Nfm*****YK2EhQjq*****F-0e84M8B6U
※適度にマスキングをしています
フォアグラウンドでのメッセージ受信
実装
続いて、メッセージを受信できるように改修します。
受信はFirebaseMessaging.onMessage.listen((RemoteMessage message) {}によっておこなえます。
ただし、コンソールに出すだけなら、このメソッドの中でprintをすればよいのですが、実用的ではありません。
そこで、flutterLocalNotificationsPluginを使い、通知として表示されるようになります。
flutterLocalNotificationsPlugin.show(
  notification.hashCode,
  notification.title,
  notification.body,
  NotificationDetails(
  android: AndroidNotificationDetails(
    channel.id,
    channel.name,
    channel.description,
    icon: 'launch_background',
  ),
));
この第4引数のDetailsは、特定のクラスになっているためこちらも準備します。
使い回しなどがなければ、上記に直接指定してもOKです。
const AndroidNotificationChannel channel = AndroidNotificationChannel(
  'high_importance_channel', // id
  'High Importance Notifications', // title
  'This channel is used for important notifications.', // description
  importance: Importance.high,
);
フォアグラウンドの処理を組み込んだ全体像は下記のようになります。
import 'package:firebase_core/firebase_core.dart';
import 'package:flutter/material.dart';

import 'package:firebase_messaging/firebase_messaging.dart';
+import 'package:flutter_local_notifications/flutter_local_notifications.dart';

+final FlutterLocalNotificationsPlugin flutterLocalNotificationsPlugin =
+    FlutterLocalNotificationsPlugin();

+const AndroidNotificationChannel channel = AndroidNotificationChannel(
+  'high_importance_channel', // id
+  'High Importance Notifications', // title
+  'This channel is used for important notifications.', // description
+  importance: Importance.high,
+);

Future<void> main() async {
   // Firebaseの初期化用
  WidgetsFlutterBinding.ensureInitialized();
  await Firebase.initializeApp();

  runApp(MyApp());
}

class MyApp extends StatelessWidget {
  @override
  Widget build(BuildContext context) {
    return MaterialApp(
      title: 'Flutter Demo',
      theme: ThemeData(
        primarySwatch: Colors.blue,
        visualDensity: VisualDensity.adaptivePlatformDensity,
      ),
      home: MyHomePage(title: 'Flutter Demo'),
    );
  }
}

class MyHomePage extends StatefulWidget {
  MyHomePage({Key key, this.title}) : super(key: key);
  final String title;

  @override
  _MyHomePageState createState() => _MyHomePageState();
}

class _MyHomePageState extends State<MyHomePage> {
  FirebaseMessaging _firebaseMessaging = FirebaseMessaging.instance;

  @override
  void initState() {
    super.initState();

    _firebaseMessaging.getToken().then((String token) {
      print("$token");
    });

+    FirebaseMessaging.onMessage.listen((RemoteMessage message) {
+      print("フォアグラウンドでメッセージを受け取りました");
+      RemoteNotification notification = message.notification;
+      AndroidNotification android = message.notification?.android;
+
+      if (notification != null && android != null) {
+        flutterLocalNotificationsPlugin.show(
+            notification.hashCode,
+            notification.title,
+            notification.body,
+            NotificationDetails(
+              android: AndroidNotificationDetails(
+                channel.id,
+                channel.name,
+                channel.description,
+                icon: 'launch_background',
+              ),
+            ));
+      }
+    });
  }

  @override
  Widget build(BuildContext context) {
    return Scaffold(
        appBar: AppBar(
          title: Text(widget.title),
        ),
        body: Center(
            child: Column(
          mainAxisAlignment: MainAxisAlignment.center,
          children: <Widget>[
            Text("FCMテスト"),
          ],
        )));
  }
}
動作イメージ
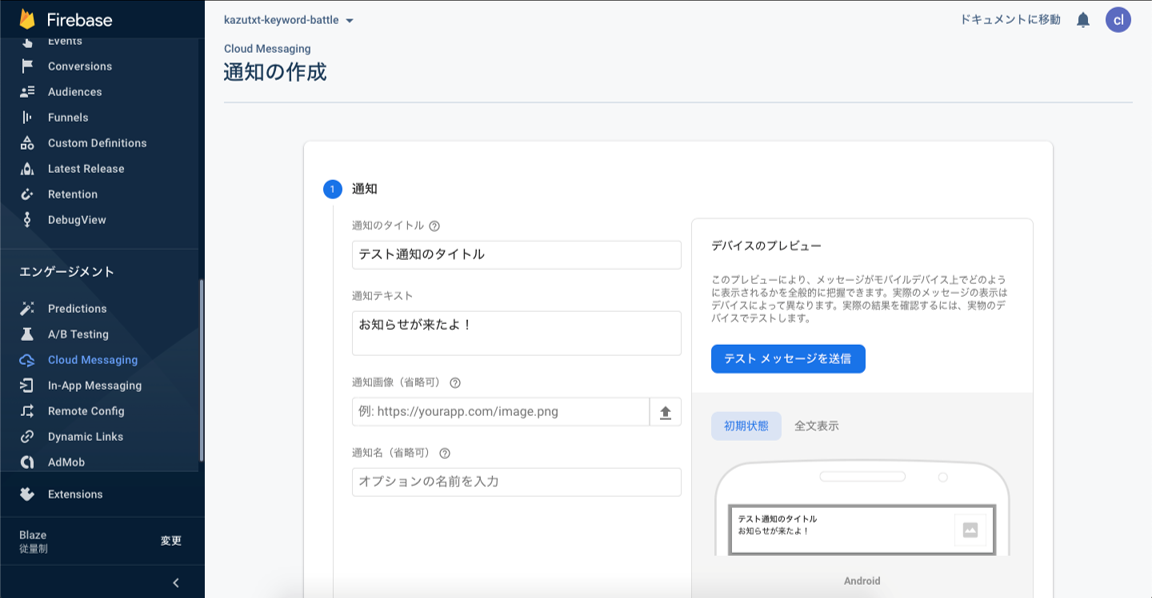
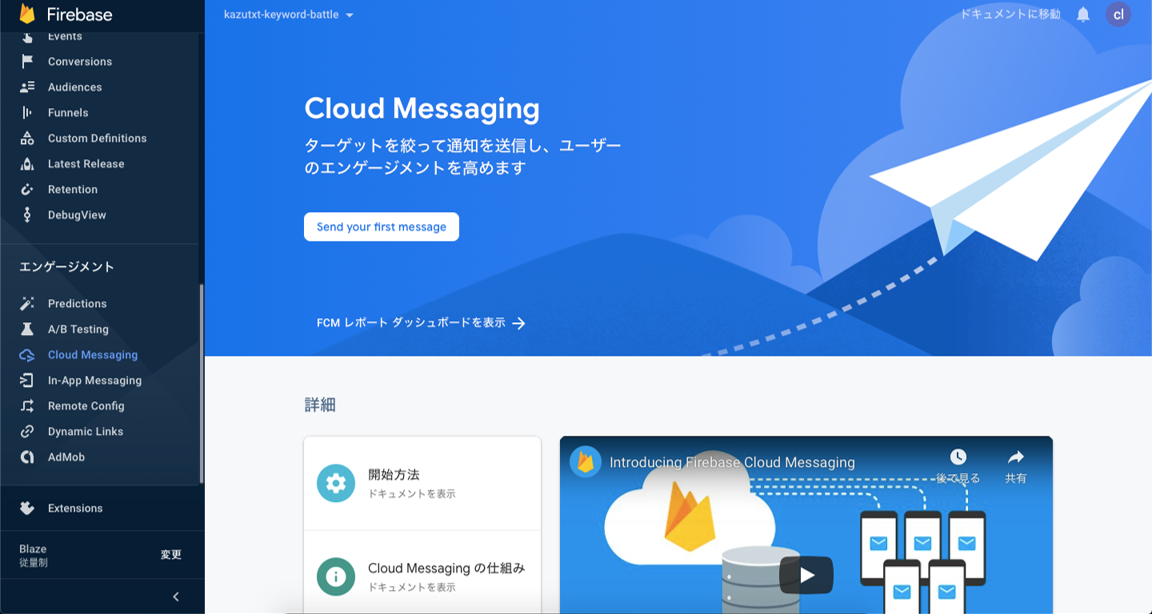
Cloud Messagingからテスト用メッセージの送信ができ、Androidシミュレータで受信の確認ができます。
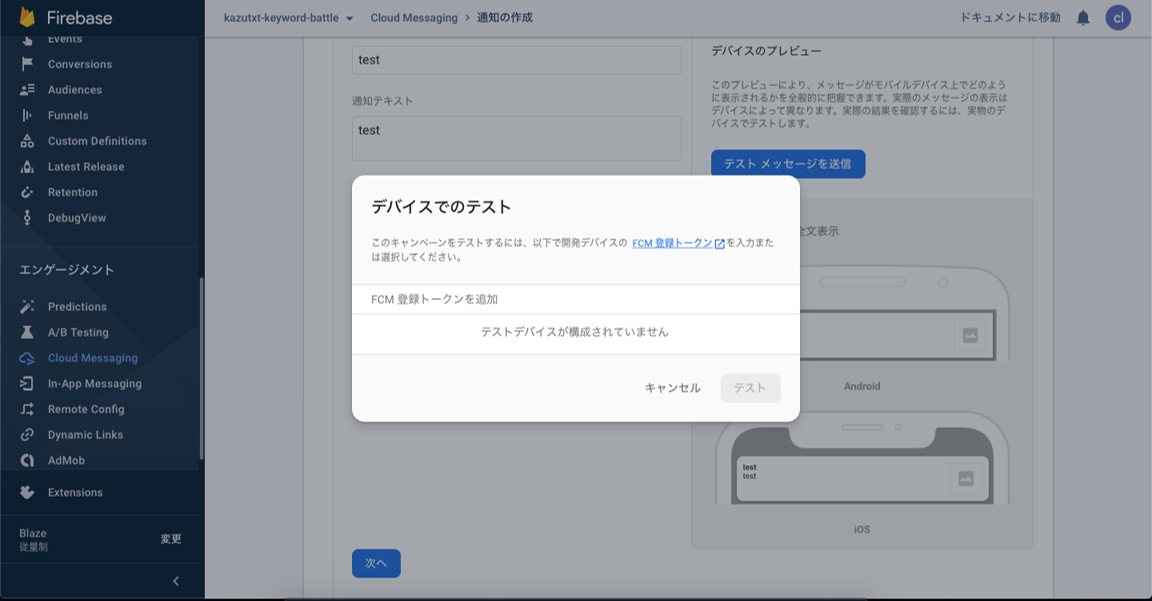
まず、FirebaseのメニューからCloud Messagingを選択します。
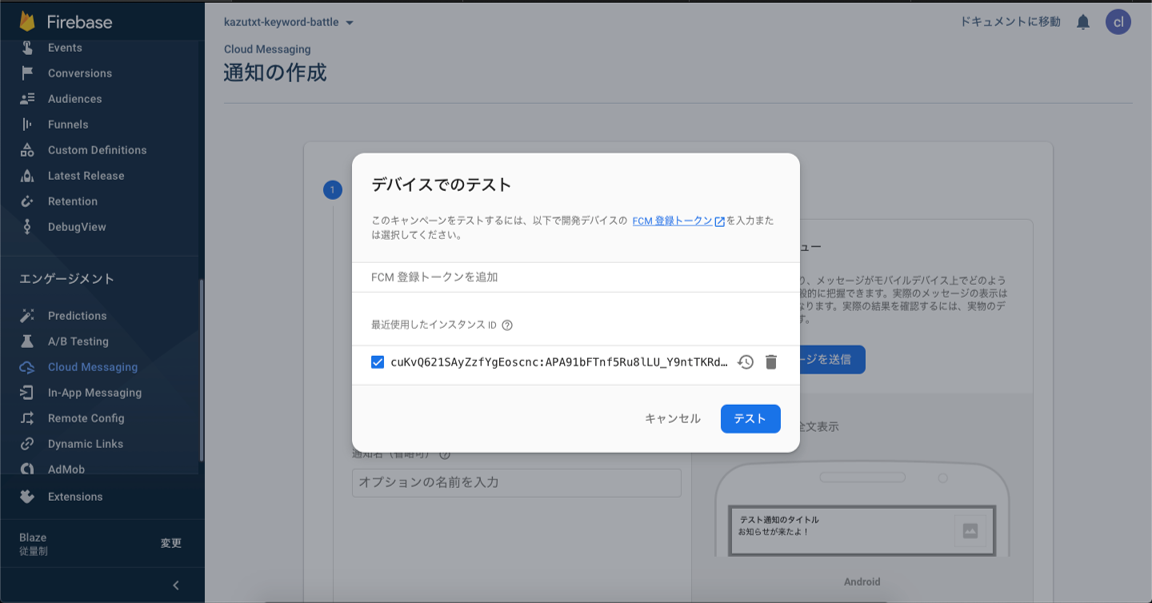
先程表示させたトークンIDを入力し、テストをクリックします。
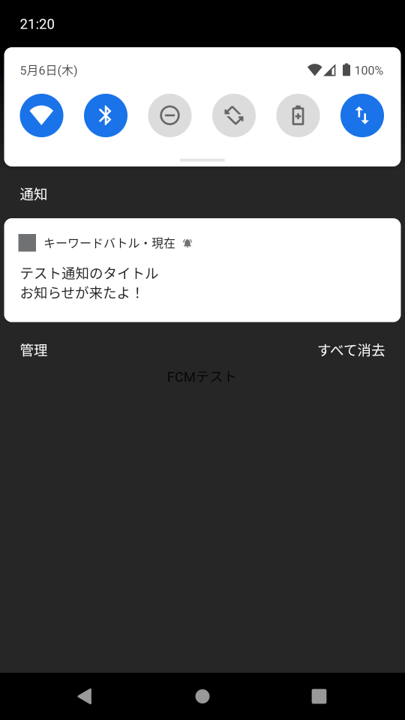
フォアグラウンドの状態にしておくとシミュレータに通知がきます。
コンソールの方にも表示されます。
D/FLTFireMsgReceiver(21013): broadcast received for message
I/flutter (21013): フォアグラウンドでメッセージを受け取りました
バックグラウンドでのメッセージ受信
実装
まず、FirebaseMessaging.onBackgroundMessage(_firebaseMessagingBackgroundHandler);でバックグラウンド時に呼び出されるコールバックのハンドラを指定します。
続いて、_firebaseMessagingBackgroundHandlerに呼び出されたときの処理を記述します。
これらのメソッドはトップレベルに定義する必要があります
バックグラウンドでのメッセージ受信を追加した、全体像は下記のようになります。
import 'package:firebase_core/firebase_core.dart';
import 'package:flutter/material.dart';

import 'package:firebase_messaging/firebase_messaging.dart';
import 'package:flutter_local_notifications/flutter_local_notifications.dart';

+// バックグラウンドの処理の実態
+// トップレベルに定義
+Future<void> _firebaseMessagingBackgroundHandler(RemoteMessage message) async {
+  await Firebase.initializeApp();
+  print("バックグラウンドでメッセージを受け取りました");
+}

final FlutterLocalNotificationsPlugin flutterLocalNotificationsPlugin =
    FlutterLocalNotificationsPlugin();

const AndroidNotificationChannel channel = AndroidNotificationChannel(
  'high_importance_channel', // id
  'High Importance Notifications', // title
  'This channel is used for important notifications.', // description
  importance: Importance.high,
);

Future<void> main() async {
  WidgetsFlutterBinding.ensureInitialized();
  await Firebase.initializeApp();

+ //バックグラウンド用
+ FirebaseMessaging.onBackgroundMessage(_firebaseMessagingBackgroundHandler);

  runApp(MyApp());
}

class MyApp extends StatelessWidget {
  @override
  Widget build(BuildContext context) {
    return MaterialApp(
      title: 'Flutter Demo',
      theme: ThemeData(
        primarySwatch: Colors.blue,
        visualDensity: VisualDensity.adaptivePlatformDensity,
      ),
      home: MyHomePage(title: 'Flutter Demo'),
    );
  }
}

class MyHomePage extends StatefulWidget {
  MyHomePage({Key key, this.title}) : super(key: key);
  final String title;

  @override
  _MyHomePageState createState() => _MyHomePageState();
}

class _MyHomePageState extends State<MyHomePage> {
  FirebaseMessaging _firebaseMessaging = FirebaseMessaging.instance;

  @override
  void initState() {
    super.initState();

    _firebaseMessaging.getToken().then((String token) {
      print("$token");
    });

    FirebaseMessaging.onMessage.listen((RemoteMessage message) {
      print("フォアグラウンドでメッセージを受け取りました");
      RemoteNotification notification = message.notification;
      AndroidNotification android = message.notification?.android;

      if (notification != null && android != null) {
        flutterLocalNotificationsPlugin.show(
            notification.hashCode,
            notification.title,
            notification.body,
            NotificationDetails(
              android: AndroidNotificationDetails(
                channel.id,
                channel.name,
                channel.description,
                icon: 'launch_background',
              ),
            ));
      }
    });
  }

  @override
  Widget build(BuildContext context) {
    return Scaffold(
        appBar: AppBar(
          title: Text(widget.title),
        ),
        body: Center(
            child: Column(
          mainAxisAlignment: MainAxisAlignment.center,
          children: <Widget>[
            Text("FCMテスト"),
          ],
        )));
  }
}
動作イメージ
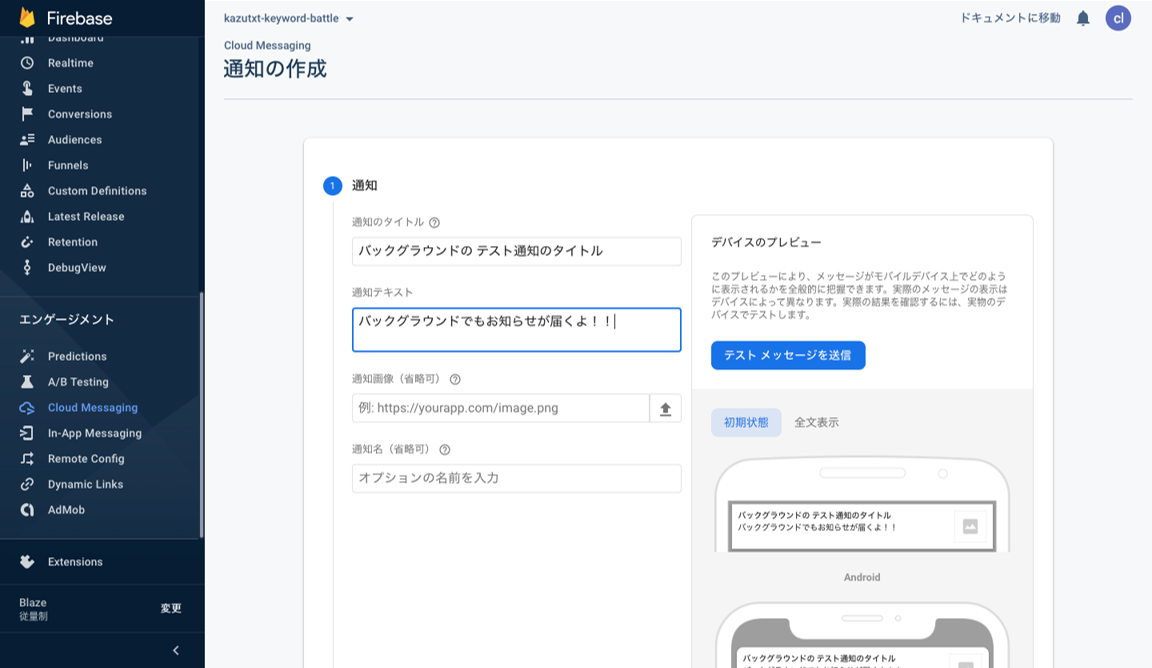
フォアグラウンドと同じように、Firebaseからメッセージを送信します。
※フォアグラウンドじとの違いがわかるように、タイトルとメッセージを変えてあります。
送信の仕方は変わりません。
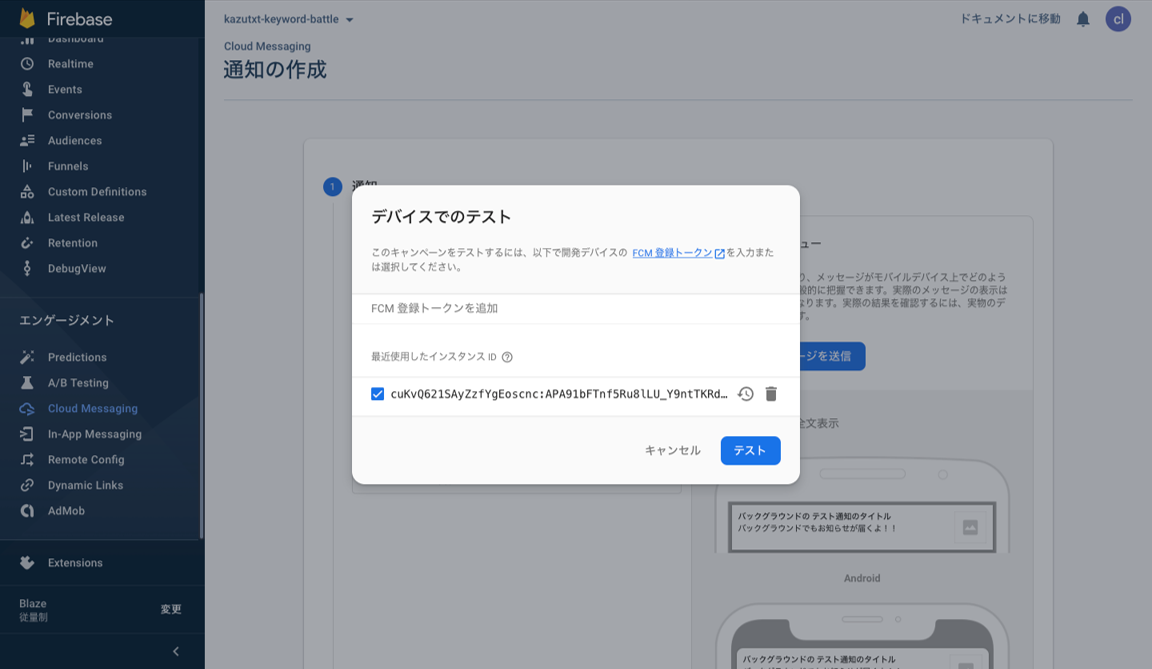
トークンを指定してテストをクリックします。
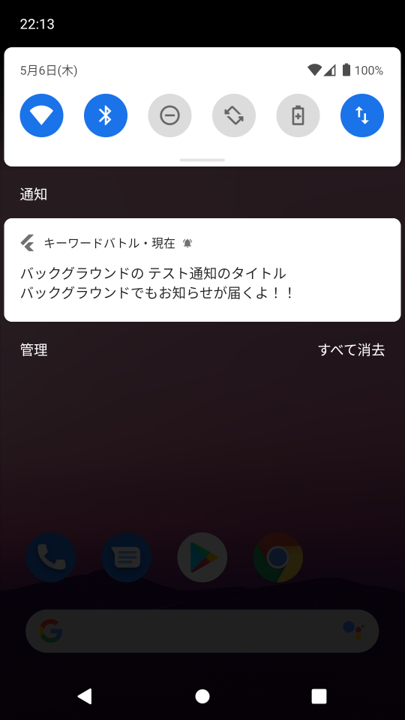
アプリ起動中でなくても、通知が来ていることが分かります。
コンソールの方にも表示されます。
I/FLTFireMsgService(19699): FlutterFirebaseMessagingBackgroundService started!
W/FLTFireMsgService(19699): Attempted to start a duplicate background isolate. Returning...
D/FLTFireMsgReceiver(19699): broadcast received for message
W/FirebaseMessaging(19699): Unable to log event: analytics library is missing
W/FirebaseMessaging(19699): Missing Default Notification Channel metadata in AndroidManifest. Default value will be used.
I/flutter (19699): バックグラウンドでメッセージを受け取りました
アプリが終了していてもバックグラウンドプロセスとして残っていれば、通知は届きます
